
Your wood front door refresh is the first handshake a buyer has with your home. This guide narrows the process to 12 steps worth your attention to ensure you protect your ROI and avoid costly inspection haircuts. Start with a deep clean to reveal the wood’s true state.
Surface Cleaning
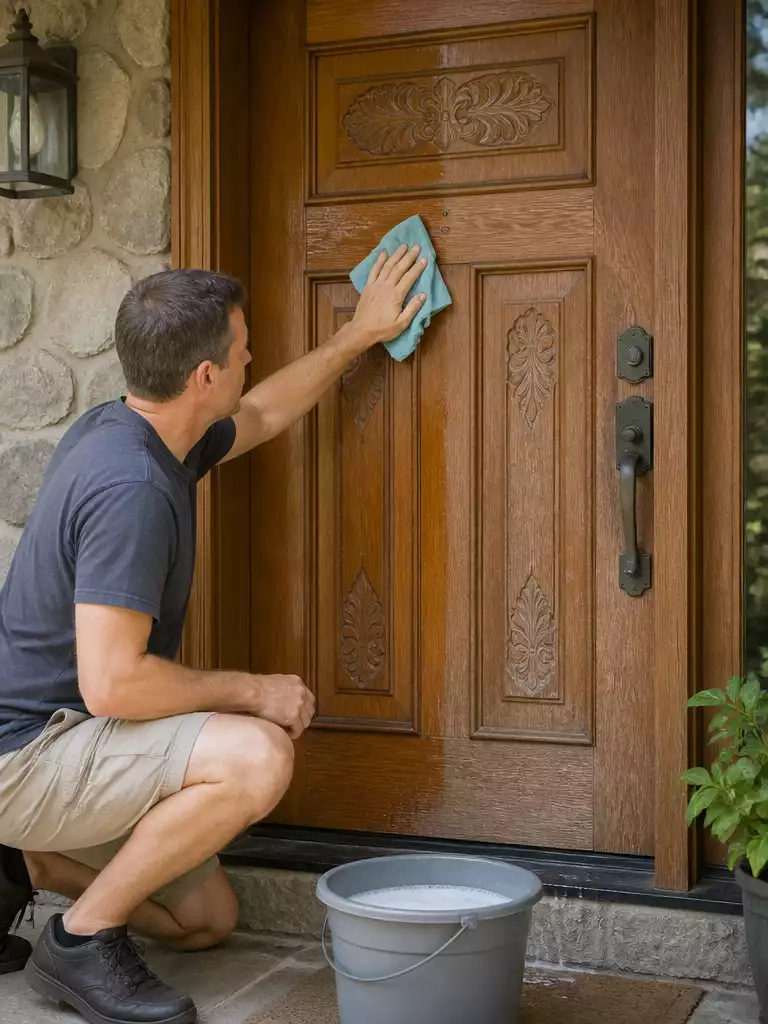
A thorough deep clean removes years of grime to reveal the wood’s true potential.
As an Amazon Associate I earn from qualifying purchases. Affiliate links may earn me a commission at no extra cost to you.
You cannot accurately assess your door’s condition when it is hidden under a year’s worth of pollen, spiderwebs, and street grime. This initial cleaning isn’t just about aesthetics; it’s a diagnostic step that reveals the true state of the wood and any underlying damage.
The Pressure Washer Trap
Never use a pressure washer on a wood door. The high-velocity stream forces water deep into the grain fibers, causing swelling and internal moisture traps that will ruin any new finish you apply later.
Start with the Dry-First Rule to protect the finish from accidental abrasion. Use a soft brush or a dry microfiber cloth to remove loose debris before introducing any moisture.
Wetting a dusty door immediately turns that fine grit into an abrasive mud that can micro-scratch the remaining clear coat. Once the surface is dusted, follow this sequence for a professional-grade prep:
- The Wash: Use a bucket of warm water mixed with a mild, pH-neutral dish soap or a dedicated wood cleaner.
- The Solvent: For stubborn wax buildup or greasy prints around the handle, use odorless mineral spirits on a clean rag.
- The Scrape: If you encounter bird droppings or old paint drips, use a plastic scraper only—metal blades will gouge the softened wood.
Always work strictly with the grain, even during the cleaning phase. Any cross-grain scrubbing can create “ghost” scratches that become painfully visible once a fresh layer of stain is applied.
Once the surface is squeaky clean and dry, those hidden scars—the dents, cracks, and parched patches—will finally be visible and ready for repair.
⭐ Top Products for Surface Cleaning
Restorative Exterior Wood and Deck Cleaner
Complete Wood Restore and Repair Kit
Orange Scent Enhancing Wood Furniture Polish
💰 What This Really Costs:
- The real range: Expect to spend under $50 for a full cleaning kit including mineral spirits and wood-safe cleaners.
- Hidden cost: Budget for high-quality microfiber cloths; cheap rags often snag on weathered grain and leave lint behind.
- Worth it / not: This is your highest ROI step—spending $20 here prevents ruining a $100 gallon of premium stain.
2. Crack and Dent Repair
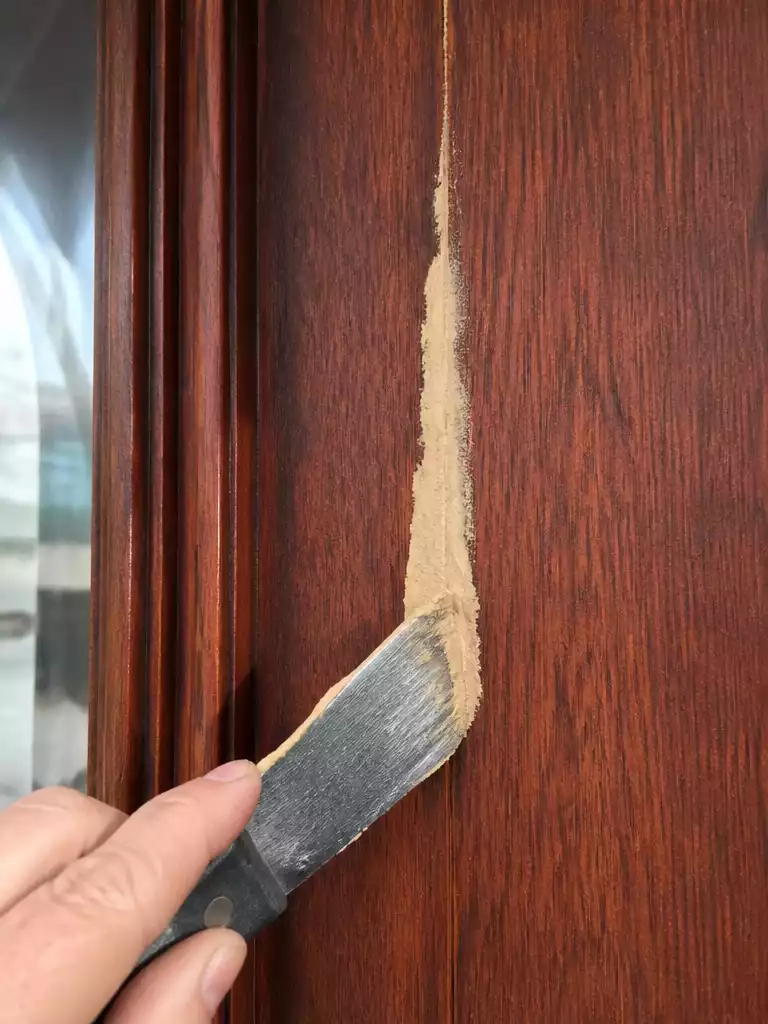
Restoring a flawless surface ensures your entryway feels meticulously maintained and ready for inspection.
A buyer’s finger will instinctively find that one deep gouge near the lockset—it’s a “neglect signal” you need to erase before the first showing. Even the most beautiful stain cannot hide structural gaps or impact damage that suggests the home has been weathered by more than just the sun.
When the damage is too deep for steam, you must choose your chemistry based on the severity of the scar. Tiny nail holes or hairline surface checks are easily handled by standard wood putty, but anything structural requires more muscle.
Always clean out loose debris or old finish from the crack using a stiff brush before applying your filler to ensure a permanent bond. Use the “high mound” technique by overfilling the area slightly; wood filler naturally shrinks as it cures, and you need that extra material to sand down perfectly flat later.
Expert Insight: If you plan to stain the door, double-check that your filler is labeled as “stainable.” Even then, fillers rarely match the surrounding grain perfectly, so completing these repairs before your final heavy sanding is the only way to feather the edges for a seamless transition.
With the repairs cured and sitting “proud” of the surface, your door is ready for the transformation phase. It is time to level the playing field with sandpaper and prepare the wood for its new finish.
⭐ Top Products for Surface Cleaning
Restorative Exterior Wood and Deck Cleaner
Complete Wood Restore and Repair Kit
Orange Scent Enhancing Wood Furniture Polish
⚠️ Where This Can Go Wrong:
- The Debris Trap: Filling over loose wood shards or old finish prevents the epoxy from bonding, causing the patch to pop.
- Underfilling Cracks: Forgetting that filler shrinks as it cures leads to a “ghost” dip that becomes visible under final paint.
- Skipping the Prime: Applying stain directly to raw filler without a primer or scuff-sand often results in a blotchy, mismatched finish.
Sanding and Prep
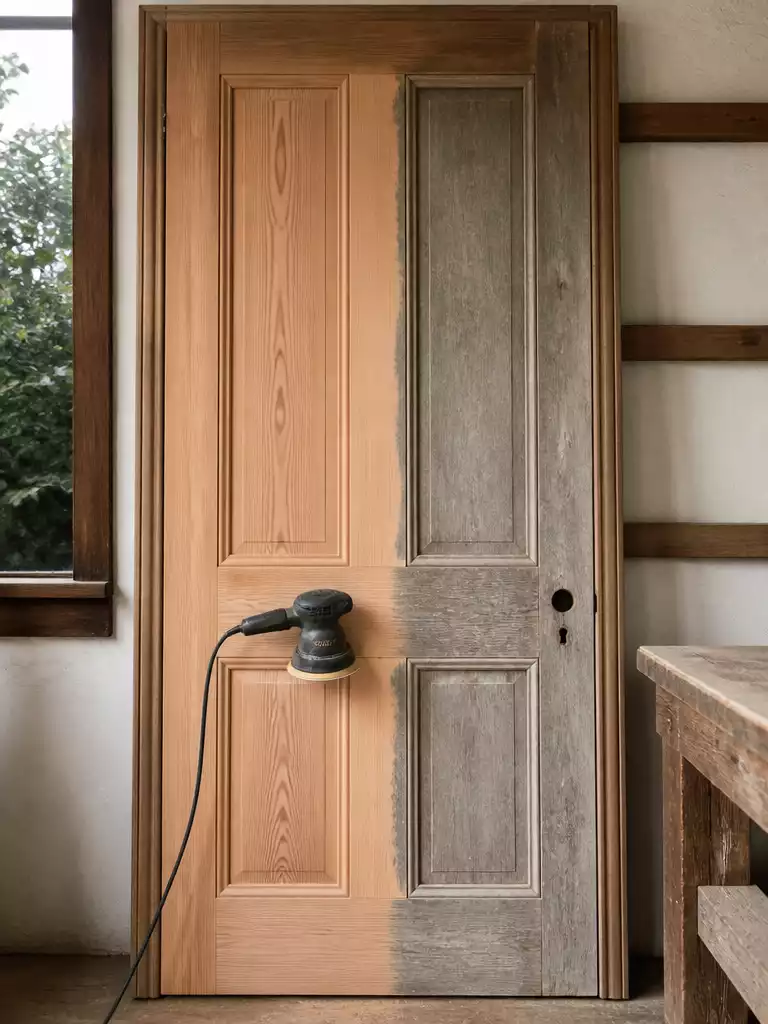
Restoring the raw beauty of the grain creates the perfect foundation for a flawless finish.
Most sellers fail here by being either too timid or too aggressive with their technique. Sanding isn’t just about stripping away the past; it is about creating mechanical “tooth” so your new finish actually bonds to the wood fibers instead of peeling off in six months.
The Pro’s Sanding Secret: The 80-120-220 Sequence
- 80 Grit: Your “eraser” for removing old, flaking finish and leveling out weathered, grey wood fibers.
- 120 Grit: The medium step that smooths out the deep scratches left by the 80-grit paper.
- 220 Grit: The “polisher” that prepares the surface for a surgical-grade finish and professional-level smoothness.
For the large, flat panels of the door, a random orbital sander is your best friend for efficiency and an even finish. However, you must switch to hand-sanding for the “profiles”—those decorative recessed moldings and sharp corners—to avoid rounding off the crisp edges that give a door its character.
The Graphite Trick: Lightly scribble pencil marks across the wood surface before you start each grit level. When the pencil marks have completely disappeared, you know you have sanded that section evenly and are ready to move to the next grit.
Once the sanding is complete, simply blowing the dust away with a fan isn’t enough. Use a vacuum with a soft brush attachment to pull debris out of the grain, followed by a tack cloth to pick up the microscopic particles that would otherwise cause “nibs” or bumps in your final topcoat.
A perfectly smooth, dust-free door is a blank canvas ready for its cosmetic “glow-up.” With the prep work finished, you’ve removed the primary reason most DIY stain jobs fail to look professional.
⭐ Top Products for Surface Cleaning
Restorative Exterior Wood and Deck Cleaner
Complete Wood Restore and Repair Kit
Orange Scent Enhancing Wood Furniture Polish
⚠️ Prep Mistakes That Ruin the Finish:
- Skipping Grits: Jumping from 80 straight to 220 grit leaves deep “piggy tail” swirls that only appear after staining.
- Cross-Grain Sanding: Sanding against the wood’s natural direction creates permanent scars that trap excess pigment and look like dark scratches.
- Over-Sanding Moldings: Using a power sander on decorative profiles flattens crisp edges, making a high-end door look cheap and melted.
4. Stain or Paint Touch-Up
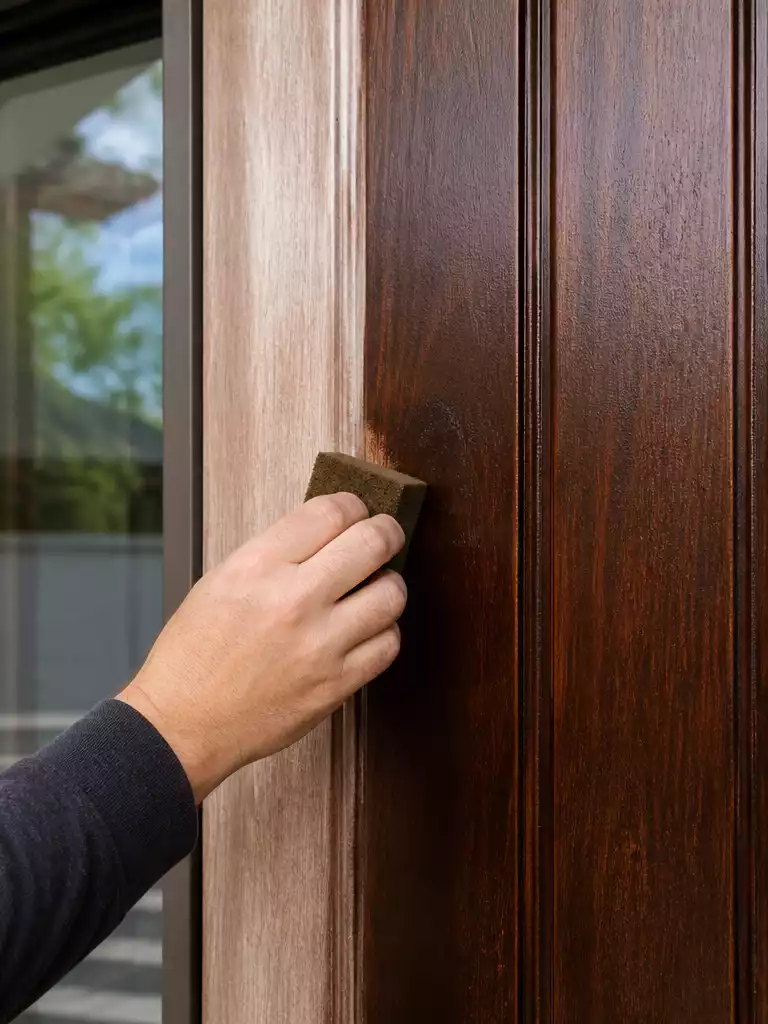
A fresh coat of pigment restores the depth and intentionality of your home’s grand entrance.
Whether you are refreshing a classic Chestnut stain or opting for a bold “Statement Black” paint, the finish must look intentional rather than patched. A buyer’s eye is drawn to inconsistency, so your goal is a seamless transition between the original finish and your repairs.
The Secret Weapon: Gel Stain
If your wood is badly faded or has mismatched repair spots, use a gel stain. Unlike traditional thin stains, gel stain sits on top of the wood like a glaze, masking imperfections and providing uniform color without requiring you to strip the door to raw wood.
When selecting your product, matching the gloss level is actually more important than an exact color match. A matte patch on a satin-finished door will stick out immediately under porch lights, signaling a DIY “fix” rather than a professional restoration.
For doors made of “bleeding” woods like Cedar or Redwood, you must apply an oil-based primer if you are switching to paint. This creates a barrier that stops natural tannins from migrating to the surface and turning your crisp new paint a muddy brown.
Always perform a test patch on a hidden area, such as the hinge edge, to verify the final dried color. Once satisfied, apply your finish in thin, even layers, working strictly in the direction of the wood grain to ensure a professional, streak-free result.
⭐ Best Wood Stain for Touch-Up
Exterior Wood Stain and Sealer Formula
Fast Dry Premium Wood Stain Spray
Microfiber Cut to Size Stain Pads
⚠️ Where This Can Go Wrong:
- Midday Sun: Never apply finish in direct sunlight; the heat causes stain to flash-dry, leaving permanent, unsightly lap marks.
- The “Patch” Trap: Avoid spot-staining only the repair; always feather the color out to the nearest natural wood joint or panel edge.
- Incompatible Chemistry: Applying oil-based stains over water-based fillers without a dedicated sealer often results in poor pigment adhesion and peeling.
The sheer number of technical steps can make an entry refresh feel like a high-stakes puzzle, but most of these tasks are simple maintenance rather than permanent risks. You don’t need a flawless renovation to avoid a valuation haircut; you just need the door to look intentional and well-kept. A high-impact entry comes from balancing aesthetics with durability, ensuring the home feels secure the moment a buyer reaches for the handle.
🎯 What Moves the Needle:
- Focus on surface prep before you refinish a weathered door properly.
- Ensure smooth mechanical operation so the door hardware clicks effortlessly.
- Prioritize weatherproofing seals to eliminate drafts during final showings.
Sealing and Weatherproofing
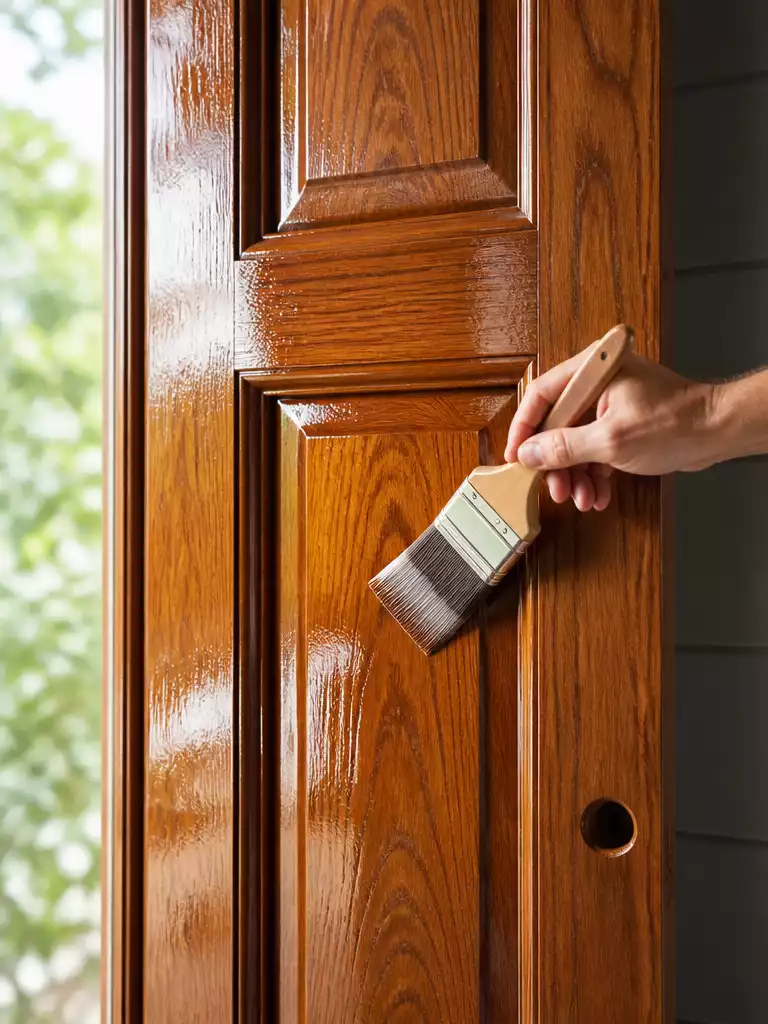
A durable UV-rated topcoat acts as an insurance policy, protecting your hard work from the elements.
Think of this step as the insurance policy for your entire restoration project. Without a UV-rated topcoat, your fresh stain will bake under the sun and begin to peel within a single season, leaving the door vulnerable to moisture.
When selecting your sealer, the chemistry matters more than the brand name. While standard interior polyurethane is great for coffee tables, an exterior door requires the flexibility of Spar Urethane or Marine Varnish to survive the outdoors.
The Pro’s Choice: Spar Varnish vs. Polyurethane
Exterior-grade Spar Urethane contains higher oil content, allowing the finish to expand and contract with the wood as temperatures shift. Standard poly is too brittle for exterior use and will eventually crack as the wood “breathes.”
Application is a game of patience rather than speed. For a professional, glass-like depth, you should apply two to three thin coats, allowing for a light scuff-sand with 220-grit paper between each layer to ensure perfect adhesion.
The “Six-Side Rule” is non-negotiable for a door that won’t warp. You must seal the top and bottom edges of the door—the parts no one ever sees—to stop the wood from “drinking” moisture from rain or ground humidity.
The 24-Hour Cure Rule
Never close your door against the weatherstripping if it feels even slightly “grabby” or tacky. Ideally, give the varnish 24 hours to cure, or you risk the finish tearing off the frame the very next morning.
Once your final coat is smooth and dry to the touch, the structural protection is complete. Now it is time to focus on the “jewelry” that makes the entryway truly pop for potential buyers.
⭐ Top Products for Surface Cleaning
Restorative Exterior Wood and Deck Cleaner
Complete Wood Restore and Repair Kit
Orange Scent Enhancing Wood Furniture Polish
📋 Before You Apply the Final Seal:
- The Moisture Check: Ensure the wood is completely dry after cleaning; trapped moisture under a sealer causes cloudy “blushing” and peeling.
- Weather Window: Verify the forecast for 48 hours of low humidity and temperatures between 50°F and 80°F for proper curing.
- Compatibility Test: Confirm your topcoat is chemically compatible by testing a small patch over your stain to ensure it doesn’t bead.
6. Hardware
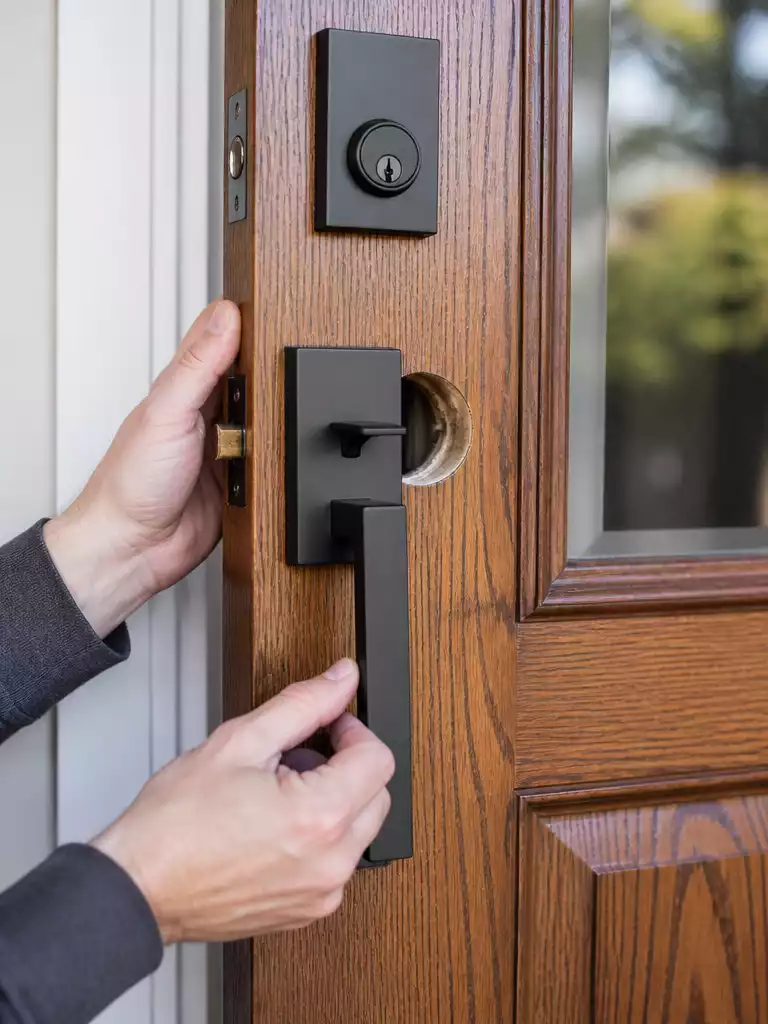
Elevate your entryway with high-end hardware that provides a secure and sophisticated first impression.
Old, tarnished brass hardware screams “1990s” to a buyer. Swapping outdated locks for Matte Black or Satin Nickel is the highest ROI mini-flip you can perform on your home’s exterior.
Before you fall in love with a new set at the store, you need to verify your door’s technical specs. Most standard doors are 1-3/4 inches thick, but you must confirm your specific measurements to avoid a frustrating return trip.
Functionality is just as vital as aesthetics during a showing. A deadbolt that requires “lifting the door” or excessive jiggling to lock is an immediate red flag for buyers.
Spend time adjusting the strike plate on the jamb so the bolt clicks into place smoothly with a single turn. This “one-click” operation signals that the home is well-maintained and structurally sound.
The Weight Test
Buyers equate heavy, solid-feeling handles with security and quality. Avoid cheap, hollow aluminum sets; instead, opt for forged brass or heavy zinc alloys that feel substantial in the hand.
Finally, ensure your finish coordination is seamless across the entire porch. Match your new door handle to the doorbell, the house numbers, and the threshold to create a high-end designer look.
New hardware looks great, but it won’t stop the draft—that’s the job of the weatherstripping.
⭐ Top Products for Door Hardware
Heavy Duty Matte Black Door Hinges
Aluminum Door Push Plate Protection Set
Keyless Entry Keypad Door Lock System
Weatherstripping
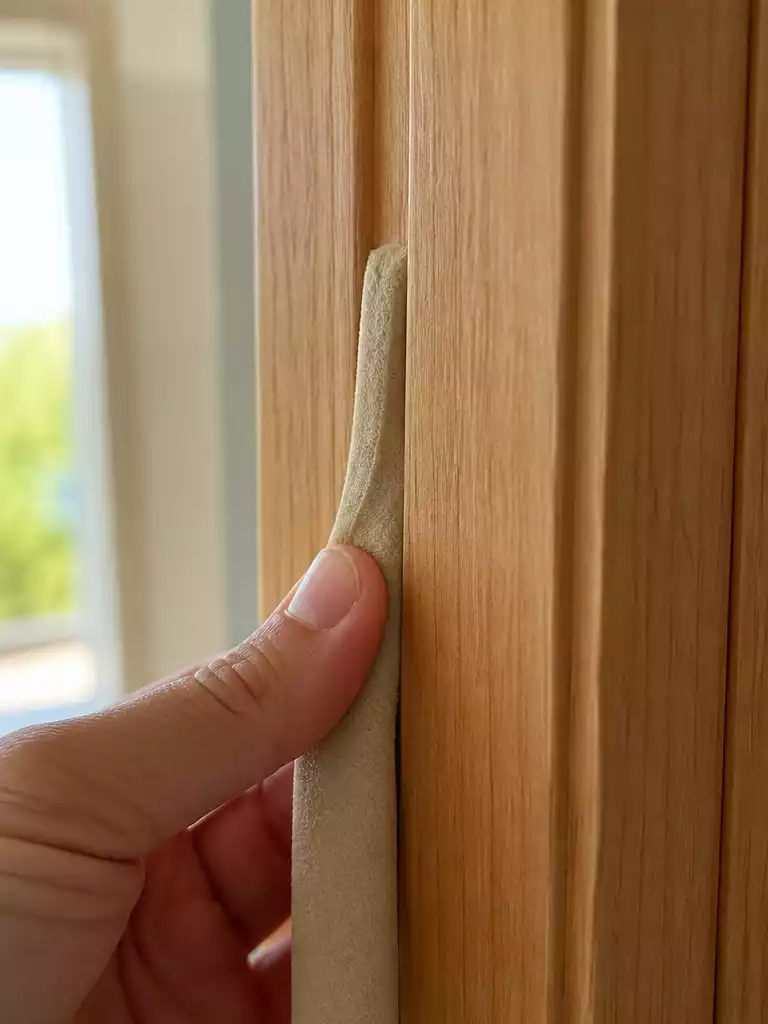
Seal out drafts and noise to create a solid, energy-efficient first impression for every buyer.
You can’t see a draft, but a buyer will certainly feel it the moment they stand in your foyer. Replacing flattened, cracked, or brittle rubber seals is the silent upgrade that makes a home feel structurally sound and well-insulated.
When weatherstripping fails, it doesn’t just let in cold air; it allows the door to rattle in the frame, which signals a lack of precision to anyone walking through. Upgrading these seals ensures the door closes with a satisfying, muffled “thump” rather than a hollow clatter.
Choosing the Right Seal Type
- Kerf-in Foam: This is the standard for modern wood doors; it features a plastic “barb” that slides directly into a pre-cut groove (the kerf) in the door stop.
- Adhesive-backed V-Strips: Ideal for older frames without a groove, these fold into a ‘V’ shape to bridge gaps between the door face and the jamb.
- Compression Seals: Best for the hinge side of the door to provide a tight, springy barrier against wind driven rain.
To find the “invisible” failures, perform the nighttime light test. Stand inside with the entryway lights off while someone shines a bright porch light on the door; if you see slivers of light dancing around the edges, your energy efficiency is literally leaking out.
The goal is to achieve a perfect compression balance. The seal must be thick enough to stop airflow, but not so aggressive that a buyer has to “shoulder-bump” the door just to get the deadbolt to engage.
Pro Tip: The Kerf Clean-Out
Before sliding in your new foam, run a thin putty knife through the slot to clear out old paint drips or jagged wood splinters. This ensures the new seal seats deeply and remains flush against the door for years to come.
Always install your weatherstripping on the door stop rather than the door face. This prevents the material from being crushed or sheared off by the constant friction of the door’s swing, extending the lifespan of the repair.
⭐ Top Products for Surface Cleaning
Restorative Exterior Wood and Deck Cleaner
Complete Wood Restore and Repair Kit
Orange Scent Enhancing Wood Furniture Polish
💰 Seal Upgrade Cost Reality:
- The real range: Expect to spend less than $50 for a full perimeter refresh of high-quality foam and V-strips.
- Hidden cost: Adhesive failure often occurs if you skip the surface prep; budget for a small bottle of denatured alcohol.
- Worth it: This is a high-ROI fix because it prevents “structural” red flags during the buyer’s initial walkthrough.
8. Threshold and Sweep

A perfectly adjusted threshold creates a seamless, weather-tight seal that buyers can feel the moment they step inside.
The threshold is the literal “step” into your home, yet it is often the most overlooked part of an entryway refresh. If yours is pitted, worn, or missing its rubber sweep, the entire entrance feels incomplete and slightly neglected to a keen-eyed buyer.
Beyond the look, this area is your primary defense against drafts and moisture. A loose or poorly fitted sweep doesn’t just let in air; it signals to an inspector that the home’s “envelope” hasn’t been properly maintained.
The “Wicking” Prevention: Always apply a heavy bead of exterior-grade silicone directly under the threshold during installation. This prevents water from “wicking” underneath and rotting out your expensive subfloor over time.
Many homeowners are surprised to learn that most modern brass or aluminum thresholds are adjustable. You can often “dial in” a perfect seal by simply turning the visible screws to raise or lower the center riser bar.
When selecting a replacement sweep—the piece attached to the bottom of the door—consider the specific needs of your porch floor. While a standard rubber flap works for smooth surfaces, a brush-style sweep is the secret for uneven floors like slate or brick because it contours to gaps more effectively.
Aim for a clearance of 1/8 inch between the sweep and the threshold for the most effective seal. When installing new components, trim them slightly long at first, then perform a final “cut to fit” once you’ve tested the door’s swing to ensure it doesn’t drag or bind.
⭐ Top Products for Surface Cleaning
Restorative Exterior Wood and Deck Cleaner
Complete Wood Restore and Repair Kit
Orange Scent Enhancing Wood Furniture Polish
⚠️ Where Installation Goes Wrong:
- The “Shoulder-Bump” Trap: Avoid installing a sweep so thick the buyer must force the door to latch or lock.
- Ignoring the Kerf: Failing to clean old debris from the threshold slot prevents the new seal from seating deeply.
- The Dragging Edge: Trimming the sweep exactly to the door width often leaves light-leaking gaps at the jamb corners.
9. Glass and Sidelights
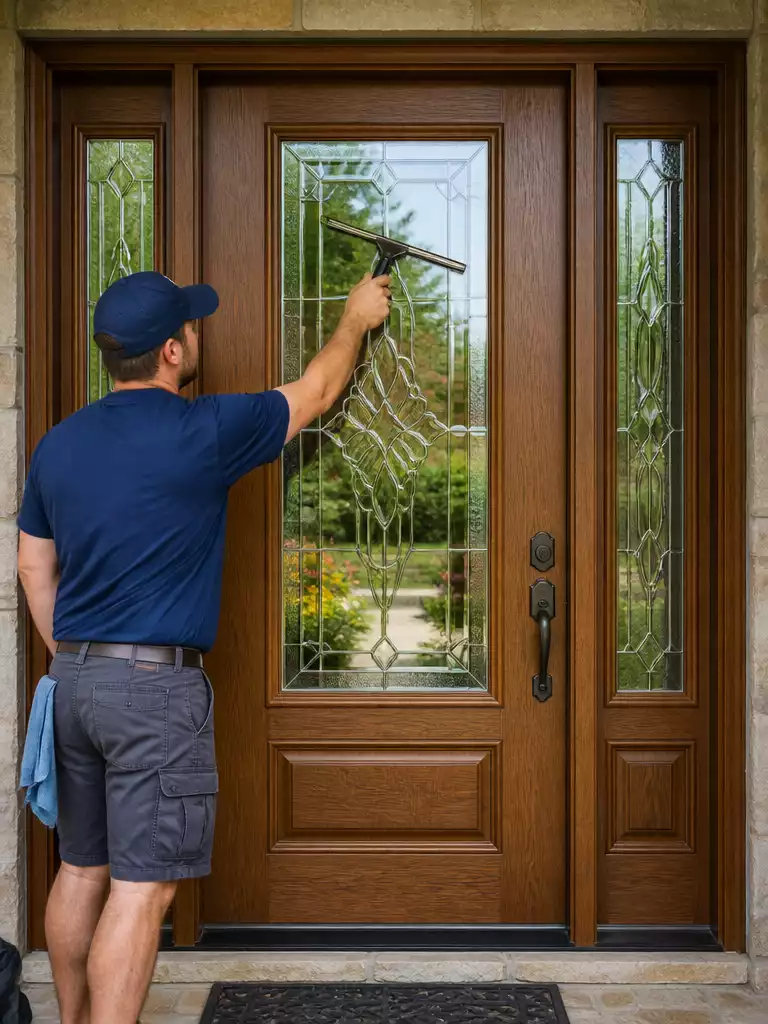
Crystal clear glass and pristine seals signal a high-end, well-maintained home to every prospective buyer.
Foggy glass or cracked caulk around your sidelights acts as a giant red flag for buyers. These “failed seals” often lead people to suspect there are expensive, hidden window issues throughout the entire house.
To avoid these subconscious deductions, start with a deep, intentional clean using a mixture of white vinegar and lukewarm water with a lint-free cloth. You must avoid ammonia-based cleaners, as they can chemically weaken or discolor the fresh wood finish you just applied to the frames.
The Glazing Integrity Check
Inspect the decorative wooden “stops”—the small trim pieces holding the glass in place. If you see gaps or shrinkage, apply a tiny, precise bead of clear, paintable caulk to the glass-to-wood joint to create a seamless, weather-tight look.
If your sidelights are wood-framed, they require the exact same 80-120-220 grit sanding and staining treatment as the main door. A mismatch in color or sheen between the door and its surrounding glass panels makes the entrance feel pieced together rather than professionally restored.
⚠️ Inspection Alert: The Failed IGU
If your glass is dual-pane and shows internal fogging or moisture that you can’t wipe away, you have a failed Insulated Glass Unit (IGU). It is much smarter to replace the glass pane now for roughly $150 than to let a buyer’s inspector flag it and demand a $500 credit during negotiations.
Once the glass is sparkling, use a squeegee to ensure a streak-free finish that catches the light during afternoon showings. Working from the top-down prevents dirty water from running over the sections you have already perfected.
⭐ Recommended for Glass and Sidelights
Pet Resistant Heavy Duty Screen Mesh
Fiberglass Screen Mesh with Rolling Tool
Frosted Glass Paint DIY Privacy Kit
Frosted Glass Paint DIY Privacy Kit
✨ Complete the Look
Once your glass is crystal clear, these final styling adjustments ensure the decorative elements feel intentional and high-end rather than just functional.
- Shadow Lines: Use a dark-toned caulk behind dark-stained trim to hide unsightly gaps that white caulk would highlight.
- Internal Grilles: Ensure removable interior grilles are snapped firmly into place to prevent a “rattling” sound when the door closes.
Frame and Trim
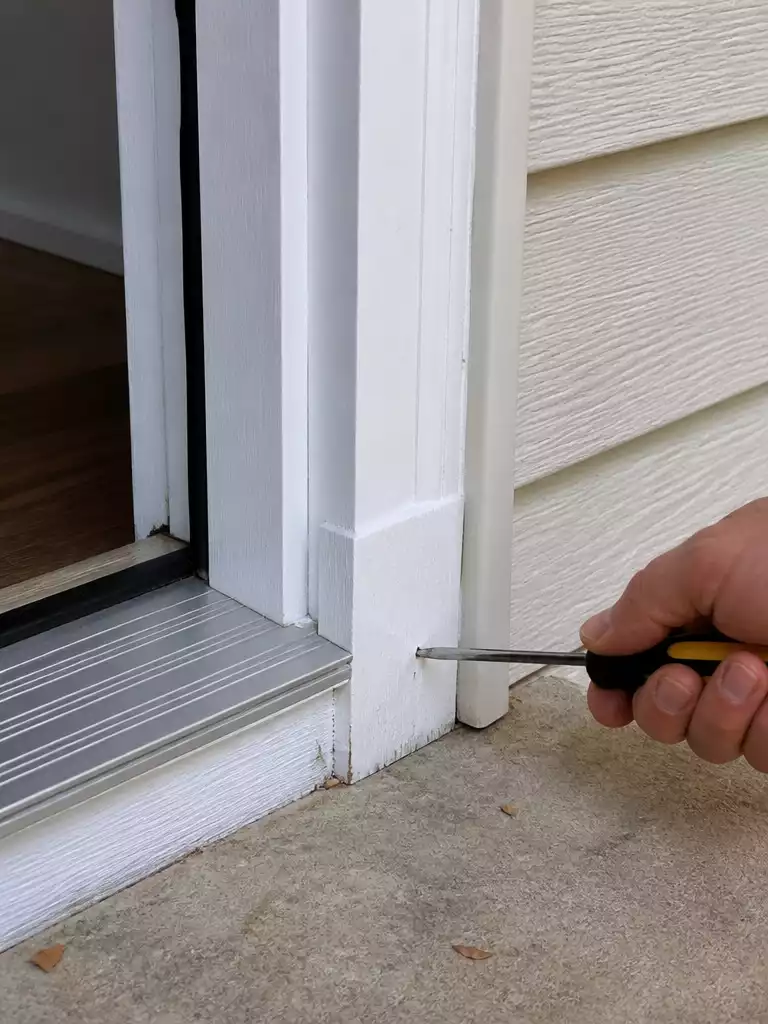
A crisp, structurally sound frame provides the perfect high-contrast border for your restored wood door.
A beautiful door in a rotten frame is like a diamond set in lead. If the surrounding brickmold and jambs look weathered or soft, a buyer will immediately worry about structural water damage behind the walls.
Before you pick up a paintbrush, you need to conduct the Screwdriver Test. Take a flathead screwdriver and firmly poke the bottom six inches of the door frame where it meets the threshold.
If the wood is firm, you are in the clear for a simple cosmetic refresh. However, if the metal sinks in or the wood feels spongy, you have found rot that must be petrified and filled before listing.
The Structural “Save” Checklist
- Excavate: Use a 5-in-1 tool or screwdriver to scrape out all loose, crumbly decay until you hit sound, dry wood.
- Petrify: Apply a liquid wood hardener to the soft area; this penetrates the fibers and turns them into a rock-hard base for your filler.
- Reconstruct: Use a high-performance two-part epoxy putty to rebuild the missing shape of the molding, smoothing it with a plastic putty knife.
- The Brickmold Refresh: If the exterior trim is paint-grade, apply a fresh coat of “Trim White” to create a sharp, clean border that makes the wood grain of the door pop.
Mistake to Avoid: The “Telegraphing” Patch
Never skip the primer on your repairs! If you fill a hole in the frame and don’t prime it, the patch will “suck” the gloss out of your topcoat, leaving a dull spot that screams “recent repair” to an eagle-eyed inspector.
Once your repairs are sanded flush and primed, focus on the caulk lines. Run a thin bead of exterior-grade silicone-latex caulk where the brickmold meets the siding.
This simple step prevents moisture from “wicking” into the subfloor and creates the seamless, high-end finish that buyers associate with a meticulously maintained home.
⭐ Top Products for Surface Cleaning
Restorative Exterior Wood and Deck Cleaner
Complete Wood Restore and Repair Kit
Orange Scent Enhancing Wood Furniture Polish
💰 What This Really Costs:
- The real range: A basic frame repaint typically stays under $50, while professional-grade epoxy kits and hardeners add $30–$60.
- Hidden cost: Budget for high-quality exterior caulk and specialized primer; skipping these leads to moisture rot that ruins new paint.
- Worth it: Repairing the frame is significantly cheaper than a $3,000+ full entry replacement that buyers might otherwise demand.
Final Walk-Around
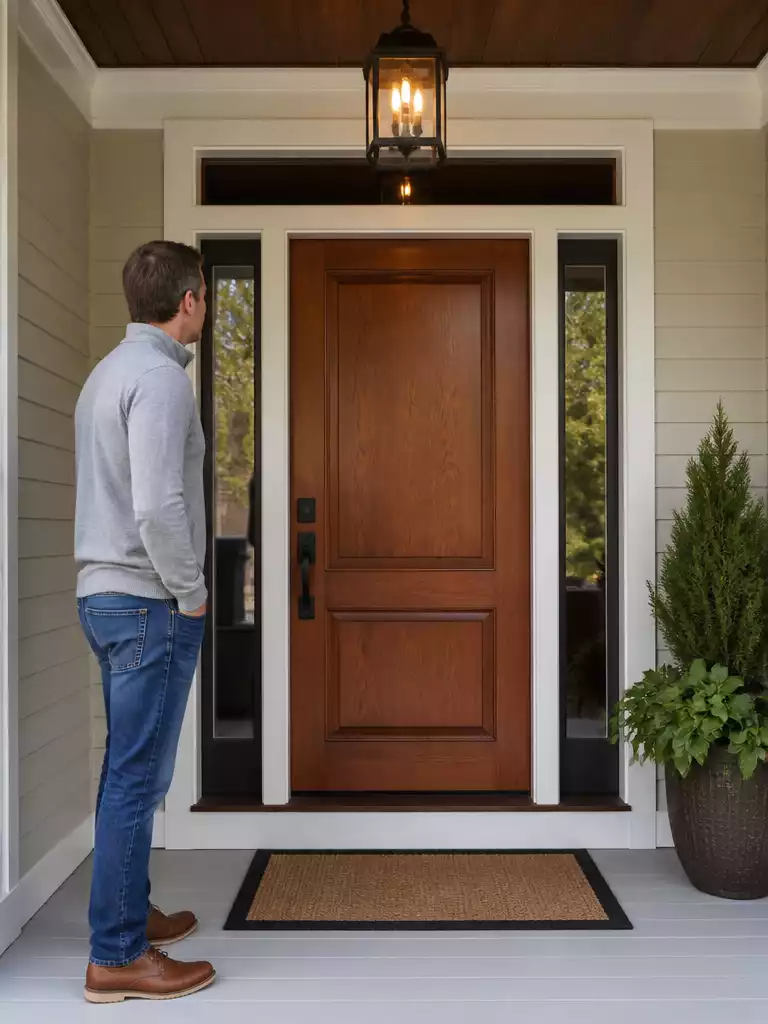
A final quality check ensures your door operates with high-end precision for every prospective buyer.
Think of this stage as the “Stress Test” before the curtains go up on your first showing. You need to identify every minor flaw—from a sticky latch to a phantom swing—before a buyer’s agent has the chance to point them out.
The Pro’s “Ghost” Test
Open the door halfway and let go; if it drifts open or shut on its own, the hinges are out of plumb. Use the long screw trick by replacing one short hinge screw with a 3-inch screw to pull the jamb back into the stud and square the frame.
Next, focus on the sensory experience of using the door, as buyers equate a solid “click” with a well-maintained home. Close the door slowly and verify that it latches and “double-clicks” smoothly without requiring a shoulder-bump or an aggressive slam.
-
✔
The Squeak-Free Check: Apply a tiny drop of 3-in-1 oil or silicone spray to the hinge pins to eliminate any “haunted house” sounds.
-
✔
The Light Leak Test: Stand inside at night with the porch light on; any visible light around the edges means a draft is getting through.
-
✔
The Floor Clearance: Ensure the new sweep or threshold adjustment isn’t dragging or scraping against the interior flooring.
Wrap up with a Visual Sweep from two specific distances to ensure your finish is flawless. Stand 10 feet back to check for overall color uniformity, then move to 2 feet away to hunt for “holidays” (missed spots) or drips in the varnish.
Functional Sign-Off
| Component | Target Performance |
|---|---|
| Deadbolt | Clicks into the strike plate with zero resistance. |
| Hinges | Tight to the jamb with no visible sagging or gaps. |
| Seals | Even compression along the entire perimeter. |
.
💰 Surprise Costs to Plan For:
- The hardware gap: A mid-range handle set typically costs $30–$100, but specialty finishes can quickly double that price.
- Hidden structural rot: Budget for wood hardener or epoxy if the frame screwdriver test reveals soft, spongy wood fibers.
- Maintenance reality: Factor in long-term costs; spar varnish requires two fresh topcoats annually to prevent finish failure.
Final Checklist & Documentation
Transform your hard work into a tangible asset that proves your home’s meticulous care.
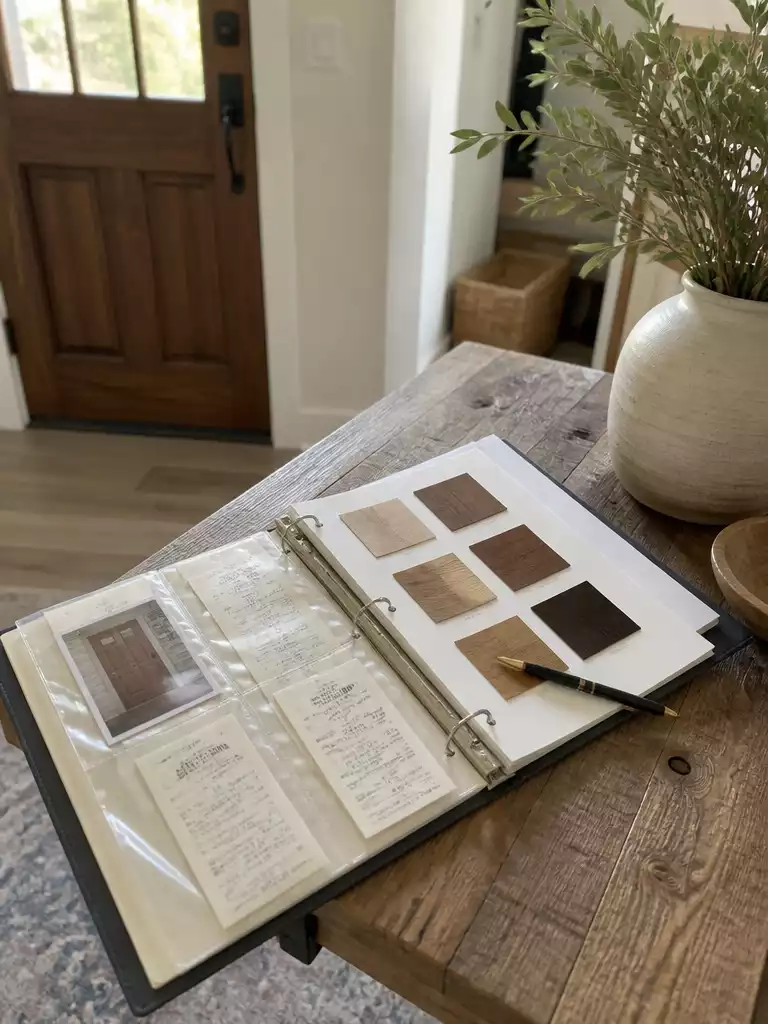
Professionalism sells, and nothing says “meticulous homeowner” like a paper trail. By turning your weekend of labor into a structured Maintenance Log, you provide the buyer with proof that the home’s first impression isn’t just a quick cosmetic flip, but a deep-seated restoration.
This documentation acts as a powerful psychological tool during showings. When a buyer flips through a “Home Features” binder on your kitchen counter and sees the specific care you’ve put into the entry, they stop looking for hidden flaws and start trusting the property’s integrity.
The Seller’s Restoration Log
Keep these specific details organized in a folder or binder to hand over to the new owners:
- The Product Map: Note the exact brand and color name of the stain, paint, and sealer used. Label the leftover tins in the garage so the buyer can handle future touch-ups with zero guesswork.
- Warranty Assets: Secure the receipts for new hardware, especially if your handleset or deadbolt carries a lifetime finish warranty.
- Service Dates: Record the completion date to establish a baseline for the next recommended maintenance cycle.
Before you officially “sign off” and welcome the first photographer or agent through the door, perform one final physical audit. It is the small, tactile details—the lack of a sticky handle or a stray paint drip—that confirm the job was done to a professional standard.
By treating this refresh with the same technical precision as a major structural repair, you eliminate the “neglect signals” that lead to low-ball offers. You aren’t just selling a door; you’re selling the confidence that the rest of the home has been treated with the same level of respect.
⭐ Top Products for Surface Cleaning
Restorative Exterior Wood and Deck Cleaner
Complete Wood Restore and Repair Kit
Orange Scent Enhancing Wood Furniture Polish
💰 The Investment Reality Check
- The restoration ROI: A full DIY refresh typically costs under $200, successfully avoiding a $3,000+ total door replacement.
- Hidden savings: Meticulous documentation prevents “valuation haircuts” where inspectors flag weathered wood as a sign of deeper structural neglect.
- Worth the spend: Prioritize high-quality spar urethane and heavy-duty hardware; buyers equate a solid, smooth-latching handle with overall home security.
With all twelve technical steps on the table, the path to a professional-grade result is clear. You do not need to execute an exhaustive overhaul to see a massive shift in curb appeal; focusing on the structural integrity and the finish addresses the core issues buyers notice first. The most impactful results come from getting the prep work right rather than rushing toward the cosmetic details.
Decide on your highest-priority fixes today to ensure your front door reflects a well-maintained home. Once the primary seals and surfaces are secure, the rest of the checklist is simply about protecting your investment.