

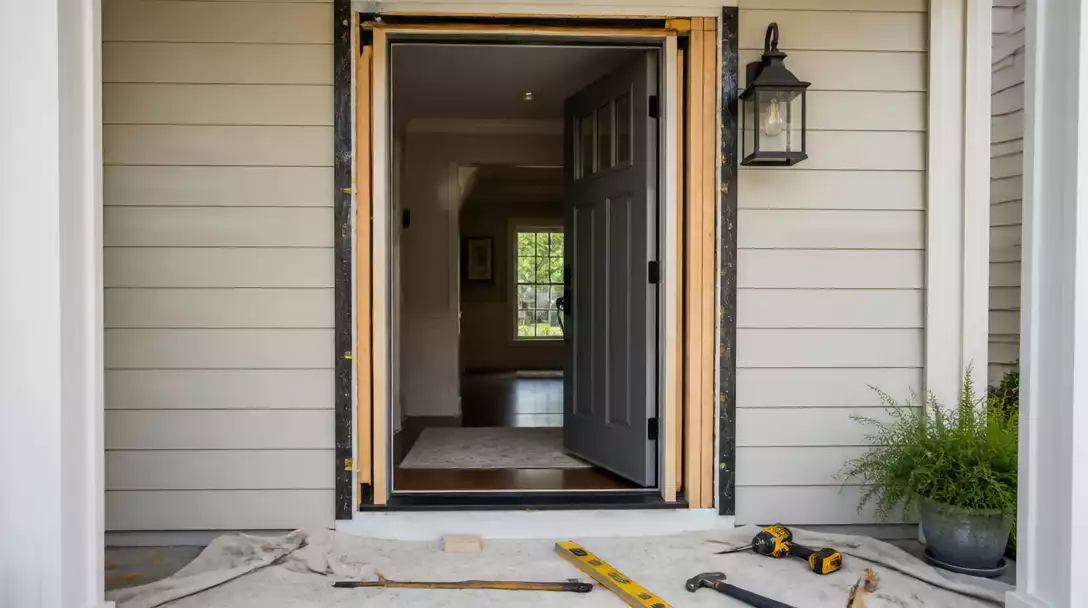
Replacing your front door is a structural project, not just a design choice. This guide cuts through the noise and provides 12 essential steps to ensure your investment protects your home. Let’s start by assessing whether your current unit actually needs a full replacement.
How to Tell Whether You Actually Need a Full Replacement
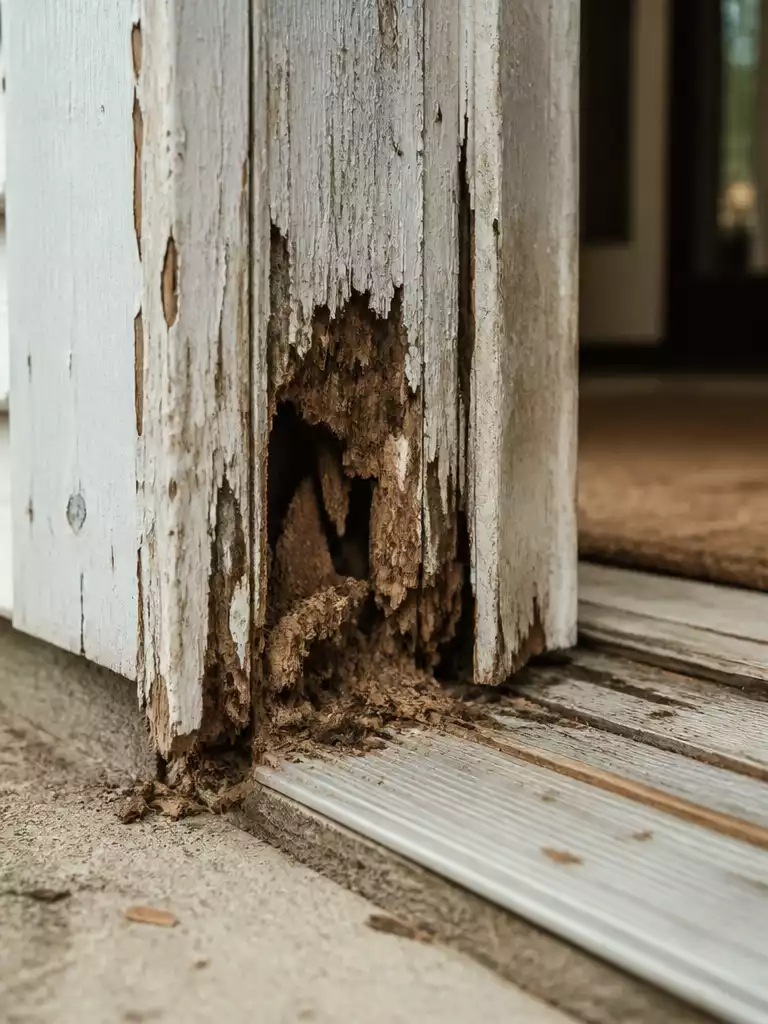
Distinguishing between a quick patch-up and a necessary structural upgrade to protect your home.
As an Amazon Associate I earn from qualifying purchases. Affiliate links may earn me a commission at no extra cost to you.
Most homeowners assume a door is ready for the scrap heap the moment the paint starts to peel, but that is often just a surface issue. To determine if you are looking at a true structural failure, start with the screwdriver test.
Take a standard flat-head screwdriver and gently poke the wood at the very bottom of your door jambs and sill. If the wood feels soft, spongy, or allows the tip to sink in easily, you are dealing with active rot that has compromised the integrity of the unit.
Beyond the Surface: When to Let Go
Sometimes the issue isn’t the door itself, but the environment around it. If your threshold is visibly sagging or the floor inside the entryway remains consistently damp after a rainstorm, the problem likely extends into the structural framing of your house.
You should also be honest about the glass. If you notice persistent fogging or moisture trapped between the panes of a glass insert, the thermal seal has failed permanently. This isn’t something that can be repaired; it is a sign that the unit has lost its ability to regulate temperature, leading to energy loss.
It is helpful to differentiate between a simple maintenance task and a project requiring a full swap. Use this checklist to narrow down the scale of the work ahead:
-
✓
Minor Hinge Adjustments: If your door simply sticks or scrapes the floor, try tightening the hinge screws or shimming the hinges first. -
✓
Perimeter Gaps: If you can see daylight around the edges of the door even when it is latched, your gaskets are likely shot and the door is no longer sealing properly. -
✗
Structural Settling: If the frame itself is visibly out of square or the house foundation has shifted, attempting to force a new door into a warped frame is a losing battle.
If you find that the frame is warped or the foundation has settled, you are effectively in full replacement territory. Once you have confirmed that the old unit is failing beyond the scope of a simple repair, you can move forward with the confidence that a new installation will provide the thermal protection and security your home needs.
⭐ Top Door Mats for Entryway Cleanliness
Heavy Duty Rubber Backed Entry Mat
Floral Patterned Outdoor Entryway Rug
Funny Personalized Indoor Welcome Mat
📋 What to Check First
- Frame Plumbness: Place a long level against the hinge-side jamb to ensure it isn’t bowed, which prevents any new door from closing correctly.
- Threshold Condition: Inspect the area directly under the sill for signs of water staining or moisture, which often points to hidden subfloor rot.
- Clearance Check: Measure the gap between the door and the floor; constant scraping usually indicates that the house foundation has shifted, requiring a full frame replacement.
Measuring Your Existing Door and Frame the Right Way
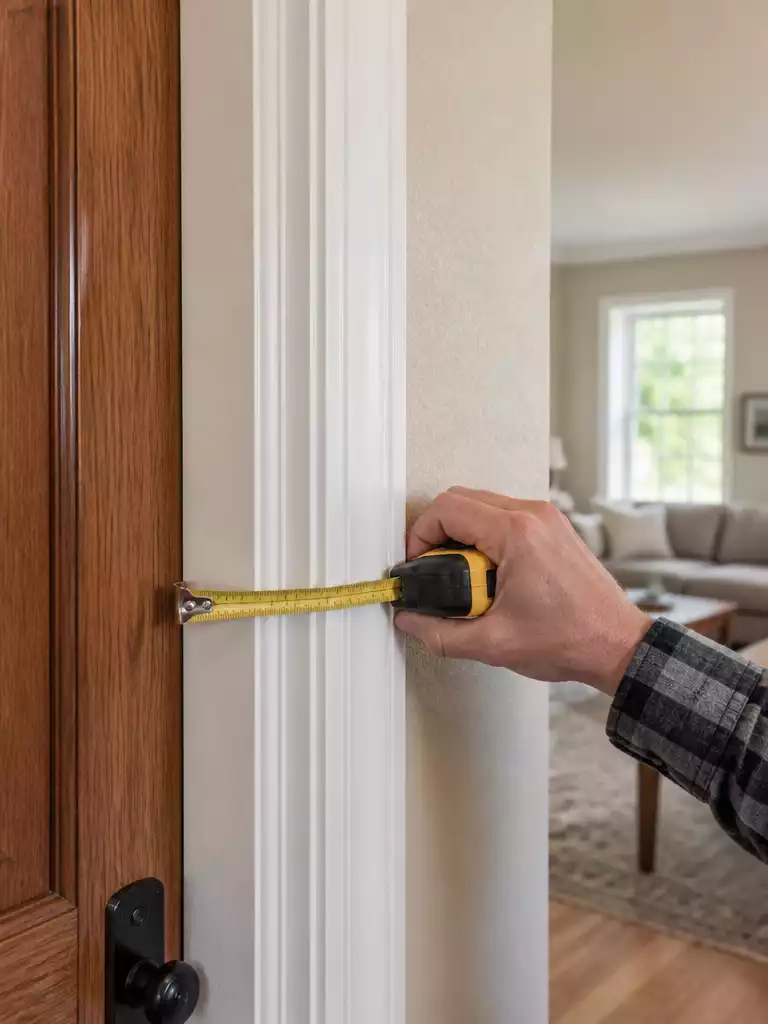
Getting these dimensions right is the difference between a simple swap and a construction nightmare.
Most homeowners treat the front door as a decor choice, but your first measurement is actually a structural data collection mission. If your measurements are off by even a quarter-inch, you can end up with hardware that won’t latch or, worse, a door that binds against its own frame within a season.
The Golden Rule of Measurement
Always measure your width and height at three points: the top, the middle, and the bottom. When you have three different results, always use the smallest number to ensure the new door unit fits within the tightest part of the opening.
To get a true read, you need to differentiate between the door slab and the rough opening. The slab is just the door itself, while the rough opening is the actual structural hole in your house where the jamb sits.
If you are planning a full replacement, you must pull the interior casing to reveal the studs. This allows you to measure the true rough opening, which prevents the frustration of ordering a door that is too wide for the actual framing.
Measurement Checklist
- Width: Top, middle, and bottom (use the smallest).
- Height: Left, center, and right (use the smallest).
- Jamb Depth: Measure from the interior drywall edge to the exterior brickmould.
- Rough Opening: Remove casing to see the studs, then measure width and height at three points.
The “jamb depth” is frequently overlooked, yet it is essential for a clean finish. This measurement ensures the door unit sits flush with your interior walls and exterior trim, preventing gaps that require excessive caulking or carpentry later.
Measuring the door slab instead of the rough opening is the single most common cause of product returns. By capturing the exact measurements of the structural opening, you secure the integrity of your entryway before the first tool even touches your wall.
⭐ Essential Tools for Accurate Door Measuring
Large Rubber Backed Double Door Mat
Heavy Duty Backyard Water Slide Kit
Monogrammed Extra Large Coir Door Mat
📋 What to Check First: Avoiding Common Sizing Pitfalls
- Clearance verification: Measure the distance between your finished floor and the bottom of the existing door to ensure your new threshold won’t drag.
- Hinge-side plumb: Check the hinge side of your frame with a long level; if it’s bowed or out of plumb, a prehung unit will hide those inaccuracies better than a slab.
- Hardware bore alignment: Confirm your current handle’s backset—either 2-3/8 or 2-3/4 inches—to ensure your existing lockset will fit the new door’s pre-drilled holes.
Choosing a Door Material That Suits Your Climate
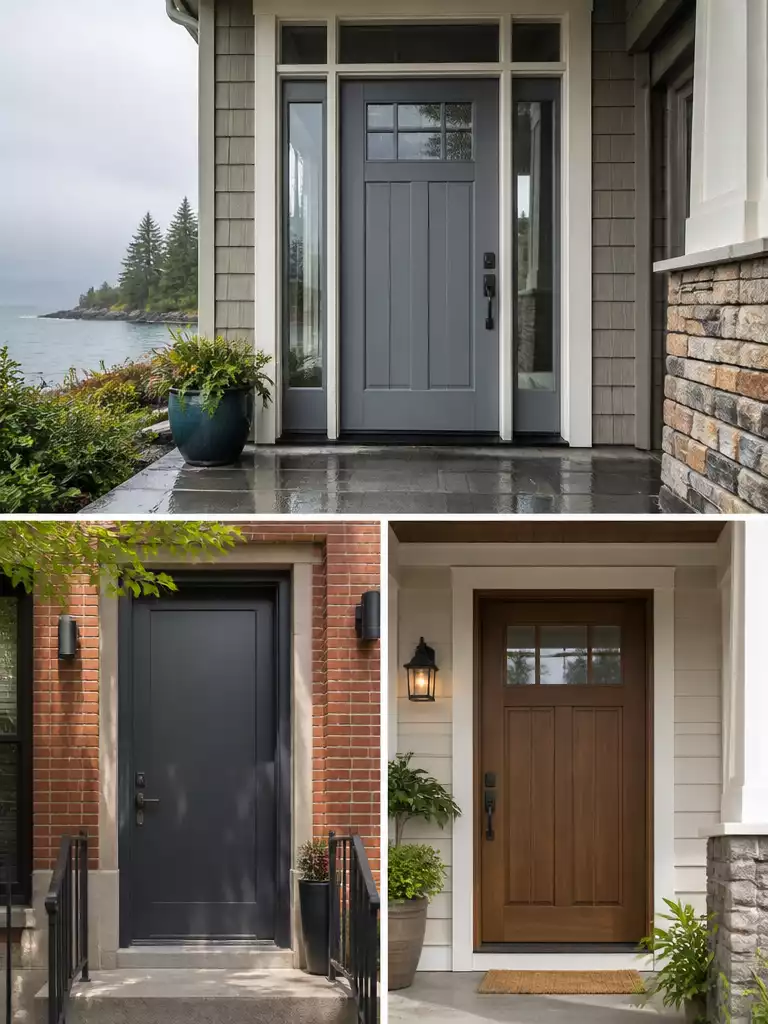
Selecting the right material ensures your entryway stays beautiful and functional for years.
Your local climate is the most important factor in your decision, as it dictates how much maintenance you will actually be doing. If you live in a coastal or humid environment, a wood door acts like a sponge, eventually swelling until it binds in the frame.
For most homeowners, fiberglass is the low-maintenance champion. It resists warping, swelling, and rotting, making it ideal for regions that see extreme temperature swings or heavy precipitation.
Steel doors provide the best security-first option for urban settings. Just keep in mind that the finish is vulnerable; if you scratch the surface in salty, harsh air, you risk rust that can compromise the structural integrity over time.
If you love the aesthetic of wood, understand that it comes with a high-maintenance tax. You must be prepared for seasonal sanding and staining to keep it from cracking or rotting.
The Climate Compass
Choose fiberglass for coastal or humid zones, steel for high-security urban environments, and wood only when you have a fully covered porch in a temperate climate.
⭐ Best Door Materials for Your Climate
Funny Outdoor Front Porch Welcome Mat
Extra Long Faux Coir Welcome Mat
Personalized Monogrammed Coir Entrance Mat
🔢 The Right Sequence to Follow:
Choosing a material is only the first step; you must verify your structural needs before finalizing your order to prevent expensive returns or installation delays.
- Assess existing frame: Confirm if the current jambs are sound enough for a slab or require a prehung unit.
- Measure the opening: Take three width and height measurements, always recording the smallest value to ensure a perfect fit.
- Match to climate: Select your door material based on local humidity levels and security requirements before checking availability.
Understanding the Difference Between a Slab and a Prehung Door
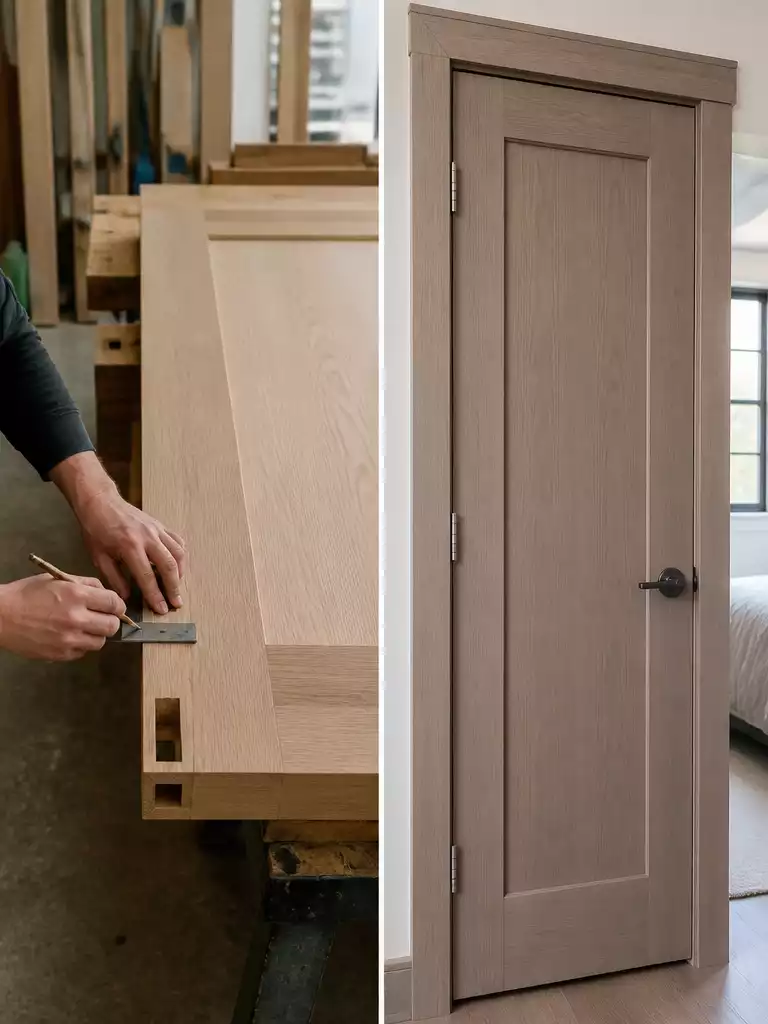
Choosing the right configuration determines whether your update is a simple swap or a structural overhaul.
When you start shopping, you will quickly notice that doors are sold in two distinct formats: prehung units and individual slabs. Making the right choice here is the difference between a smooth installation and a project that requires advanced carpentry skills.
A prehung door is a complete package. It arrives with the door leaf already attached to a frame, including the jambs, hinges, and often the weatherstripping. This is the go-to choice if your existing door frame is damaged, rotting, or out of square, as it provides an entirely new foundation for the door to hang on.
A slab, on the other hand, is simply the door leaf itself. It does not come with a frame or pre-drilled hardware holes, meaning you are responsible for mortising the hinges and fitting the door precisely into your existing opening.
When to choose a slab
Only reach for a slab if your current frame is in flawless condition and perfectly square. If you have any doubt about the integrity of your current jambs, the labor required to fit a slab correctly often outweighs the cost savings.
Most first-time renovators are better served by a prehung unit. It eliminates the need for complex, on-site measurements and custom wood-working to ensure the door opens and closes without binding. Taking the time to evaluate your existing frame condition now will save you from having to troubleshoot alignment issues later.
⭐ Understanding Slab and Prehung Door Differences
Golf Theme Indoor Decorative Door Mat
Matte Black Heavy Duty Door Hinges
Oversized Plain Blank Outdoor Door Mat
🔢 The Right Sequence for Installation
Choosing between a slab and a prehung unit dictates your preparation schedule; doing this in the correct order prevents misaligned hinges and structural binding.
- Inspect the frame: Verify the existing jambs are perfectly plumb, square, and free of rot.
- Select your unit: Choose a prehung door to bypass complex mortising and frame-leveling work.
- Verify the rough opening: Measure the actual stud-to-stud distance before committing to a final order.
Replacing a front door is a heavy structural commitment, but the anxiety surrounding the project often outweighs the actual technical difficulty. You can simplify the process by focusing on the core elements that ensure a lasting, secure installation while browsing new door options with total clarity.
Securing long-term structural integrity comes down to a few precise measurements and choosing the right material for your specific climate.
Matching the Door Style to Your Homes Character
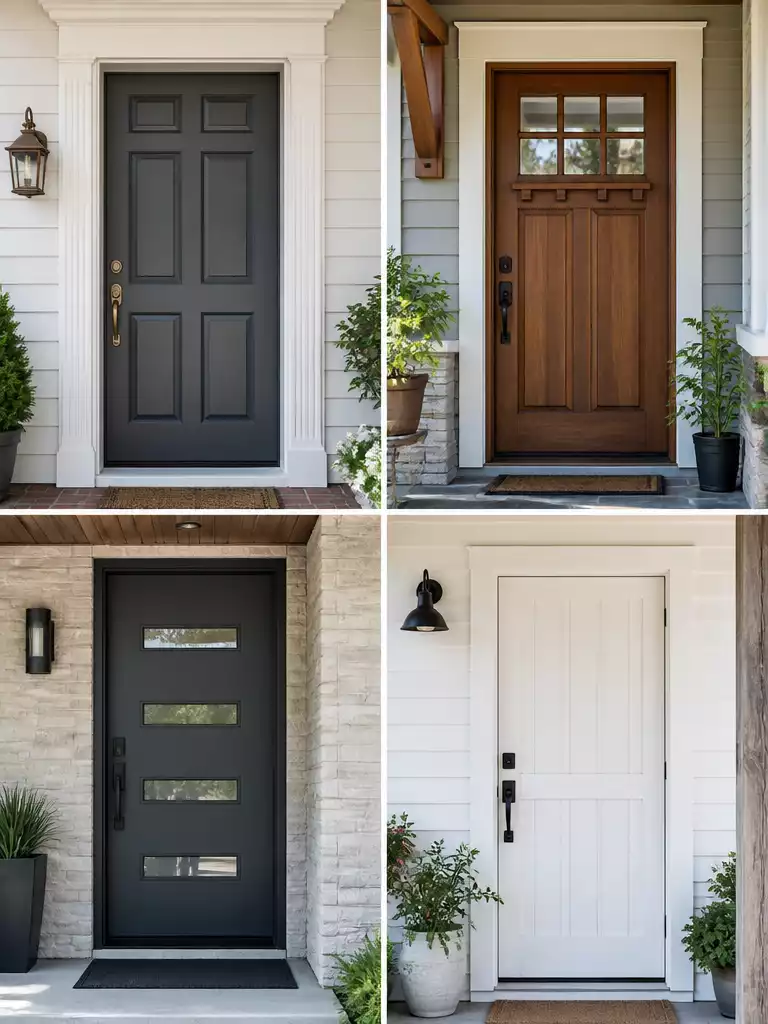
Selecting a door that honors your home’s architecture preserves your long-term property value.
Choosing a front door isn’t just about picking a color you saw on social media. Your entry serves as the focal point of your home’s exterior, and choosing a style that clashes with your house’s architectural DNA can actually impact your property’s resale appeal and appraisal value.
Instead of chasing fleeting trends, look at your home’s existing lines, trim, and windows to determine which category it naturally fits into. Aligning your choice with these established profiles creates a sense of intentionality that makes your home feel cohesive and well-maintained.
A Note on Resale Integrity: If you install an ultra-minimalist door on a traditional Victorian, or a heavily ornate door on a stark contemporary build, the visual “jarring” effect can be a red flag for potential buyers. Stick to the character of your home to ensure the upgrade feels like a natural improvement rather than an awkward addition.
⭐ Matching Door Styles to Home Character
Boho Style Washable Braided Area Rug
Modern Zinc Alloy House Number Plaque
Monogrammed Coir Mat for Double Doors
🏡 How This Works in a Real Home:
- Audit your neighbors: Take a walk to see if your choice fits the street’s rhythm or feels completely out of place.
- Mind the hardware: Ensure your handle and lock finish complements your home’s existing exterior light fixtures and house numbers.
- Keep it lived-in: Avoid overly ornate styles that require constant cleaning; focus on a profile that ages gracefully with your facade.
What Energy Efficiency and Weatherproofing Actually Involve
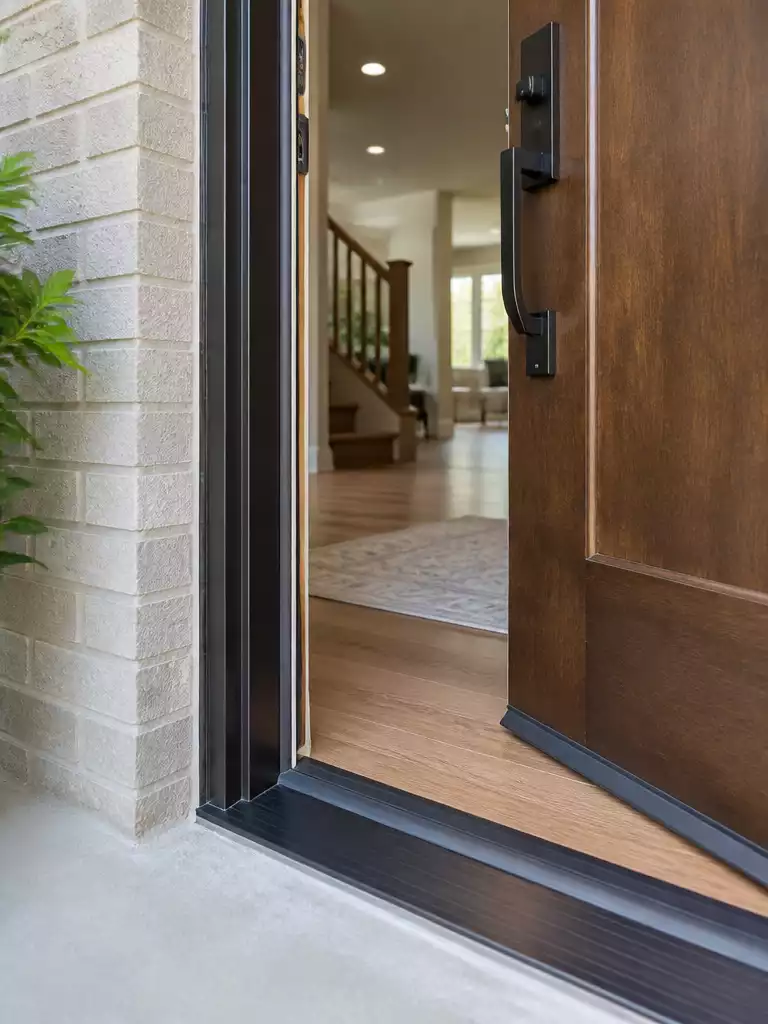
Optimizing your entry threshold creates a lasting, comfortable barrier that protects your home year-round.
When you replace your front door, you are doing more than swapping a slab; you are installing a high-performance seal between your living room and the elements. Most homeowners focus on the aesthetic, but the real value lies in the U-factor, which measures how well the door prevents heat flow. A lower U-factor means better insulation, keeping your home cooler in the summer and warmer in the winter.
To ensure your new door meets modern performance standards, look for the ENERGY STAR label and check the specific criteria for your door type. These benchmarks are non-negotiable if you want to see a genuine reduction in your energy bills:
- Opaque doors (no glass) should target a U-factor of 0.17 or lower.
- Doors with less than 1/2-lite glass require a U-factor of 0.23 or lower and a Solar Heat Gain Coefficient (SHGC) of 0.23 or lower.
- Doors with more than 1/2-lite glass allow for a U-factor of 0.28, though SHGC requirements will vary based on your local climate zone.
Pro Tip: Air leakage is just as important as glass insulation. Look for products benchmarked at 0.3 cfm/ft² or lower for opaque doors, or 0.5 cfm/ft² for swinging doors, to ensure your entryway isn’t a hidden source of drafts.
Beyond the ratings, weatherproofing depends on the physical integrity of the seal. Even the most efficient door will underperform if the perimeter gaskets are flimsy or the door sweep doesn’t make firm contact with the threshold.
Check that your chosen unit features high-quality compression weatherstripping that remains flexible across seasons. When you move to the installation phase, remember that flashing and caulking are the final, vital steps in preventing moisture—not just air—from compromising your new door’s long-term performance.
⭐ Energy Efficiency and Weatherproofing Essentials
Ultra Thin Absorbent Threshold Floor Mat
Aluminum Foil Heat Insulation Dampening Mat
🔢 The Right Sequence for Weatherproofing
Preventing air and water intrusion relies on a strict installation order; skipping these steps often leads to rot behind the frame.
- Prep the sill: Install your flashing membrane securely to bridge the gap between the subfloor and the exterior.
- Shim for level: Check your frame with a level; use shims at every hinge and fastener point to prevent bowing.
- Seal the gaps: Use non-expanding foam and high-quality exterior caulk to tie the frame into your home’s moisture barrier.
Deciding on Glass Panels Sidelights and Privacy
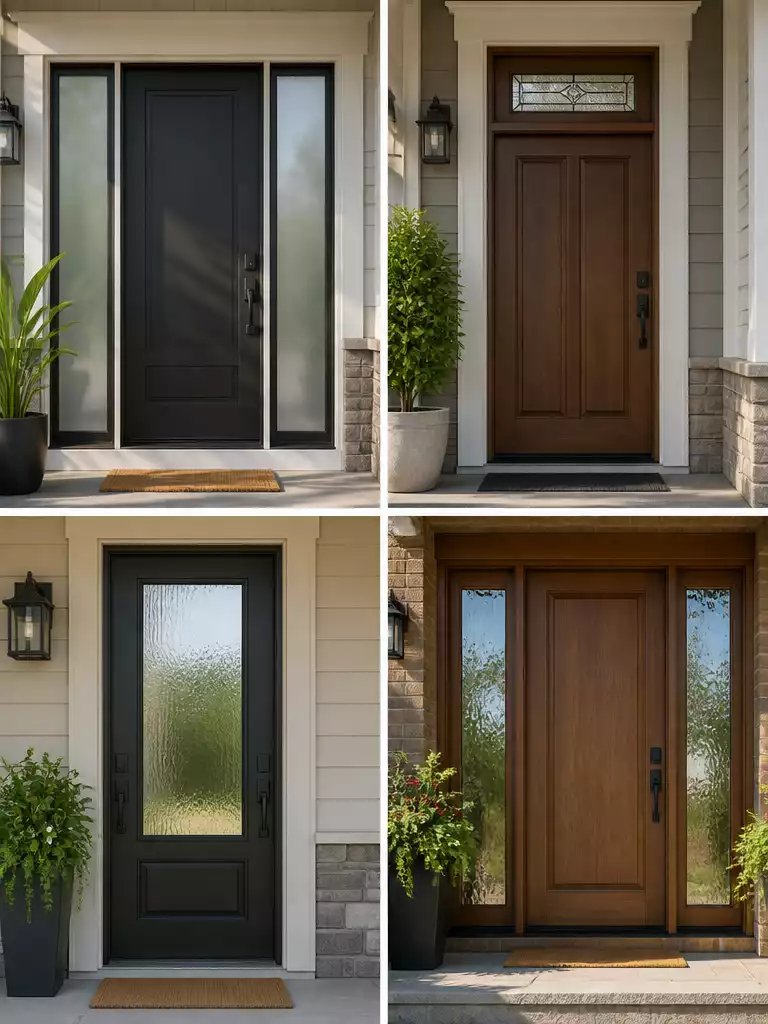
Balance natural light and curb appeal with the right level of privacy for your home.
Adding glass to your entryway is a trade-off between welcoming natural light and maintaining your household’s privacy. While clear glass looks pristine, it turns your front hall into a display case for anyone walking by your home.
If you love the aesthetic of sidelights but want to avoid the “fishbowl” effect, consider obscured or textured glass. These options allow plenty of daylight to stream through while keeping the interior of your home shielded from prying eyes.
Privacy Solutions for Entryways
- Frosted or Sandblasted: Provides a soft, diffused glow without letting outsiders see shapes or movement inside.
- Textured or Reeded Glass: Adds a layer of visual interest and pattern while distorting the view through the pane.
- Window Film: A cost-effective, DIY-friendly solution that can be applied to clear glass to add privacy after installation.
- Glass Block: Offers maximum security and privacy with a distinct, modern, or retro-industrial look.
Beyond privacy, you must prioritize the physical security of your entry. If you opt for glass panels near your door handle or lock, you risk creating a vulnerability where an intruder could simply break the glass and reach inside to turn the thumbturn.
Security Alert: Avoid Reach-Through Access
Never place a deadbolt thumbturn within reach of glass panels or sidelights. If your design requires glass near the hardware, choose laminated security glass that resists shattering, or opt for a double-cylinder deadbolt that requires a key on both the inside and outside.
If you decide on glass, ensure the product meets your specific energy needs. Large glass inserts can become major heat sinks, so check the U-factor ratings to ensure your new door doesn’t compromise your home’s thermal efficiency.
⭐ Choosing Glass Panels and Privacy Inserts
Heart Patterned Outdoor Entryway Mat
Colorful Heavy Duty Outdoor Welcome Mat
Blue Green Patterned Outdoor Door Mat
⚖️ Quick Decision Guide: Choosing Your Glass
- Choose this if: You want maximum natural light in a dark foyer and have a private, fenced-in front yard.
- Skip this if: Your entry faces a busy sidewalk; opt for textured or frosted glass to maintain your home’s privacy.
- Pair it with: A high-quality light fixture that complements your hardware finish to create a cohesive, welcoming transition for guests.
Planning the Hardware Lock and Handle Swap
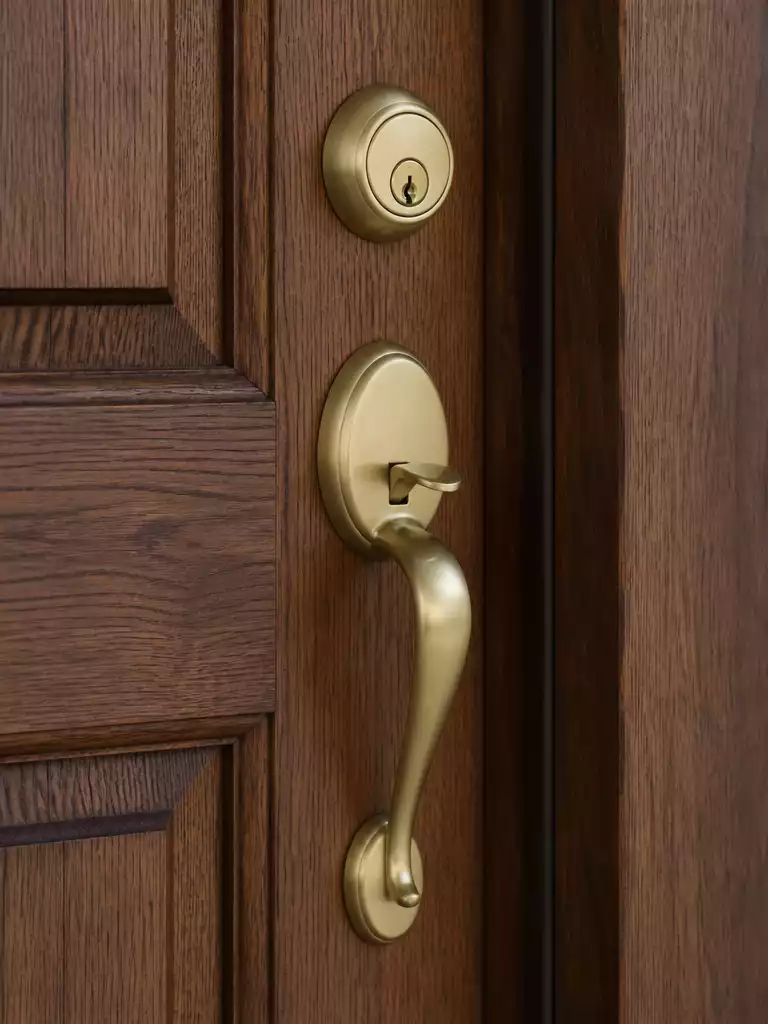
Selecting the right hardware ensures long-term security and smooth, reliable entry for your home.
Swapping your hardware is more than just an aesthetic choice; it is a mechanical transition that must align perfectly with your door’s geometry. If the holes in your new door don’t match your existing hardware, you will find yourself stuck with a project that requires tedious filling and redrilling.
Before you purchase that handle set, you need to verify three specific measurements. These standards ensure your locking mechanism functions as intended without binding or misalignment.
- Bore Hole: The main hole for the handle is typically 2-1/8 inches in diameter, and the smaller hole on the edge of the door is 1 inch.
- Backset: This is the distance from the edge of the door to the center of the cross-bore hole. It will be either 2-3/8 inches or 2-3/4 inches, and you must match this exactly to your chosen hardware.
Pro-Tip: Check Your Grade
When shopping for security, look for the ANSI/BHMA rating. Grade 1 offers the highest level of security and durability, while Grade 2 is a common mid-range choice for residential use. Avoid Grade 3 hardware, which is intended only for light, interior-only applications.
If you are reusing existing hardware, take a moment to inspect the internal components for signs of wear. A handle that feels “gritty” or a deadbolt that requires extra force to engage is often a sign that the internal springs have reached the end of their lifespan.
Replacing these parts while the door is off the hinges or during the initial installation is significantly easier than trying to troubleshoot a sticking lock once the unit is fully sealed and trimmed. Always keep the door’s thickness in mind, as most standard sets are designed for doors between 1-3/8 and 1-3/4 inches thick.
⭐ Planning Your Hardware and Handle Swap
Custom Interior Door Pocket Liner Set
Ergonomic Loop Grip Fabric Rotary Cutter
Rescue Themed Toddler Nap Mat
🔢 The Right Order for Hardware Upgrades
Installing hardware is the final touch, but doing it in the wrong sequence can lead to damaged finishes or misaligned latches.
- Prep the door face and edge holes before installing the door unit in the frame.
- Hang and shim the door to ensure a perfect, level fit before mounting the handles.
- Install the strike plates last to verify the latch aligns perfectly with the frame hole.
Setting a Realistic Budget for the Whole Project
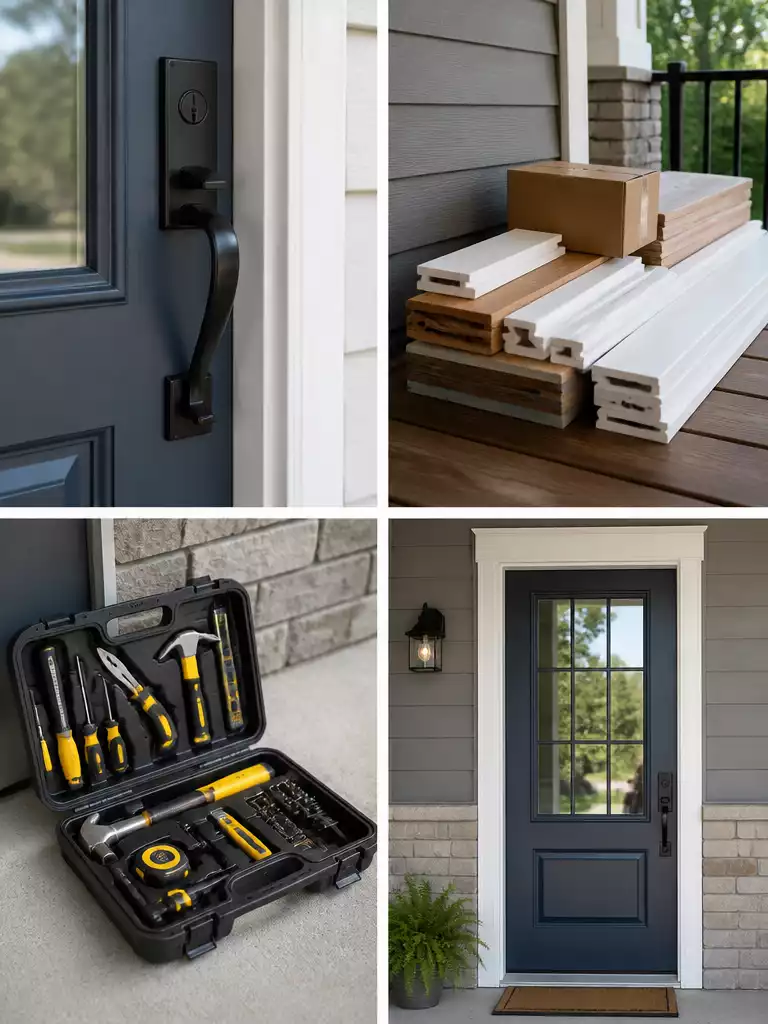
Build a clear financial roadmap to ensure your entry upgrade is a lasting success.
Approaching a door replacement requires balancing your aesthetic vision with the reality of hidden costs. Most standard projects fall into a range of $500 to $2,500 for a full installation, though custom configurations or complex structural repairs can easily push that into the $3,000 to $6,000 range.
Understanding where these dollars go helps prevent the common mistake of underestimating the “hidden” requirements. You aren’t just buying a slab; you are investing in a system that includes the frame, jambs, weatherstripping, and specialized hardware.
Budgeting Checklist
- Structural Contingency: Set aside at least 15% of your total budget for unexpected framing repairs found once the current casing is removed.
- Hardware Compatibility: Ensure your chosen lockset matches your door’s bore hole requirements (typically 2-1/8 inches) to avoid costly last-minute returns.
- Professional Labor: If you are hiring a pro, confirm if their quote includes disposal of the old unit, as hauling away a heavy, rotted door can add unexpected time and effort.
- Finishing Supplies: Don’t forget the cost of high-quality exterior caulk, backer rod, and professional-grade paint or stain, which are essential for long-term weatherproofing.
When you are tallying your numbers, remember that the long-term performance of your door depends on proper sealing and flashing materials. Spending a little more on high-grade sealant and flashing now is far more economical than paying for water damage repairs or air leakage mitigation two years down the road.
⭐ Setting a Realistic Project Budget
Coastal Nautical Themed Coir Welcome Mat
💰 Surprise Costs to Plan For
- Disposal fees: Old, heavy door units often incur extra recycling or hauling charges from your installer.
- Structural patching: Expect to buy matching exterior siding or trim touch-ups if the new frame dimensions differ.
- Fastener upgrades: High-quality stainless steel flashing and shims ensure long-term integrity, but add to material totals.
Knowing When to DIY and When to Hire a Pro
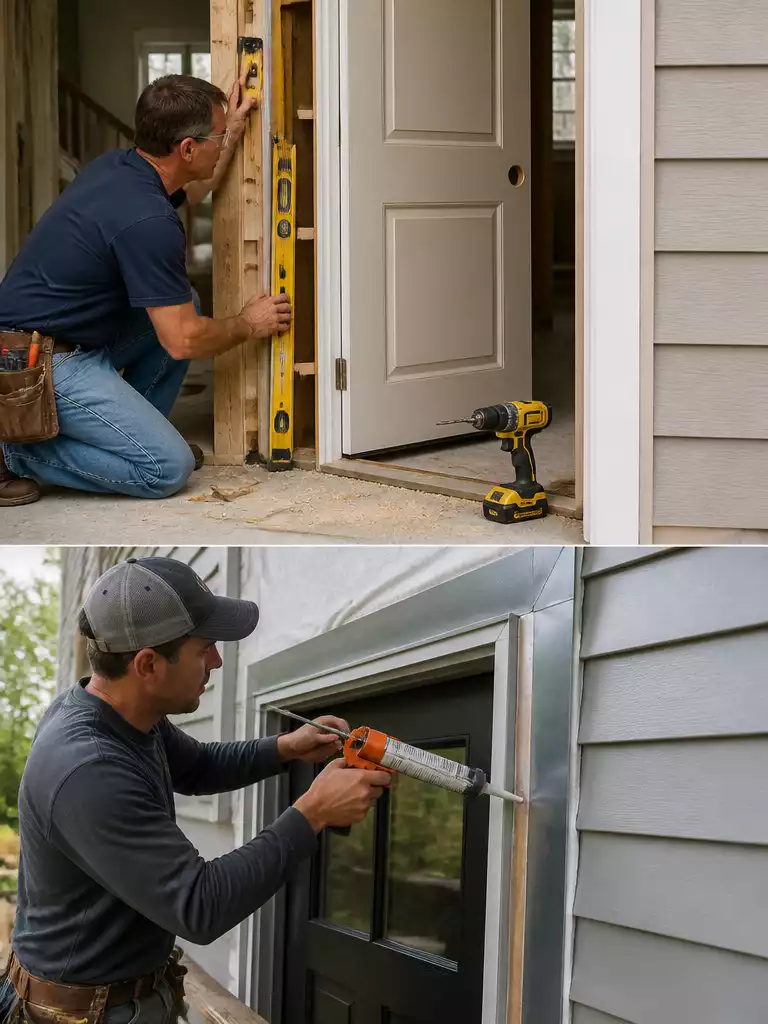
Balancing the pride of a personal project against the security of professional-grade weatherproofing.
Deciding between a DIY approach and professional installation usually comes down to your comfort level with structural precision. Replacing a door is significantly more complex than swapping out a light fixture or adding a new shelf, as the threshold is your home’s primary line of defense against the elements.
If you are considering the DIY route, you should have experience with framing, shimming, and water-management techniques. A front door must be perfectly plumb, level, and square to operate smoothly and maintain its thermal seal.
Essential DIY Toolkit
Before committing to the project, ensure you have these tools on hand: a drill, accurate level, tape measure, hammer, wood chisel, pry bar, circular or oscillating saw, shims, and high-quality exterior sealant.
Hiring a professional is often the smarter choice if you discover the existing frame is rotted or if the opening has settled significantly. A pro brings the specialized knowledge required to handle flashing and water management, which are the most common points of failure in DIY installations.
Improper flashing can lead to hidden water intrusion, causing expensive structural damage to your home’s subfloor and wall studs over time. If you decide to hire out the labor, expect to budget between $200 and $800 depending on the complexity of the frame repair and the specific door type.
The Safety Warning
Prehung door units can be heavy and awkward to maneuver into place. Always plan for a two-person lift to avoid injury and to prevent damage to the new door slab during the installation process.
Ultimately, your decision should weigh the time investment against the risk of misalignment. A professional installation is typically faster and includes a guarantee on the work, which provides significant peace of mind for such a critical structural component of your home.
⭐ DIY vs Hiring a Professional Installer
Colorful Eco Friendly Outdoor Door Mat
Semicircle Shaped Heavy Duty Door Mat
🧰 Questions for Your Installer
- Flashing approach: How will you integrate the flashing with my home’s existing exterior water-management layer?
- Scope clarity: Does this quote include the removal and disposal of my old door and frame?
- Warranty terms: Do you provide a workmanship guarantee on the installation to cover potential future air leaks?
Preparing the Opening on Installation Day
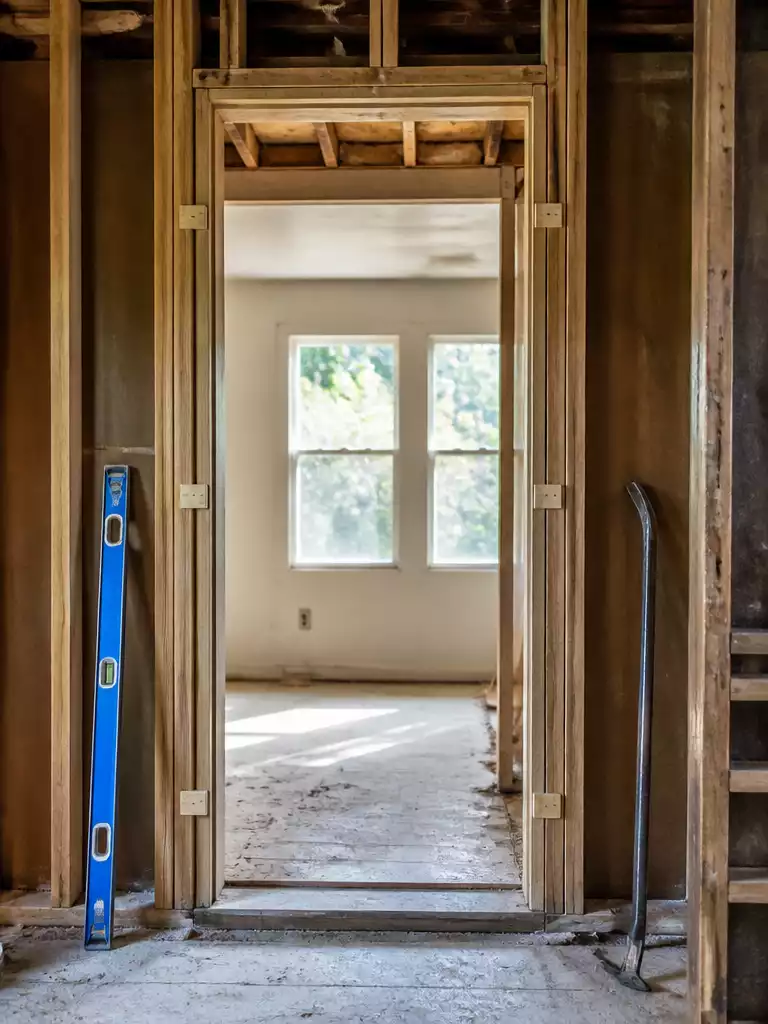
Setting a solid foundation ensures your new door operates smoothly for years to come.
Before the new unit even touches the rough opening, you must ensure the structural “bones” of your entryway are ready. This process begins by removing the old slab and frame entirely, clearing away any years of accumulated debris, old insulation, or loose drywall remnants.
Once you have a clean slate, the most important task is to verify that your rough opening is level, plumb, and square. Few home openings are perfectly uniform, which is why your toolkit must include a reliable level and a generous supply of shims.
Installation Day Checklist
- Clearance: Remove all old nails, staples, and bits of old flashing from the studs.
- Verification: Check the sill for level; if it slopes toward the interior, you must shim it before installing the door to prevent water infiltration.
- Plumb Check: Use a long level to ensure the side studs are perfectly vertical.
- Shimming Strategy: Place shims behind every hinge point and every fastening point along the frame to prevent the jamb from bowing when you drive in your screws.
If you find that your studs are slightly out of alignment, do not attempt to force the new door frame into place. Instead, use shims to bridge any gaps between the new jamb and the wall studs, adjusting until the door opens and closes without binding or swinging on its own.
This is a two-person job, particularly when maneuvering a prehung unit to prevent injury or damage to the frame. By taking the time to properly shim and square the door now, you prevent the common frustrations of air leaks and sticking doors that plague rushed installations.
.
🔢 The Right Sequence for a Tight Install
Following this specific order prevents the common “bind and rub” issue caused by installing a door frame into an unconditioned or shifting opening.
- Check the threshold: Verify the sill is level before placing the unit, as floor slope causes uneven gaps.
- Temporary fixation: Tack the frame in place using minimal fasteners to test the swing and latch alignment.
- Final shimming: Adjust shims at hinge and strike points only after the frame is confirmed plumb and square.
Sealing Finishing and Painting the New Door
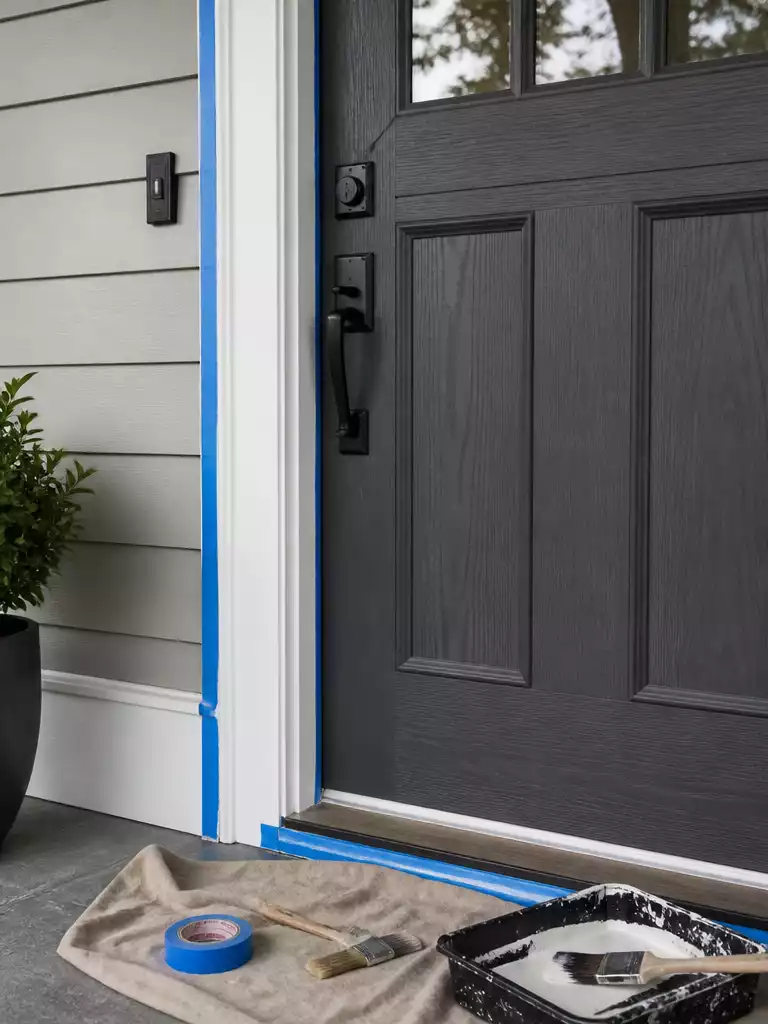
Protecting your home from the elements through precise sealing and a durable, professional finish.
The final stage of your installation—sealing and finishing—is where you protect your home from wind, water, and heat loss. If you rush this part, even the most expensive door will eventually succumb to air leaks or water intrusion behind the frame.
Effective weatherproofing relies on tying your new unit into the home’s existing water-management layers. You must ensure that flashing is integrated properly so that any moisture hitting the exterior is directed away from your subfloor and wall studs.
The Water and Rot Risk
Avoid the common mistake of relying solely on caulk to stop water. Use backer rod to fill deep gaps before applying exterior-grade sealant, and ensure your flashing tape overlaps the house wrap correctly to create a shedding path for moisture.
When it comes to the actual finish, temperature is your biggest constraint. You should only apply paint or stain when the air and surface temperatures are above 20°F (-7°C) to ensure the coating cures properly.
Follow these steps to finish your installation correctly:
- Use a high-quality, non-expanding foam specifically designed for windows and doors; standard window foam can expand with enough pressure to bow your new jambs.
- Apply exterior-grade, paintable caulk to all perimeter gaps where the frame meets the exterior siding to prevent air infiltration.
- Consult the manufacturer’s specific finish instructions for your door material, as fiberglass and steel require different priming and painting techniques than natural wood.
- Ensure all six sides of the door—including the top and bottom edges—are sealed to prevent internal moisture absorption.
Taking the time to seal and paint correctly ensures your project remains a one-time investment rather than a maintenance burden. Proper finish application acts as a barrier against UV rays and moisture, significantly extending the lifespan of your unit.
⭐ Finishing and Sealing Your New Door
DIY Personalized Garden Stepping Stone Kit
💰 What This Really Costs
- Finishing material investment: Plan for $50 to $300 to cover high-quality exterior paints, stains, sealants, and weather-resistant finishing supplies.
- Hidden labor expenses: Budget an additional $200 to $800 if you need a professional to handle complex flashing or site-specific weather-sealing.
- Long-term value: Investing in premium exterior-grade sealants now prevents costly structural repairs later, making it a high-return priority for your project.
With all twelve points on the table, you have the technical roadmap to move past the guesswork. The decisions that dictate the longevity and security of your entry are far fewer than this list suggests. Rather than tackling every detail at once, prioritize the structural integrity of your measurement and material selection.
Getting those foundational pieces right ensures your front door replacement stands up to the elements for years, eliminating the fear of hidden repair costs. Focus your energy on those primary requirements, and the rest of the project will fall into place with confidence.




