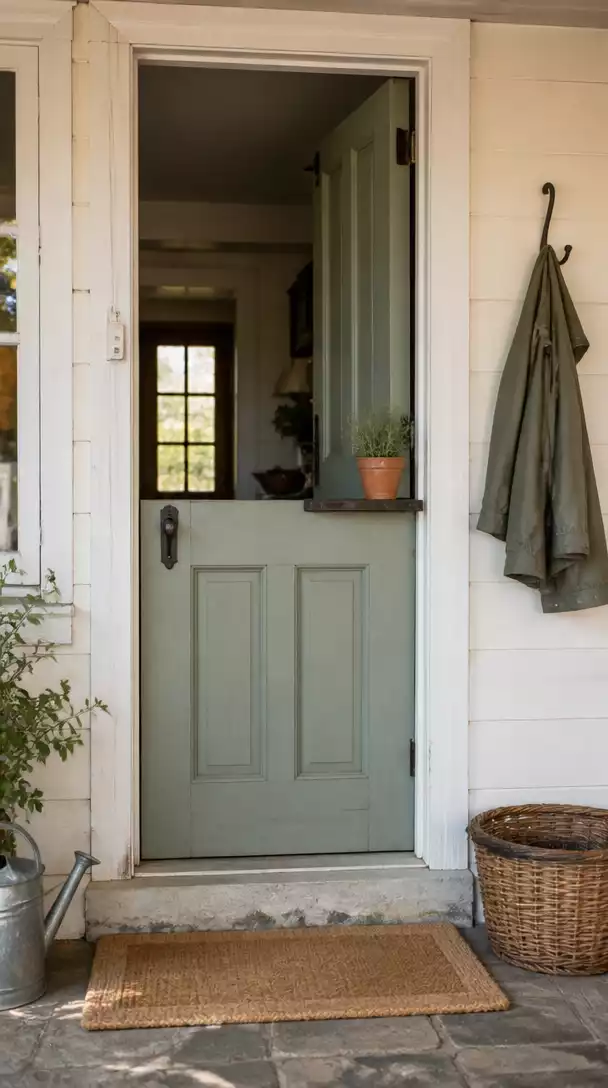
Cottage front door inspiration often swings between too plain and overly staged, loaded with fake hardware and novelty details. The doors that truly feel storybook rest on simple construction logic, classic glass patterns, and soft heritage colors. Here are 10 ideas that hold up.
Dutch Door
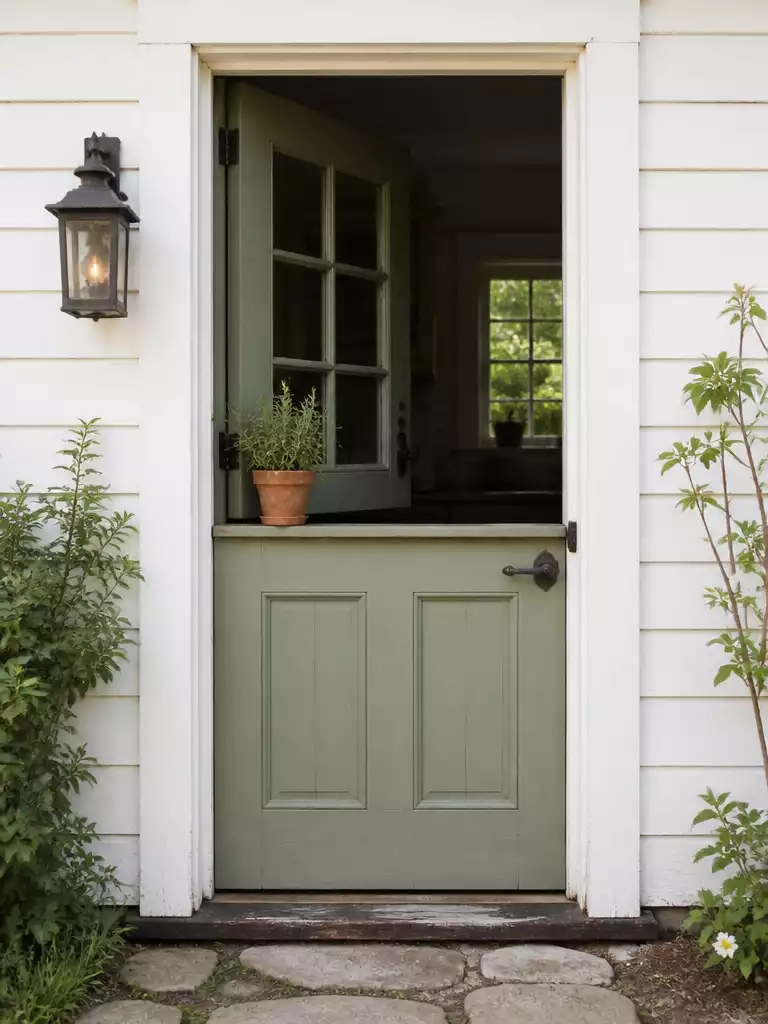
Function meets form with a practical split that keeps fresh air flowing.
As an Amazon Associate I earn from qualifying purchases. Affiliate links may earn me a commission at no extra cost to you.
The practical split sits at 40 to 42 inches: The defining feature of a Dutch door is its horizontally split halves, with the division positioned around 40 to 42 inches from the floor, roughly counter height. This precise division makes the door feel balanced and functional rather than novelty. The bottom half must be constructed like a door—not a flat slab—using solid wood or wood-composite with visible panel construction to withstand daily knocks and wear. The small ledge where the halves meet when closed, called the hardware shelf, is a functional surface perfect for placing mail or a small potted herb.
The hardware shelf detail is often overlooked until you live with a Dutch door. For instance, a potted rosemary rests easily on that small flat ledge, practical and accessible. Overlooking this feature means missing what makes the door genuinely livable rather than just photogenic.
A Dutch door is right for anyone who values ventilation without sacrificing security or who enjoys functional details that age well. However, skip it if you want a simple door that requires minimal maintenance or if your installer won’t fit a two-point latch system, which is essential to keep the bottom half securely latched and prevent rattling in the wind. This latch system, securing the halves to each other and the lower half to the threshold, is a must-ask before ordering. If installed correctly, expect this door to add authentic charm for years.
⭐ Top Products for Dutch Door
Child and Pet Proof Bi-fold Door Lock
Door Lock Installation Kit for Wood Doors
Heavy Duty Pivot Hinges for Wood Doors
📋 What to Check First Before Installing Your Dutch Door:
- Split Height Accuracy: Confirm the horizontal division is set between 40 and 42 inches for proper proportion and usability.
- Latch System Installation: Verify your installer plans to use a two-point latch to secure both halves and prevent rattling.
- Durability of Lower Half: Check that the bottom panel is solid wood or composite with panel construction, not hollow or flat slab, for long-term wear resistance.
Arched Top
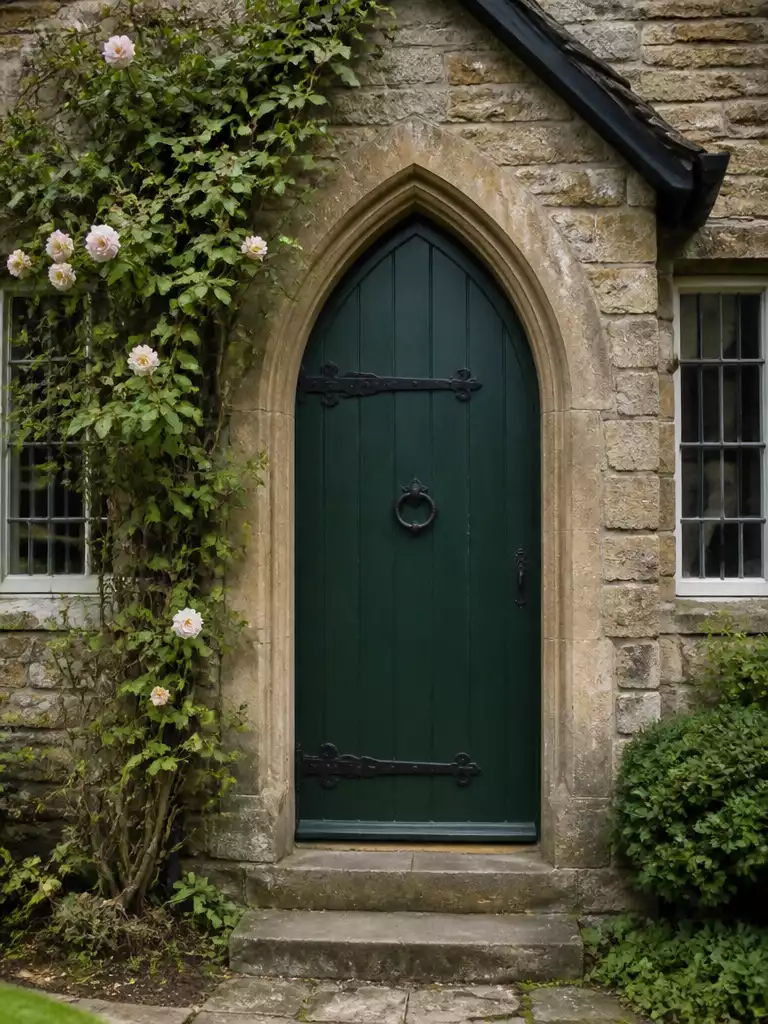
An arched top door naturally elongates narrow entries, adding subtle height and presence.
The arch profile must match existing facade shapes: An arched top door requires custom framing to fit its curved shape, making it a permanent architectural choice rather than a decorative add-on. The specific arch type—segmental, semicircular, or pointed Gothic—should echo the roofline or window arches, or it risks looking like a catalog order instead of a natural fit. Solid wood is traditional here, as the curve at the top is steam-bent or laminated, giving visible grain lines and weight distinct from molded fiberglass alternatives.
The defining detail of an arched top door is its curve, not just the door itself. For instance, a pointed Gothic arch pairs best with English cottage stonework and low porches. A mismatch, such as a Mediterranean semicircular arch on a Georgian facade, immediately feels off. This subtle architectural alignment is what brings authenticity.
This door suits homeowners with narrow or low porch entries wanting a subtle height boost through shape. Skip it if your home has only square or flat-topped windows since the arch will clash visually and reduce cohesion. Custom framing and solid bent-wood construction typically push prices above $1,200, so it’s not a budget pick but a lasting architectural investment.
⭐ Top Products for Dutch Door
Child and Pet Proof Bi-fold Door Lock
Door Lock Installation Kit for Wood Doors
Heavy Duty Pivot Hinges for Wood Doors
📋 What to Check First Before Choosing an Arched Top Door:
- Arch Profile Match: Confirm your home’s existing arches or window shapes to select a matching arch style.
- Rough Opening Shape: Measure your door’s opening—an arched door needs a custom frame, not a square one.
- Material Inspection: Decide between solid wood for visible grain and durability versus molded fiberglass for budget and maintenance.
Arched Plank and Batten
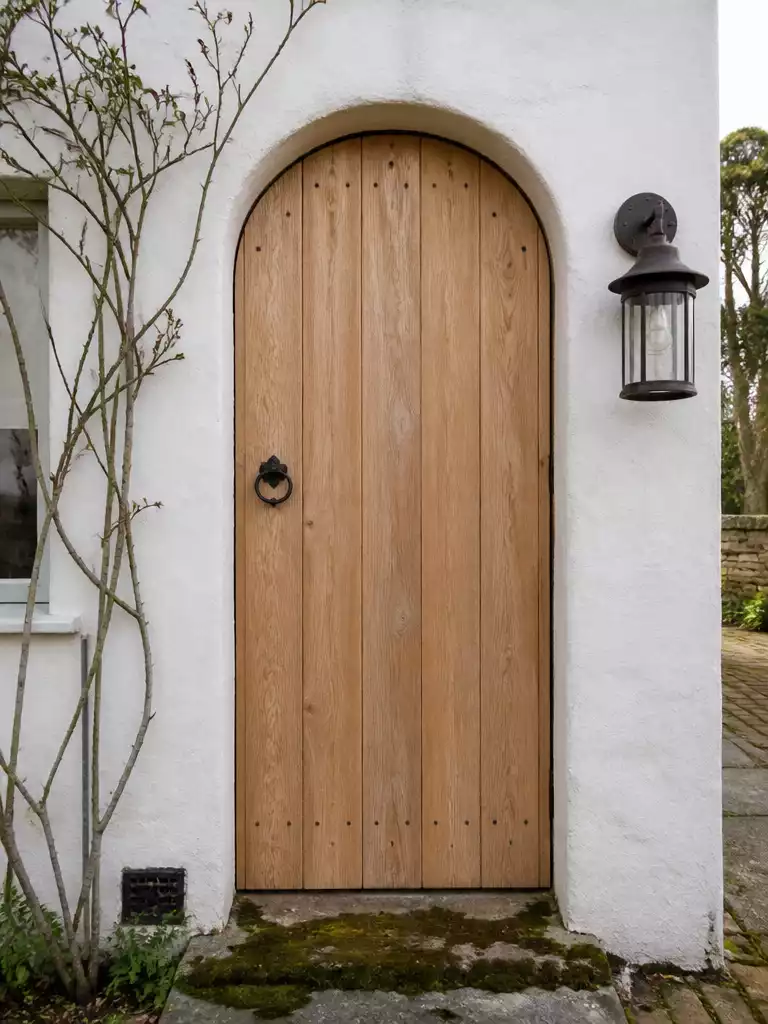
A door that merges structure and surface with authentic hand-nailed wood battens
Cut nails and wood species separate $400 doors from $1,200 ones: Plank and batten means vertical boards held tight with narrow battens nailed face-up to the seams—no panels, no molding. The battens are structural, not decorative, often using irregularly spaced cut or hand-forged nails. The arch is formed by cutting each plank’s top to match the curve, making the arch part of the door’s body itself, not an added rail.
The way battens are spaced and nailed is a subtle but telling mark of quality. Machine-made doors have evenly spaced, identical nails; authentic versions show slight irregularity, especially with cut nails. This detail alone signals craftsmanship and age, instantly distinguishing a door that looks genuinely old from a box-store reproduction.
Arched plank and batten doors are right for homeowners who want a door where the surface is its structure—those valuing authentic construction and willing to invest $1,200 or more. Skip this style if you want a lower-cost door under $600 or prefer painted finishes that hide natural wood grain. Also, choose dense wood species like Douglas fir or white oak to avoid dents and splitting around the nails; pine, though cheaper, won’t hold up as well and shows wear quickly.
⭐ Top Products for Dutch Door
Child and Pet Proof Bi-fold Door Lock
Door Lock Installation Kit for Wood Doors
Heavy Duty Pivot Hinges for Wood Doors
📋 What to Check First:
- Arch fit: Confirm your doorframe can accommodate a curved door without costly modifications.
- Nail authenticity: Ask your supplier about using cut or hand-forged nails versus machine-made nails.
- Wood choice: Verify the door uses dense, resilient species like Douglas fir or white oak for durability.
Stable Style
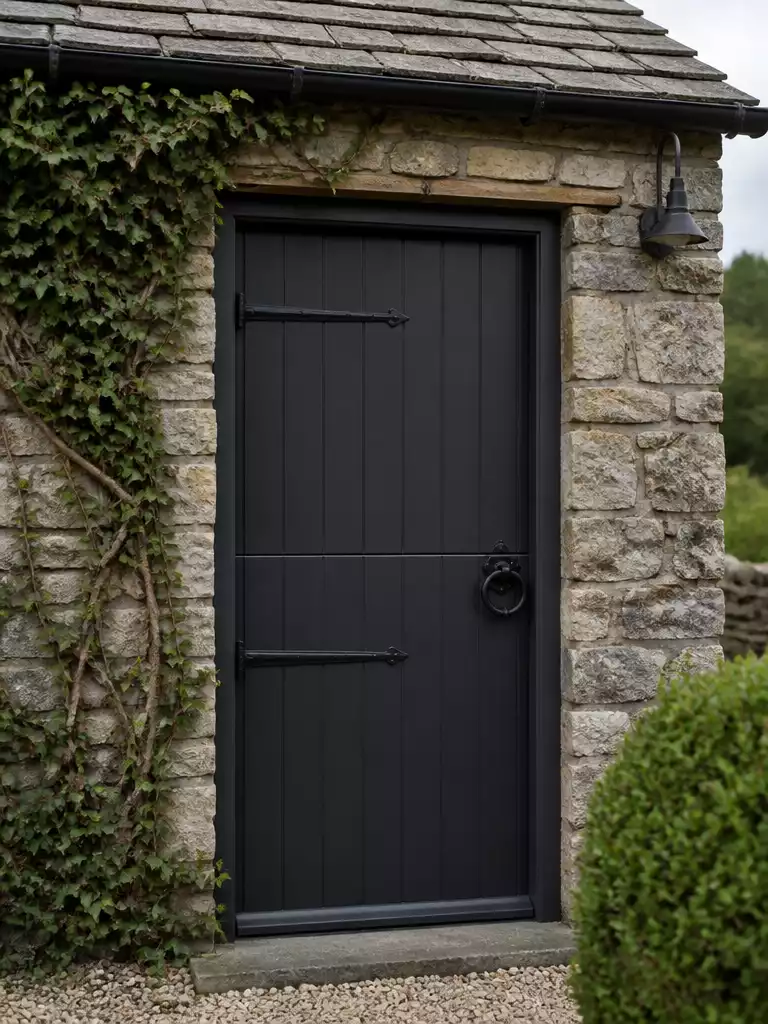
Heavy plank construction with long strap hinges for a solid, functional cottage door
Long hand-forged strap hinges define visual weight: A true stable door is built from thick tongue-and-groove planks with strap hinges often 12 to 18 inches long that visually carry the door’s weight even when closed. This hardware is visible from the street and sets stable doors apart from Dutch doors, which use lighter hinges. The flat, clean plank face with no battens reads as tidy and refined rather than rustic.
Stable doors use tongue-and-groove construction, which means no battens on the face—just flat, locking planks that fit tightly together. You won’t see the narrow strips holding seams like on plank-and-batten doors. This gives a smoother, quieter surface that suits cottages leaning toward a neat, understated look.
Stable style is right for homeowners who want a substantial door with architectural presence—especially if you value authentic hand-forged hardware textures on hinges. Skip it if you want lightweight or highly decorative doors, or if your budget won’t stretch to quality ironwork. Strap hinges with hand-forged finishes cost more but make the difference between a door that looks like it came with the house and one that feels like a cheap imitation.
⭐ Top Products for Stable Style
Child and Pet Proof Bi-fold Door Lock
Door Lock Installation Kit for Wood Doors
Heavy Duty Pivot Hinges for Wood Doors
📋 What to Check First Before Installing a Stable Style Door:
- Hinge clearance: Verify there’s enough exterior space for long strap hinges to fully open without obstruction.
- Door frame strength: Confirm the frame can support the door’s heavier weight and wider hinge spread.
- Finish compatibility: Test paint or stain on tongue-and-groove planks to ensure even absorption and durability outdoors.
As you reach the midpoint, it’s normal to pause and wonder if you’re on the right path. Small thoughtful choices add up and shape the authentic cottage feel you’re aiming for. This approach isn’t about rushing perfection but building a look that feels quietly lasting and true.
💡 Keep This in Mind:
- Matching arch profiles across windows and doors is a subtle but key detail; see more on classic door shapes.
- Choose hardware finishes that age gracefully instead of shining too brightly.
- Focus on proportion over decoration to let the door’s construction style speak for itself.
Top Half Glass
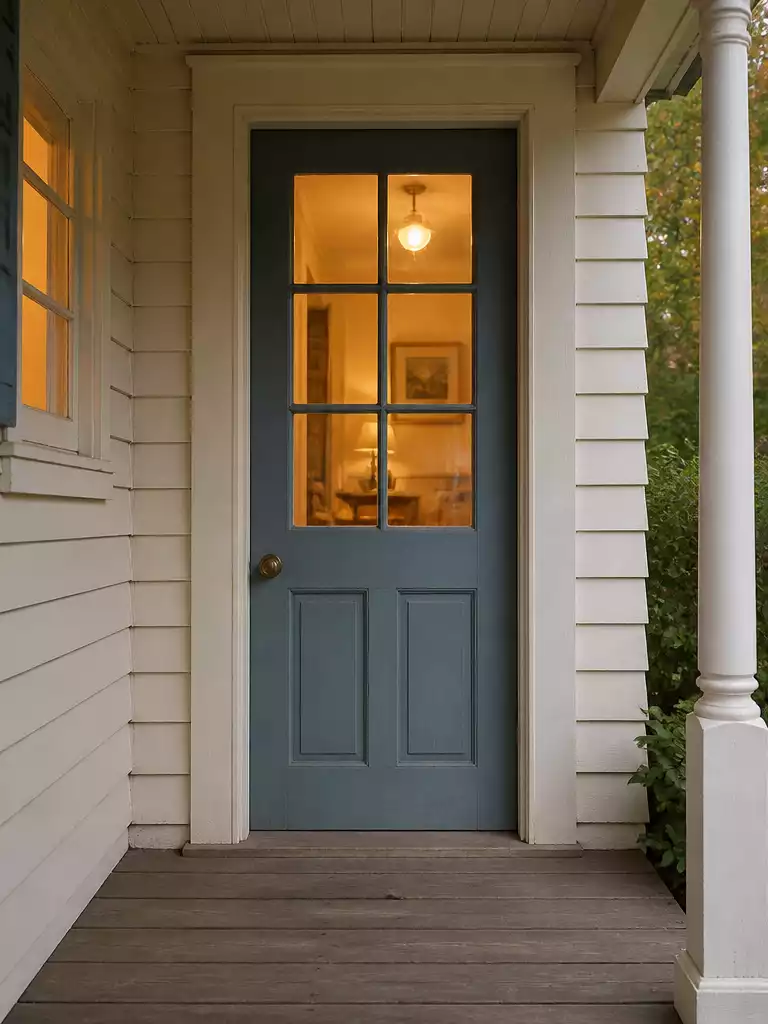
Brings natural light into small entry halls without compromising privacy
The grid of small panes makes or breaks cottage style: A top half glass door pulls daylight into a dark entry without sidelights or transoms. But it’s the divided lites—four to six small panes in a narrow grid—that give this door its authentic cottage look, unlike a single large glass panel that reads as modern or Craftsman style.
The thickness and finish of the muntins separating the glass panes also matter. Narrow wood muntins between 5/8 and 3/4 inch wide, finished to match the door hardware, keep the grid delicate and authentic. Thick plastic or vinyl dividers make the door look like a cheap window unit retrofit rather than a thoughtfully built cottage door.
Clear glass at eye level means you’ll see anyone standing on the porch, so most cottage owners choose obscure glass—reeded, frosted, or seeded—to maintain privacy while still letting in light. If you want a door that brightens a small or windowless entry hall but still feels right for a historic cottage, this is the door. Skip it if you want full privacy or if you prefer a solid door’s insulation. Expect to pay around $600 to $1,800 depending on the quality of muntins and glass.
.
📋 What to Check First:
- Grid proportion: Confirm the top glass section’s size fits your door without overpowering the solid lower half.
- Muntin material: Verify muntins are narrow wood or metal, not thick plastic or vinyl, for authentic look and durability.
- Glass privacy: Decide between clear or obscure glass based on porch visibility and your privacy needs before ordering.
Diamond Pane Glass
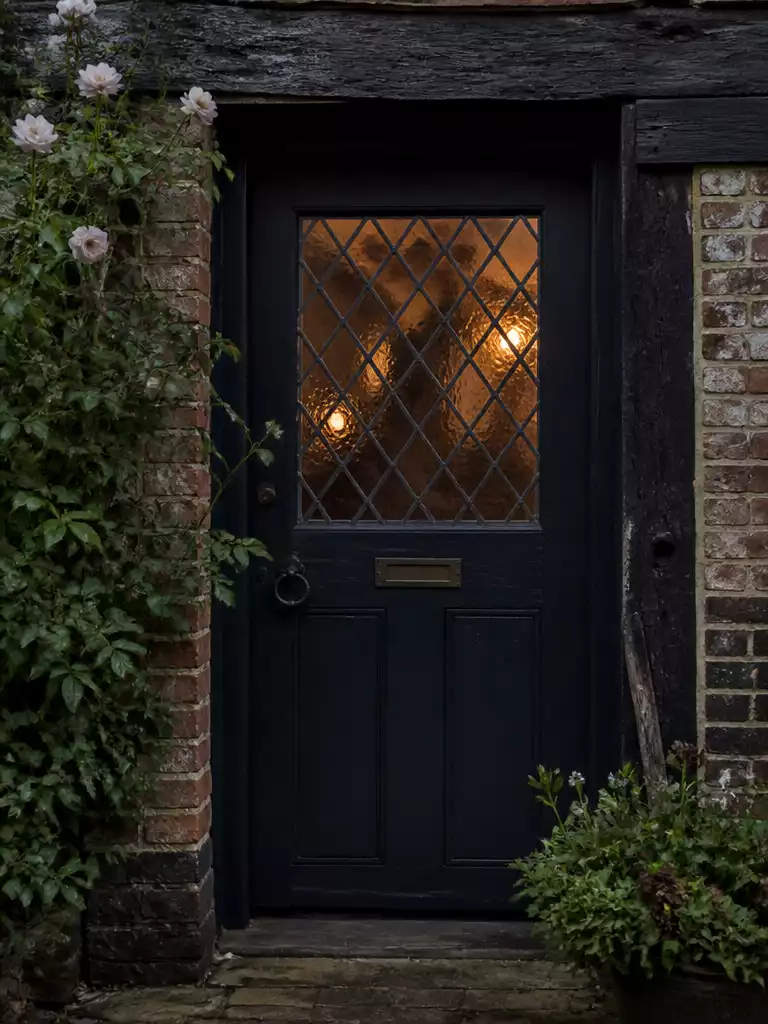
Small diamond panes lend soft privacy while honoring deep glass-making tradition
Diamond Pane Glass Originates from Manufacturing Limits: Diamond pane glass comes from 15th-century English vernacular windows where small diamond-shaped glass was the largest reliably made size, not a decorative choice. On doors, the ideal diamond size is 3 to 4 inches point-to-point to keep correct scale, and true leaded glass has slightly irregular came lines that add depth versus flat etched panes.
Diamond pane panels typically appear either as a single glass panel inset in the door’s upper section or covering the entire top-half glass area of a door. The lead came used to join each diamond piece is soft, showing subtle imperfections that reveal hand craftsmanship, a detail missing in machine-etched panels that look flat up close. This craftsmanship also slightly obscures views, offering more privacy without frosted glass.
If you’re after authentic period detail and moderate privacy in a front door, diamond pane glass is a strong choice. Skip it if you want large, uninterrupted glass views or need a budget under $600 — leaded diamond pane panels often cost more due to hand assembly. For homes facing public streets, this glass balances light with discretion, making it right for traditional cottages or homes aiming for genuine historical accuracy.
⭐ Top Products for Dutch Door
Child and Pet Proof Bi-fold Door Lock
Door Lock Installation Kit for Wood Doors
Heavy Duty Pivot Hinges for Wood Doors
📋 What to Check First Before Choosing Diamond Pane Glass:
- Panel Size: Confirm your door’s glass inset can fit 3–4 inch diamond panes without looking crowded or oversized.
- Glass Type: Decide between authentic lead came or sandblasted etched glass depending on budget and desired depth.
- Privacy Needs: Consider how much view obstruction is needed; diamond pane glass offers moderate privacy without frosting.
Leaded Glass
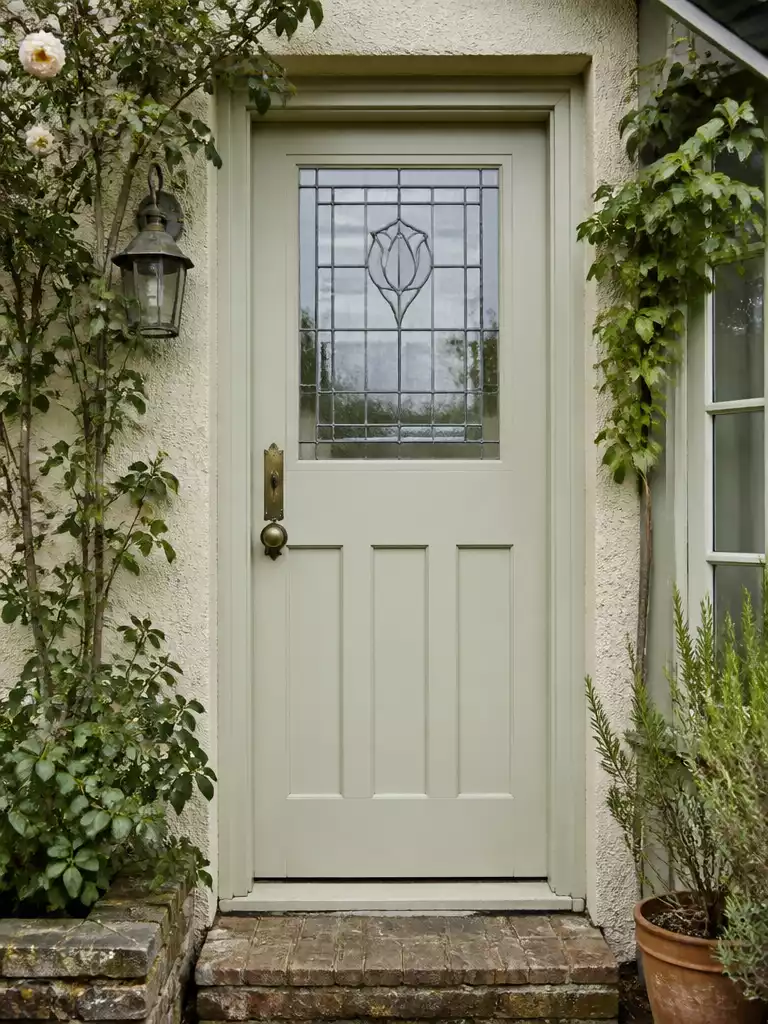
Softly textured leaded glass panels bring authentic early 20th-century charm
Leaded Glass Panels Can Cost $150 to $400 Salvaged: Leaded glass differs from stained glass by using clear or lightly tinted textured pieces joined with narrow lead came to form geometric or floral patterns popular in 1890–1940 Arts and Crafts cottages. Genuine panels often feature stylized roses or tulips and gently diffuse light thanks to seeded or cathedral glass textures, avoiding the overly perfect look of modern float glass.
Original leaded glass panels are frequently available through architectural salvage dealers at prices between $150 and $400, making them a cost-effective and authentic option to fit into new doors. Using a salvaged panel creates a look that’s indistinguishable from period originals and can save hundreds compared to custom reproductions.
This door suits homeowners who want a historically accurate Arts and Crafts or early 20th-century cottage look without the gaudy color of stained glass. Skip leaded glass if you want vivid jewel tones or if you’re on a tight budget below $150, since custom panels typically cost $600 or more. For a subtle, softly textured front door glass that balances light and privacy, leaded glass is a smart, authentic choice.
⭐ Top Products for Dutch Door
Child and Pet Proof Bi-fold Door Lock
Door Lock Installation Kit for Wood Doors
Heavy Duty Pivot Hinges for Wood Doors
📋 What to Check First Before Choosing Leaded Glass:
- Panel Size: Measure your door’s upper panel carefully to ensure a salvaged panel will fit without trimming the design.
- Glass Texture: Confirm the glass texture type (seeded, reamy, cathedral) matches your lighting needs and privacy preference.
- Lead Came Condition: Inspect salvaged panels for lead came integrity and minimal wear to avoid costly repairs later.
Half Round Window
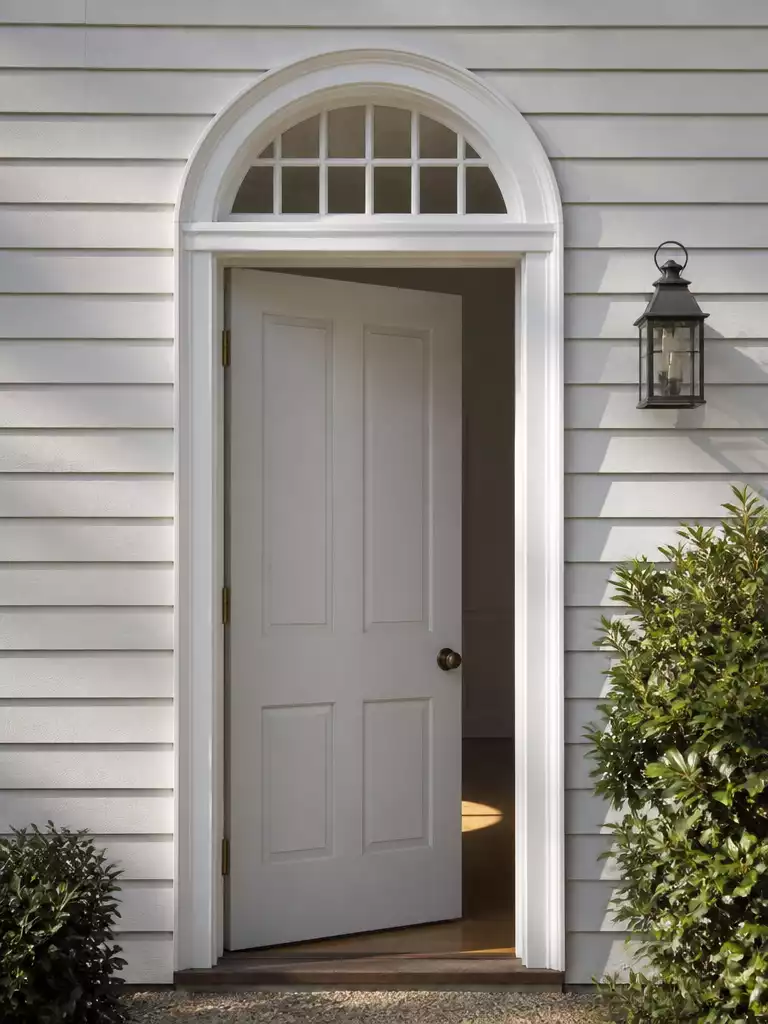
A half-round fanlight above the door adds historic proportion and soft natural light.
The Door Surround’s Fanlight Diameter Must Equal Door Width: The half-round window, or fanlight, sits above the door in the surround, not inside the door panel. A fanlight with a simple rectangular grid of small panes fits cottage style best and looks intentional only if its diameter matches the door width exactly. Off-center or narrower fanlights read like afterthoughts.
Many homeowners expect the “half-round window” to be part of the door itself, but it’s actually architectural glass above the door in the frame. A fanlight with radiating muntins reads formal and Georgian, while a plain semicircle looks modern. The rectangular grid is the practical middle ground that complements small door panes.
This entry style suits those with moderate-width doors and classic surrounds who want to add daylight without altering the door panel. Skip this if your door opening isn’t wide enough to balance a fanlight’s diameter or if your entry faces north with little direct light—clear glass fanlights cast a moving arc that needs direct sun to show. Prices for custom fanlights typically start around $600 depending on size and muntin pattern—a worthwhile investment only if the surround can accommodate it precisely.
⭐ Top Products for Dutch Door
Child and Pet Proof Bi-fold Door Lock
Door Lock Installation Kit for Wood Doors
Heavy Duty Pivot Hinges for Wood Doors
📋 What to Check First Before Adding a Half-Round Fanlight:
- Door Width Measurement: Confirm your door’s exact width matches the fanlight diameter to avoid awkward proportions.
- Surround Depth and Clearance: Verify there’s enough space above the door frame to fit the fanlight without crowding or trimming modifications.
- Entry Orientation: Note your door’s direction to decide between clear or obscure glass based on sunlight and privacy needs.
Soft Sage
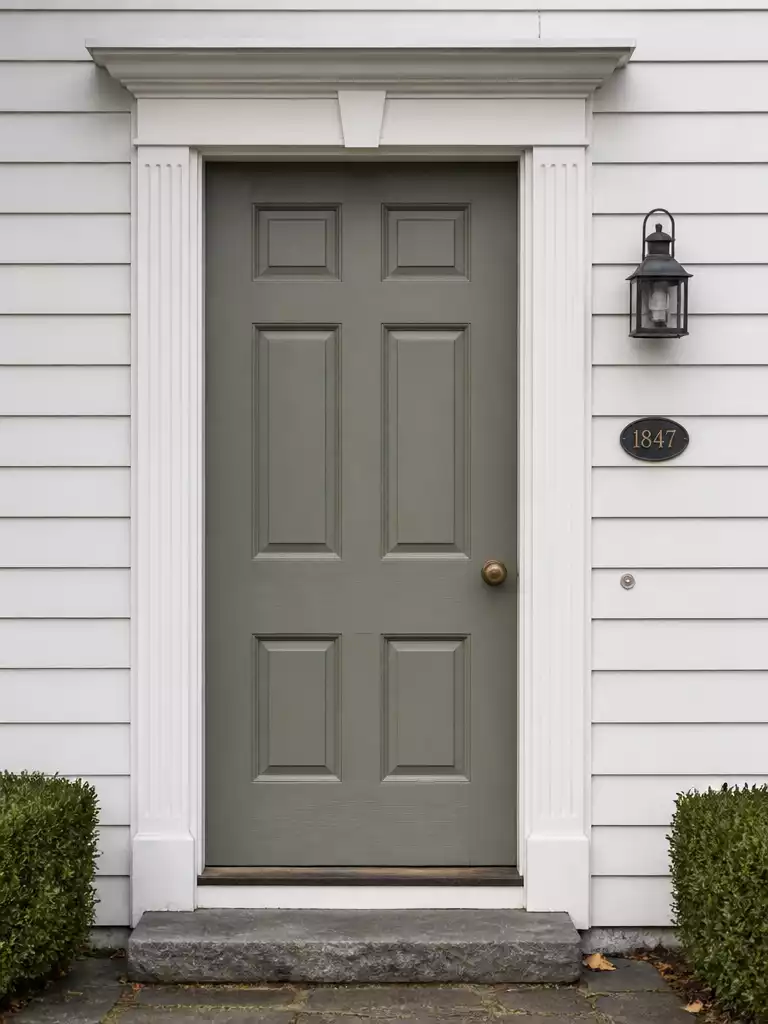
A muted grey-toned sage door color that feels naturally aged and grounded.
Sage Reads Grey Before Green: Soft sage stands out because it contains a high grey content—often including black and sometimes a bit of red or brown pigment—which makes the green recede so the color appears as if it has always belonged to the house. Its look shifts dramatically depending on the surrounding materials: it leans greener against white trim, turns nearly neutral next to warm stone or brick, and almost blends into dark or charcoal trim.
The finish on a sage door changes everything. A flat or eggshell finish makes the color feel absorbed into the wood, as if it’s faded naturally over decades. But a semi-gloss finish, no matter the paint brand, always looks freshly applied and contemporary. This is why traditional cottages almost never use shiny finishes on sage doors.
If you want a door color that genuinely feels old and settled, soft sage is right for you—especially if your home has white trim or warm brick. But skip soft sage if your trim is dark charcoal or stained wood, where it disappears, or if you want a bright green punch. Heritage paint lines with higher grey and mineral content cost more but wear better; expect to invest accordingly. The color works best with a low-sheen finish for that quietly settled look.
⭐ Top Products for Soft Sage
Child and Pet Proof Bi-fold Door Lock
Door Lock Installation Kit for Wood Doors
Heavy Duty Pivot Hinges for Wood Doors
📋 What to Check First:
- Surround color: Confirm if your door trim is white, warm stone, or dark to predict how sage will read.
- Finish sheen: Decide between flat or eggshell for aged look versus semi-gloss for a fresher appearance.
- Paint source: Check if your paint has higher grey and mineral content for authentic soft sage aging over time.
Buttery Cream
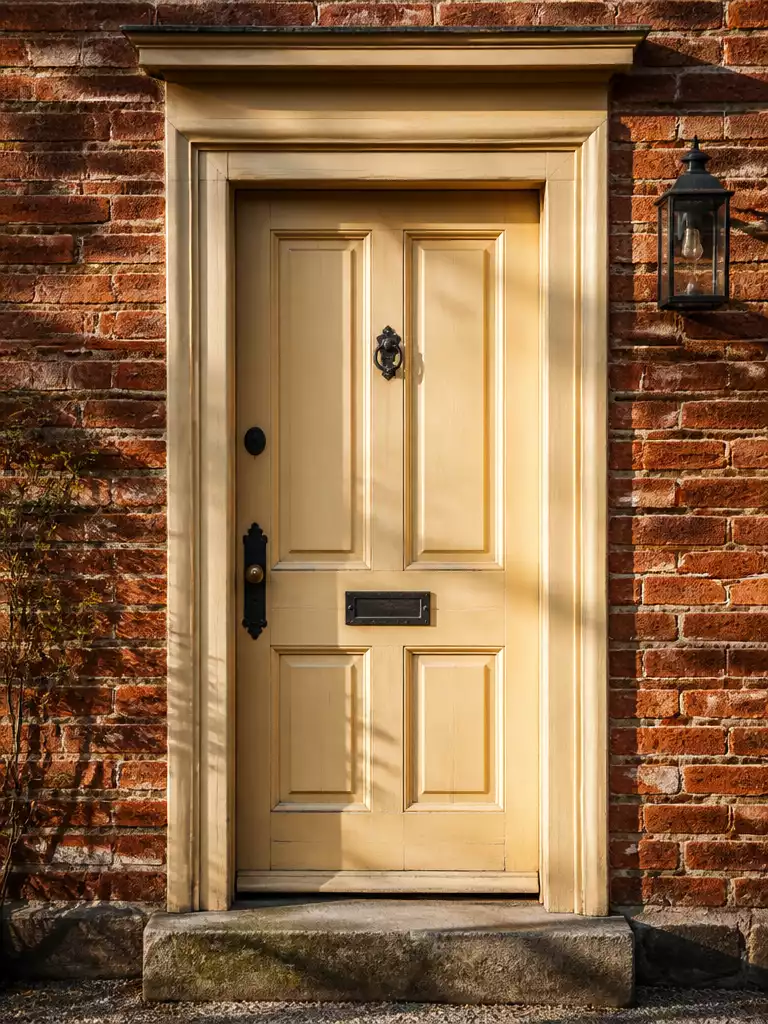
Warm cream tones deepen door details and complement brick facades naturally
Too yellow or too white ruins the effect: Cream doors that lean too yellow feel stuck in the 1990s, while those that veer too white lose warmth and blend into trim. The best buttery cream balances warm yellow with subtle brown or grey undertones to avoid looking like a kitchen appliance or plain white.
Buttery cream is highly dependent on door surface texture. Raised panels, planks, or carved moldings catch the warm tone in the recesses, revealing depth and craftsmanship. On a flat slab door, the same color tends to appear flat and slightly dingy, so this color demands detailed door construction to work well.
This color excels on warm brick facades where it harmonizes rather than competes, but it also adds needed warmth against grey stone or white render. Keep in mind that cream shows dirt and oxidation faster than darker colors, requiring repainting every three to four years to maintain its fresh look. Skip buttery cream if you want low maintenance or have a flat door surface—otherwise, it’s a classic choice that reveals your door’s construction in the best light.
⭐ Top Products for Dutch Door
Child and Pet Proof Bi-fold Door Lock
Door Lock Installation Kit for Wood Doors
Heavy Duty Pivot Hinges for Wood Doors
📋 What to Check First Before Painting Buttery Cream:
- Door Texture: Confirm your door has raised panels or planks for buttery cream to reveal depth well.
- Facade Compatibility: Note your facade material—cream pairs best with warm brick, grey stone, or white render.
- Maintenance Plan: Be prepared to repaint every 3-4 years as cream shows dirt and oxidation faster than darker colors.
Having explored these thoughtful approaches, you now have a clear sense of how classic door shapes, authentic glass patterns, and subtle heritage colors come together to create timeless cottage entrances. There’s no need to adopt every detail at once—choosing a single element that feels right for your home can make a meaningful difference.
Your front door can quietly reflect the story and rhythm of your home with each carefully considered choice. Comfort grows naturally from these authentic details, inviting you to invest in a welcoming entry that endures beautifully over time.