

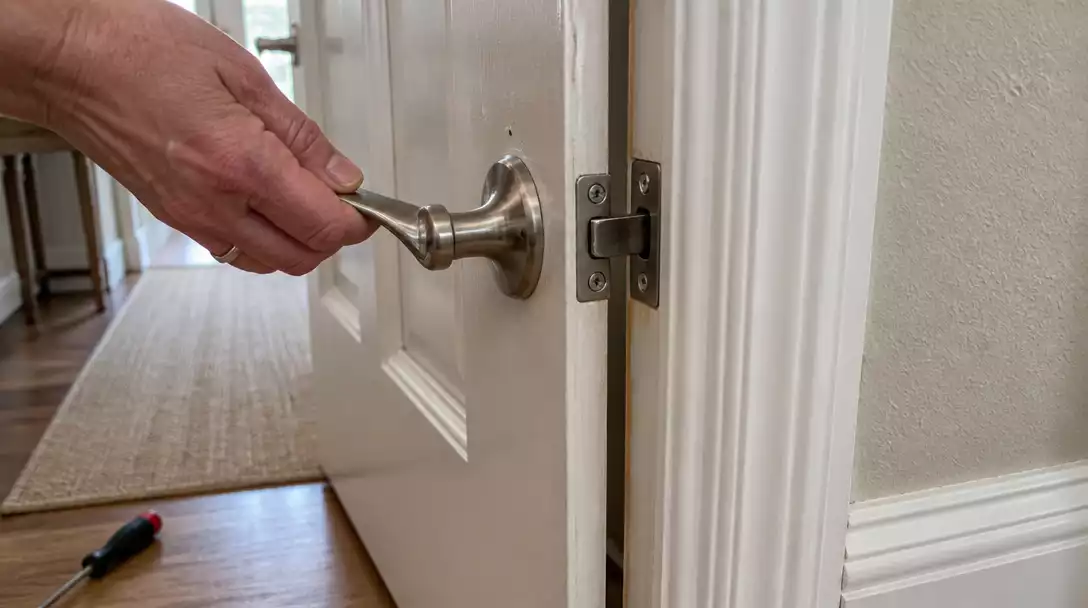
If your door latches only when you lift the handle, you’re deciding whether the problem is alignment or the latch mechanism itself—not automatically replacing the lock. These 6 practical steps narrow the diagnosis to what matters, helping you make a sound repair without repeated guesswork. Start by testing the latch with the door open.
1. UNDERSTAND WHY LIFTING THE HANDLE WORKS
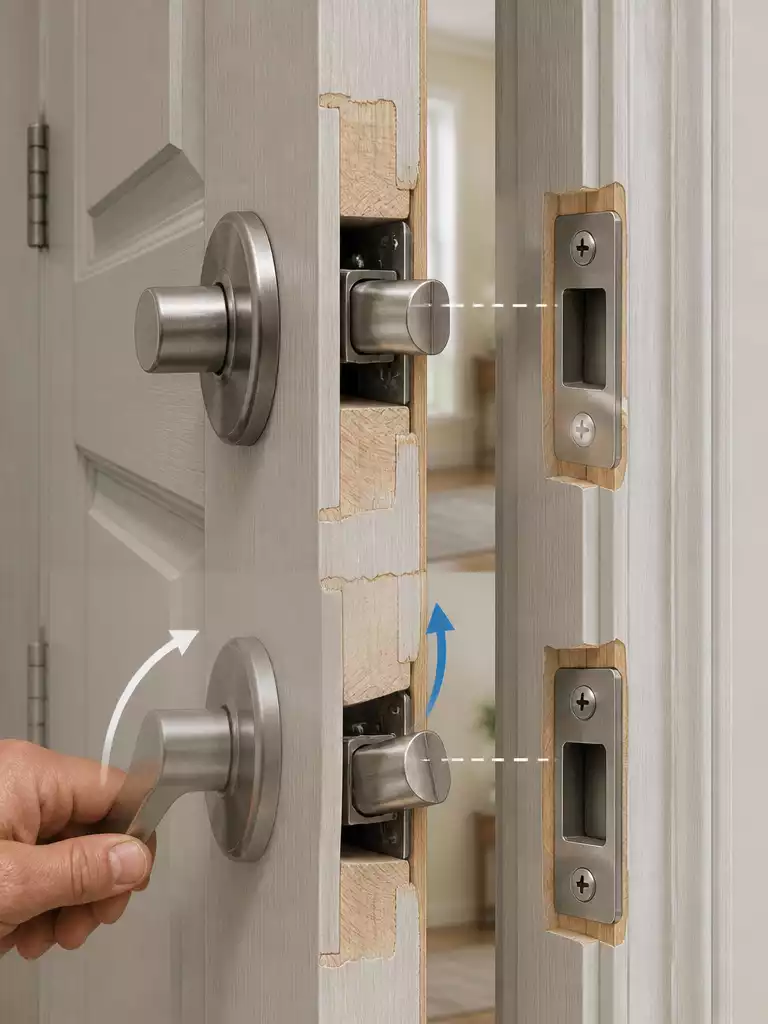
A clear latch diagnosis keeps small alignment issues from becoming expensive hardware repairs.
As an Amazon Associate I earn from qualifying purchases. Affiliate links may earn me a commission at no extra cost to you.
If the door closes normally until you raise the handle, then the latch suddenly reaches the opening, treat that movement as a mechanical clue. It is usually a geometry problem to diagnose first—not proof that the entire lockset has failed.
Lifting the handle can raise or slightly twist the latch side of the door, changing the angle between the beveled spring-loaded latch and the strike opening. A door affected by hinge wear, settling, thermal movement, or a small frame shift may hang slightly low while the latch and strike remain at different heights.[1][7][9][10]
Start with the door open, where the strike cannot interfere. Operate the handle several times and watch and feel the latch as it retracts, then springs back into place.
Use the open-door test to choose the repair path:
- If the latch retracts and springs back smoothly and decisively while open, but needs lifting only when closed, prioritize the door’s position, hinge movement, strike alignment, or the latch opening.[8][9]
- If it remains stiff, slow, or incomplete while open, suspect dirt, wear, a damaged or worn latch nose, internal damage, or a jammed auxiliary deadlocking plunger.[1][9][10]
With the door closed, the latch should enter near the center of the strike opening rather than catching only on an edge. Contact with the non-angled portion of the latch can prevent it from retracting smoothly, which may make the lifted-handle workaround seem necessary.[1][3][6][8][10]
A symptom that developed gradually points more toward hinge wear, sag, settling, or a slight door-and-frame shift. An immediately stiff latch, especially one that feels wrong with the door open, points more strongly to the mechanism itself; stop adjusting the frame if the latch will not operate properly in that basic test and consider hardware-focused repair or professional help.[7][9][10]
Do not keep lifting the handle as the permanent fix. An incompletely engaged latch can leave the door looking closed without securing it, and repeated forcing can wear the latch and strike area.[1][2][5]
Once the open-door test shows the latch itself is functioning, identify exactly where it contacts—or misses—the strike opening. That contact point determines the next practical step.
⭐ Top Door Handles for Latch Issues
Privacy Door Knobs With Adjustable Latches
Interior Privacy Knobs With Solid Latches
Passage Door Knobs With Durable Locksets
💡 Why This Test Saves Unnecessary Repairs:
Separating latch action from door position keeps you from replacing a working lockset when the real fault is a shifted hinge, frame, or strike. It also tells you when alignment work is the wrong direction, so you avoid adding rubbing or reducing reliable latch engagement.
Best next move: Diagnose the component that fails, rather than forcing the component that temporarily makes the door latch.
2. CHECK THE STRIKE PLATE ALIGNMENT
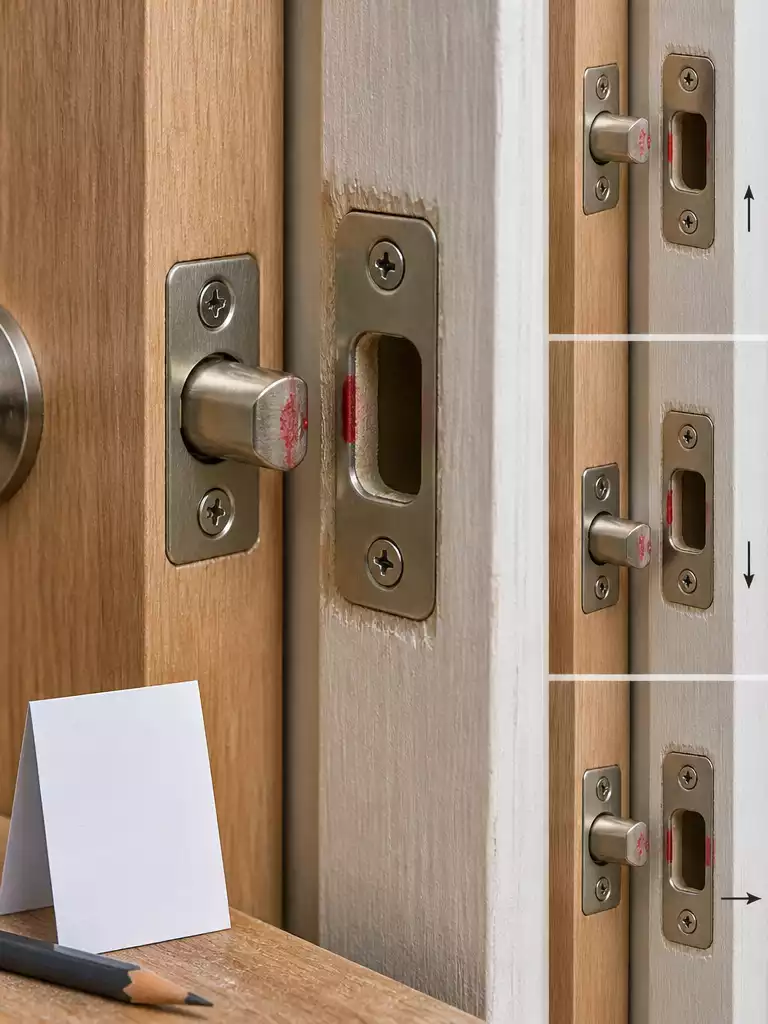
A visible contact map points to the right adjustment before you touch the hardware.
Find the contact point before moving the strike plate. A latch that misses high, low, sideways, or catches on an edge needs a documented correction—not a guessed one that may create more rubbing or reduce how deeply the latch enters.
Start with a clean, transferable mark. Put a small amount of chalk, lipstick, ink, wax crayon, graphite, or pencil on the latch tip, keeping it light enough that the door still closes normally.
- Close the door slowly and gently, without lifting the handle, pushing hard, or slamming.
- Reopen it and inspect the strike plate, jamb, and latch area for the transferred mark.
- Record whether the latch contacted above, below, to one side, at the opening’s edge, or in the opening without entering fully.
Check both vertical and horizontal directions. A door can be high or low and also shifted toward one side, so correcting height alone can leave the latch rubbing after the next adjustment.
If the transfer is difficult to read, hold a thin card, piece of paper, or straight edge along the top or bottom of the strike opening. Close the door gently against it, then reopen the door to make vertical contact easier to see.
Record the direction before removing screws. As practical field guidance—not an official tolerance—an offset may be described as about 1–2 mm or 2–5 mm; another guide uses roughly an eighth of an inch, or 3 mm, for some strike adjustments.[4][6]
Inspect the surrounding parts while the door is open: look for bent metal, crushed or polished wood, rubbing marks, and deformation around the strike, jamb, or latch. These clues can explain inconsistent engagement and may show that the plate is not the only component involved.
Moving the plate before marking it is the costly mistake in this step. The recorded direction tells you whether the door needs to be brought back into position first or whether the strike is the component that should move; once that is clear, choose the smallest supported correction.
Saveable alignment check
- Test the latch with the door open.
- Mark the latch tip with chalk, lipstick, crayon, ink, or graphite.
- Close gently without lifting, pushing, or slamming.
- Record high, low, sideways, or combined-axis contact.
- Photograph or note the existing strike position before removing screws.
⭐ Strike Plates That Improve Alignment
Heavy-Duty Door Strike Reinforcement Plate
Commercial Brass-Plated Door Strike
💡 Why the Contact Map Matters:
The transfer mark turns a frustrating lifting symptom into a directional repair decision. A high or low contact pattern may point toward door position, while a side contact pattern can reveal a lateral shift or an opening that needs localized attention. That evidence helps you avoid moving a correctly positioned plate or removing wood where the latch is already aligned.
Best takeaway: Treat the mark as a map of the latch’s path, not merely proof that the strike plate is wrong.
You do not need to decide immediately whether the hinges, strike, or latch deserves the repair. Record where the latch touches first, just as you would document a door’s fit before considering broader door improvements.
A visible offset turns an expensive-feeling guess into one focused correction, leaving the rest of the door untouched.
3. TIGHTEN LOOSE HINGE SCREWS
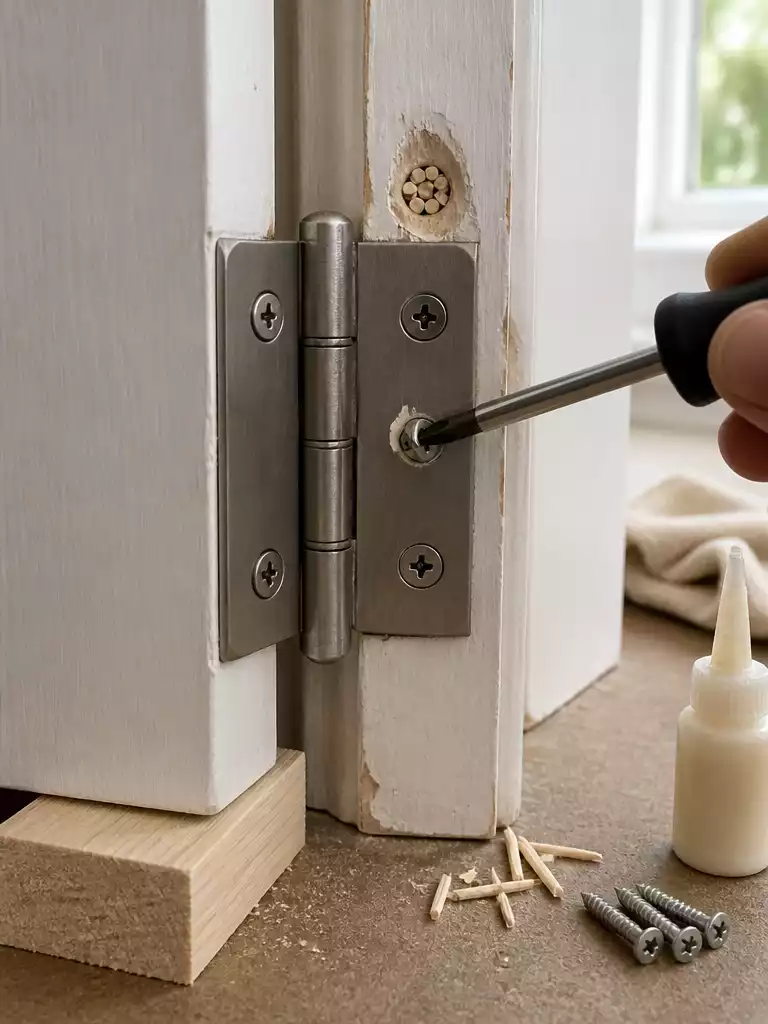
Restore the door’s position so the latch meets the strike without lifting the handle.
If the latch side of the door sits slightly low, the gap around the door looks uneven, or lifting the handle raises it into place, inspect the hinges before moving the strike plate. Loose hinge screws let the hinge leaf shift, allowing the door to drop or twist just enough for the latch to miss the strike opening.
This repair applies to a door that moves visibly or shows sag during the alignment check. It will not correct a latch that feels stiff, slow, or incomplete with the door open; that points toward the latch mechanism rather than the door’s position.
Support the door’s weight while you work, especially if you are loosening more than one screw. Tighten each screw by hand until it is snug, then stop—over-tightening can strip the wood or distort the hinge, and a power drill can damage a repaired hole.[2][5][7]
Inspect every hinge, not just the screw closest to the latch side. One loose screw may be the visible symptom, but several loose screws or enlarged holes can continue pulling the door out of position after a single fastener is tightened.[8][10]
Repair small holes before changing screw size. Remove the loose screw from the hinge leaf, coat wooden toothpicks, matchsticks, a golf tee, small wood splinters, or another supported wood filler with carpenter’s glue, and pack the material tightly into the hole.
- Break or cut the excess filler flush with the hinge surface.
- Let the glue dry—often a few hours, depending on the glue type and temperature.
- Reinstall the screw by hand and confirm that it bites instead of spinning.
For a badly enlarged hole, the more durable repair is to remove the hinge, glue a wooden dowel into the opening, allow it to cure, and drill a pilot hole slightly smaller than the screw before reinstalling the hinge.[8][9] If a replacement screw is needed, match the existing head size and choose a shank at least 1/2 inch longer than the original; do not assume one universal gauge fits every hinge.[8]
Afterward, the hinge leaf should sit flush with no wobble or play, the screws should feel snug, the door should show even gaps, and the visible sag should be reduced.[2][7][10] Repeat the gentle close test without lifting the handle; if the latch still contacts the same incorrect spot, the documented strike position—not the hinge—may be the remaining problem.
⭐ Hinge Screws Worth Buying
Black Removable-Pin Screen Door Hinges
Heavy-Duty Ball-Bearing Door Hinges
Extra-Long Door Hinge Security Screws
🛠️ Practical Tips for a Secure Hinge Repair:
- One at a time: Repair one loose hole per hinge leaf while the remaining screws preserve the hinge’s position.
- Choose the method: Use filler for minor looseness; choose a dowel when the screw spins or wood is badly enlarged.
- Check both sides: Inspect door-side and jamb-side leaves, since movement at either surface can keep the door sagging.
Reposition the Strike Plate
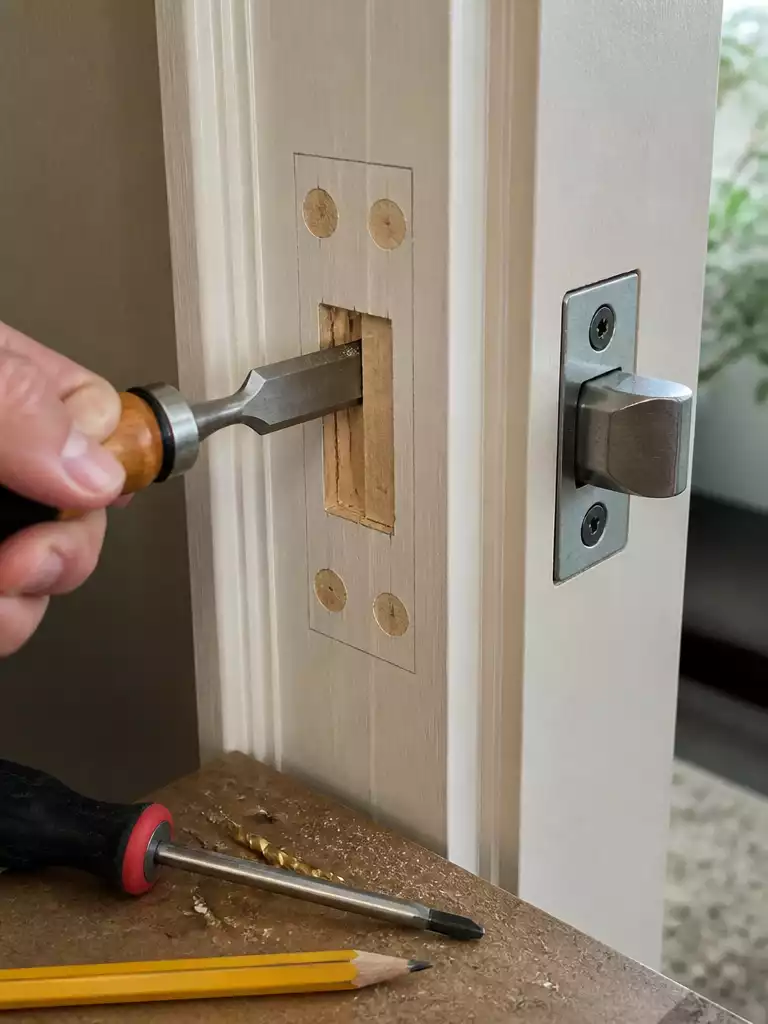
A carefully positioned strike plate restores smooth, secure latching without forcing the handle.
If the latch retracts and springs back smoothly with the door open, the hinges are secure, and your contact mark still lands consistently outside the strike opening, the strike plate may be sitting in the wrong place. This is the point for a measured relocation—not a broad adjustment based on how the door feels in one awkward close.
Move only the documented offset. A DIY example shifts a strike plate about a quarter inch in some cases, but that is an example—not a universal relocation amount. Your marked contact point decides whether the plate moves up, down, or sideways, and by how much.
Start by removing the strike plate and examining the jamb beneath it. Redrilling directly beside the old screw holes can leave the screws biting into weakened wood, so repair those holes before marking a new position.
- Fill the abandoned holes with glue-coated toothpicks or glued dowels.
- Let the filler dry, then trim it flush with the jamb.
- Hold the strike plate at the recorded new position while the door is closed normally or carefully held in its aligned position. Do not lift the door during this step.
- Trace the plate outline and mark the screw centers.
- Chisel or clear only enough wood for the plate to sit flush in the jamb recess.
- Drill pilot holes into sound wood and reinstall the plate.
A 3/4-inch wood chisel is one supported example for enlarging a mortise during a small relocation, but the tool should match the correction rather than dictate it. Remove enough material for a flush fit; a strike left proud of the jamb can interfere with the latch and make closing feel worse.
Do not position the plate while forcing the door upward. That simply preserves the lifted-handle workaround, leaving normal closure misaligned and potentially reducing how deeply the latch enters.
After fastening, check that the plate is flush, the screws bite sound wood, and the latch enters the opening cleanly and fully without scraping. If the plate is now in the correct location but the latch still catches an edge or stops short, the plate position is no longer the issue; the localized latch opening may need adjustment next.
⭐ Strike Plates to Consider
Universal Extended-Lip Strike Plates
Adjustable Door Hinge And Strike Jig
Quick Door Installation Bracket Kit
🔢 Change One Thing at a Time
Keeping each adjustment separate shows whether the plate solved the problem or created a new obstruction.
- Photograph or note the plate’s original position before removing any hardware.
- Test the relocated plate through normal closure before touching the latch opening.
- Keep the plate if engagement improves; adjust the opening only when scraping or incomplete entry remains.
5. ADJUST OR DEEPEN THE LATCH HOLE
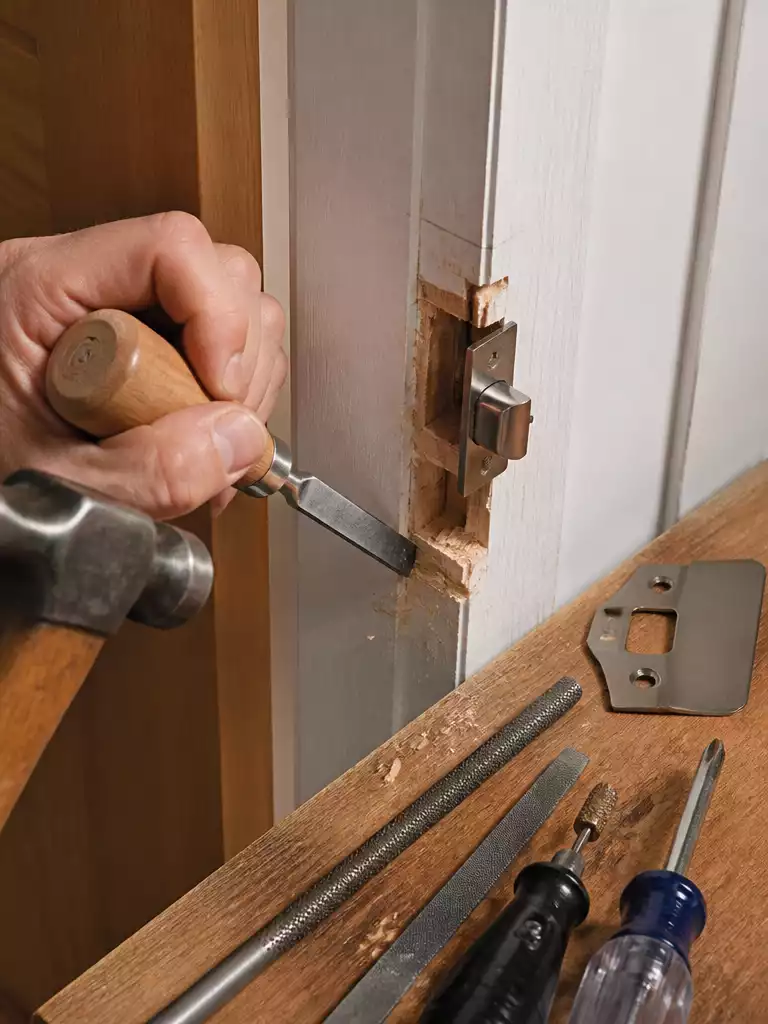
A small, controlled opening adjustment restores smooth latch engagement without weakening the jamb.
Use this step only when the strike plate is in the right position, the hinges are secure, and the latch still hits an edge, scrapes, or stops before entering fully. The goal is a small jamb-opening or mortise adjustment in the direction shown by your marking test—not a broad cut or a full lock installation.
Start by removing the strike plate if it blocks access, then mark the exact area where the latch lands. If the latch is close but catches on one side, a round file or metal file is usually the better first tool because it removes material gradually and keeps the correction narrow.
- Use a round or metal file for a very small directional correction.
- Use a sharp wood chisel and hammer when the surrounding jamb needs a controlled wood adjustment.
- Use a rotary tool carefully when localized material removal is awkward by hand.
- Use a drill, hole bit, or guide/template only when a broader, cleaner opening is genuinely required.
Remove a small amount, reinstall or hold the strike plate in place, and test-fit the door before cutting again. Frequent test-fitting is slower than one large cut, but it prevents an opening that is too loose, too deep, or angled away from the latch path.
Product-dimension caution: Some tubular-latch preparation guidance uses a 7/8-inch (22 mm) hole drilled about 5/8-inch (16 mm) deep, while a strike mortise may be about 1/16 inch (1.6 mm) deep. Treat these as product-specific examples, not universal dimensions for every door or latch.
The strike must finish flush with the jamb and remain supported by solid wood, with screws biting securely. If you over-enlarge or over-deepen the pocket, the jamb can weaken, the latch may engage less deeply, and the door can feel loose or unreliable.
A guide or installation kit is useful when a larger correction is truly needed because it helps prevent angled drilling and tear-out. For a small misalignment, hand tools and gradual material removal are the safer choice; stop if the opening needs extensive cutting, the frame is distorted, or the cause is still unclear.
Once the latch enters fully without scraping, move on to testing the door through its normal swing. The repair is not complete until it latches repeatedly without lifting, nudging, or slamming.
⭐ Latch Holes to Adjust
Wood And Drywall Hole Saw Kit
Privacy Door Knobs With Adjustable Latch Bolts
💡 Why This Works:
A localized adjustment lets the latch travel into the opening instead of repeatedly striking the jamb or relying on handle force. That preserves more sound wood around the strike, helps the plate stay secure, and gives you a more dependable close without turning a small obstruction into a larger repair.
Best test: The latch should enter freely while the handle remains untouched and the door closes normally.
6. TEST THE DOOR THROUGH ITS FULL SWING
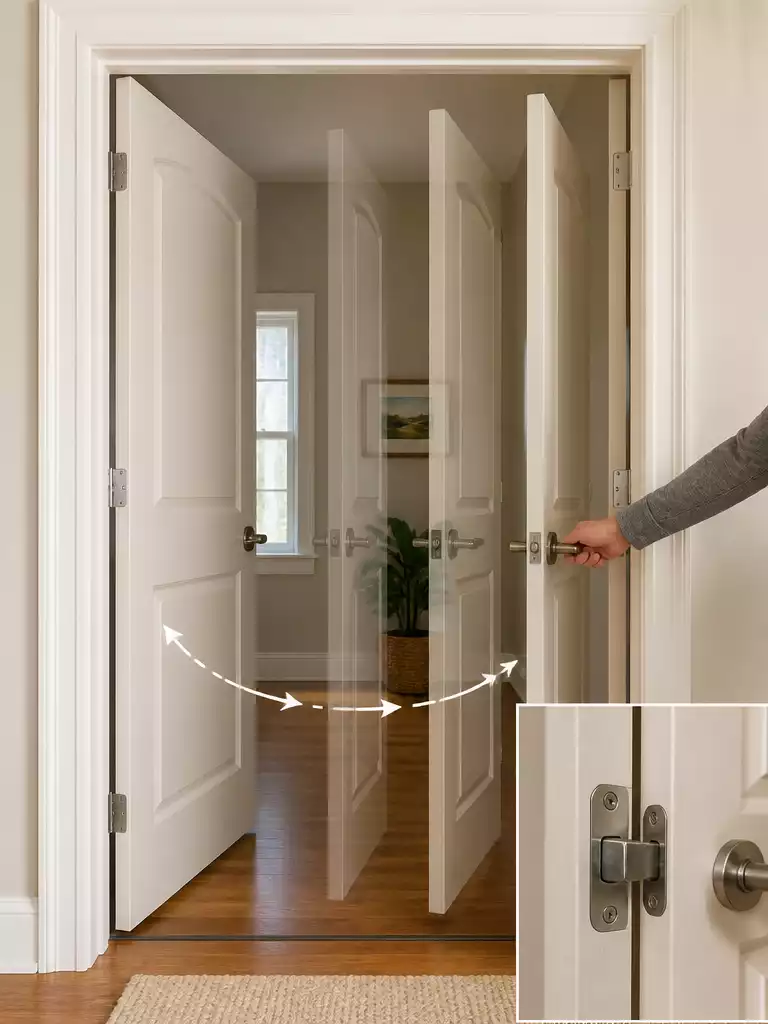
Confirm smooth movement and dependable latching before calling the repair finished.
One successful close is not proof that the repair is stable. The final check must reproduce normal movement and confirm that the latch engages without lifting the handle, nudging the door, or slamming it.
Start with the door fully closed, then open it all the way while feeling for resistance. Watch for rubbing, dragging at the floor or threshold, hinge-side catches, squeaking, or a point where the door suddenly feels heavier.
- Close the door from a normal-use position, such as approximately 30° open, and check whether the latch engages on the first close.
- Repeat the test several times at normal speed rather than carefully guiding the door into place.
- Perform one or two firmer—but still normal, non-slamming—cycles to check whether the alignment stays consistent.
- If the door has a self-closing function, test it from approximately 90° open as well.
Pay attention to changing gaps around the door as it travels. If the latch works at one point in the swing but misses at another, or if the door still needs a lift or push, the underlying alignment problem remains.
Pass or fail: the latch should enter the strike or keep fully on the first normal close and stay engaged without lifting the handle or forcing the door.
Recheck after every adjustment instead of changing the hinges, strike plate, and latch opening together. That keeps the diagnosis clear and shows which correction solved the symptom—or made it worse.
Stop repeated adjustments if the latch remains stiff, slow, or incomplete with the door open, if the door is significantly sagging, if the frame appears distorted, or if the cause is still unclear. Those signs point beyond a simple final alignment check and may call for hardware-focused repair or professional help.
The repair is complete only when the door moves freely through its full arc and latches repeatedly from ordinary use without lifting, pushing, or slamming.
⭐ Door Hardware for Smooth Swing Testing
Commercial Hydraulic Door Closer
Adjustable Hinge Pin Door Stop
Storm Door Hinge Pin Repair Kit
🏡 How This Works in a Real Home:
- Everyday motion: Test the door from both sides so hallway pressure or room airflow does not mask resistance.
- Final hardware check: After cycling, confirm the strike remains flush and its screws still feel snug.
- Clean handoff: Wipe away chalk, lipstick, or graphite marks so future contact changes remain easy to spot.
After working through all six checks, What to Do When a Door Latch Works Only if You Lift the Handle becomes a matter of diagnosis rather than guesswork. The open-door test separates a stiff or damaged latch from a door that has shifted; the contact mark then shows whether hinges, strike position, or the latch opening is responsible. From there, the useful repair is the smallest supported correction, followed by a full-swing test and repeated first-time engagement.
You do not need to change every component or pursue every adjustment. Start with the open-door latch test and the contact mark; those two observations usually show which part deserves attention and which should be left alone. If the latch is stiff while open, the frame is distorted, the door is significantly sagging, or the cause remains unclear, stop rather than forcing a result. A door that closes once is not the standard—secure, repeatable latching through normal use is. Make the call based on what the door is showing, and the repair will be clear, controlled, and complete.




