

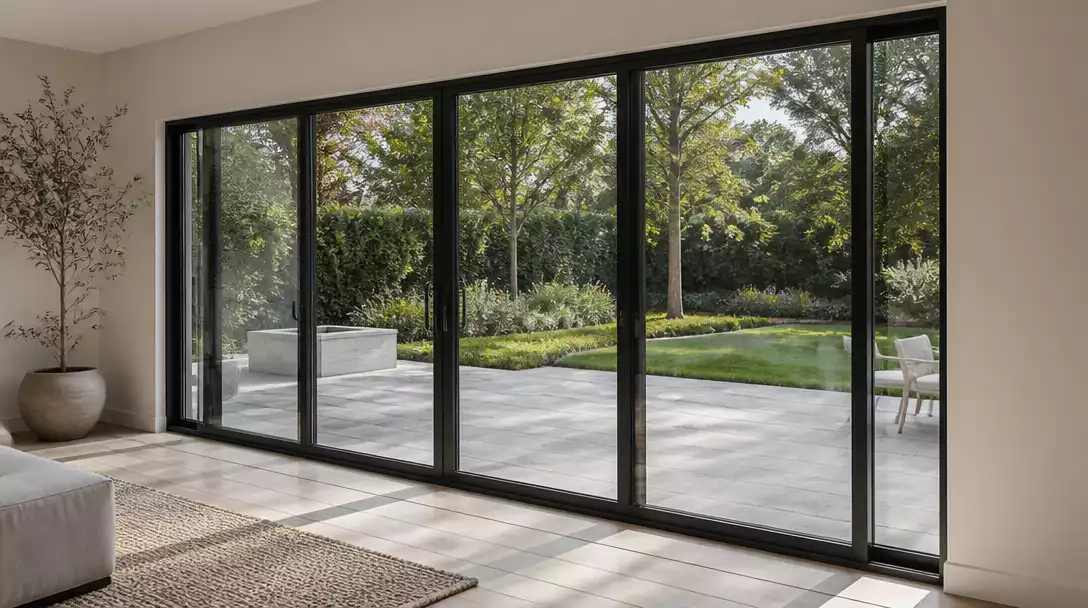
Selecting 4-panel sliding patio doors for wide openings requires a precise eye for technical detail to avoid the generic builder-grade look. This guide narrows the process down to 10 critical choices worth your attention, ensuring you get the architectural impact you paid for. Let’s start with your opening configuration.
1. Opening Width and Panel Config
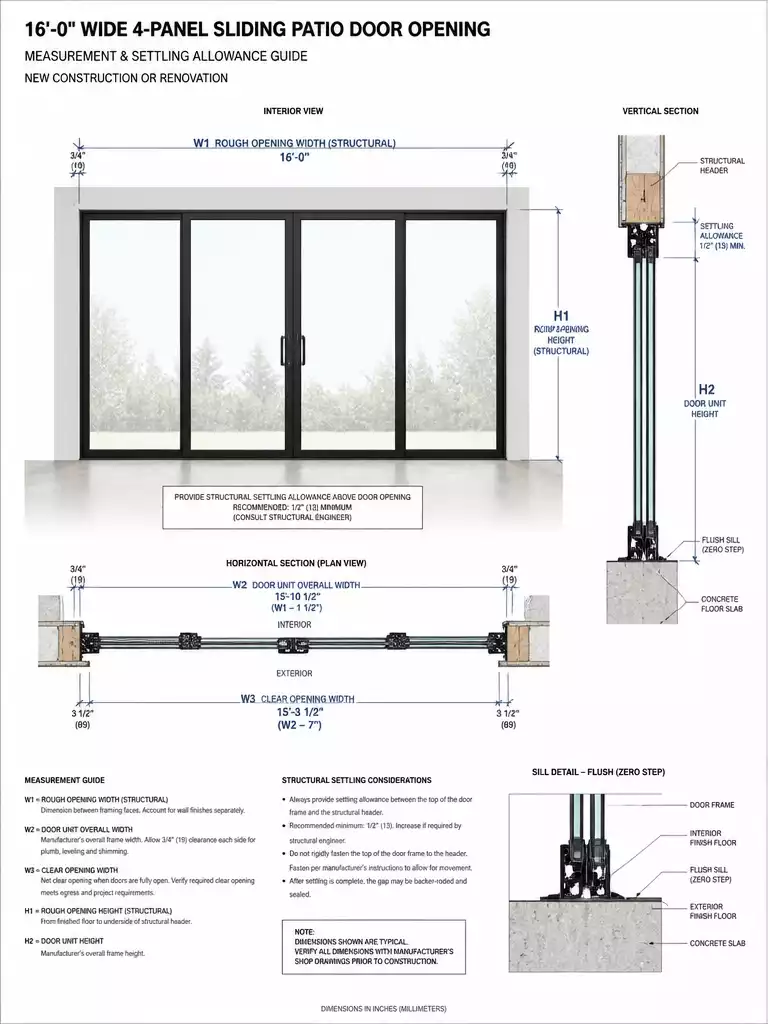
Precision measurements ensure your 4-panel door operates smoothly without binding or energy loss.
As an Amazon Associate I earn from qualifying purchases. Affiliate links may earn me a commission at no extra cost to you.
Most contractors will take a single measurement of your patio opening and call it a day. In the world of high-end, 4-panel sliders, that is a major red flag that often leads to binding doors and massive gaps after the house settles.
You need to use the Rule of Three: measure the width of your opening at the top, the middle, and the bottom. Because no wall is perfectly square, you must always order your door system based on the narrowest of those three dimensions. If you don’t, you will be left with a door that physically cannot slide once the frame is installed.
The 3/4″ Flat Sill Requirement
For a clean, custom look, your subfloor must provide at least 3/4″ of flat, level space for the door track. If your floor isn’t perfectly flat, the track will eventually warp, causing the rollers to skip and the weatherstripping to fail.
Once you have your dimensions, you have to choose between two primary 4-panel configurations. Your choice here dictates how you actually live in the space and how much “clear opening” you get when the doors are fully retracted.
- Center-Opening: The two center panels slide outward, stacking over the two fixed outer panels. This is a classic, symmetrical look that works beautifully in formal living rooms.
- Side-Stacking: All four panels slide in one direction, stacking behind a single fixed panel or into a pocket. This is the choice for anyone who wants a massive, unobstructed view and a completely open transition to the patio.
For most residential projects, the sweet spot for 4-panel systems is between 12′ (144″) and 16′ (192″) wide. While custom systems can stretch up to 288″, once you push past 16 feet, you start dealing with significantly higher structural requirements for the header to prevent sagging, which can add thousands to your installation cost.
Avoid the “Generic Slider” Look
Never settle for a system that uses generic filler panels to make up for a bad opening measurement. A true custom system is built to the exact width of your opening, ensuring the glass-to-frame ratio remains consistent across all four panels.
⭐ Top Track Systems for Smooth Sliding Doors
Premium Vinyl Sliding Door Bottom Track
Adjustable Sliding Door Security Bar Lock
Compact Sliding Patio Door Security Lock
📋 What to Check Before You Order
- Header Structural Load: Confirm your header can support the weight of four heavy glass panels without any deflection or sagging.
- Subfloor Levelness: Verify your subfloor is perfectly level across the entire 12-to-16-foot span to prevent future binding or track misalignment.
- Internal Wall Depth: Measure your wall cavity depth if choosing a pocket configuration to ensure it accommodates the full panel stack.
2. Stacking vs. Pocket Design
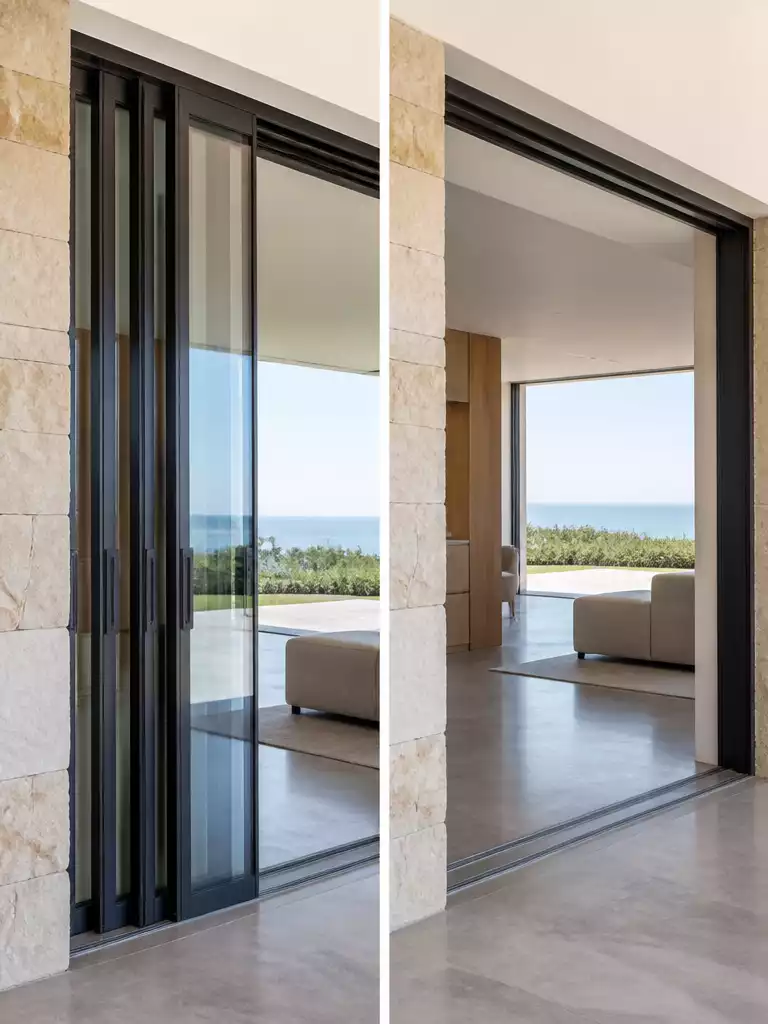
Choose between a visible architectural statement or the magic of a vanishing glass wall.
The “vanishing door” fantasy is the ultimate goal for many high-end renovations, but the reality of how you achieve that look depends entirely on your home’s structural bones. You are essentially choosing between two distinct ways of managing your glass panels when the door is fully open: keeping them visible as a decorative stack or hiding them entirely within the wall structure.
Stacking systems are the more common choice because they are significantly easier to integrate into existing construction. In this setup, the panels slide past each other and rest behind a fixed glass panel or against a wall, meaning you will always have a portion of the glass “footprint” visible even when the door is wide open.
Pocket designs, conversely, require the panels to disappear into a dedicated cavity built into your wall. This creates a true, uninterrupted opening that feels like the outdoors is simply part of your living room, but it comes with a high price for the extra construction work involved.
Structural Warning: Pocket Cavities
If you choose a pocket design, do not underestimate the structural requirements. You need a beefier header to support the wall above the pocket, and the wall cavity itself must be perfectly engineered to prevent debris buildup or track binding over time.
If you are working with an existing home, a pocket door often requires moving electrical outlets, plumbing, or structural studs, which can quickly inflate your budget. Stacking doors are far more forgiving and can often be installed with only minor modifications to your existing rough opening.
⭐ Space-Saving Hardware for Modern Sliding Doors
Double Track Bypass Sliding Barn Door Kit
Single Track Bypass Sliding Barn Door Kit
Modular Sliding Barn Door Hardware Set
3. Frame Material and Profile

Selecting the right material ensures your massive door remains rigid and visually stunning.
The frame material dictates more than just the color of your door; it defines the sightline thickness, which is the actual width of the vertical bar between your glass panels. When you are looking at a 12-foot to 16-foot span, these vertical bars become the most prominent visual element of the entire wall.
If you want that high-end architectural look where the door feels like a wall of glass rather than a collection of windows, the frame profile is your most critical choice. Avoid vinyl for any opening exceeding 12 feet, as it simply lacks the structural rigidity to keep four large panels from sagging or binding under their own weight over time.
For most homeowners chasing that custom, modern aesthetic, narrow-stile aluminum frames are the gold standard. They provide the necessary strength to span wide openings while keeping the sightlines as thin as possible, which prevents the door from looking like heavy, industrial hardware.
If you opt for clad-wood to match your home’s interior trim, ask the dealer specifically for the profile width in inches. A difference of just half an inch per stile can change the total visible frame width on a four-panel system by several inches, significantly impacting your view.
If you prefer the warmth of wood, ensure the cladding on the exterior is heavy-duty, as the exposure levels on a 16-foot span are significant. Ultimately, if your primary goal is a clean, unobstructed view, thin-profile aluminum is the choice that most consistently delivers that bespoke, high-end result.
⭐ Durable Frames and Casing for Custom Doors
Tailored Aluminum Door Casing for Interiors
Waterproof Custom Aluminum Door Jamb Cover
Heavy Duty Interior Door Jamb Repair Kit
⚖️ Quick Decision Guide: Choosing Your Frame
- Choose Aluminum if: You prioritize a razor-thin, minimalist look that keeps the focus entirely on your outdoor view.
- Skip Aluminum if: You want a warm, traditional interior feel that matches existing wood trim or window casings.
- Pair it with: Matte black hardware to emphasize the modern, architectural profile of a narrow-stile aluminum system.
Designing a home that looks custom isn’t about hitting every single detail perfectly, but rather securing the structural elements that define your home’s long-term integrity. Understanding how these choices impact your overall door quality allows you to filter out the noise and focus on what provides lasting value.
🎯 What Moves the Needle:
- Prioritize structural header integrity to ensure your system functions smoothly for years.
- Focus on proper sill flashing to prevent water damage and ensure long-term durability.
- Narrowing your focus to these foundational steps removes the pressure of total perfection.
Glass and Sightlines
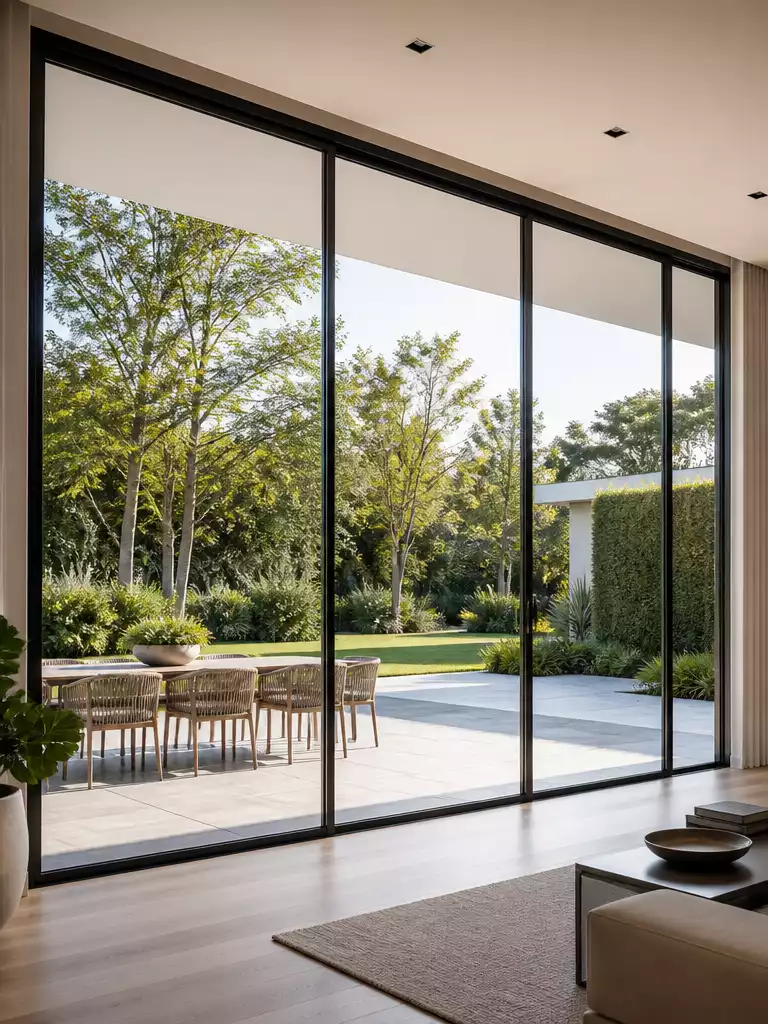
Achieving near-invisible transitions starts with selecting glass that prioritizes clarity over standard green-tinted panes.
When you are investing in a 16-foot span of glass, the goal is to make the barrier between your living room and patio feel like it isn’t there at all. Many standard sliding doors use glass that carries a distinct green hue, which is a major giveaway that you’ve opted for a mass-produced product rather than a custom installation.
To achieve that high-end, gallery-like aesthetic, you need to specify low-iron glass. By removing the iron content during the manufacturing process, you eliminate that murky green color, resulting in a pane that is essentially invisible and offers true-to-life color transmission.
Sightline Consistency: When selecting your door, ensure the manufacturer guarantees identical glass thickness across all four panels. Even a slight variation in the tint or thickness between the fixed and sliding panels creates visual “stutter” that catches the eye for all the wrong reasons.
Safety is non-negotiable for floor-to-ceiling glass, especially in high-traffic areas where children or guests might accidentally walk into a panel. For these large spans, you will be looking at either tempered or laminated glass to meet building codes.
While both are safe, they behave differently under impact, and your local dealer will guide you based on your specific regional codes. Do not compromise on these safety requirements to save on the glass package; it is the most critical component for the longevity and security of your opening.
Glass Selection Checklist
- Ask for Low-Iron: Explicitly request “high-clarity” or “low-iron” glass in your spec sheet to avoid the green tint.
- Verify Safety Compliance: Confirm that the glass is properly tempered or laminated for your specific wind-load and local building requirements.
- Check Coatings: Ensure Low-E coatings are applied to the interior surface to maximize energy efficiency without compromising the neutral appearance of the glass.
⭐ Clear Glass Panels for Elegant Entryways
Semi Frameless Double Sliding Shower Door
Energy Efficient Exterior Door Glass Kit
Entry Door Glass Insert Replacement Kit
Designer Note: The “Invisible” Sightline
Beyond just glass clarity, the secret to a high-end look is minimizing the vertical profile where panels meet. By choosing a narrow-stile aluminum frame, you reduce the physical bulk of the door, allowing the glass to dominate the view. This creates a seamless, gallery-like transition that makes your patio feel like a natural extension of your indoor living space.
Threshold Height
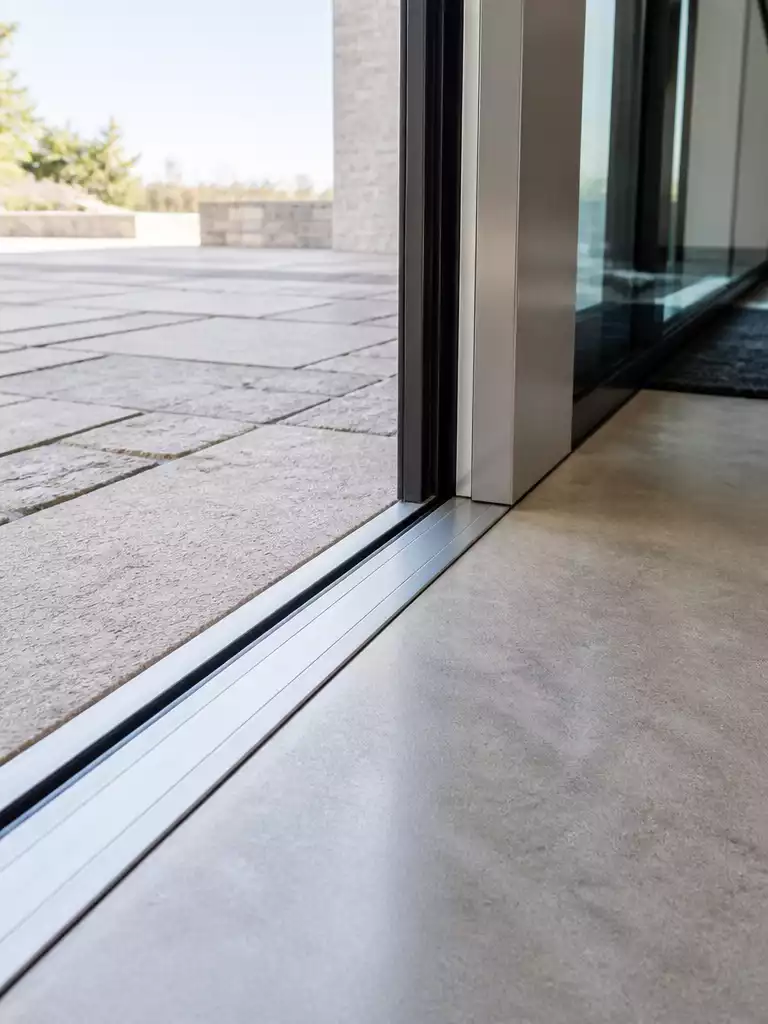
A truly flush threshold eliminates tripping hazards and creates an invisible boundary between rooms.
The “trip-free” threshold is arguably the single biggest indicator of a high-end, custom installation. If you are investing in a four-panel system to bridge the gap between your living room and patio, a two-inch tall aluminum track ruins the effect by creating a literal wall you have to step over every time you want to go outside.
Achieving a flush sill—where the finished floor inside meets the patio surface outside at the exact same elevation—is the gold standard. It requires significant planning during the framing phase, as you must account for a recessed drainage system to prevent water from wicking into your subfloor.
The Recessed Sill Requirement: You cannot simply order a standard door and hope for a flush finish. You must specify a recessed sill detail to your contractor before the rough opening is framed, as it necessitates a specific sub-floor depression or channel to house the track and the drainage assembly.
If a fully flush installation isn’t possible due to structural constraints, ADA-compliant thresholds are your next best move. These are engineered with a gentle slope that minimizes the height differential, providing a sleek, low-profile look that feels deliberate rather than clunky.
Regardless of the threshold type, never neglect the drainage aspect. A high-end sliding system must incorporate a hidden weep system that directs water away from the interior track.
Mistake to Avoid: Never settle for a standard 2-inch track if you are aiming for a custom aesthetic. If your installer insists it is “standard practice,” tell them you are specifically looking for a low-profile, recessed, or ADA-compliant sill to maintain the continuity of your flooring.
When you are on-site for the final walkthrough, check that the track is free of debris and that the weep holes are clear. A custom door that functions correctly should slide with minimal resistance, even with a low-profile threshold, because the weight is properly distributed across a high-quality track system.
⭐ Essential Door Threshold and Weather Seals
Adjustable Bubble Door Sweep for Exteriors
Vinyl Door Threshold Replacement Seal Insert
White Adjustable Double Bubble Door Sweep
🔢 The Right Sequence
Getting a flush threshold isn’t just about the door itself; it requires precise coordination between your framer, slab contractor, and door installer before any concrete is poured or subfloors are finished.
- Finalize door specs: Choose your exact track and drainage system before finalizing the rough opening dimensions.
- Recess the foundation: Have your contractor create the precise channel for the sill to sit perfectly flush.
- Verify floor elevation: Confirm your finish flooring thickness matches the door manufacturer’s required threshold height to avoid lips.
6. Hardware Finish
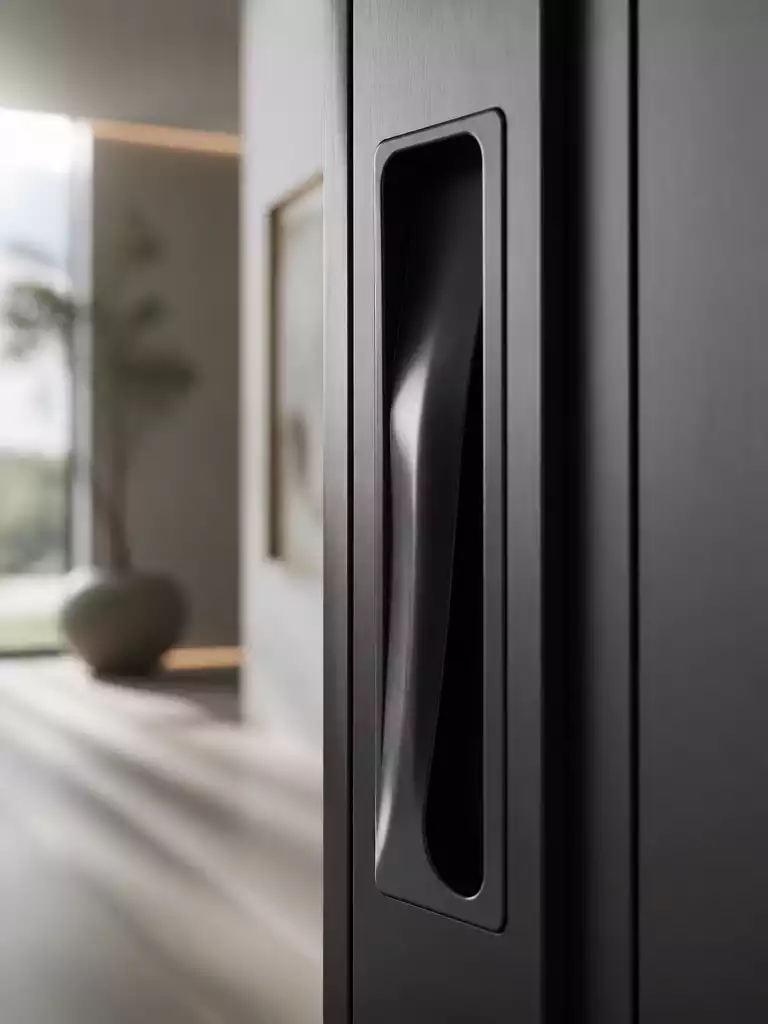
Elevate your door’s profile with hardware that feels as substantial as it looks.
Cheap, shiny chrome hardware is the fastest way to turn a high-end, 16-foot glass wall into a generic apartment slider. When you are investing in a custom 4-panel system, the hardware should disappear into the frame, not distract from the view.
The most successful installations prioritize a monolithic look by matching the hardware finish directly to the frame color. If you have chosen a black aluminum frame, opt for matte black handles; if you have a bronze or silver finish, stick to corresponding metallic tones to keep the visual lines clean.
The Tactile Test: High-end hardware isn’t just about color; it is about weight and resistance. When you visit a dealer, operate the handle yourself—it should engage with a satisfying, dampened click rather than a hollow, plastic-sounding snap. If the handle feels light or flimsy, it will likely fail under the weight of large glass panels within a few seasons.
Beyond the finish, prioritize integrated hardware whenever possible. Rather than picking a bulky, bolt-on handle that protrudes significantly from the glass, look for systems where the locking mechanism and handle are recessed into the stile. This design choice maintains that razor-thin profile that makes custom doors feel like true architectural features.
Avoid the temptation to mix finishes across the door system, as this creates visual clutter that breaks the line of sight. By keeping the hardware finish consistent with the frame, you ensure the door remains a seamless transition between your indoor space and the patio.
⭐ Handlesets That Elevate Any Door
Black Zinc Alloy Sliding Door Pulls
Stainless Steel Round Recessed Door Lock
Matte Black Privacy Interior Door Handles
✨ Finishing Touches: Beyond the Handle
The aesthetic impact of your hardware relies on how it integrates with the surrounding door frame and interior trim.
- Backplate Alignment: Ensure the handle backplate is flush with the vertical stile to prevent snagging on clothing or curtains.
- Finish Continuity: Coordinate your door hardware with nearby window frame finishes for a cohesive, intentional look throughout the room.
7. Screen Options
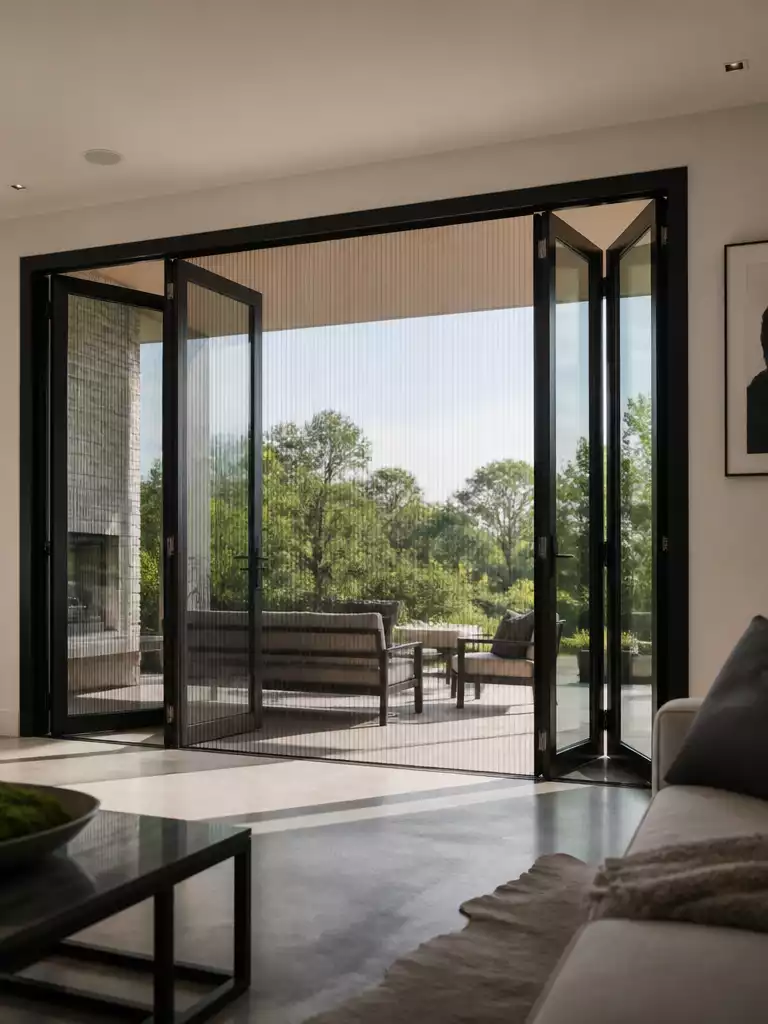
A retractable screen provides a bug-free experience without sacrificing your view when the doors are closed.
When you invest in a wide-opening door system, the last thing you want is a clunky, permanent screen blocking your view or ruining the architectural lines of your home. In a custom build, retractable screens are the only acceptable choice for maintaining that seamless transition between your living area and the patio.
These systems work by pulling a durable mesh across the opening only when you actually need it, then disappearing completely into a slim housing integrated into the door frame when not in use. Unlike fixed screens, they don’t clutter your sightlines or trap dust and debris against the glass permanently. Because you are dealing with spans that often exceed 8 feet, you need to be intentional about the mesh quality and the housing footprint.
Pro Tip: Plan the housing before the framing. These screen housings add width to your door casing. If you don’t account for this extra space during the rough opening phase, you risk having the screen housing protrude past your trim or interfere with the door’s operation.
If you choose a side-pull retractable system, ensure the mesh is rated for high-traffic areas and consistent use. Cheap mesh will sag or fray after a few seasons, especially in larger openings where the wind can put significant tension on the material. Always verify that the track system is recessed or low-profile enough to match the threshold height you selected, ensuring that the screen doesn’t become a tripping hazard or a point where water can pool.
Warning: Avoid fixed screens. Fixed screen panels are a dealbreaker for wide-opening glass doors. They create a permanent visual barrier, block natural light, and make it impossible to achieve that truly open, airy feeling you paid for when choosing a 4-panel system.
Before finalizing your order, ask your dealer for a demonstration of the specific tracking mechanism. The best systems glide smoothly without binding, allowing you to operate a massive 8-foot-plus span with just one hand. If the hardware feels flimsy or requires two hands to pull shut, it likely won’t survive the daily wear and tear of a busy family home.
⭐ Screen Solutions for Your Home
Magnetic Garage Door Mesh Screen Kit
Durable Pet Proof Window Screen Replacement
Adjustable Sliding Screen Door Roller Assembly
✨ Small Details That Matter
Beyond the screen itself, the hardware finish and mesh tension determine whether your installation feels like a permanent upgrade or a temporary fix.
- Finish Matching: Ensure the screen housing color is color-matched to your door frame; a mismatch creates a jarring visual break.
- Mesh Tensioning: Opt for a system with adjustable tension control to prevent the mesh from sagging or flapping in cross-breezes.
8. Standard vs. Custom Sizing
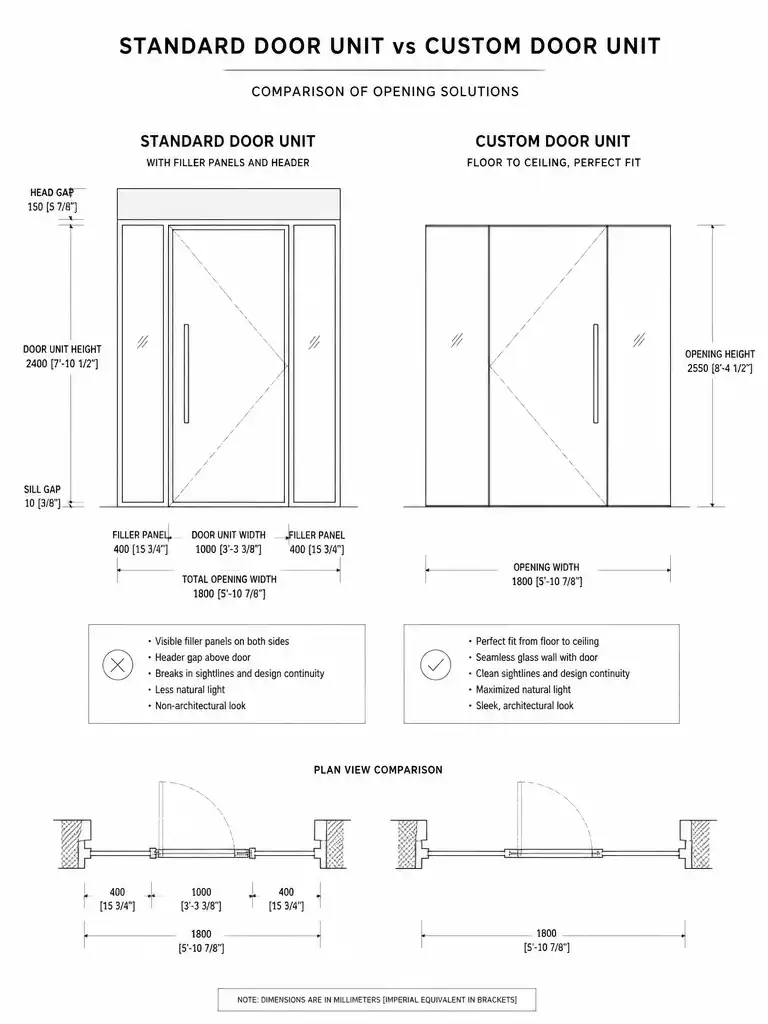
Bespoke sizing eliminates unsightly filler panels for a clean, floor-to-ceiling architectural view.
When you are shopping for a 4-panel system, the word “standard” is often the quickest path to a builder-grade aesthetic. Most mass-produced doors come in fixed increments, and if your rough opening does not align perfectly with those dimensions, your contractor will be forced to use filler panels or extra trim to bridge the gap.
These filler strips are the tell-tale sign of an off-the-shelf installation. They break the clean lines of the frame and draw the eye away from the view, making the entire system feel like an afterthought rather than a deliberate design choice.
The Custom Advantage: By ordering your door to fit your specific opening, you achieve a true floor-to-ceiling glass experience. This approach removes the need for structural headers or ugly filler panels, allowing the frame to disappear into the architecture of your home.
If you have the luxury of planning your project early, design your rough opening to the manufacturer’s exact specifications rather than forcing a standard unit into a space that does not fit. This is the single biggest lever you have to control the final look of your wall, and it often saves money on labor by preventing the need for custom carpentry and site modifications during installation.
However, moving to a custom-sized system does come with a trade-off in timing. Because these units are manufactured specifically for your home, you should prepare for lead times that can add 6 to 10 weeks to your project schedule.
Planning Checklist for Rough Openings
- ✅ Verify the Subfloor: Ensure your subfloor is perfectly level before the frame is ordered to avoid a sloped threshold.
- ✅ Coordinate with the Header: Confirm your header is rated for the specific weight of your chosen glass to prevent future binding.
- ✅ Final Field-Measure: Never sign off on a custom order based solely on architectural drawings; require a professional field-measure by the installer.
If your timeline is tight, you might be tempted by the speed of standard units, but keep in mind that the long-term visual cost of filler panels rarely justifies the short-term convenience. A custom-sized door is a permanent feature of your home, and precision is what separates a professional installation from a generic one.
⭐ Reliable Door Hardware for Repairs
Garage Door Bottom Weather Seal Replacement
Large Reinforced Door Strike Plate Guide
Magnetic Fiberglass Mesh Screen Door Kit
⚖️ Quick Decision Guide: Standard vs. Custom
- Choose custom if: You want a seamless, floor-to-ceiling glass wall without visible filler strips or header bulk.
- Skip custom if: Your move-in date is less than 10 weeks away and you cannot accommodate the manufacturing lead time.
- Pair it with: A recessed sill installation to ensure the custom-sized door sits perfectly flush with your finished flooring.
9. Installation Requirements

Precision installation is the final barrier between a high-end architectural feature and a leaking, binding headache.
The most common mistake homeowners make is assuming the dealer who sells the door is also the one responsible for its performance. In reality, the dealer often hands the product off to a third-party subcontractor, and that disconnect is where structural integrity usually breaks down.
You need to ensure that the installation team is specifically certified by the manufacturer for the door system you have selected. If they haven’t installed that specific model before, you are essentially paying for them to learn on your dime—and your wall.
The Field-Measure Rule: Never finalize your order based on your own measurements or the architect’s plans. Insist on a formal field-measure performed by the lead installer *after* the rough opening is framed but *before* the contract is signed.
Beyond the installer’s credentials, you must account for the structural realities of a 4-panel system. Because these doors are massive, the header above the opening is under immense load; if that header deflects even a fraction of an inch, your doors will bind or stop locking completely.
Your contractor needs to verify the header deflection limits against the manufacturer’s weight specifications for the glass panels. If the header isn’t stiff enough, no amount of adjustment will keep that door sliding smoothly over time.
Final Walkthrough Checklist
Before you sign off on the installation, perform these tests to ensure the system is truly “custom” grade:
- ✅ Smoothness Test: The panels should glide with a single finger; any resistance indicates a leveling issue or debris in the track.
- ✅ Lock Alignment: Every panel must engage the locking mechanism without you having to lift, push, or wiggle the door frame.
- ✅ Weatherstripping Integrity: Check that the seals are compressed evenly against the frame across the entire height of all four panels.
- ✅ Drainage Verification: Pour a small amount of water near the sill corners to ensure it exits through the weep holes rather than pooling inside the track.
Flashing is the final, non-negotiable step. Improper sill flashing is the leading cause of water damage in wide-opening systems, and it is almost impossible to fix once the finished flooring and drywall are installed.
Make sure your installer is using a high-quality, self-adhered flashing membrane that integrates directly with the home’s water-resistive barrier. If you don’t see them treating the sill pan as a critical waterproofing component, stop the work until they do.
⭐ Essential Kits and Maintenance for Doors
Double Pocket Door Frame Kit System
🧰 Questions for Your Installer:
- Header deflection: “What is the maximum deflection rating for the header supporting this specific 4-panel system?”
- Flashing strategy: “How will you integrate the sill pan flashing with my home’s existing water-resistive barrier?”
- Field-measure policy: “Will you perform a formal field-measure of the opening before we place the final order?”
10. Cost
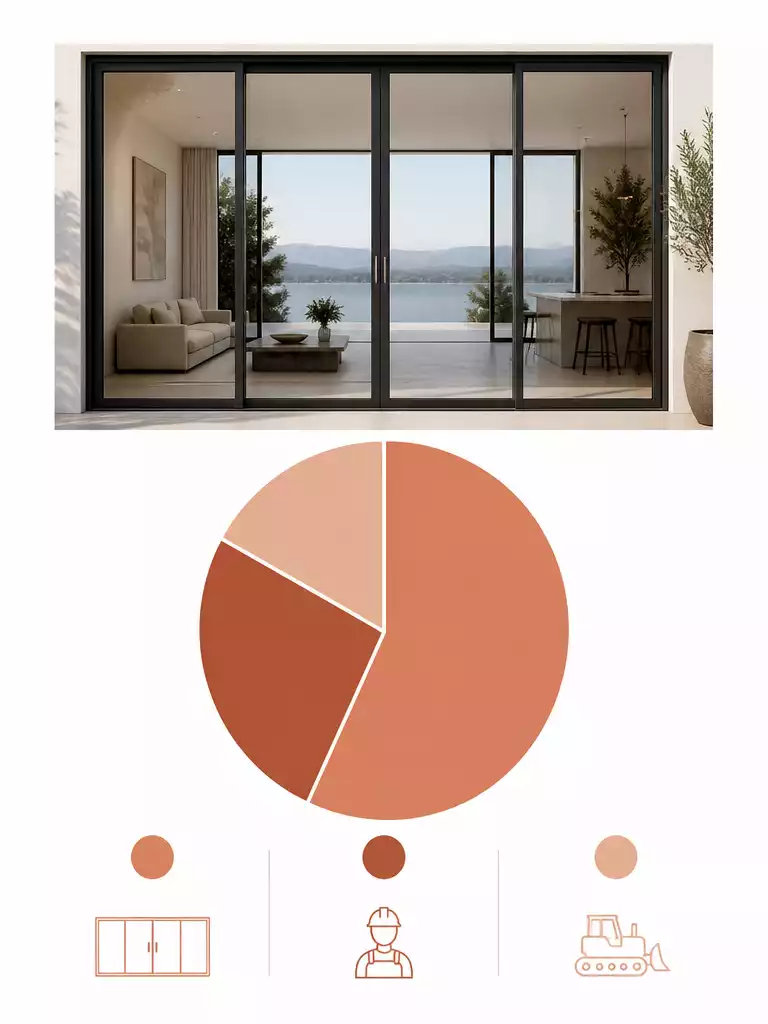
Understanding the total investment ensures your project adds real value to your home.
When you look at 4-panel systems, the biggest mistake is fixating on the unit price. A high-end, 16-foot wide door is not a simple commodity purchase; it is a complex assembly that requires professional installation to function as intended.
Labor typically accounts for 20% to 30% of your total budget. This is not a place to cut corners, as the structural integrity of your header and the precision of your sill flashing will determine whether your door slides effortlessly or binds within a single season.
Beyond the door and labor, you must budget for site preparation. Installing a wide-opening system often requires beefing up the structural header to prevent sagging, which can add significant costs before the door even arrives.
The Resale Reality
A bespoke, 4-panel system is a tangible asset. Unlike a generic slider, a narrow-stile, high-clarity door creates a premium indoor-outdoor connection that prospective buyers recognize instantly, providing a much higher ROI than builder-grade units.
Before you sign a contract, ensure your quote itemizes these specific expenses. If the quote covers only the “unit” without a clear breakdown of installation and necessary structural work, you are at high risk for “surprise” change orders once the project begins.
⭐ Understanding the True Cost of Custom 4-Panel Doors
Louvered Crawl Space Access Door
Non-Louvered Crawl Space Access Door
Insulated Crawl Space Access Door
🧰 Questions to Confirm in the Quote:
- Site prep scope: Does this quote include the structural header reinforcement required to prevent long-term door binding?
- Flashing responsibility: Who is specifically tasked with the sill flashing installation to ensure a watertight, leak-proof threshold?
- Warranty coverage: Does your labor warranty cover adjustments for settling or alignment shifts during the first two years?
You now have a complete technical breakdown for your 4-panel sliding patio doors, which means you can stop guessing and start specifying. Focusing on the high-impact details like custom sizing and flush thresholds is what truly separates a high-end architectural feature from a standard builder-grade install. You do not need to overthink every minor spec, as a few deliberate, structural choices will carry the entire look of your wide opening.
To get started, take your project requirements to a local professional and insist on a field-measure to ensure your final door design is as precise as the plans you have in mind. By anchoring your budget toward these critical hardware and framing decisions, you ensure the final result looks intentional and stands the test of time. When you prioritize the structural integrity of your home entry, the aesthetic payoff follows naturally.




