Replacing sliding closet doors is a repair that relies more on precise measurement and alignment than on expensive labor. This guide narrows the process down to 8 steps worth your attention so you can finish the job with confidence. Grab your tape measure and let’s begin.
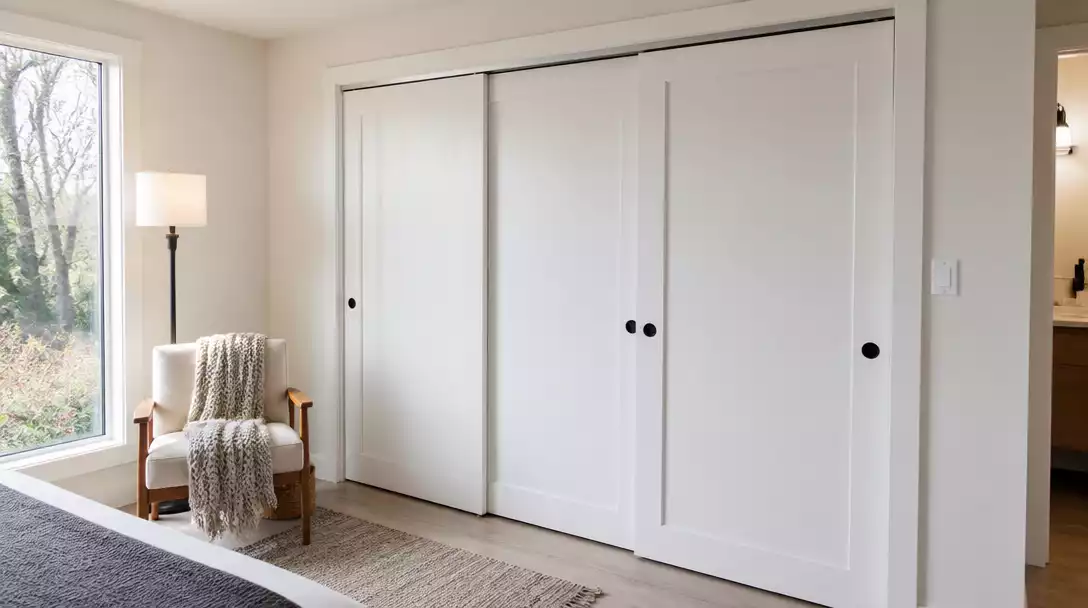
Measure the Opening and Track
Precision is the secret to a smooth glide that never sticks or jumps the track.
As an Amazon Associate I earn from qualifying purchases. Affiliate links may earn me a commission at no extra cost to you.
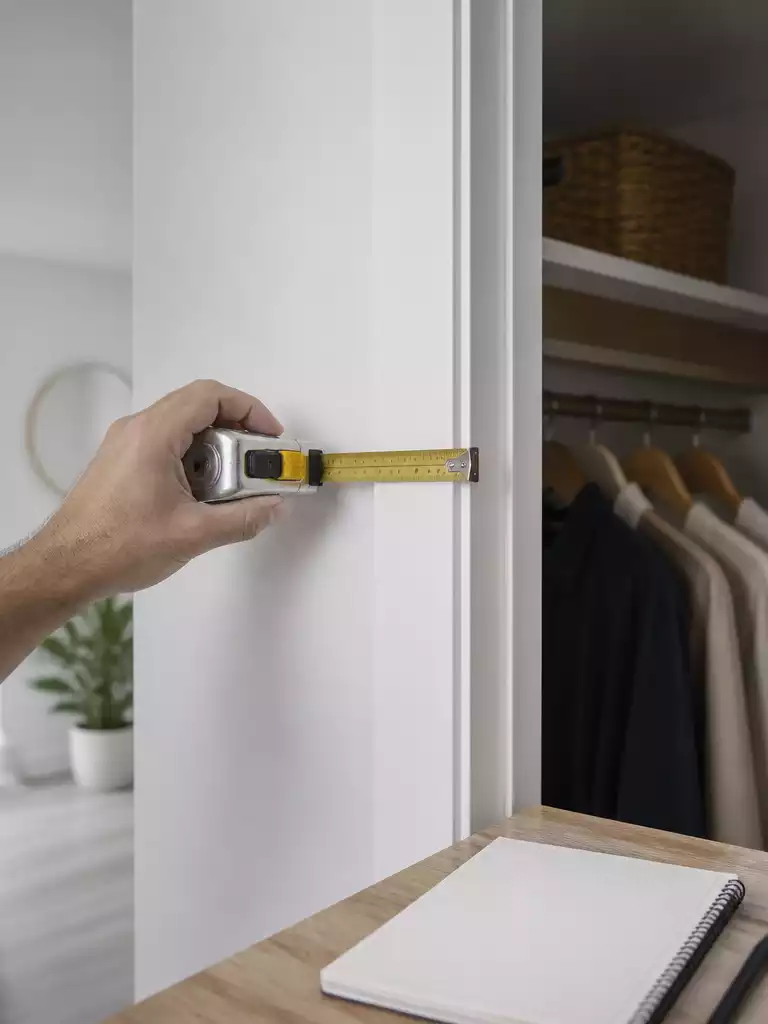
One measurement is a classic recipe for project disaster. To get this right, you need to rely on the Rule of Three for both width and height.
Measure your closet width at the top, middle, and bottom, and record each one. Then, repeat the process for the height by measuring at the left, center, and right sides of the opening.
The Measurement Worksheet
- Width: Top, Middle, Bottom
- Height: Left, Center, Right
Always use the smallest dimension from your set as your final number for door sizing. Using the largest number will result in a door that physically cannot fit into the frame.
It is common to confuse the “finished opening” with the “rough opening.” As a general rule, a 48×80 inch door typically requires a 49×82 inch rough opening to account for the frame and track mechanics.
Don’t fall into the “carpet trap” during this stage. If your closet sits on thick pile carpet, failing to account for that extra height will cause your new doors to drag or bind the moment you install them.
Check Your Documentation First
Manufacturer clearance requirements vary wildly and are non-negotiable. Always verify the specific rough opening requirements in your product documentation before you order any hardware or panels.
Once you have those precise, triple-checked dimensions written down, you are ready to clear the path. You now have the data needed to move forward without the risk of an expensive return.
.
🔢 The Right Sequence to Prevent Rework:
Following this specific order ensures you aren’t stuck with hardware that doesn’t fit or a door that binds.
- Record dimensions: Note the smallest width and height found across your three measurement points.
- Verify manufacturer specs: Compare your numbers against the required rough opening documented for your specific hardware.
- Account for floor finish: Add the height of any carpet pile or planned flooring before finalizing your order.
Remove the Old Doors
Safely clearing your space starts with the right technique to protect your floors and back.
Removing sliding closet doors might seem straightforward, but they are often heavier than they look, especially if you are dealing with classic mirrored panels. Before you touch a single screw, clear the surrounding area of furniture and lay down a drop cloth or heavy cardboard to protect your flooring from accidental scratches.
The Helper Rule
Never attempt to remove heavy or mirrored panels alone. The risk of dropping a panel, shattering glass, or sustaining a strain is simply not worth the time saved by working solo.
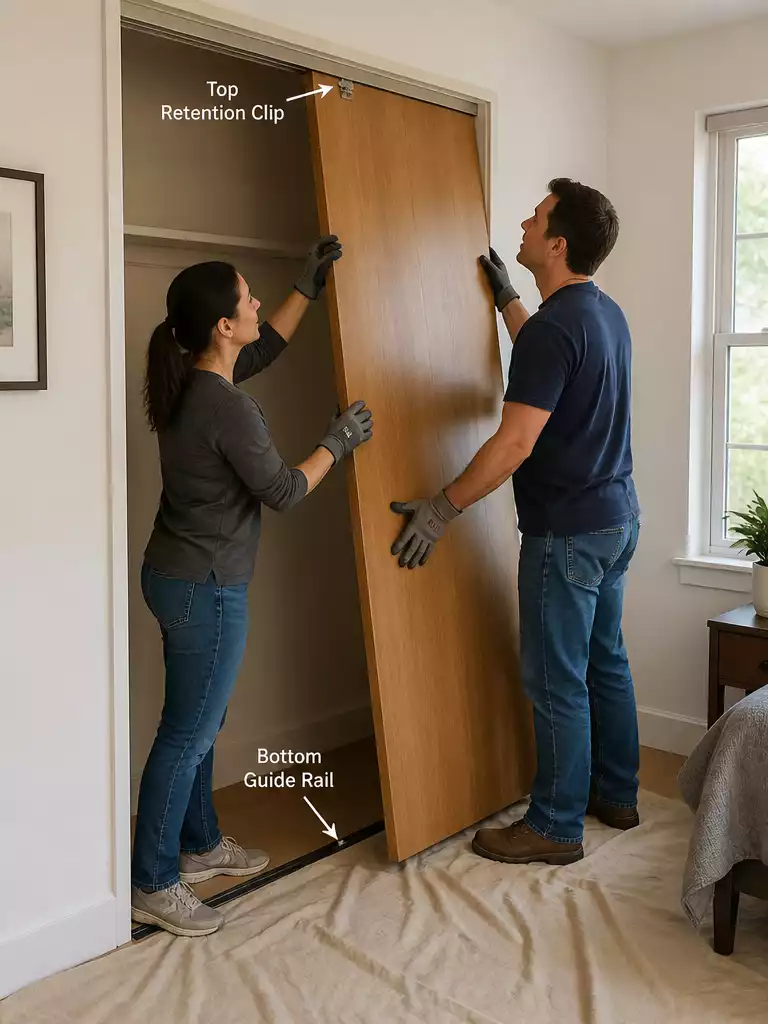
Start by identifying the top retention clips or adjustment screws that hold the door in the upper track. These mechanisms prevent the door from jumping out, so they must be released or unscrewed before the panel will budge.
Once the retention hardware is loose, use the Lift and Tilt method to free the panel. Grip the door firmly on both sides, lift it vertically to clear the bottom guide, and then pull the bottom edge outward toward you.
Avoid the common mistake of trying to unscrew the entire bracket system while the door is still hanging in the track. This puts unnecessary tension on the rollers and creates a high risk of the panel slipping unexpectedly.
Once you have the bottom tilted out, carefully lower the panel to the floor and move it to a safe location. With the doors removed, you’ll have a clear view of the old track hardware—the next phase of your project.
.
🔢 The Right Sequence for Removal
Following a specific removal order prevents accidental damage to your surrounding trim and floor surfaces while keeping heavy panels stable.
- Clear the floor area and lay down protective drop cloths or cardboard.
- Locate and release top retention clips or screws before touching the panels.
- Lift the panel slightly to disengage the bottom guide, then tilt and remove.
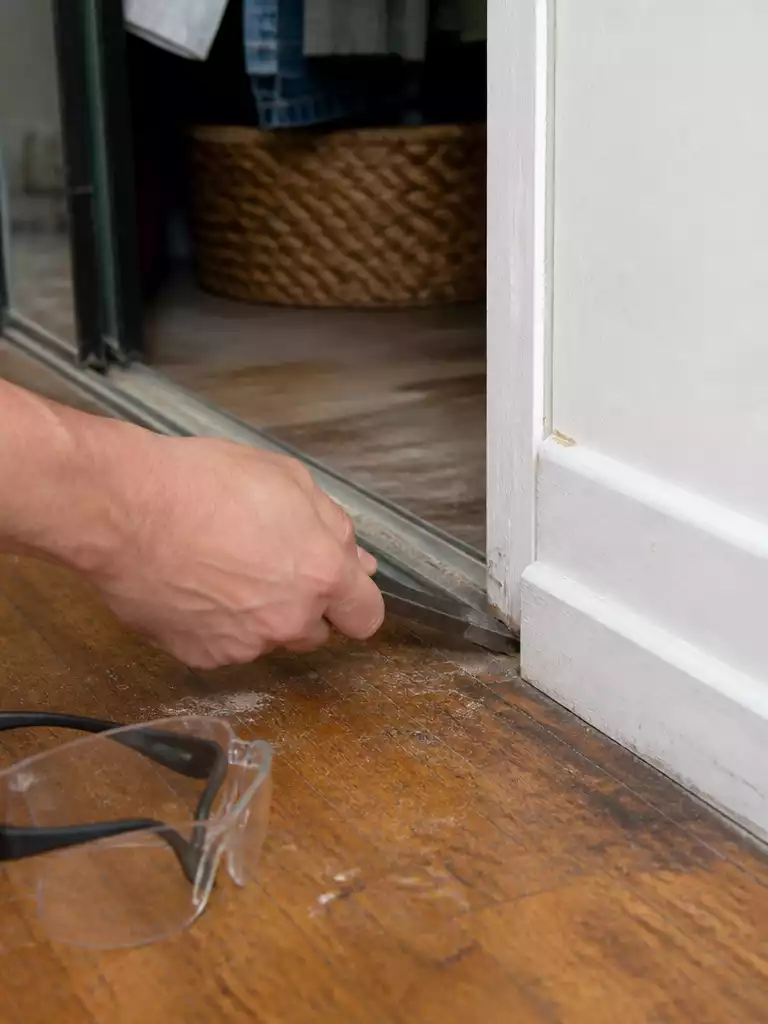
Pull Out the Old Track Hardware
Clear away outdated hardware to create a clean, functional slate for your new installation.
Removing old tracks can feel like a bit of a mystery, especially when fasteners are hidden under layers of paint or thick carpet fibers. Take a moment to inspect the entire length of the track before you reach for any tools.
You will often find screws tucked away at the very ends or hidden toward the back of the channel. Once you have located and removed every fastener, use a flat pry bar to gently lift the track away from the floor or baseboard.
Warning: Don’t Force It
If the track refuses to budge, stop and look for one more hidden screw rather than applying extra pressure. Forcing a stubborn track often leads to gouged trim or damaged drywall that requires avoidable repair work.
Protect your flooring during this demolition phase by laying down cardboard or a heavy drop cloth around the work area. This simple step prevents the metal track from scratching your wood or vinyl flooring as you pull it free.
Pro Tip: Surface Protection
Keep a piece of scrap wood handy to place under your pry bar as a fulcrum. This distributes the pressure and helps keep your baseboards looking sharp while you work.
Once the old hardware is gone, take a quick vacuum to the area to remove any lingering debris or old adhesive. A clean, smooth surface is the best foundation for your new sliding system.
.
🛠️ Practical Steps for a Clean Removal:
- Identify Fasteners: Use a flashlight to spot screws buried under paint or carpet fibers before grabbing your tools.
- Leverage Protection: Place a sturdy piece of scrap wood under your pry bar to prevent damaging your subfloor or baseboard.
- Clear Debris: Vacuum the entire track area immediately after removal to ensure your new hardware sits perfectly flat and level.
Choose Your Replacement Doors
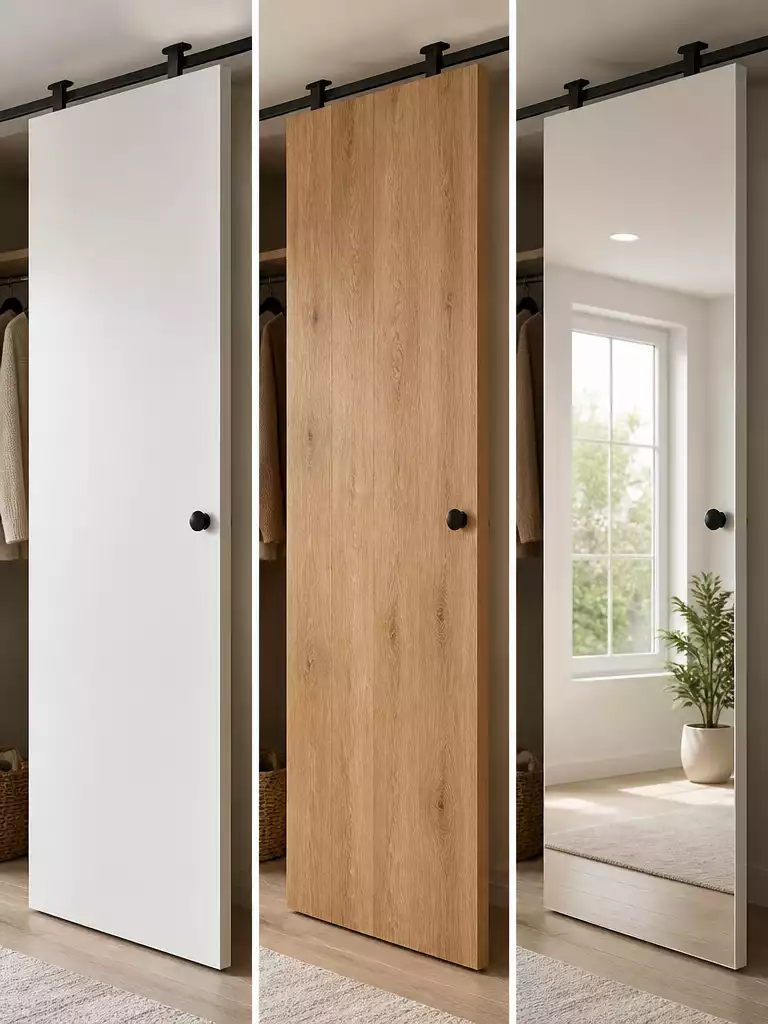
Selecting the right material ensures your closet doors remain smooth, sturdy, and visually balanced.
Choosing the right material for your replacement doors is a balance of weight, durability, and your specific aesthetic goals. For a standard 48-inch opening, you will typically encounter panels sized at 25 inches by 78.58 inches to allow for the necessary overlap.
When you are shopping for these panels, material density is your best friend. Solid-core or wood composite panels are far more resistant to flexing and bowing than hollow-core versions.
Pro Insight: Avoid the “Wavy” Look
Prioritizing denser materials prevents your doors from developing that dreaded wavy, sagging appearance over time. If you opt for mirrored panels, remember that the extra weight requires careful handling to avoid accidental breakage during the installation phase.
Always verify the manufacturer’s specific sizing requirements before you finalize your purchase. Even though 48-inch and 60-inch widths are common, track clearance needs can vary between different hardware systems.
.
⚖️ Quick Decision Guide
Choosing the right material depends on your specific lifestyle needs and how much maintenance you are willing to manage over the coming years.
- Choose MDF if: You want a clean, paintable surface that stays within a modest budget without sacrificing too much smoothness.
- Skip mirrored if: Your household includes active kids or pets where accidental impact could lead to dangerous glass breakage.
- Pair it with: High-quality, solid-core composite panels if you prioritize long-term stiffness and want to avoid future door warping.
Balancing the visual impact of your closet materials with their long-term structural resilience often feels like a high-stakes trade-off. Most of the perceived complexity fades once you focus on the few technical details that truly dictate how well your doors will function years from now.
Prioritizing material density ensures your doors stay smooth and silent, much like selecting durable door choices that elevate your home’s overall functional quality without requiring flawless execution across every single hardware component.
Install the Top Track
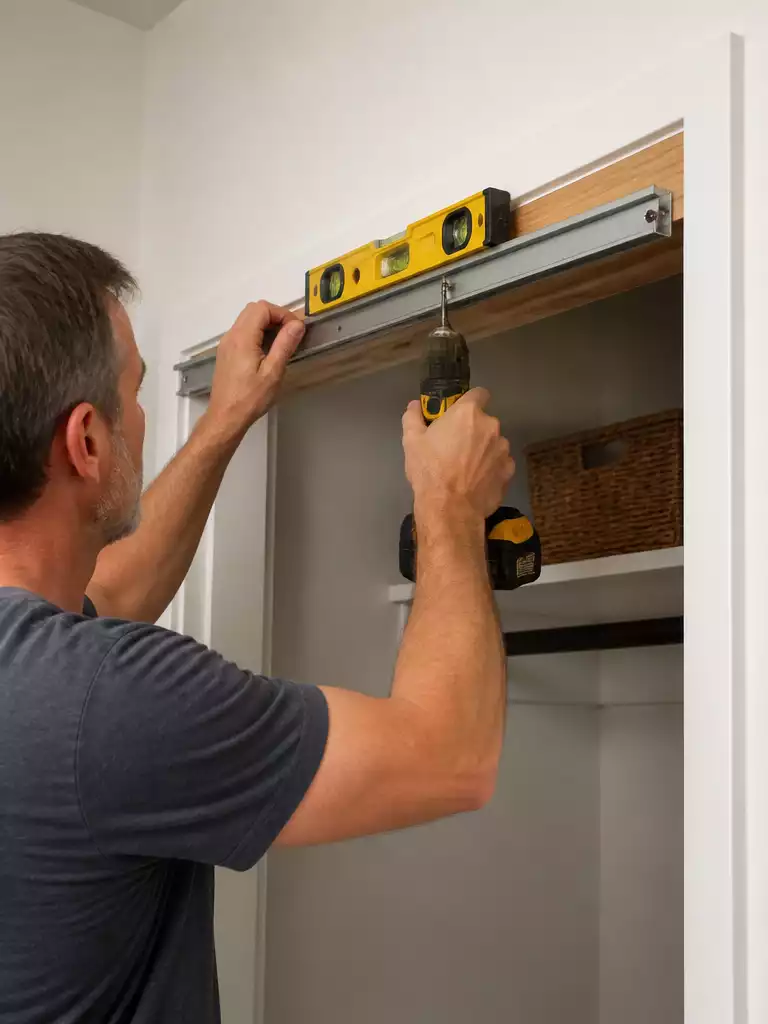
Setting a perfectly level top track creates the essential foundation for smooth-gliding doors.
The top track serves as the anchor for your entire system, so accuracy here is non-negotiable. Even a slight tilt in the header will cause your doors to drift open or closed on their own.
Start by verifying that your header is flat and level across the entire opening. If you find significant dips or bows, you may need to shim the track to ensure a perfectly straight line.
Pro Tip: Position the track back about 1/8 inch from the front edge of the header. This slight offset provides the necessary clearance for the doors to move without scraping the trim.
Before driving any screws, reach for a 7/64-inch drill bit to create your pilot holes. Pre-drilling is essential to prevent the wood header from splitting as you secure the track.
Space your fasteners roughly three inches from each end of the track, then distribute the remaining screws about 16 inches apart. This spacing keeps the track secured firmly against the header without any bowing.
Your choice of fastener depends entirely on what is behind your drywall:
- Wood Headers: Use standard wood screws that offer a deep bite into the framing.
- Metal or Drywall: Use appropriate anchors to ensure the track stays rigid under the weight of the moving panels.
Always consult the specific manufacturer documentation included with your hardware kit. Different systems have unique clearance requirements that override general installation rules.
.
📋 Quick Reality Check: Before You Secure the Track
- Check Substrate: Confirm if you are drilling into solid wood framing or hollow drywall, as this determines your fastener choice.
- Verify Clearance: Ensure your 1/8-inch track setback provides enough room for door hardware without the panels rubbing against your floor trim.
- Confirm Leveling: Place your level across the entire span to catch hidden dips that might cause your doors to roll uncontrollably later.
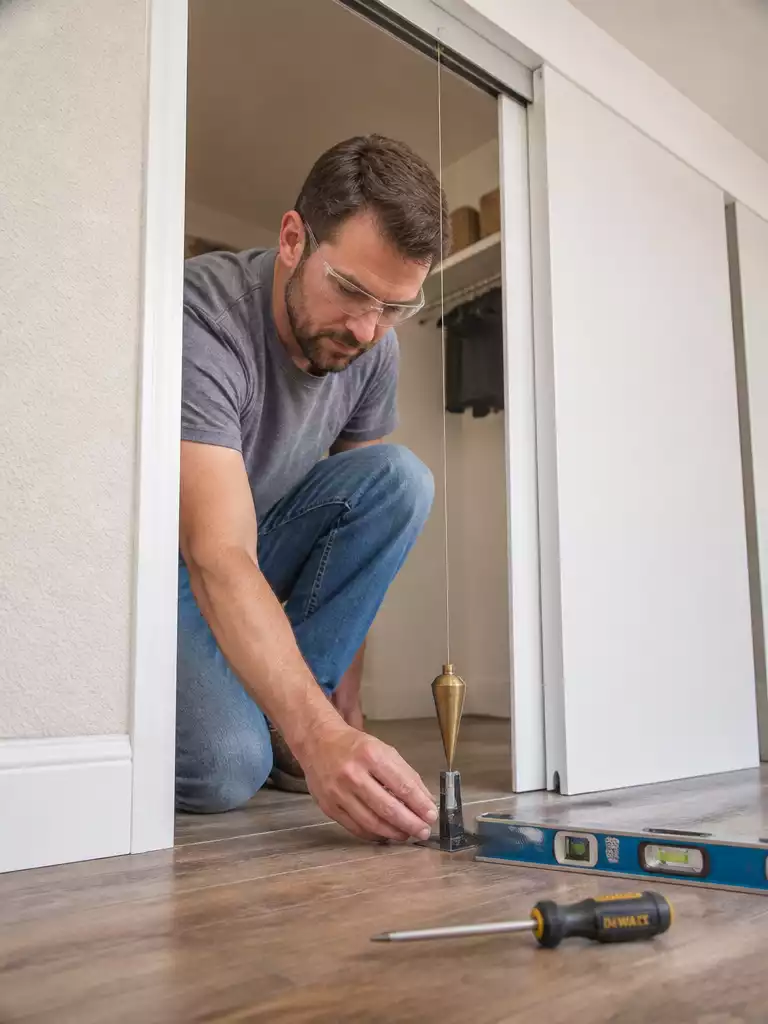
Install the Bottom Guide
 .
.
🔢 The Right Sequence: Avoiding Rework
Getting the floor guide position locked in early prevents the frustration of having to un-install your top track later because the doors don’t hang plumb.
- Install the top track and hang the doors to check their natural vertical resting point.
- Mark the floor guide position while the doors are hanging straight and plumb.
- Remove the doors briefly to screw the floor guide securely into the subfloor.
Hang the New Doors
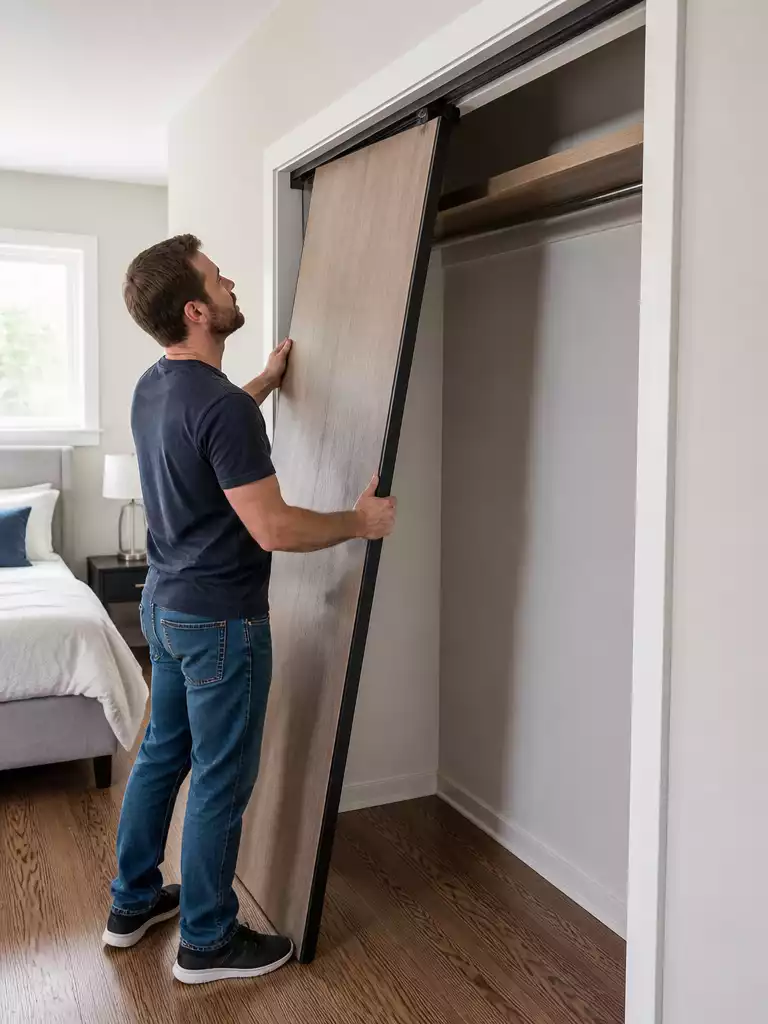
Getting the back panel seated correctly is the secret to a smooth, glide-ready closet.
The trick to a successful installation is knowing that your doors have a specific order of operations. You must hang the back door first, as it needs to reach the inner track furthest from the room.
Angle the top of the panel toward the header and guide the rollers into the back groove of the top track. Once those rollers are engaged, lift the panel slightly to clear the bottom guide, then gently swing the bottom edge inward until it sits flush against the floor track.
Pro Tip: The Roller Pinch
If you feel resistance, stop immediately and check your roller angle. Forcing the panel can bend your hardware, so ensure the rollers are fully seated before you swing the bottom into position.
Repeat this exact process for the front door, ensuring it rests in the outer track. Avoid the common mistake of mixing up your tracks, as this will lead to the two panels bumping into each other during operation.
Watch Out for Roller Resistance
Never force a door that refuses to glide. If it binds, the panel is likely not seated fully or the rollers aren’t properly aligned with the groove.
.
🏡 How This Works in a Real Home:
- Clear the pathway: Remove any area rugs or bulky floor decor beforehand to give yourself extra room to maneuver.
- Manage the weight: Always use a second person to hold the panel steady, especially with heavy, full-length mirrored doors.
- Lived-in safety: Place a folded blanket beneath the track area to protect your flooring from accidental scratches or drops.
Adjust the Rollers for Alignment

Fine-tuning your roller height ensures a whisper-quiet glide that feels professional and effortless.
The difference between a door that stutters across the track and one that glides effortlessly is almost always in the roller adjustment. Most sliding doors feature adjustment screws accessible from the top or bottom of the panels, which allow you to raise or lower each side independently.
Use a screwdriver to make adjustments in small increments, specifically limiting yourself to 1/4 turns at a time. This controlled approach prevents you from over-correcting and saves you from the frustration of resetting your height multiple times.
The Test-Turn-Test Cycle: Always test the door’s motion immediately after every adjustment. This iterative process is the only way to ensure the vertical edge of your door remains perfectly parallel to the door jamb.
If you find that your doors are still binding despite these micro-adjustments, stop and examine the frame itself. A door will never slide smoothly if the tracks are not square, so check the frame’s alignment before forcing the rollers any further.
Remember that the rotation direction for your specific screws can vary by manufacturer. Take a moment to observe how the panel reacts to your first quarter-turn to determine if you are lifting or lowering the door.
.
✨ Finishing Touches
Ensuring your door alignment is precise is only half the battle; the final mechanical feel dictates the long-term success of your installation.
- Hardware Security: Double-check that all roller screws are fully tightened after your final height adjustment to prevent mid-slide slips.
- Dust Clearance: Vacuum out the lower track one last time to ensure no hidden debris interferes with the newly aligned rollers.
With all eight steps outlined, you have a complete view of how to manage this upgrade without external help. You do not need to tackle every detail at once to see a professional result. Focusing on precise measurements and a level installation is what actually dictates how the doors glide and hold up over time.
Start by printing your measurements and handling the track alignment, as these are the decisions that upgrade your home functionality most effectively. Once the hardware is set, the rest is just mechanical adjustment. Make those two calls correctly, and the build quality will speak for itself.