Choosing a front door requires balancing security, architecture, and your budget to avoid costly mistakes. This guide narrows the search down to 12 critical factors that ensure your investment delivers long-term value. Let’s start with the foundational choice of material.
MATERIAL OPTIONS
Selecting the right material balances your home’s security needs with long-term maintenance realities.
As an Amazon Associate I earn from qualifying purchases. Affiliate links may earn me a commission at no extra cost to you.
Choosing a front door comes down to a three-way battle between steel, fiberglass, and wood. Your decision here dictates not just the initial cost, but how much of your weekend will be spent on upkeep for the next two decades.
Steel is your go-to if you are prioritizing security and budget. It is incredibly tough against forced entry, though you must touch up any paint chips immediately to prevent rust from taking hold.
Fiberglass is the champion of low maintenance, especially in extreme climates where wood would swell or warp. It resists dings and rot, making it a reliable workhorse for busy family households.
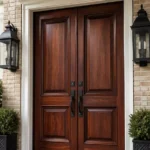
If you choose wood, you are opting for prestige and natural character. Be prepared to commit to bi-annual sealing and staining to protect that investment from the elements.
Once you narrow down your material, the next step is ensuring the door doesn’t look out of place on your home’s exterior.
.
💡 How to Choose a Material for Your Climate:
- Coastal Environments: Opt for fiberglass to prevent salt-air corrosion, which quickly pits steel and degrades wood finishes near the ocean.
- Extreme Sun Exposure: Choose fiberglass or light-colored steel; dark-painted wood or steel can absorb heat, leading to warping or paint blistering.
- Budget-Conscious Security: Use a steel door with a high-quality, UV-resistant paint finish to balance robust physical protection with long-term curb appeal.
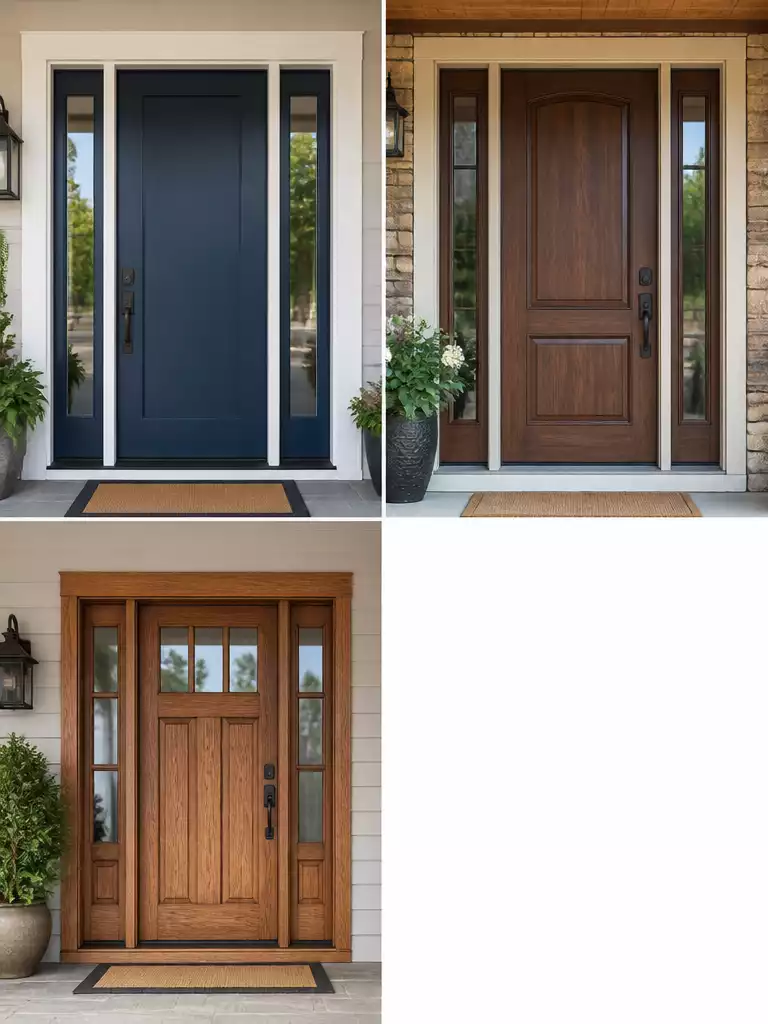
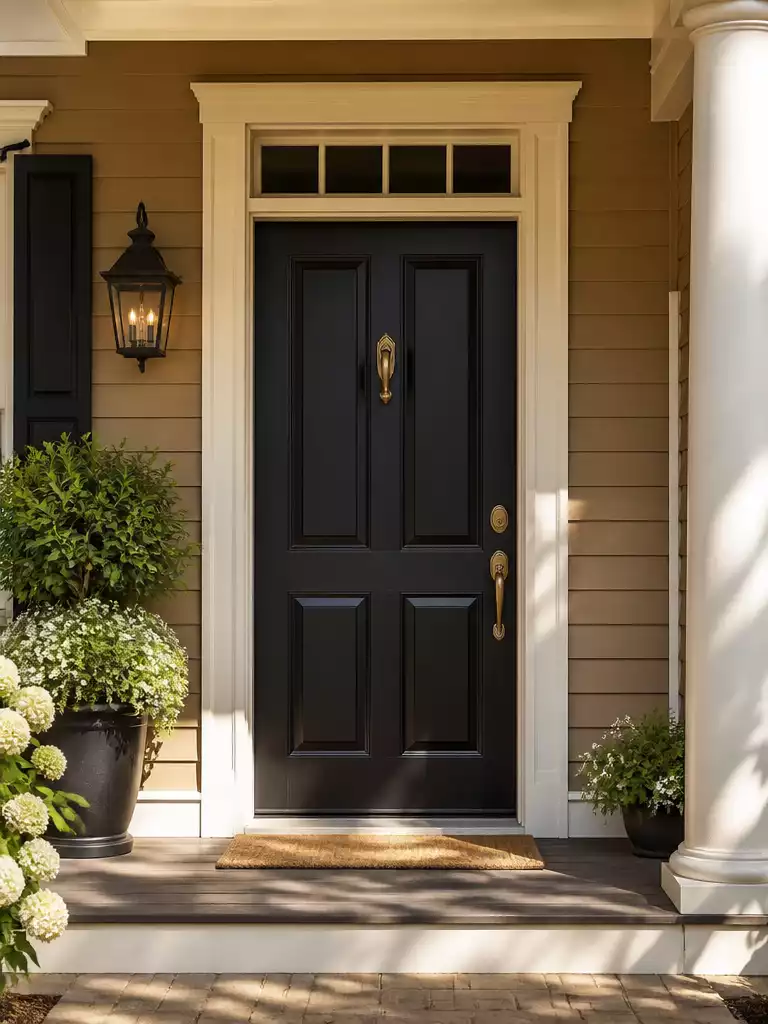
Style and Architecture Match
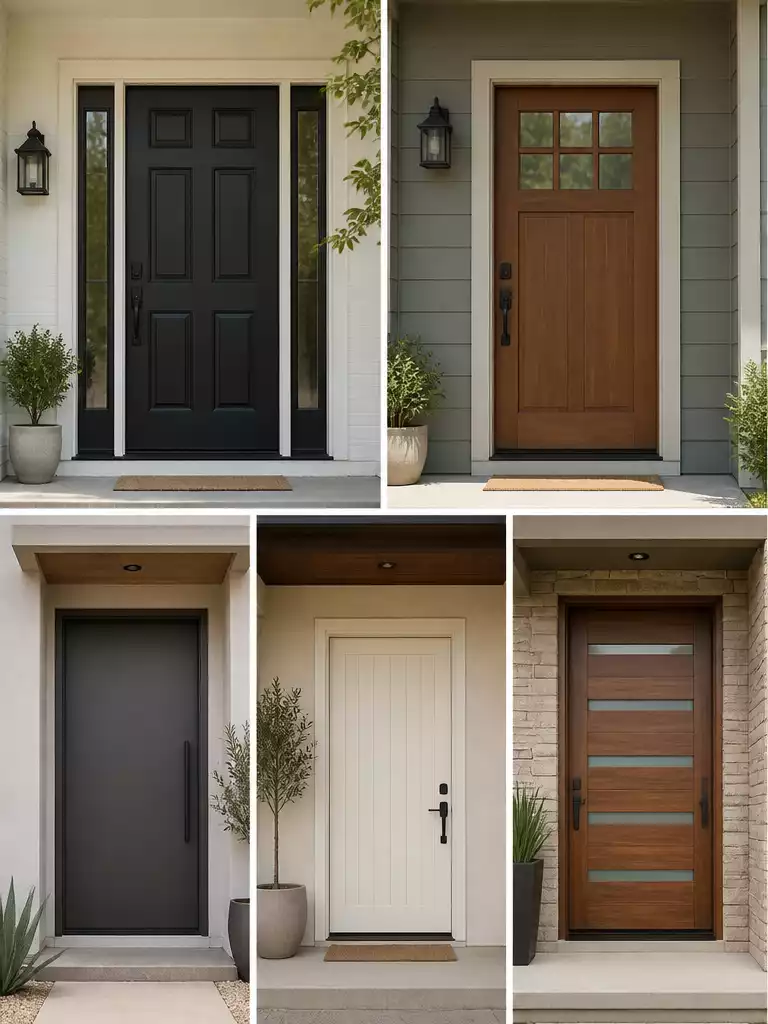
Aligning your door with your home’s architecture ensures timeless curb appeal and protects resale value.
A door that looks stunning in a catalog can feel like an intruder on your house if the styles clash. The visual rhythm of your home relies on consistency, and your front door is the focal point of that narrative.
The Geometry Rule: Always mimic the existing window geometry of your home in your door design. If your windows feature arched tops, an arched door creates a harmonious, intentional look that prevents the entryway from feeling disconnected.
Choosing a style that lacks historical or architectural synergy with your facade directly impacts your home’s resale value. Potential buyers often equate a mismatching door with a lack of maintenance or poor design judgment elsewhere in the house.
Use this guide to ensure your selection complements your home’s specific architectural DNA:
- Colonial/Georgian: These homes demand symmetry and balance, making a classic 6-panel door the most appropriate choice.
- Craftsman: Look for 3-panel configurations that incorporate square, high-placed upper glass to reflect the period’s emphasis on hand-crafted joinery.
- Modern/Mid-Century: Prioritize flush surfaces and clean lines; horizontal glass lines are a hallmark of these eras and keep the aesthetic grounded.
- Farmhouse: Opt for simple, rustic, or heritage-inspired designs that emphasize solid wood textures or clean, vertical paneling.
Mistake to Avoid: Don’t force an ultra-modern steel door onto a historic Victorian home just because it is energy-efficient. You can find high-performance materials in styles that respect your home’s character.
.
Designer Note: The Power of Proportion
Beyond mere style, front door success hinges on scale. An oversized door can make a cottage look top-heavy, while a narrow door on a grand entrance feels like an afterthought. When selecting trim or glass inserts, mirror the proportions of your existing windows to ensure the entry feels like an intentional extension of the home’s original design rather than a tacked-on upgrade.
Energy Efficiency
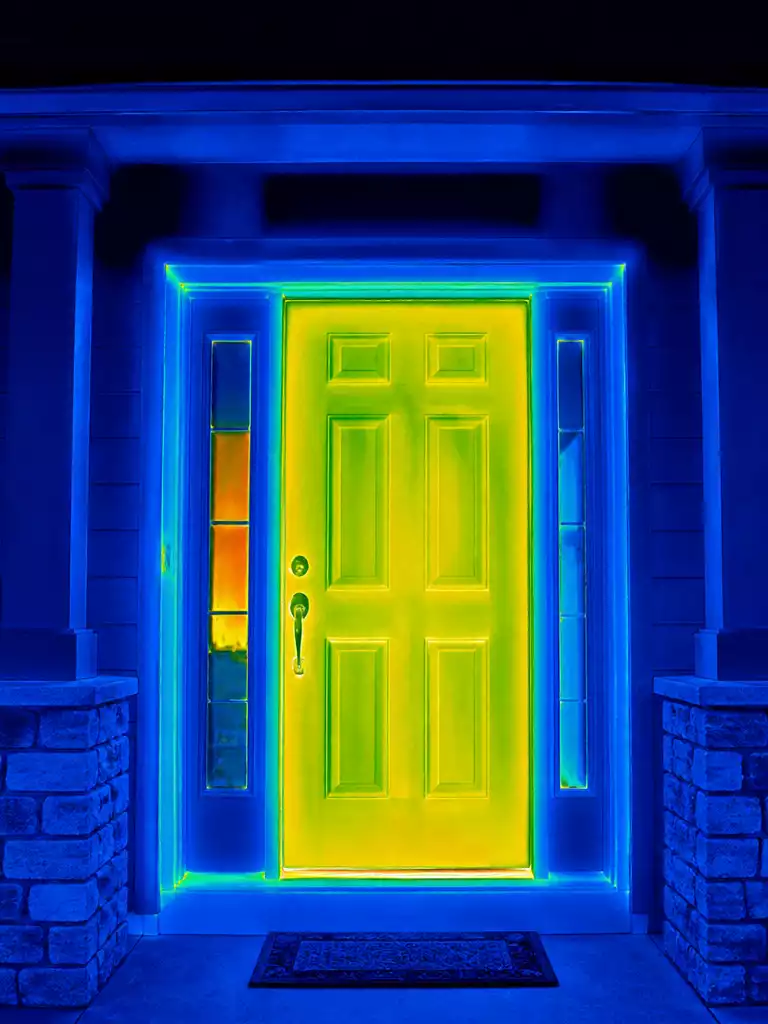
Stop paying to heat the neighborhood by choosing a door built to seal tight.
If you can see daylight peeking through the edges of your door frame, your entryway is essentially a hole in your home’s thermal envelope. Keeping your climate-controlled air inside is one of the most practical ways to reduce long-term utility bills.
To evaluate how well a door will perform, look for these two technical metrics:
- U-Factor: This measures how well the door insulates. A lower number indicates better insulation performance.
- Solar Heat Gain Coefficient (SHGC): This measures how much heat from the sun passes through your door. Choosing the right SHGC depends on your climate, as it helps determine if you want that heat during winter or prefer to block it during summer.
The Pass/Fail Test: The simplest way to verify efficiency is to look for the ENERGY STAR certification. This label serves as the industry standard for verification, saving you from decoding complex thermal specs yourself.
Be wary of decorative doors that prioritize intricate aesthetics over thermal performance. Some highly stylized options sacrifice insulation for visual detail, leading to drafts that negate any potential savings on your energy bills.
Warning: Never assume a heavy door is an efficient door. Solid construction is important, but proper weatherstripping and a high-quality sweep are what actually prevent air and water intrusion.
.
💡 Practical Ways to Verify Energy Performance:
- Check thermal labels: Look for the NFRC sticker on the door slab, which provides independent, verified U-factor and SHGC ratings.
- Test frame seals: Run your hand along the perimeter weatherstripping to ensure it feels firm and creates a consistent, gap-free compression.
- Verify threshold contact: Place a piece of paper under the door sweep; if it slides out easily, the sweep isn’t tight enough.
SECURITY FEATURES
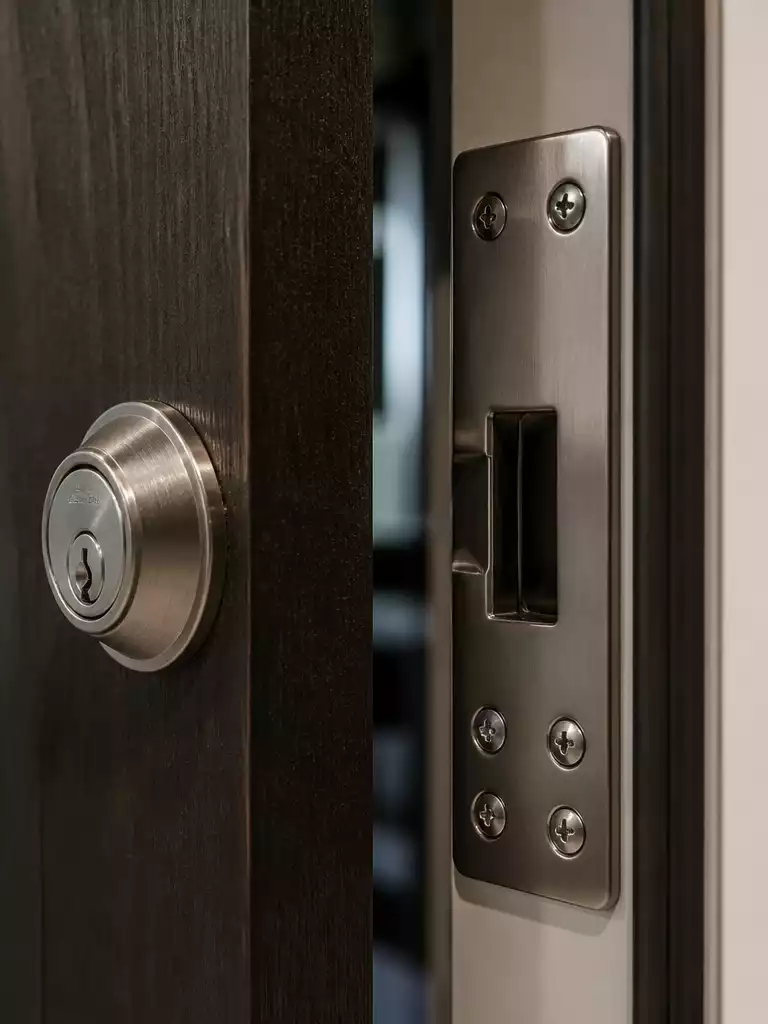
Reinforcing your entryway creates a formidable barrier that protects your family and your home.
Most intruders don’t pick locks; they simply kick the door in. The vulnerability rarely lies in the door slab itself, but rather in the hardware and the frame that holds it.
To truly secure your home, you must treat the door and its frame as a single, integrated system. A high-end, solid door provides zero protection if the strike plate is held in place by short, flimsy screws.
The Security Checklist
- Strike Plate: Install a 16-gauge (or thicker) steel plate to prevent the wood from splintering.
- Anchoring: Always use four 3-inch screws that penetrate deep into the structural wall stud, not just the trim.
- Deadbolt: Insist on a 1-inch throw requirement and ensure the bolt itself is constructed from hardened steel.
- Core Integrity: Avoid hollow-core doors entirely; only solid-core construction offers the density required for a front-facing security barrier.
The “kick-in” resistance of your entryway depends heavily on this hardware configuration. If your current strike plate uses standard, short 1-inch screws, you have a critical weak point that can be corrected in minutes with a simple trip to the hardware store.
When you are selecting your new door, make sure the framing and the jamb are also robust. A beautiful door is only as effective as the structure it is bolted to.
.
📋 What to Check First
- Frame condition: Inspect your existing door jamb for soft spots or rot that could compromise new hardware security.
- Stud alignment: Verify if your framing studs are positioned to accept deep screws for the strike plate installation.
- Hardware clearance: Measure the distance between your edge and the deadbolt hole to ensure compatibility with modern locksets.
Selecting the hardware that secures your home often feels like a permanent commitment, yet the long-term integrity of your entry depends on just a few mechanical essentials. You do not need to over-analyze every detail to reach a high-quality result, as focusing on the right structural standards simplifies the entire selection process significantly.
Prioritizing durable entry hardware ensures your investment remains both functional and visually sharp for years, far outpacing the need for constant updates.
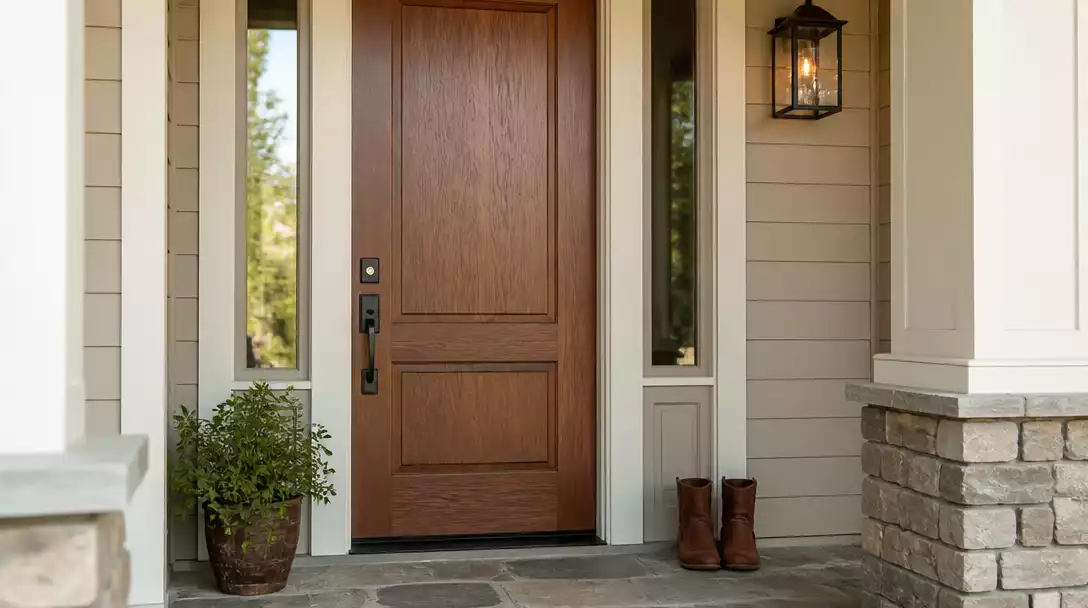
GLASS AND SIDELIGHT CHOICES
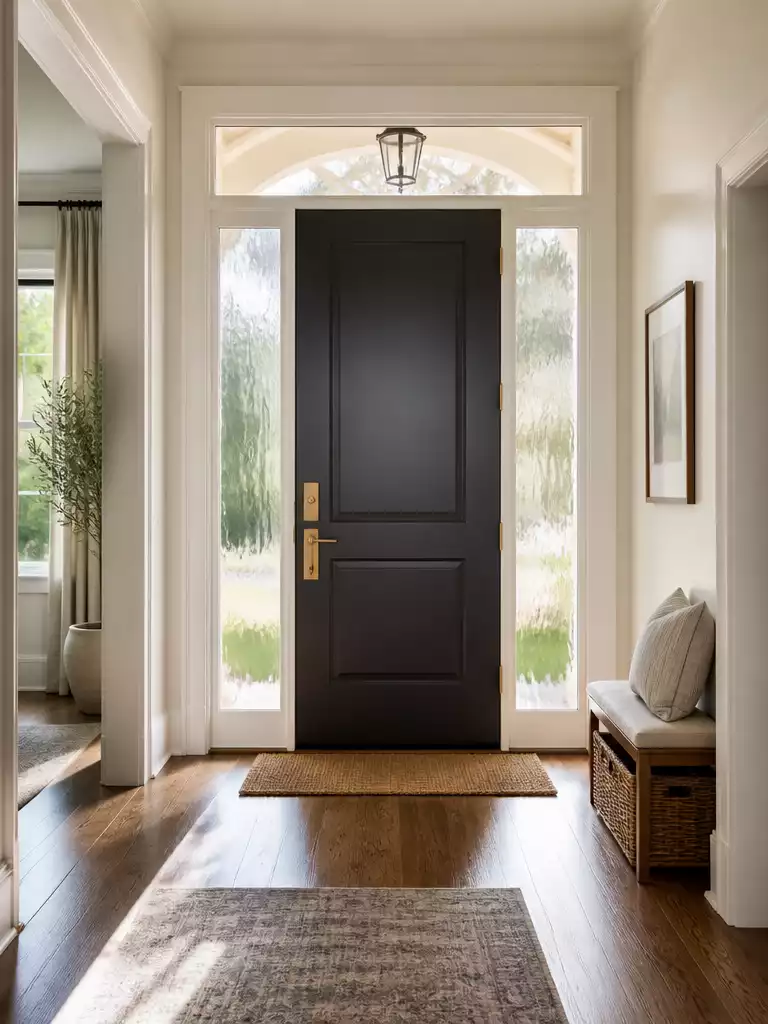
Brighten your entryway while maintaining essential home security and thermal performance with smart glass selections.
Glass adds immediate curb appeal, but it acts as a weak point for both security and thermal regulation. You can balance light and privacy by selecting the right glass specifications for your specific climate and neighborhood.
Security and Efficiency Essentials
Always demand tempered or laminated glass to withstand impacts and prevent dangerous shards during a break-in attempt. Pair this with double or triple-pane construction featuring a Low-E coating to ensure your home stays comfortable without driving up utility bills.
When incorporating sidelights, size matters for both the look and the functionality of your entry hardware. Standard practice dictates keeping these panels between 12 and 14 inches wide to maintain proper structural proportions.
If you have the flexibility, place your sidelights on the handle side of the door. This configuration provides a clearer view of who is at your front step before you ever turn the deadbolt.
If you live in a high-traffic area, textured glass is your best friend. It allows natural light to flood your foyer while keeping your entryway activities shielded from prying eyes.
.
🏡 Real-Home Application:
- Entryway blind spots: Install sidelights on the handle side to easily check for visitors without fully opening your door.
- Daylight management: Use rain-glass or frosted textures to invite natural light in while keeping your interior foyer completely private.
- Routine cleaning: Wipe your glass panes monthly with a mild soap solution to prevent mineral buildup and maintain clear entry views.
Standard vs Custom Sizing
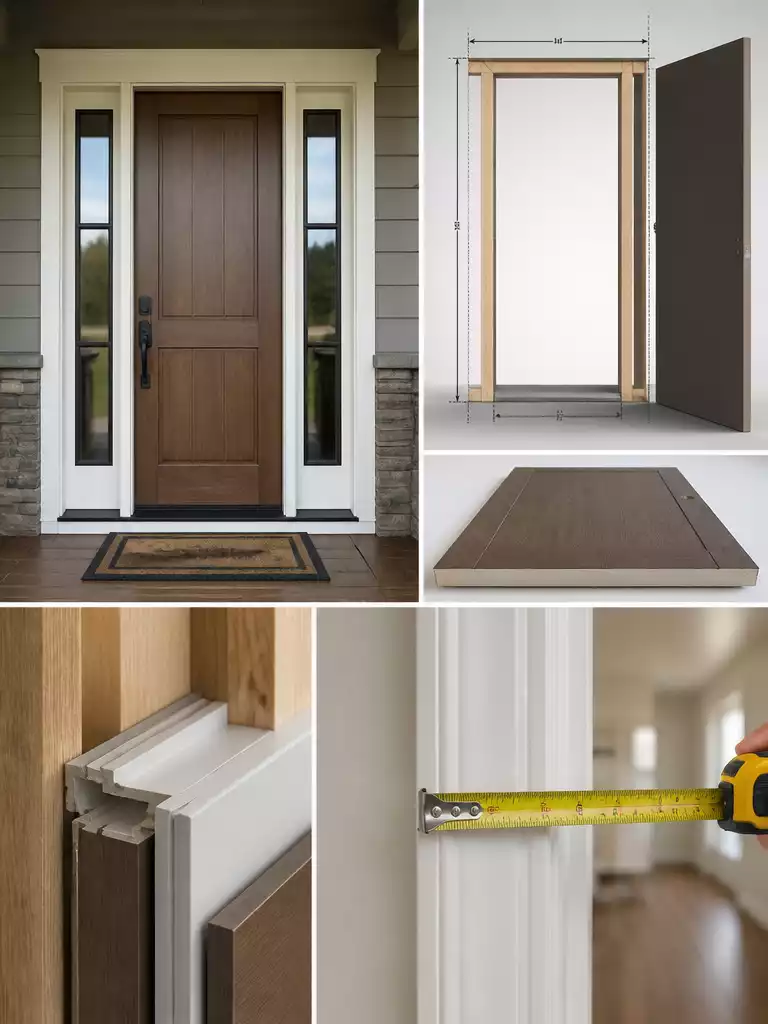
Mastering your measurements ensures a perfect fit and avoids costly installation delays.
The “standard” 36-inch by 80-inch door size is a common starting point for most homes, but it is rarely the final word for your project. Your home’s rough opening is the true boss of this installation.
The 5-Minute Size & Assessment Check
- Check for visible daylight gaps around the existing frame.
- Measure the width and height of the rough opening, not just the current door slab.
- Don’t forget to measure your wall thickness (jamb depth) to ensure the frame sits flush.
- Test the current threshold for rot or soft spots that might require repair before the new door arrives.
- Check your current strike plate to confirm it utilizes 3-inch screws hitting the structural stud.
If your measurements fall outside these standard dimensions, you will be looking at a custom door order. These orders carry a significantly higher price tag and require longer lead times, so verify your math at least twice before placing the order.
Taking the time to measure the rough opening accurately now saves you a frustrating, expensive return trip to the supplier later. If you are uncertain about your findings, it is always worth having a professional installer double-check your numbers before you commit to a custom unit.
The Hidden Cost Trap
Custom sizes often require extended production windows and specialized shipping, which can add weeks to your project timeline. Always factor these potential delays into your renovation schedule to avoid leaving your home vulnerable or unfinished.
.
🔢 The Right Sequence to Avoid Rework
Ordering a custom door before verifying your specific rough opening dimensions often leads to expensive, irreversible mistakes.
- Measure the rough opening height and width after removing the interior casing trim.
- Check wall thickness to confirm your jamb depth will sit flush with existing finishes.
- Consult your supplier about lead times specifically for your measured dimensions before finalizing payment.
HARDWARE AND FINISH
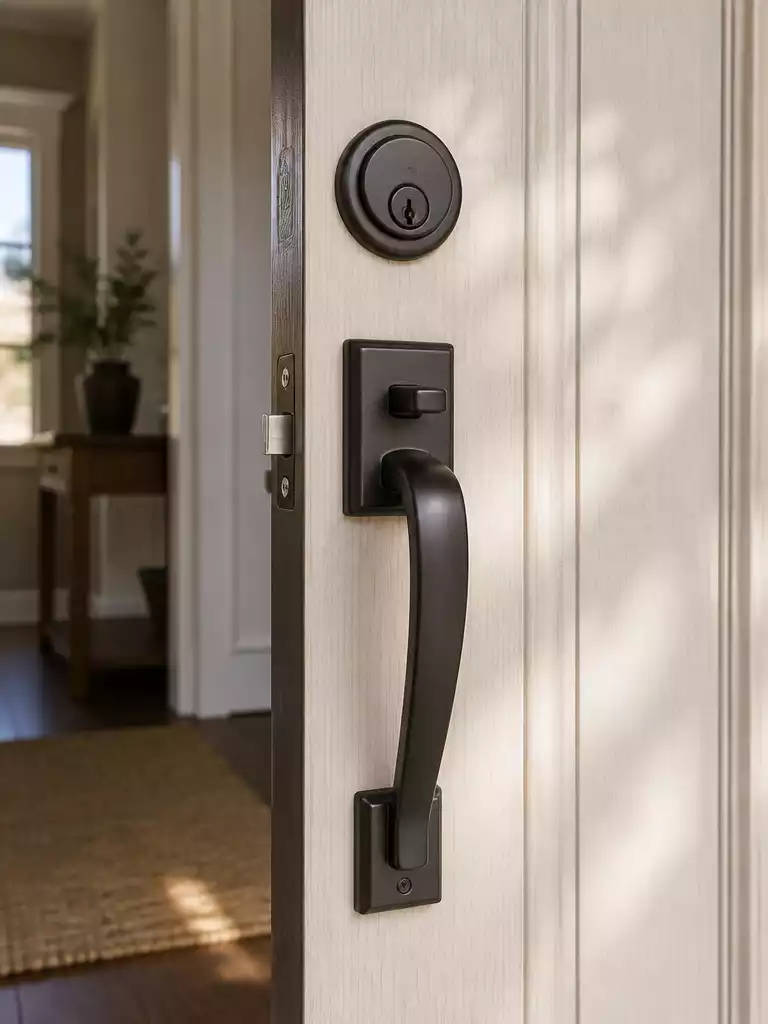
Elevate your entryway with hardware that combines lasting durability with a refined, professional finish.
Your hardware is the point of contact that guests touch every single time they visit. Choosing cheap components can turn an expensive door into a source of frustration in less than a year.
Prioritize PVD (Physical Vapor Deposition) finishes whenever possible. This technology creates a incredibly tough coating that resists tarnishing, pitting, and the wear of daily handling far better than traditional lacquered brass.
If you live near the coast, look specifically for 316L stainless steel hardware. The salt air is brutal on standard metals, but 316L provides the corrosion resistance necessary to keep your handle set looking pristine.
For inland homes, solid brass or cast iron are excellent performers that hold up well over time. Avoid standard lacquered brass at all costs, as the clear coat eventually flakes away and ruins the appearance of your metal.
Always check for BHMA certification when shopping for your locksets. For a home that sees constant coming and going, a Grade 1 rating ensures your hardware is built for the long haul.
Avoid lacquered brass finishes if you want to avoid future maintenance headaches. These surfaces often peel or flake, leaving you with an uneven, tarnished look that is difficult to restore.
.
✨ Small Details That Matter
Beyond the main handle set, these subtle finishing choices ensure your entryway hardware functions flawlessly while maintaining a cohesive, high-end appearance for years.
- Hinge coordination: Match your door hinges to the hardware finish to avoid a cluttered look that breaks visual rhythm.
- Threshold transition: Select a threshold material that complements your hardware, providing a seamless bridge between your door and floors.
WEATHERPROOFING AND INSULATION
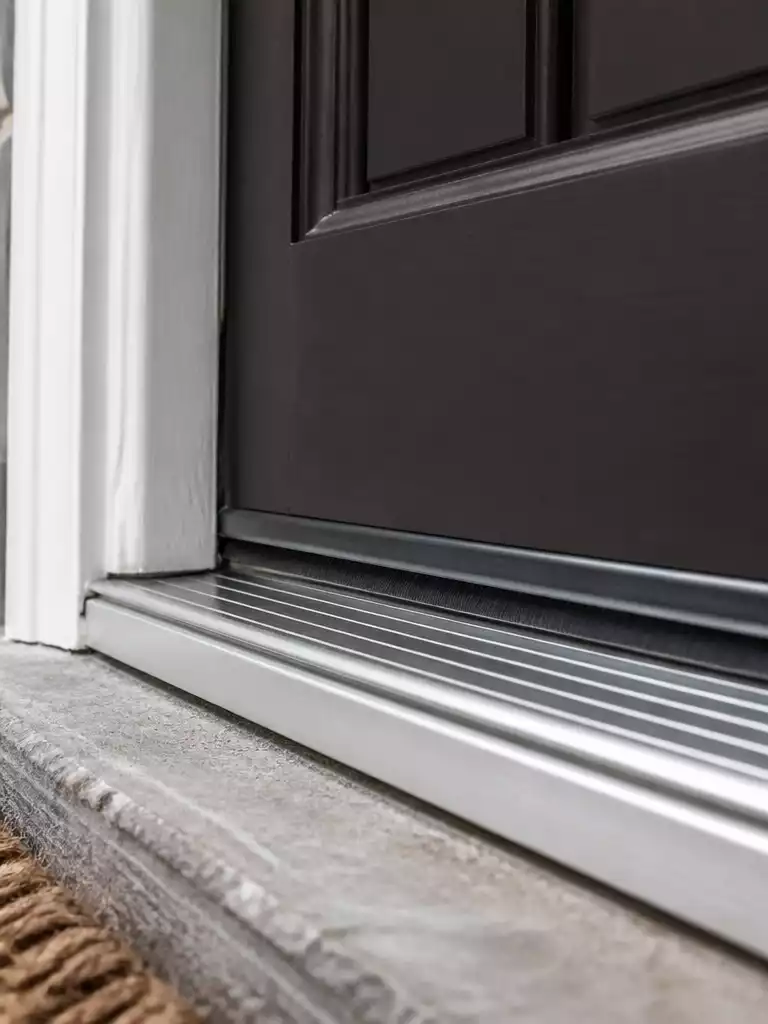
A perfect seal protects your home from drafts and prevents costly water damage over time.
Weatherstripping is the invisible shield that keeps your home’s climate-controlled air inside and the elements out. It is often the first component to degrade, yet it remains the most critical barrier for your front door’s performance.
Failed seals are the primary cause of water intrusion and premature floor damage near your entryway. If you notice light peeking through your door frame or feel a draft on a windy day, your current system has likely reached the end of its life.
The Three Layers of Defense
To ensure maximum efficiency, pay attention to these three specific points of contact:
- Perimeter Weatherstripping: This runs along the sides and top of the door frame to block air leaks.
- Door Sweep: A critical barrier attached to the bottom of the door slab that seals the gap between the door and the sill.
- Threshold: The transition piece on the floor that interacts directly with your door sweep to lock out moisture.
When selecting your door, inquire about the quality of the compression weatherstripping used at the factory. High-quality systems maintain their shape over thousands of cycles, whereas cheap materials flatten out and lose their effectiveness within a few years.
Signs of Failing Insulation
Keep an eye out for these indicators that your door is no longer performing as it should:
- Visible daylight visible around the perimeter of the door slab.
- Water stains or soft spots on the subfloor near the entryway.
- Noticeable drafts or temperature fluctuations in the foyer.
- Weatherstripping that appears cracked, brittle, or permanently compressed.
Maintenance is straightforward but essential for longevity. Keep the threshold and door sweep area clean of debris, and wipe down the surfaces with mild soap and water to prevent dirt buildup that can compromise the seal.
If you find that your sweep is worn, replacing it is a simple maintenance task that prevents the need for more expensive repairs later. A tight, well-fitted seal is the difference between a high-performing entryway and a frequent source of home maintenance headaches.
.
📋 What to Check First
- Frame Plumbness: Use a long level to ensure your existing door frame is perfectly vertical before ordering a new unit.
- Jamb Depth: Measure the exact thickness of your wall, including drywall and exterior sheathing, to guarantee the new door jamb fits perfectly.
- Threshold Clearance: Check if your finish flooring (like tile or hardwood) creates a high spot that might bind the new door’s bottom sweep.
INSTALLATION COSTS
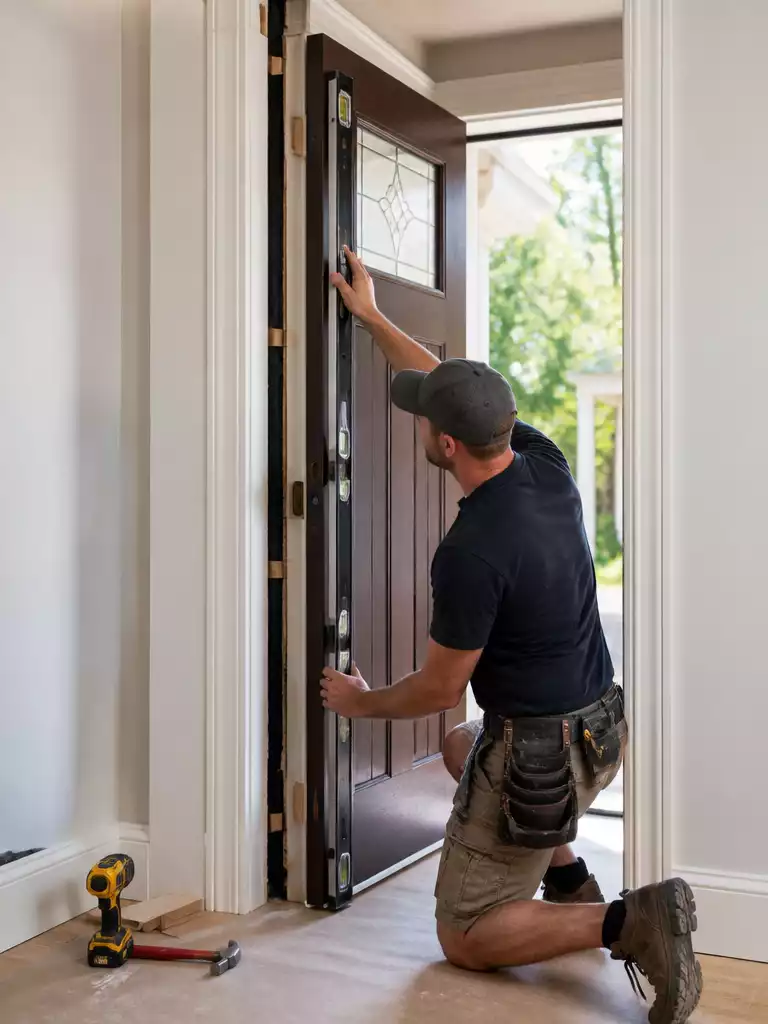
Budgeting correctly for professional labor ensures your new door performs exactly as the manufacturer intended.
A $1,000 door slab is rarely the final price you pay, as the installation process involves more than just swapping hardware. You should expect total project costs to range between $550 and $2,000+ depending on whether you are replacing the entire pre-hung unit or just the door slab.
Professional labor typically accounts for $230 to $800 of your total budget. This price varies based on the complexity of your home’s framing and whether your rough opening requires structural adjustments.
The Hidden Cost Trap
Always budget at least 20% over the cost of the door slab for incidentals like disposal fees, new trim, high-quality flashing, and shimming supplies. Neglecting these items often leads to mid-project budget fatigue.
If you are considering a DIY approach, materials like shims, high-grade sealant, and flashing tape usually cost between $100 and $200. However, improper alignment or sealing is the leading cause of premature door failure, including rot, drafts, and water intrusion.
When interviewing professional installers, ask specifically about their process for water management. A truly professional installation requires proper flashing integration with the existing house wrap to prevent moisture from reaching your subfloor.
Most installers offer a warranty on their labor, which acts as a secondary safety net against installation errors. Weigh this peace of mind against the time and potential risk of a DIY installation when finalizing your decision.
.
🧰 Questions for Your Installer:
- Water management: How exactly will you integrate the door flashing with my home’s existing weather-resistive barrier?
- Rough opening: Do you include any necessary structural header adjustments in your standard quote, or are those billed separately?
- Labor warranty: What is the specific duration of your workmanship guarantee, and what does it cover regarding potential leaks?
Maintenance Needs
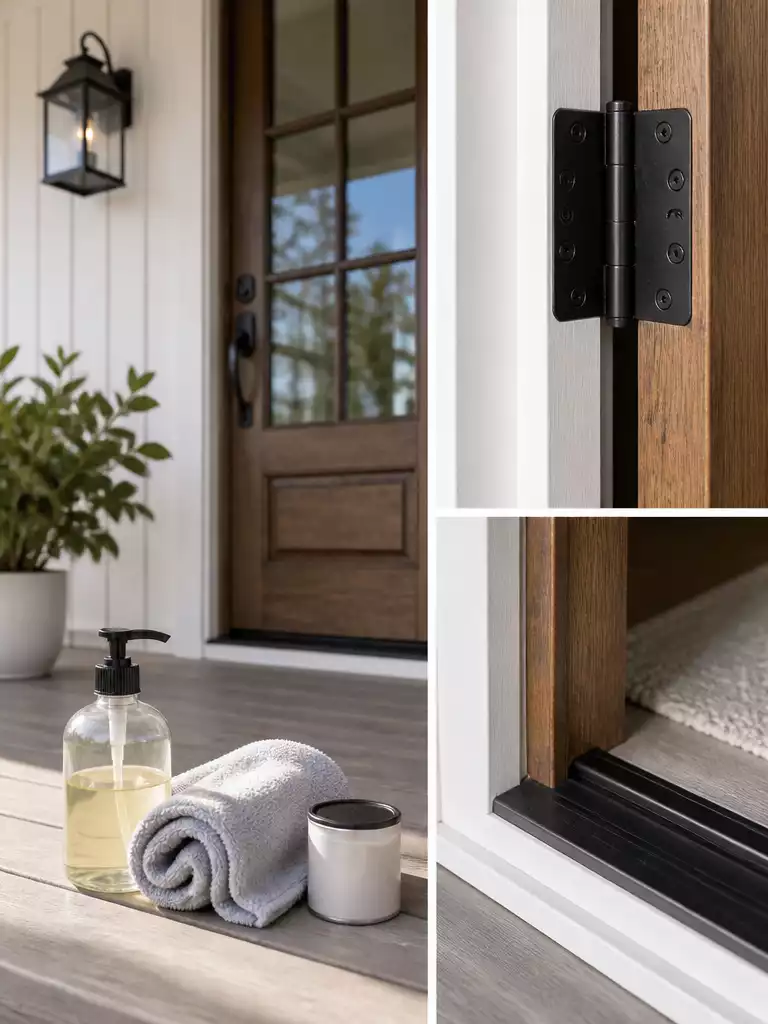
Keep your entryway looking pristine and performing perfectly with these simple, routine care steps.
Your choice of material dictates exactly how much time you will spend on your porch with a rag in hand. If you prefer to focus your weekends on hobbies rather than chores, selecting a low-maintenance material is your smartest move.
The Real-World Maintenance Reality
- Wood: Requires sanding and re-staining or painting every 1–2 years to prevent rot and peeling.
- Steel & Fiberglass: Only need a monthly wipe-down with mild soap and water to stay looking new.
Steel doors are incredibly sturdy, but they do have one specific vulnerability you must watch for. If the paint finishes chip or scratch, you must touch them up immediately to prevent rust from setting in.
Fiberglass is arguably the champion of the “set it and forget it” category. It resists warping and rotting, meaning you rarely have to do more than keep it clean and check the weatherstripping for signs of wear.
Warranty Warning
Be careful with wood doors; using the wrong finish or skipping the recommended sealing schedule often voids your manufacturer’s warranty. Always check the specific care instructions provided by your door manufacturer before applying any new stain or paint.
Regardless of the material you choose, take five minutes every season to inspect your hardware and seals. A quick check of the door sweep and perimeter weatherstripping can save you from bigger headaches down the road.
.
🛠️ Practical Tips for Long-Term Care:
- Routine Inspection: Check your weatherstripping every season; if it feels stiff or compressed, replace it immediately to maintain an airtight seal.
- Hardware Refresh: Clean your handle and locksets with a dry, soft cloth, avoiding harsh chemicals that can strip away protective PVD finishes.
- Threshold Protection: Keep the bottom threshold clear of debris and standing water to prevent rot from creeping into the door slab’s base.
Budget vs Long Term Value
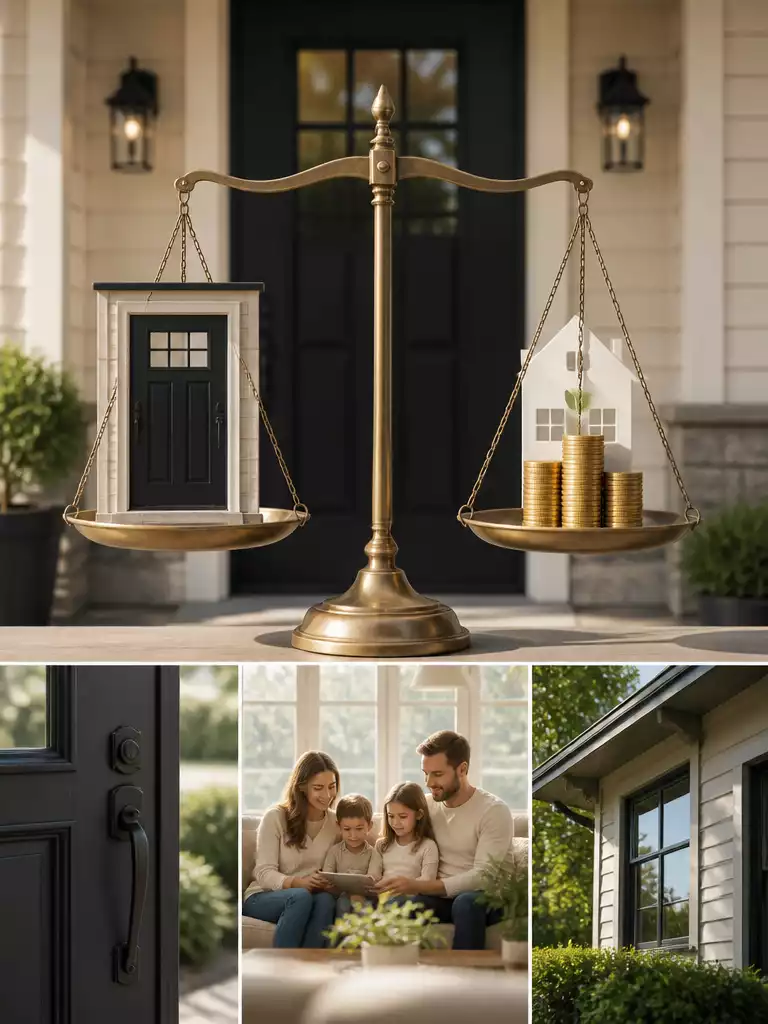
Investing in a quality entrance pays dividends through energy efficiency and lasting home value.
Stop shopping for the cheapest door and start thinking about your Total Cost of Ownership. While a bargain-basement slab might save you a few hundred dollars today, it often ignores the hidden expenses of maintenance, energy loss, and potential replacement down the road.
Entry door projects are among the most effective home improvements you can make, typically returning 70–100% of their cost in home value. A well-chosen, high-performing door delivers a steady dividend through lower monthly HVAC bills and significantly improved resale appeal.
An upscale wood door often carries a higher “labor tax” because it requires consistent, bi-annual sealing to maintain its finish. If you aren’t prepared for that commitment, a high-quality fiberglass door may actually provide better long-term value despite a similar initial price tag.
The Hidden Cost Trap
Always budget at least 20% over the cost of the door slab itself to cover essential incidentals. This includes professional installation, proper flashing, new trim casing, and hardware upgrades that protect your investment.
Consider the cumulative cost of your choice over a ten-year window. By factoring in the frequency of refinishing, the local electricity rates influenced by insulation performance, and the eventual impact on your home’s marketability, you can verify which option truly serves your financial goals.
.
📈 The Long-Term Payoff:
Investing in a high-quality entry door isn’t just about curb appeal; it’s a strategic move for your home’s equity. With entry-door projects returning roughly 70–100% of their cost in resale value, the door effectively pays for itself. Beyond the sale, you’ll see ongoing dividends through reduced HVAC strain and better thermal performance, turning a front-entry upgrade into one of the smartest home improvements you can make.
Total Cost Perspective: Focus on the total cost of ownership—including energy savings and maintenance—over the door’s 20-year lifespan.
FINAL DECISION
Selecting the right front door brings lasting security and beauty to your home entry.
You have gathered the technical data and analyzed your home’s needs, so it is time to move from research to your final purchase. A front door is a 20-year decision, so take a final breath and use this scorecard to ensure you are not rushing the process for the sake of a sale.
The Front Door Scorecard
- Style Match: Does the geometry of the door repeat your home’s existing window shapes and architectural rhythm?
- Performance: Does the slab meet your local climate needs with a low U-factor and ENERGY STAR certification?
- Security: Have you confirmed the strike plate uses 3-inch screws and the deadbolt features a 1-inch throw?
- Maintenance: Are you honest with yourself about your willingness to perform annual sealing or monthly cleaning?
- Total Budget: Does your plan account for the slab price plus the 20% buffer for installation incidentals?
Before you commit, verify your rough opening dimensions one last time to avoid the cost and delay of a return. Ensure you have a clear plan for the disposal of your old door, as this is a weight-heavy item that often requires professional removal or a dedicated haul-away service.
Pro Tip: If your measurements fall outside the 36-inch by 80-inch standard, contact your supplier immediately to confirm lead times for custom sizes before finalizing any deposits.
Trust the framework you have built throughout this process. You are now prepared to choose a door that balances your home’s aesthetic with the long-term value you expect.
.
⚖️ Quick Decision Guide: Which Door Fits Your Future?
- Choose steel if: You prioritize maximum security and budget efficiency over the natural, high-maintenance character of wood.
- Skip wood if: You prefer a “set it and forget it” lifestyle, as it demands bi-annual sealing to prevent rot.
- Pair it with: A PVD-finished hardware set to ensure your handle and deadbolt stay tarnish-free for years to come.
With all twelve factors now on the table, the path to a high-performing entry selection becomes much clearer. You do not need to address every technical detail at once to see a significant return on your investment. Focusing on the one or two trade-offs that align with your climate and maintenance preferences is what truly ensures a long-term result.
A door that looks correct for your architecture while working efficiently for your lifestyle is rarely about doing everything. It is about making the right call on the structural priorities first. Once you secure the foundation with a solid choice, the rest is just refinement.