

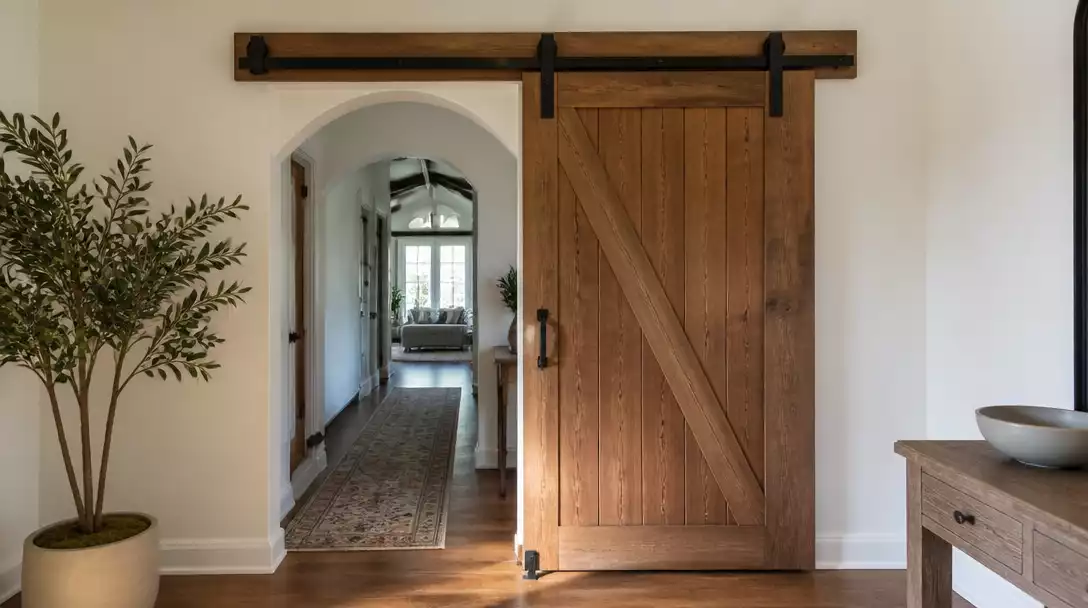
Installing a barn door over an arched opening is a significant structural challenge that requires precise planning to maintain your home’s integrity. This guide narrows the technical requirements down to 12 essential checkpoints so you can decide with confidence. Let’s start with the reality of this application.
The Short Answer
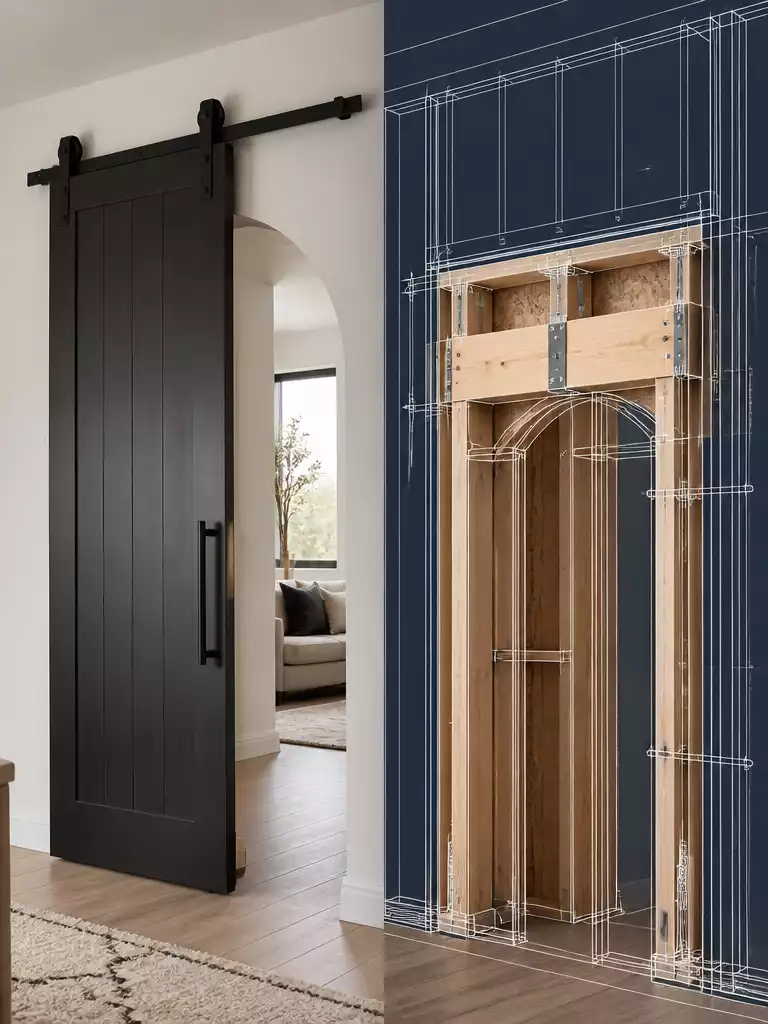
Achieve the perfect balance between classic arched architecture and modern sliding door functionality.
As an Amazon Associate I earn from qualifying purchases. Affiliate links may earn me a commission at no extra cost to you.
You can certainly install a barn door over an arched opening, but it is a custom application rather than a standard plug-and-play project. You are essentially bridging the gap between two opposing geometries: the flexible, curved aesthetic of your arch and the rigid, level plane required for sliding hardware.
Because barn doors operate on a perfectly horizontal steel track, the mechanics do not naturally align with a rounded top. This is an advanced project that demands careful structural planning rather than a quick weekend DIY for beginners.
Why Big-Box Kits Often Fail Here
Standard kits purchased from big-box retailers are designed for flat, rectangular door frames. They rarely account for the structural header work needed to support a track above an arch, often leading to hardware failure or damaged drywall if attempted without a proper foundation.
Success relies on a structural-first mindset where you prioritize the mechanics of the track over the existing trim. Now that we know it is possible to achieve this look, we should look at exactly why these openings present such a significant mechanical challenge.
⭐ Top Door Hardware for Your Home
Matte Black Heavy Duty Interior Door Hinges
Heavy Duty Rubber Front Door Entry Mat
Funny Non Slip Indoor Welcome Door Mat
🔢 The Right Sequence
Following this specific order prevents costly structural mistakes and ensures your hardware mount is rock-solid before you ever hang a door.
- Audit your structure: Verify a load-bearing header exists behind the wall, not just drywall.
- Measure clearances: Confirm the 6-inch vertical space and 2x width requirements are met first.
- Install the ledger: Secure a header board to the studs to provide a level mounting surface.
WHY ARCHED OPENINGS COMPLICATE A BARN DOOR
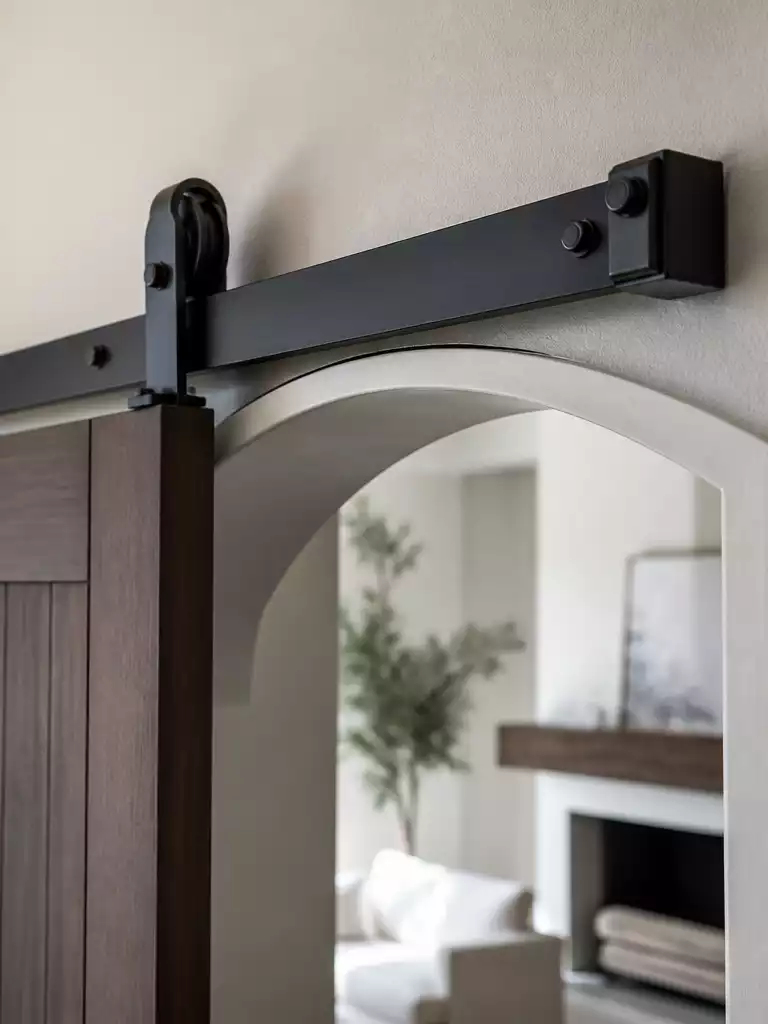
Understanding the geometric friction between your home’s unique curves and modern sliding hardware.
The primary challenge with an arched opening is a fundamental conflict of geometry. Barn door hardware requires a perfectly level, horizontal mounting line to function, while an arch is defined by its curve and lack of a flat top.
When you attempt to bridge this gap, you are essentially trying to impose a linear system onto a non-linear space. Without proper planning, this results in an awkward, gaping void at the top corners of your door frame.
Safety Warning: The Mounting Trap
Never attempt to mount a heavy steel track directly into decorative door trim or thin drywall. These surfaces lack the structural integrity to support the weight of a moving slab, which can lead to hardware failure and significant damage to your walls.
Standard door frames are rarely designed to handle the localized stress of a sliding track system. The weight of the door is concentrated at the mounting points, which must be anchored into solid structural studs or a dedicated header board.
If you rely on the existing casing to support the hardware, you are inviting structural failure. Structural planning must always precede aesthetics to ensure the installation remains safe and functional over the long term.
⭐ Why Arched Openings Need Special Care
Waterproof Non Slip PVC Front Door Mat
Large Colorful Dog Paw Print Door Mat
Blue Heavy Duty Non Slip Entrance Mat
📋 Quick Reality Check: Is Your Arch Ready?
- Structural Header: Inspect for a solid wood beam behind the drywall above the arch; never anchor hardware into hollow plaster or light framing.
- Clearance Path: Confirm that no light switches, thermostats, or electrical outlets exist within the full travel distance of your sliding door panel.
- Wall Integrity: Verify your wall material is capable of holding heavy-duty lag bolts, as masonry or stud-less walls may require specialized mounting reinforcements.
Wall Space Above the Arch
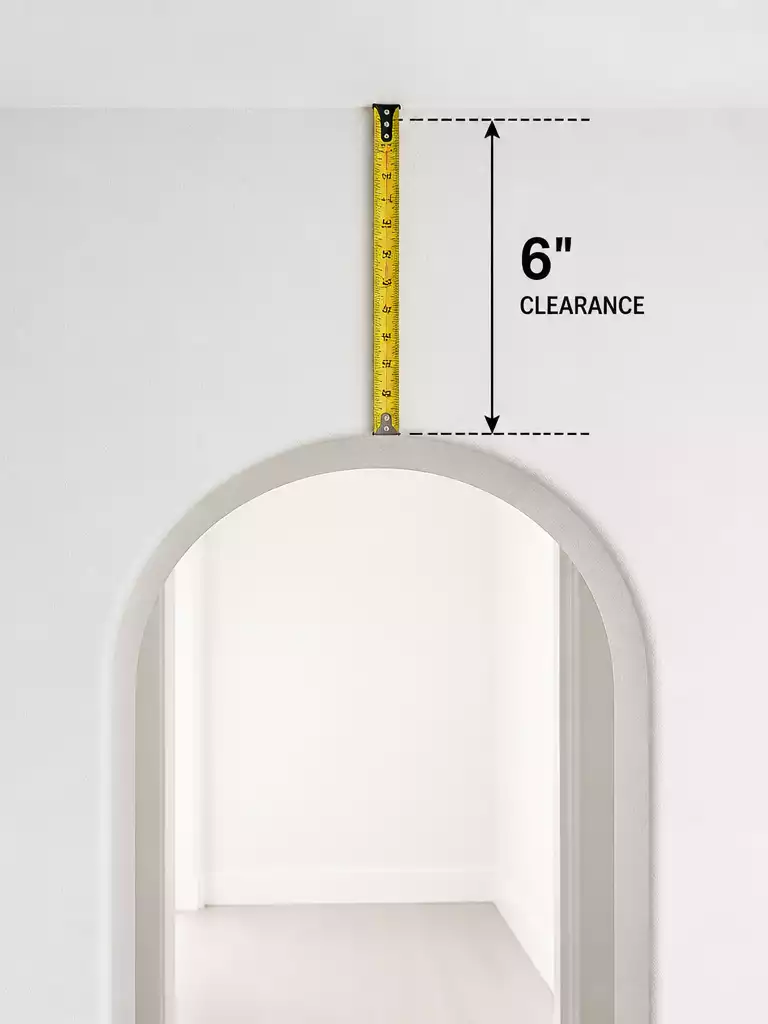
Getting this measurement right is the single biggest factor in your installation success.
The 6-inch rule is the most critical benchmark for any sliding barn door project. This measurement represents the vertical distance required between the highest point of your arch and the ceiling above it.
Standard barn door track systems typically require this full 6-inch clearance to house the rail, the hangers, and the anti-jump devices safely. If your available space is less than this, you will likely hit a dead end with standard hardware kits.
Low-Profile Workarounds: Some specialized low-profile kits may allow you to squeeze into a 3-to-4-inch clearance range.
However, if you have less than 3 inches of vertical space, the door cannot physically operate. In these scenarios, the door hardware will conflict with the ceiling line, making installation impossible without significant structural modifications.
When you measure your opening, start your tape at the very apex of the arch and pull it taut to the ceiling. If you have an irregular ceiling or a sloped roofline, you must measure from the lowest point of the ceiling across the entire width of the door’s path.
Even if the apex has plenty of room, a sagging ceiling or a low-hanging bulkhead elsewhere in the door’s travel path will stop the hardware in its tracks. Always prioritize the narrowest measurement you find to ensure the rail fits across the entire span.
Avoid the “Just Make It Fit” Trap:
Do not attempt to modify the ceiling or the architectural arch simply to gain an extra inch of track space. If your measurements fall below the 3-inch absolute minimum, it is time to pivot to a different door style rather than forcing a compromised installation.
⭐ Wall Space Above the Arch
Dog Claw Print Non Slip Floor Mat
Orange Colorful Non Slip Entrance Floor Mat
Self Adhesive Wall Mounted Cat Scratch Mat
📋 Quick Reality Check: Your Vertical Clearance
- Ceiling consistency: Scan the entire path for hidden obstructions like crown molding, HVAC vents, or recessed lighting.
- Hardware footprint: Confirm your specific kit’s total height, as some decorative hanger designs require more clearance.
- Structural reality: Verify that the wall above the arch can support a heavy-duty header board without cracking.
Clear Wall Space Beside the Arch
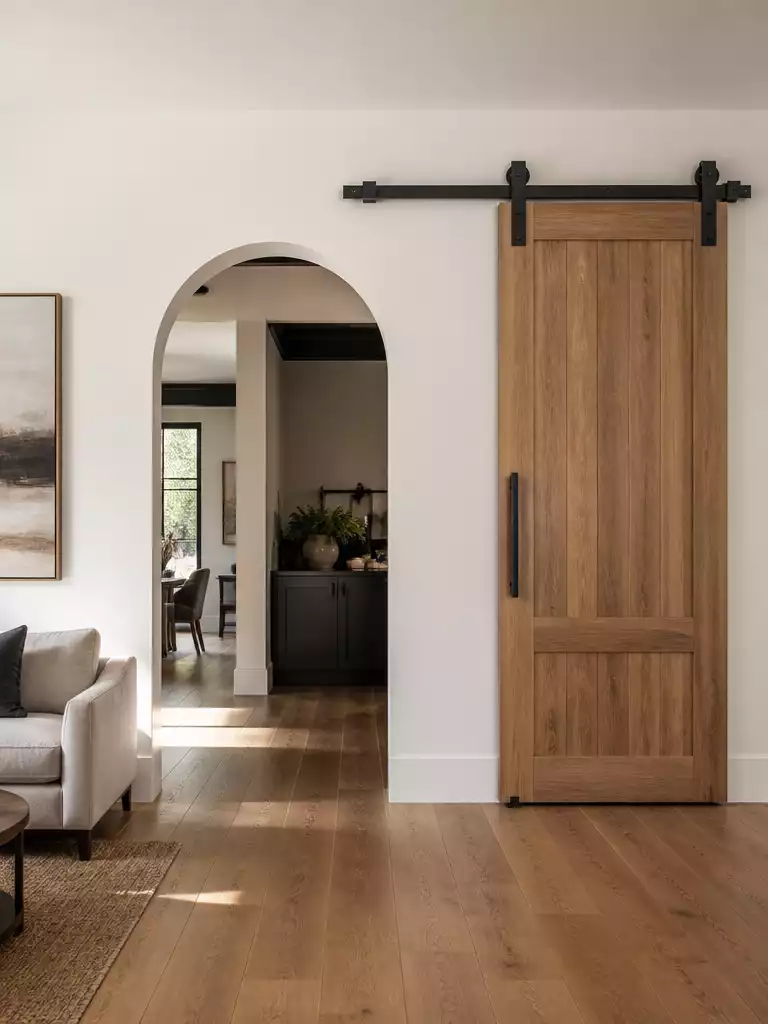
A properly parked barn door creates a clean, intentional look when your wall space is clear.
Many homeowners focusing on the arch itself forget that a barn door never truly disappears. It simply slides to a new location on your wall.
To ensure your door functions properly, you must follow the 2x width rule. If your arched opening is 36 inches wide, you need at least 36 inches of clear, unobstructed wall space to the side for the door to slide fully open.
The “Clear Wall” Definition
“Clear” means more than just empty floor space. You must ensure there are no light switches, thermostat controls, decorative wall sconces, or protruding crown molding within that travel path.
If you find that your wall space is interrupted by an outlet or a switch, you have two choices. You can either relocate the electrical components before beginning the installation, or you may need to reconsider the door type entirely.
Mistake to Avoid
Do not attempt to shorten the door width to fit a cramped wall space. A barn door that is narrower than your opening will fail to provide the privacy and light control you expect from a door.
If your layout simply cannot accommodate a full-width sliding path, a bifold barn door is the only practical alternative. This configuration allows the door to fold back on itself, effectively halving the amount of lateral wall space required while still maintaining the barn door aesthetic.
⭐ Clear Wall Space Beside the Arch
Large Rubber Entry Mat for Double Doors
📋 Quick Reality Check: Mapping Your Wall Space
- Check for obstructions: Inspect the full travel path for hidden electrical boxes or low-profile heating vents that could stop the door.
- Verify wall studs: Ensure your wall space has sufficient stud alignment to support the track and the door’s significant weight.
- Assess casing depth: Measure how far your current door trim projects; you may need extra-long wall spacers to ensure the door slides freely.
Navigating structural constraints often feels like a high-stakes calculation, but the reality of long-term functional satisfaction depends on just a few precise adjustments. Focusing on these core elements ensures your interior door choices provide lasting value without requiring an overwhelming overhaul of every detail.
Securing a stable mounting surface and accurate measurements are the only two variables that genuinely dictate the long-term success and reliable performance of your installation.
Track Height and Header Clearance
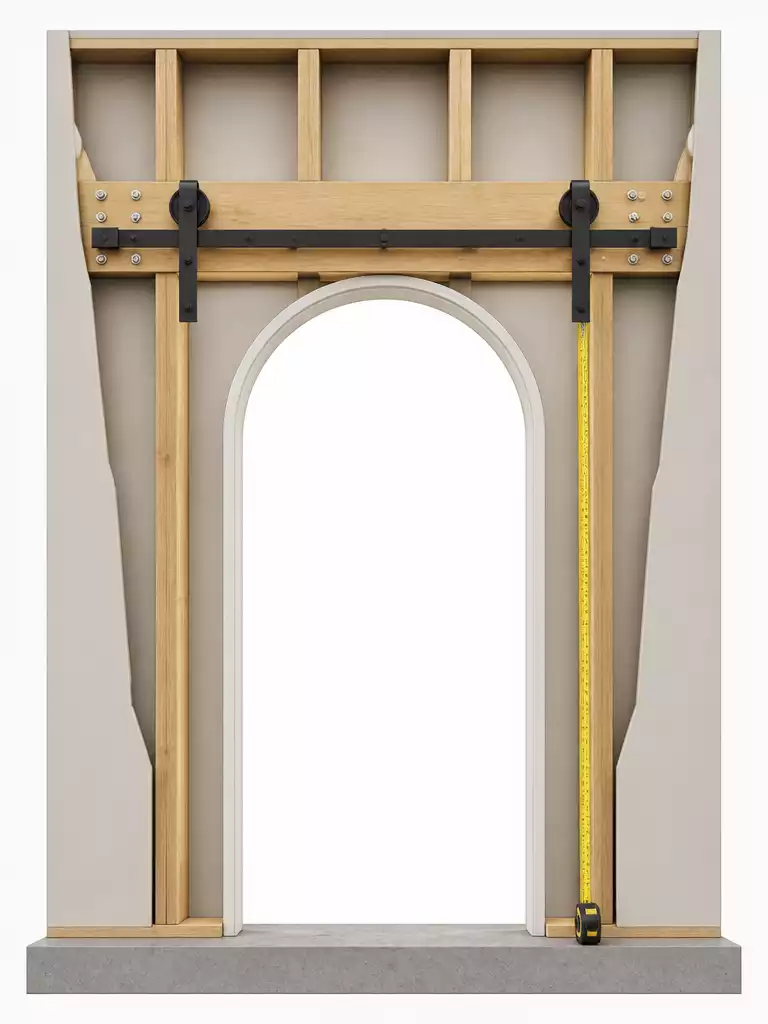
Getting the structural foundation right ensures your barn door operates safely and lasts for years.
The most common failure point for these installations is attempting to mount track hardware directly to existing door trim or drywall. These surfaces lack the necessary structural integrity to support the weight of a sliding door, which can lead to hardware loosening or complete failure over time.
Never mount your barn door track directly to door casing or drywall. You must anchor the hardware into a structural header to ensure the system can safely support the door’s weight.
To solve this, you need to install a ledger board, also known as a header, that spans the studs above your archway. This board creates a rock-solid, flat, and horizontal surface that is perfectly level, providing a stable anchor for your steel track.
When planning your installation, you must calculate the exact placement of this board to ensure the door clears the floor and the arch correctly. Use the following formula to determine your total layout:
- [Header Height] + [Hardware Clearance] + [Floor Gap] = [Total Installation Height]
You have two primary options for how this board looks once installed. You can paint it to match your wall color so it effectively disappears, or you can use a high-quality finished wood that provides a deliberate, contrasting design feature.
Regardless of the aesthetic choice, the board’s function as a load-bearing anchor is the non-negotiable part of the project. Once this flat surface is secured to the studs, your track hardware will have the stability required for long-term, trouble-free operation.
⭐ Track Height and Header Clearance
Extra Large Monogram Coir Front Door Mat
🔢 The Right Sequence
Getting the installation order wrong often forces you to drill into your finished wall twice. Follow this sequence to prevent structural rework.
- Locate wall studs precisely using a deep-scan stud finder.
- Secure the header board to studs using structural-grade lag screws.
- Mount the steel track to the header, verifying level at every bolt.
SQUARING THE PANEL TO COVER THE ARCH
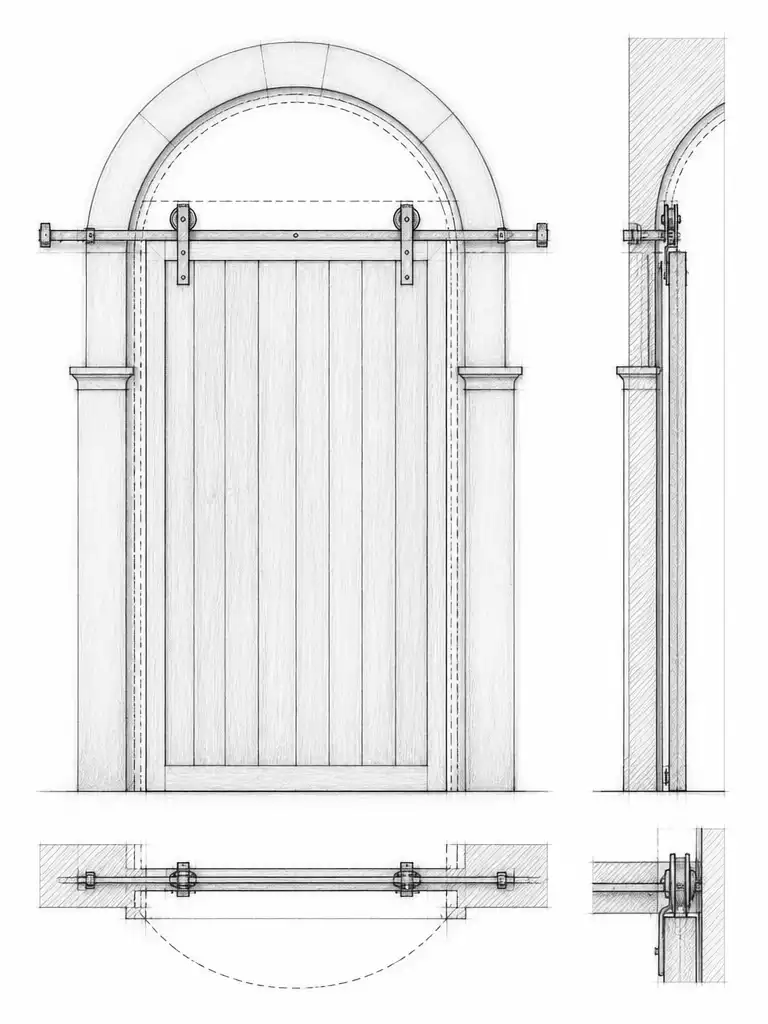
A clean rectangular barrier is the secret to a functional and secure sliding installation.
The most important mental hurdle in this project is abandoning the idea that the door must reflect the shape of the opening. Because barn doors operate on a perfectly level, linear track, they require a rectangular barrier to function properly.
Attempting to cut a door to follow the curve of an arch often leads to massive light gaps and alignment failures. Instead, treat your rectangular door panel as the primary reference point for the entire installation.
The Rectangular Standard: Using a square-edged door ensures that your hardware remains level throughout the entire travel path. This provides the consistent seal required to meet the wall casing effectively.
By keeping the panel rectangular, you ensure that the door has a straight edge to rest against the wall framing as it closes. This approach prioritizes structural integrity over mimicking the aesthetic of the arch itself.
If you find that a standard rectangle looks too heavy against your opening, remember that the door’s job is to block the void. A properly fitted rectangular panel creates the clean, custom look you want while keeping the mechanics reliable and simple.
⭐ Squaring the Panel to Cover the Arch
Letter C Monogram Coir Entrance Door Mat
⚖️ Quick Decision Guide: Choosing Your Panel Strategy
- Choose a rectangle if: You prioritize reliable function, a consistent seal against the wall, and easier installation without complex millwork.
- Skip the rectangle if: You are committed to showing
OVERSIZED RECTANGULAR PANEL METHOD
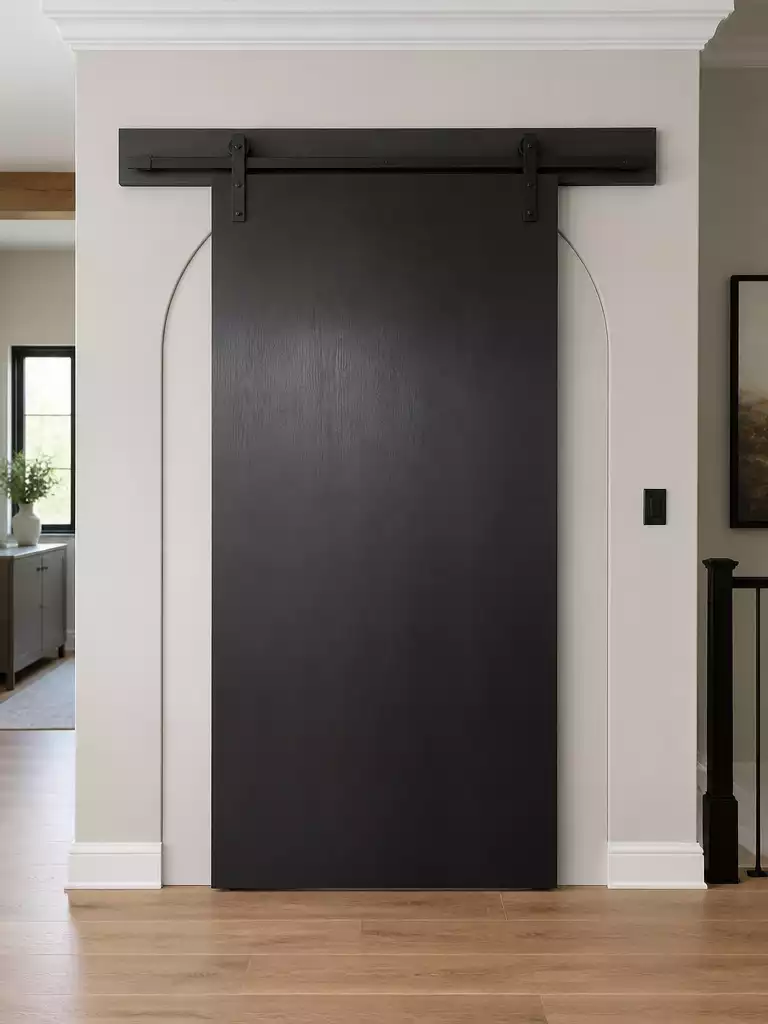
Achieve clean lines and complete privacy by sizing your door to fully conceal the arch.
When you opt for a rectangular barn door over an arch, the most effective approach is the oversized panel method. You avoid the mechanical nightmare of trying to cut a door to match an arch, instead using a standard slab that simply covers the entire opening.
The 1-2 Inch Rule: Aim for a door panel that is 1 to 2 inches wider than the opening on both the left and right sides. This adds a total of 2 to 4 inches to the overall width, ensuring the door overlaps the casing or wall edge entirely when closed.
You also need to verify that your panel height clears the apex of the arch. A door that is too short will leave an awkward visible gap at the highest point of the curve, which destroys the sleek aesthetic you are aiming for.
Hardware Capacity Warning: Because you are using an oversized slab to ensure full coverage, the weight of the door will be higher than a standard hollow-core option. Always confirm your track hardware is rated for the specific weight of a solid-core or heavy-duty material to prevent sagging or track failure.
This method provides the most reliable way to maintain visual privacy. By ensuring the panel extends well beyond the edges of the arch, you eliminate the risk of accidental line-of-sight into the room.
⭐ Oversized Rectangular Panel Method
✨ Editor’s PickPlain Oversized Blank Coir Door Mat
★★★★★Our Score: 5.0/5This oversized blank mat provides the perfect rectangular foundation for covering your arched doorway opening effectively.✨ Finishing Touches
Small adjustments ensure your oversized door doesn’t just block the arch, but integrates seamlessly into your wall’s visual flow.
- Color Matching: Paint the door the same shade as your wall to minimize the visual weight of an oversized slab.
- Symmetry Check: Ensure your overlap is equal on both sides so the door looks intentional rather than accidentally misaligned.
Arched Panel Cut to the Opening
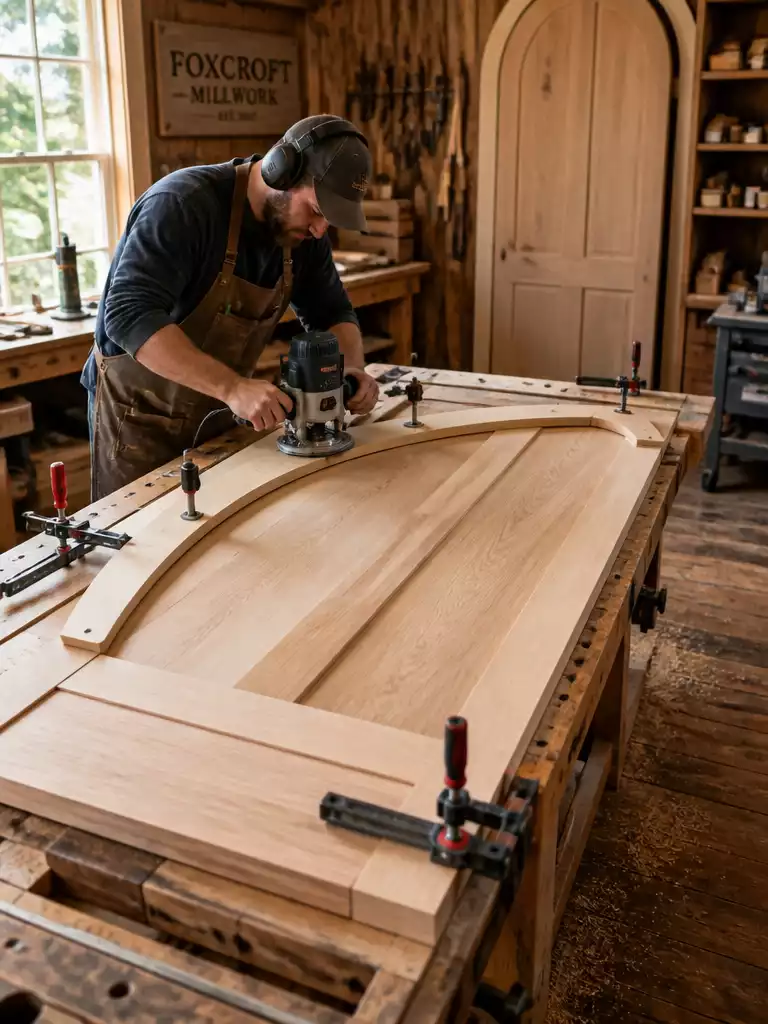
Achieve a sophisticated, custom-fit look by precision-cutting your door to mirror your unique archway.
For homeowners who want the arch to remain visible even when the door is closed, a standard rectangular slab will not suffice. This method requires custom millwork to create a door that perfectly mirrors the curve of your opening.
You must approach this as a template-based project rather than a simple hardware assembly. You will need to start with a rectangular slab and then use a flush-trim router to physically cut the door to match the arc of the opening.
Critical Build Requirement: To ensure the door does not warp or lose structural integrity after the curve is cut, the slab must be at least 1-inch thick. Thinner materials are prone to bowing along the cut line, which will ruin the seal and the look of the project.
This is arguably the most difficult method for a residential barn door installation. It demands significant woodworking precision, as even a small error in the template or the router pass will be immediately visible.
Warning: This is a professional-grade project requiring advanced skill. If you are not comfortable using a router to modify expensive door materials, we strongly suggest hiring a local carpenter to handle the template creation and precision cutting.
Because this process removes the factory-finished edge of the door, you must also be prepared to sand and refinish the exposed wood fibers along the curve. Proper sealing of this edge is essential to prevent moisture absorption and long-term movement in your custom panel.
⭐ Arched Panel Cut to the Opening
✨ Editor’s PickLetter B Monogram Coir Entrance Door Mat
★★★★★Our Score: 5.0/5This durable mat provides a stable base for custom projects when shaping your arched panel.🧰 Questions for Your Installer:
- Template creation: How do you plan to trace the arch template to ensure a perfectly smooth, symmetrical cut?
- Edge refinishing: Will the exposed wood grain be sealed and color-matched to the original factory finish?
- Structural rigidity: Can you confirm the door slab remains stable enough to prevent bowing after the curve is cut?
TRIM AND CASING CONFLICTS
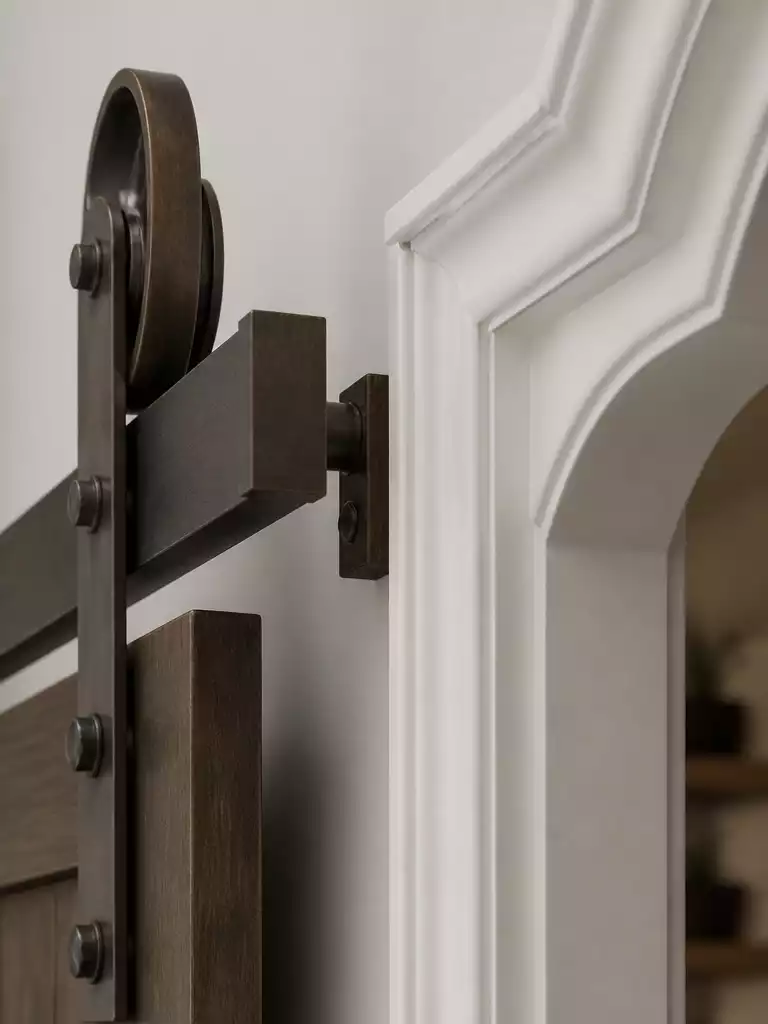
Proper hardware spacing ensures your door glides smoothly without catching on decorative trim.
Most arched openings feature decorative casing that protrudes further from the wall than the door itself. If you attempt to mount a track directly to the wall, the door will collide with this trim before it can fully open or close.
The solution is to use specialized track spacers or standoffs to push the rail further out from the wall surface. These components create the necessary clearance for the slab to bypass the molding without friction.
The Header Board Advantage
Instead of relying solely on spacers, installing a header board is the preferred method for managing trim depth. By mounting a flat board that matches your wall color, you create a solid, uniform surface that projects the entire track assembly out past the casing.
If your existing trim is exceptionally ornate or unusually deep, you may need to reconsider your approach entirely. In some cases, removing the heavy casing and replacing it with a thinner, flat-profile trim allows for a much cleaner installation.
Avoid This Common Mistake
Never attempt to anchor your track hardware directly into the trim or casing itself. Decorative molding lacks the structural integrity to support the weight of a heavy door, which will inevitably lead to hardware failure and potential wall damage.
Always verify the total thickness of your casing before ordering your hardware kit. You need to ensure the selected standoffs provide enough projection to clear the most prominent point of your trim profile.
⭐ Trim and Casing Conflicts
✨ Editor’s PickWildflower Spring Layering Front Door Mats
★★★★★Our Score: 5.0/5Use these layered mats to create a stylish base that helps mask uneven casing conflicts effectively.💡 Why This Works
Using a header board creates a continuous, straight plane that masks the irregularities of an archway. By off-setting the track from the wall, you eliminate the friction caused by decorative casing, allowing the door to slide perfectly flush without snagging on the trim’s ornate profile.
Design Cohesion: Paint the header board to match your wall color so the hardware appears to float seamlessly.
Light Gaps Around the Curve
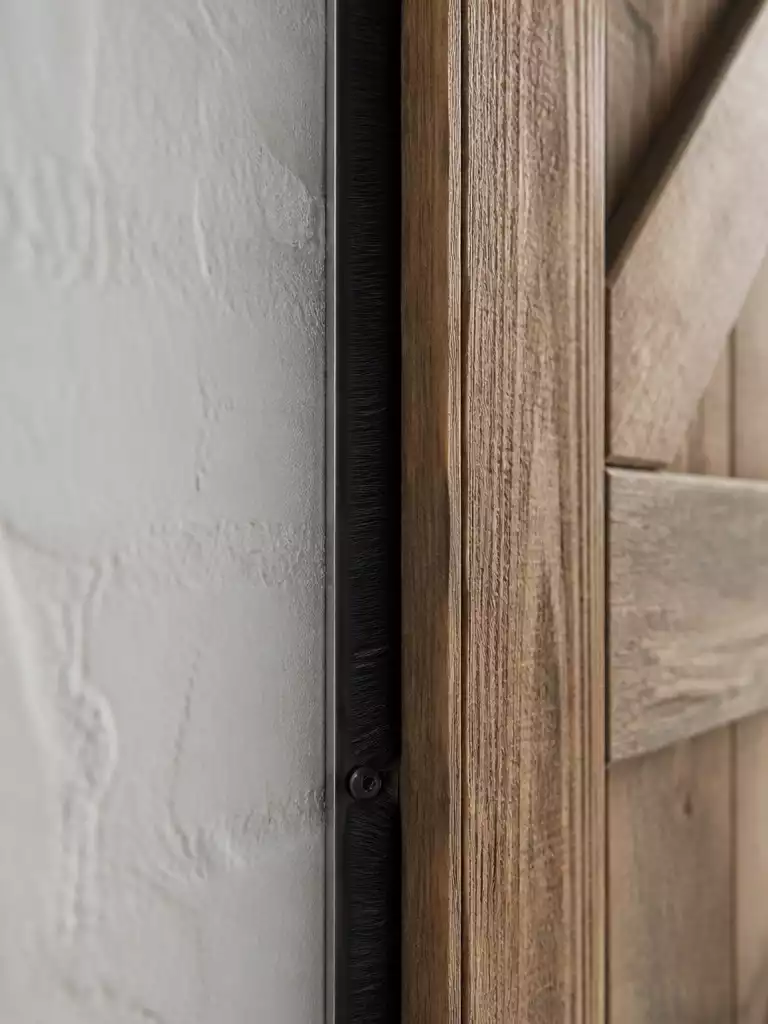
Achieve a cleaner look and better privacy by effectively sealing the inevitable gaps around your archway.
A barn door is a sliding mechanism by design, which means it will never offer the airtight seal of a traditional hinged door. When installed over an arched opening, this reality becomes even more apparent because the door hangs slightly away from the wall to clear the casing.
You will likely notice light peaking through at the top curve and along the sides. To minimize this, you should incorporate weatherstripping into your installation plan.
Key Insight: Standard rubber gaskets can create excessive friction that makes the door heavy to slide. Brush seals are generally superior for sliding applications because they provide a flexible, light-blocking barrier without hindering the door’s movement.
You can apply self-adhesive EPDM weatherstripping or brush seals directly to the back of the door panel or the mounting header. These materials are low-profile and can be color-matched to your trim or door finish to remain nearly invisible.
Privacy Checklist:
- Verify the gap distance between your wall and the door panel.
- Select a brush seal height that spans the entire gap without binding.
- Apply seals to the header board to address light leakage at the arch apex.
- Test the door travel for any friction points before finalizing the adhesive.
If you require complete soundproofing or total light blockage, please be aware that these seals only mitigate the issue rather than eliminating it. For rooms where near-total privacy is a requirement, you may need to look at alternatives to the sliding barn door format.
⭐ Light Gaps Around the Curve
✨ Editor’s PickCoastal Nature Coir Front Door Mat
★★★★★Our Score: 5.0/5Use this durable mat to help block light gaps and drafts around your arched doorway entrance.🏡 How This Works in a Real Home:
- Testing light leakage: Hold a bright flashlight against the door’s edge at night to pinpoint exactly where light escapes before buying expensive seals.
- Daily maintenance: Keep the track free of debris; even minor dust buildup can cause the door to hang unevenly, widening those light gaps over time.
- Natural blending: Choose black or dark grey brush seals to match common hardware finishes, ensuring the seal looks intentional rather than like an obvious add-on.
WHEN A POCKET OR SWING DOOR IS BETTER
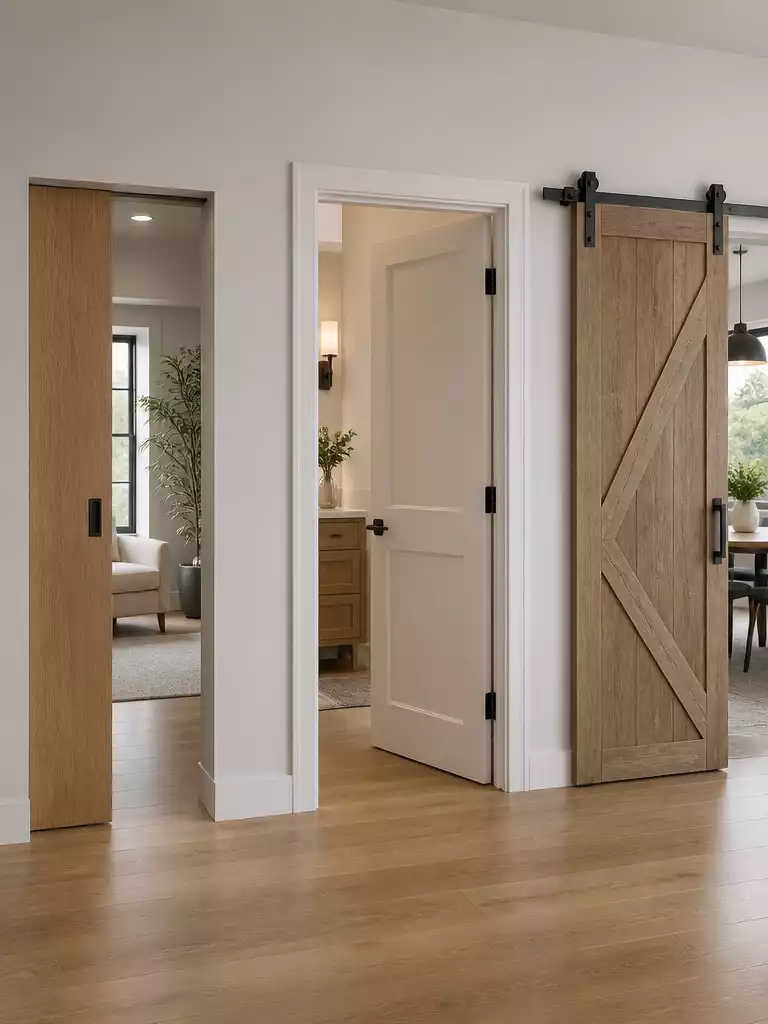
Choosing the right door function ensures long-term privacy and structural reliability for your home.
Sometimes, the aesthetic appeal of a sliding barn door simply does not align with the functional demands of your space. If your room requires genuine soundproofing or complete visual privacy, a barn door will likely fall short because it does not seal against the wall frame.
Pocket doors represent a superior choice when wall space is non-existent. Because they slide into a hidden cavity within the wall, they provide a clean, flush appearance without requiring any clearance on the adjacent wall surface.
Swing doors remain the gold standard if you cannot modify your wall structure or if the opening is in a high-traffic area. They offer the best seal against light and sound, making them ideal for bedrooms or home offices where quiet is a priority.
When to abandon the barn door project:
- You lack the wall space for a 2x width clearance.
- The room requires significant sound dampening or privacy.
- You are unable to install a structural header board securely.
- The proximity of light switches or outlets creates an unavoidable conflict.
Do not force a sliding mechanism into an opening that lacks the necessary footprint just to follow a trend. If your space constraints prevent a safe and functional installation, choosing a traditional door style will yield better long-term results for your home’s utility.
.
🔢 The Right Sequence to Decide
Following this order prevents expensive structural mistakes before you commit to a specific door type.
- Audit your wall space: Measure for the 2x width requirement to ensure the door can fully clear.
- Test your privacy needs: Evaluate if a non-sealing barn door actually meets your daily sound and light requirements.
- Verify structural capacity: Confirm you have a solid header or stud placement to support the weight of your chosen door.
FINAL VERDICT
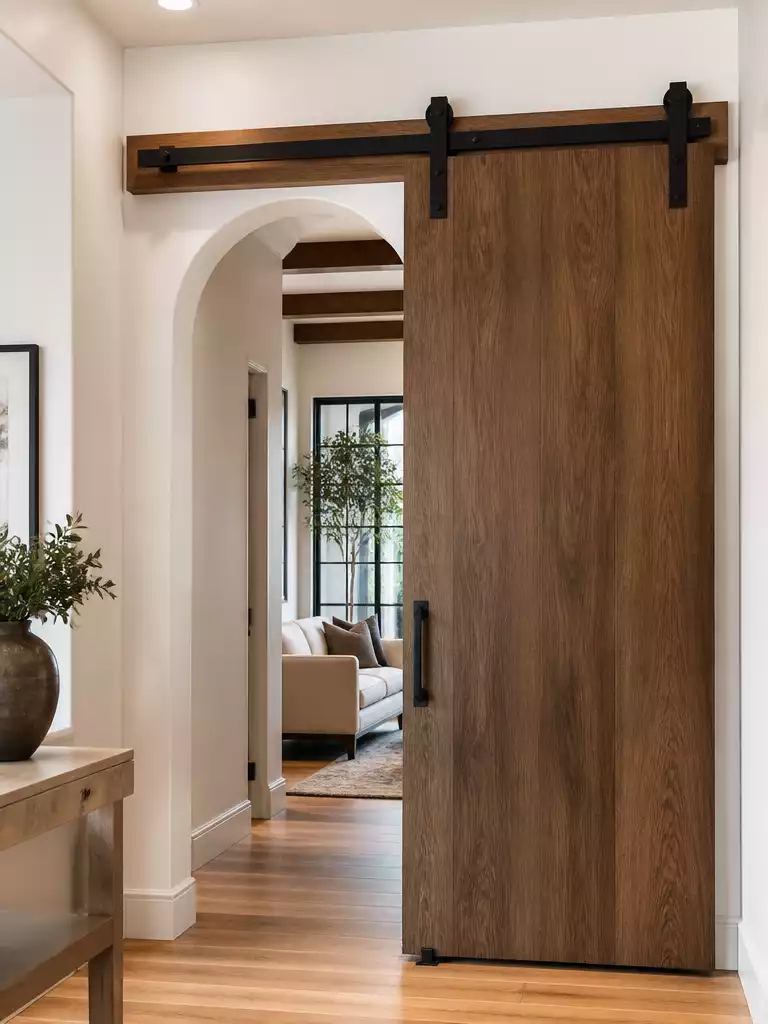
A well-executed custom barn door honors the architecture of your home while adding modern functionality.
Fitting a barn door over an arch is not a standard weekend project; it is a custom architectural workaround. You are essentially forcing a linear, level system to interact with a geometric curve, which requires significant planning rather than simple installation.
If you possess the necessary vertical clearance, a solid structural header, and the patience for custom millwork, this project delivers a high-impact upgrade. It turns a challenging opening into a unique focal point that elevates the character of your entire space.
The Decision Checklist
- Structural Integrity: Do you have a solid header board mounted to studs, or are you trying to anchor into drywall?
- Mechanical Necessity: Have you installed mandatory anti-jump devices and floor guides to keep the door secure?
- Clearance Check: Is there enough wall space for the door to slide fully open without hitting switches or trim?
Avoid this project if you are looking for a quick, plug-and-play solution or if your space lacks the required wall run. Forcing a barn door into a space that doesn’t meet these structural requirements often leads to hardware failure and a compromised aesthetic.
If your primary goal is soundproofing or maximum privacy, the inherent light gaps of a sliding door may leave you unsatisfied. In those cases, a pocket door or a traditional swing door—which seals more effectively—remains the superior choice for your home’s long-term utility.
Warning: Never attempt to mount a heavy barn door track directly to door casing or drywall. Without a structural header to distribute the weight to the wall studs, the hardware will eventually pull away, causing damage to your walls and creating a safety hazard.
⭐ Final Verdict on Arched Doorways
✨ Editor’s PickRustic Wooden Plank Vintage Barn Door Mat
★★★★★Our Score: 5.0/5This rustic mat provides a perfect finishing touch for your custom arched barn door installation project.📈 The Long-Term Payoff
Installing a high-quality barn door over an arch is an investment in architectural character. When executed with a solid header and professional hardware, it creates a unique, permanent feature that buyers often find appealing. However, if the hardware or mounting is temporary or poorly aligned, it can be viewed as a liability that requires costly correction.
Resale Strategy: Choose neutral finishes and heavy-duty hardware that ensure the door functions as smoothly as a standard wall partition.
You now have the full set of twelve technical checkpoints to evaluate how a sliding mechanism interacts with your existing archway. Focus on the measurement and header requirements first, as these two decisions dictate the success of the entire installation.
A sophisticated result is built on sound structural planning rather than implementing every detail from this list. Once you confirm your clearance and wall space, you can choose your door style with total confidence.
Related posts:




