Updating your door decoration is a simple way to add character to any room without heavy construction. This guide rounds up 10 door ideas worth saving to help you choose the right look for your home. Let’s get started with your first project.
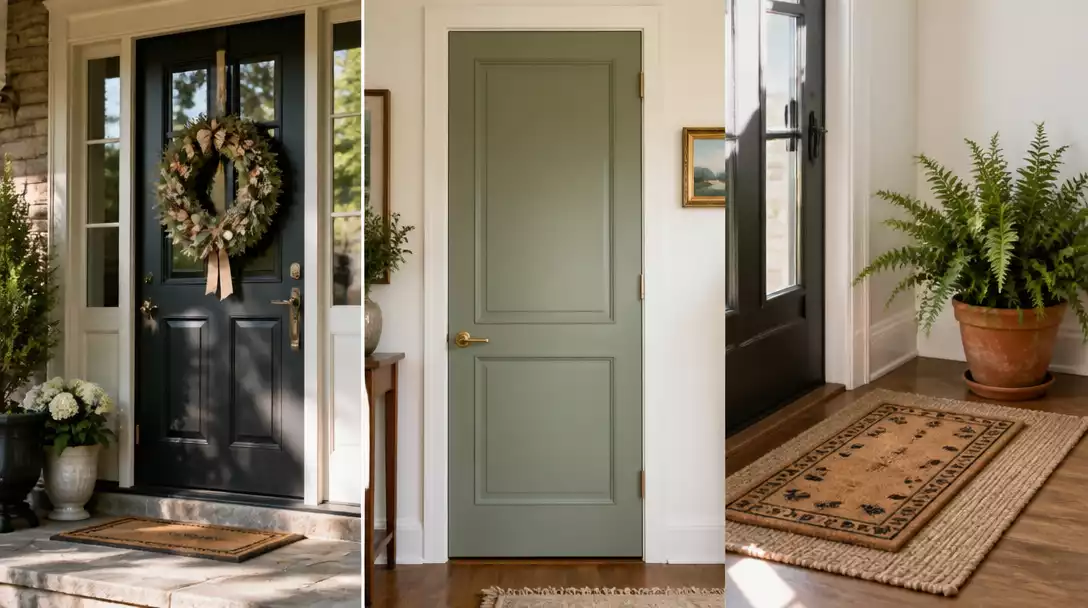
Seasonal Door Wreath
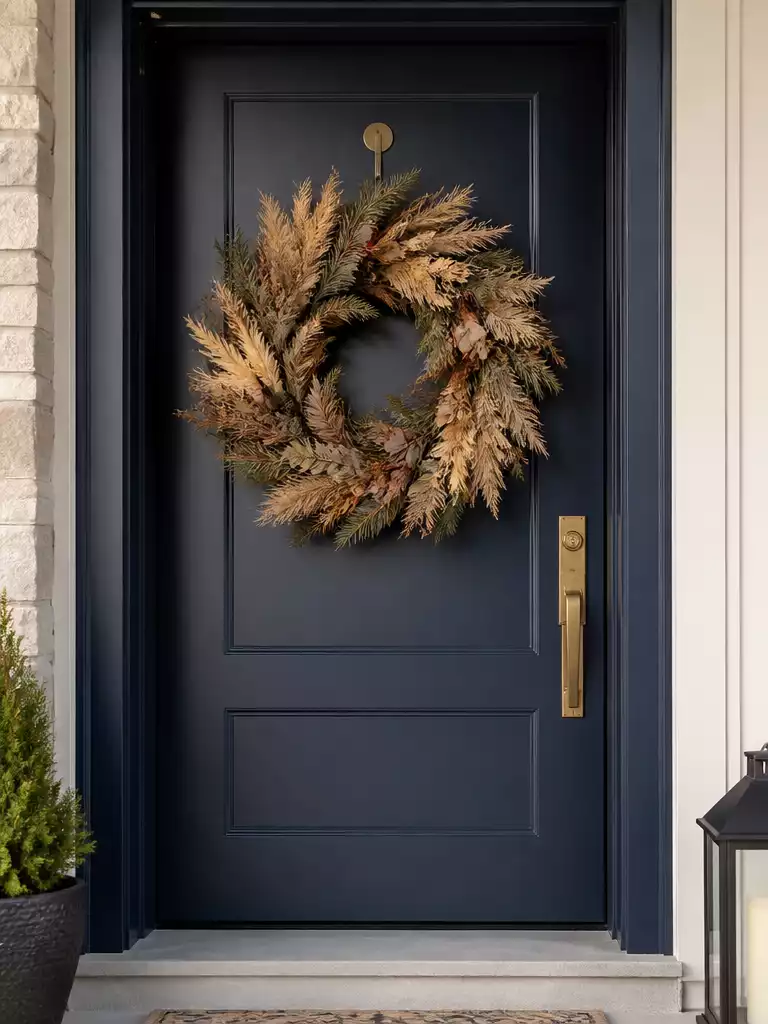
Refresh your home’s curb appeal with a custom wreath that changes with every season.
As an Amazon Associate I earn from qualifying purchases. Affiliate links may earn me a commission at no extra cost to you.
Walking up to your home should feel like a mood shift, and a well-styled wreath is the quickest way to set that tone. When you combine texture layering—think dried grasses for autumn or lush pine for winter—you move past the generic store-bought look.
The biggest mistake people make is choosing a wreath that looks “lost” against the door. Aim for a diameter that covers about two-thirds of the door’s width to ensure it feels intentional rather than like an afterthought.
The Depth Rule
To avoid the flat, lifeless look of a single-plane circle, always choose wreaths with varying foliage heights. By nestling deeper-toned branches behind lighter floral sprigs, you create a dimension that catches the eye from the street.
Installation matters just as much as the design, especially if you want to keep your door finish pristine. Skip the over-the-door metal hangers that can scrape the top of your frame and instead use clear, damage-free magnetic hooks for steel doors.
If you have a wood door, look for felt-backed adhesive hooks to prevent surface scratches. Your front door is just the beginning; next, we’ll look at how to frame your entryways with permanent architectural molding.
.
💡 Why This Works:
A wreath acts as a focal point that anchors the door, drawing the eye toward the hardware and threshold. By layering different textures, you create a sense of depth that makes the entrance feel custom and inviting, effectively softening the sharp lines of a standard door frame.
Instant Curb Appeal: A well-scaled wreath creates an immediate, welcoming visual impact that upgrades your home’s exterior character.
Framed Door Trim Molding
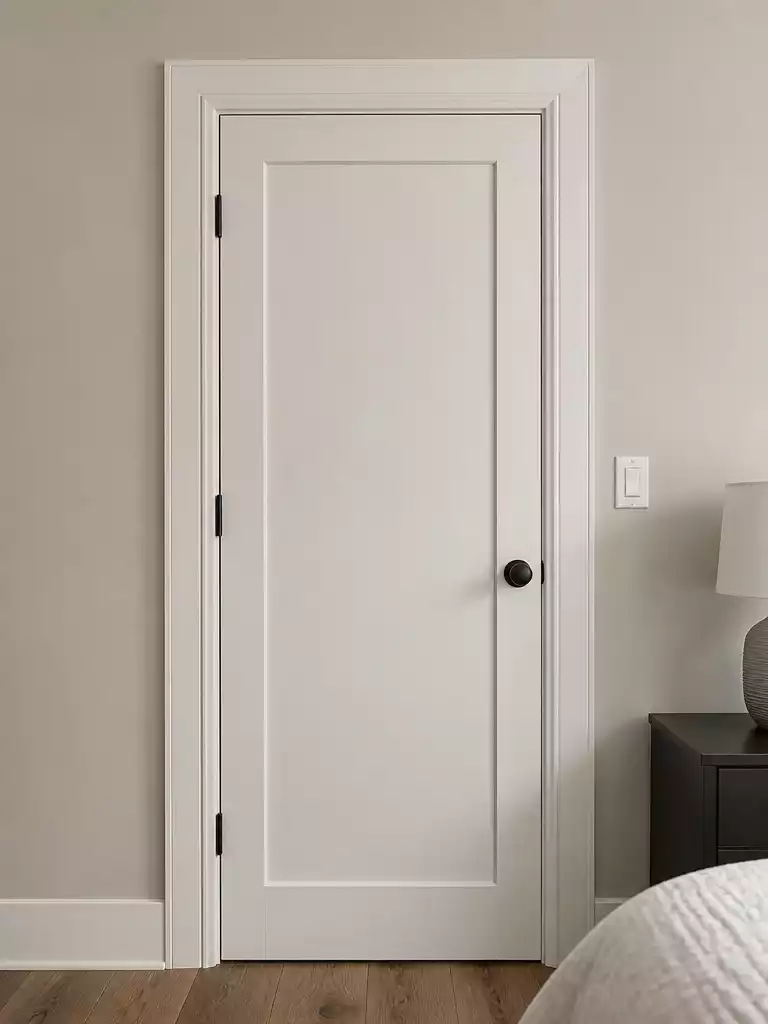
Give flat slab doors a custom, architectural profile with simple geometric trim work.
A plain slab door often feels like a missed opportunity for character, especially in newer “builder-grade” homes. Adding box trim or shaker-style molding allows you to create a high-end, custom look without the expense of replacing the entire door unit.
The secret to success here is precision. You are essentially creating a geometric frame that adds visual weight to the flat surface, so your measurements for the border gaps must be perfectly consistent.
Pro Tip: Skip the adhesive-only approach if you want this to last. Use wood glue and finish nails to secure the MDF or wood strips, ensuring they stay firmly attached through the constant vibration of opening and closing the door.
Before you head to the hardware store, gather these essential items to ensure your project looks professional:
- Miter saw or a high-quality miter box for clean corner cuts.
- Finish nailer or hammer with 1-inch finish nails.
- Wood glue for long-term stability.
- Painter’s tape to hold pieces in place while the glue sets.
If you want a seamless, high-end appearance, paint the new trim the exact same color as the door slab. This monochromatic approach highlights the geometric shadows created by the molding rather than making the door look busy or cluttered.
.
📋 Quick Reality Check Before You Cut:
- Hardware clearance: Measure your handle and deadbolt position to ensure the trim doesn’t interfere with your hand’s natural grip.
- Hinge swing: Check the gap between the door and the frame to ensure added molding won’t cause the door to bind.
- Surface flatness: Verify your door slab is truly flat; if it has a slight bow or texture, thin molding may lift at the edges.
Potted Plants Flanking a Door
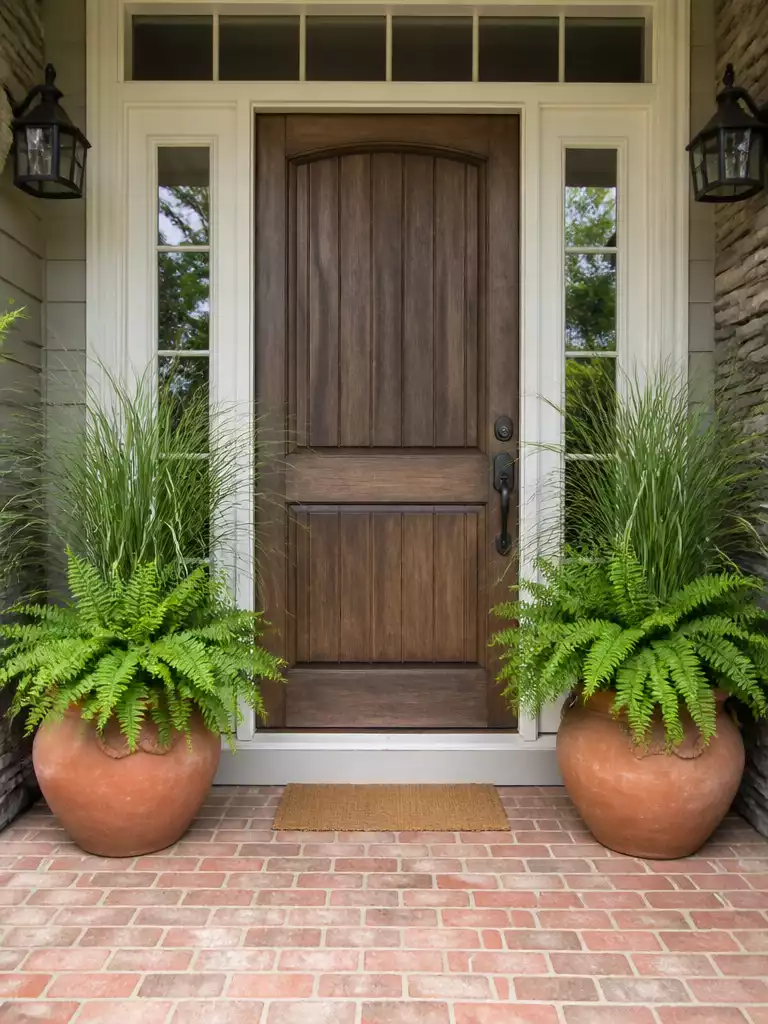
Create a formal, welcoming threshold that directs the eye straight to your home’s entryway.
Symmetry is the fastest way to turn a standard doorway into a purposeful, formal entrance. By placing a matching pair of planters on either side of the threshold, you create a visual frame that guides visitors directly toward your door handle.
Follow the Rule of Three when planting to ensure your containers feel intentional rather than cluttered. Pair a tall, structural plant in the center, a mounding plant at the mid-level, and a trailing variety that spills over the edge of the pot.
Pro Tip: Protect Your Porch
Always use plastic or cork drip trays inside your pots to prevent standing water from staining your porch decking or entryway floor. This simple step keeps your surfaces clean and prevents rot over time.
Before you commit to a plant variety, check your porch’s light exposure. North-facing doors benefit from shade-loving ferns or hostas, while south-facing entries require drought-tolerant grasses that can handle full, intense sun.
⭐ Our Picks for Potted Plants Flanking a Door
Durable Stone Resin Pedestal Urn Planters
Modern Gradient Blue Tall Floor Planters
Classic White Urn Style Porch Planters
🏡 Real-Home Application:
- Clearance testing: Before buying tall planters, ensure they don’t block the screen door’s swing or snag your doormat.
- Daily maintenance: Choose pots with removable plugs so you can easily move them indoors during harsh winter storms.
- Natural grouping: Mix different pot heights to keep the entrance feeling organic rather than like a sterile showroom display.
Decorative Garland Drape
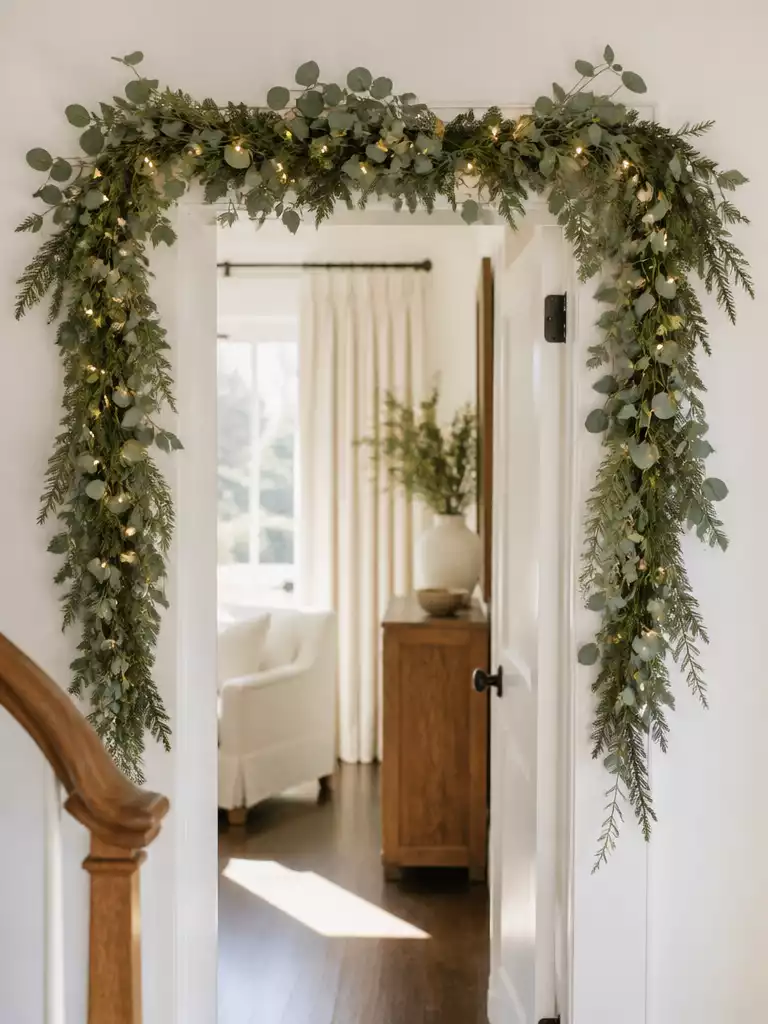
Transform any standard doorway into a grand architectural feature with cascading seasonal greenery.
Wrapping a door frame in foliage or seasonal decor adds instant architectural drama that makes a room feel intentional. This approach is perfect for wide entryways or doors that serve as focal points in your home.
You do not need to drill holes to achieve this look. Use tension rods that fit snugly inside the door frame or specialized clear adhesive clips designed to hold weight without stripping your paint.
Pro Tip: The Anchor Method
Use floral wire to anchor individual ornaments, ribbons, or accent lights directly into the garland base before hanging it. This prevents your decorations from sagging or shifting when the door moves.
When styling your drape, consider the balance of your space. A cascading side-drape creates a sophisticated, asymmetrical interest, while a full-frame arch offers a formal, symmetrical welcoming effect.
If you choose fresh greenery, keep in mind that it will dry out and shed needles over time. Stick to high-quality faux bases if you want a look that stays consistent throughout the entire season.
.
💡 Why This Works:
Adding a garland drape leverages the architectural frame of your door to soften the transition between rooms or between the indoors and the porch. By creating a visual “arch,” you draw the eye upward, making standard-height doorways feel grander and more welcoming while providing a flexible canvas for your personal style.
Design Takeaway: An asymmetrical, side-heavy drape adds an organic, relaxed charm that feels less formal than a full-frame arch.
High-traffic entryways endure the most wear, which is why focusing on durable, timeless updates often provides the best long-term return on your investment. Rather than trying to overhaul every single detail, you can create a cohesive look by prioritizing the key architectural features that define your home’s character.
Focusing your budget on one or two high-impact upgrades creates a polished, professional aesthetic that naturally simplifies the rest of your home renovation decisions.
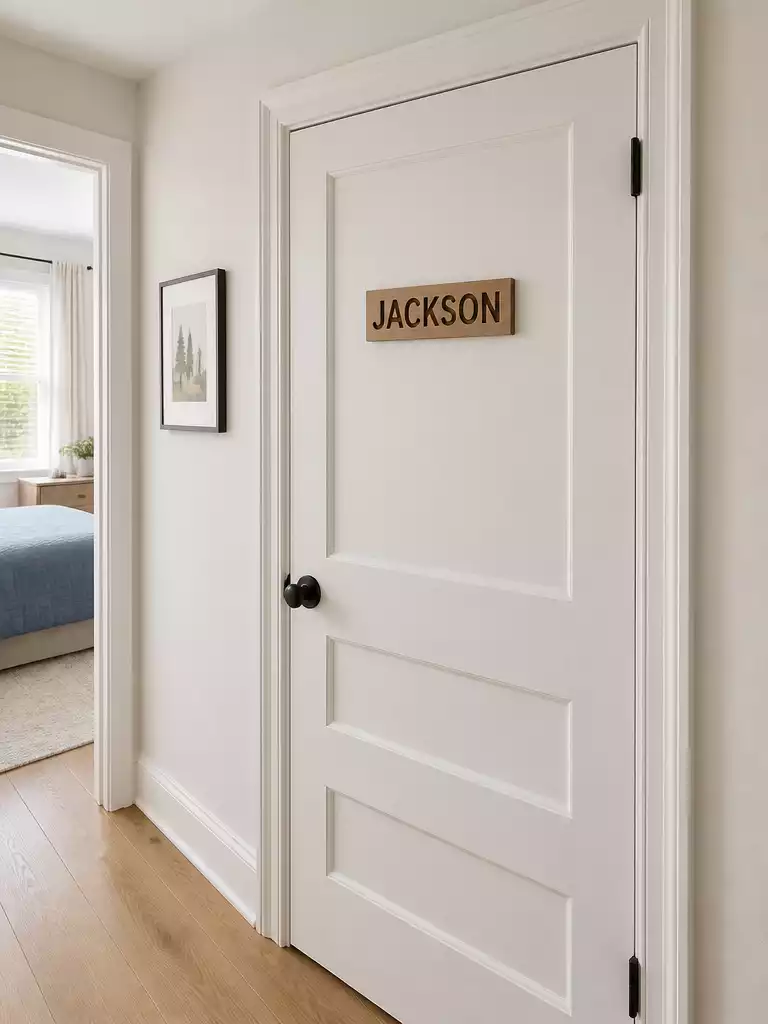
Hanging Door Sign
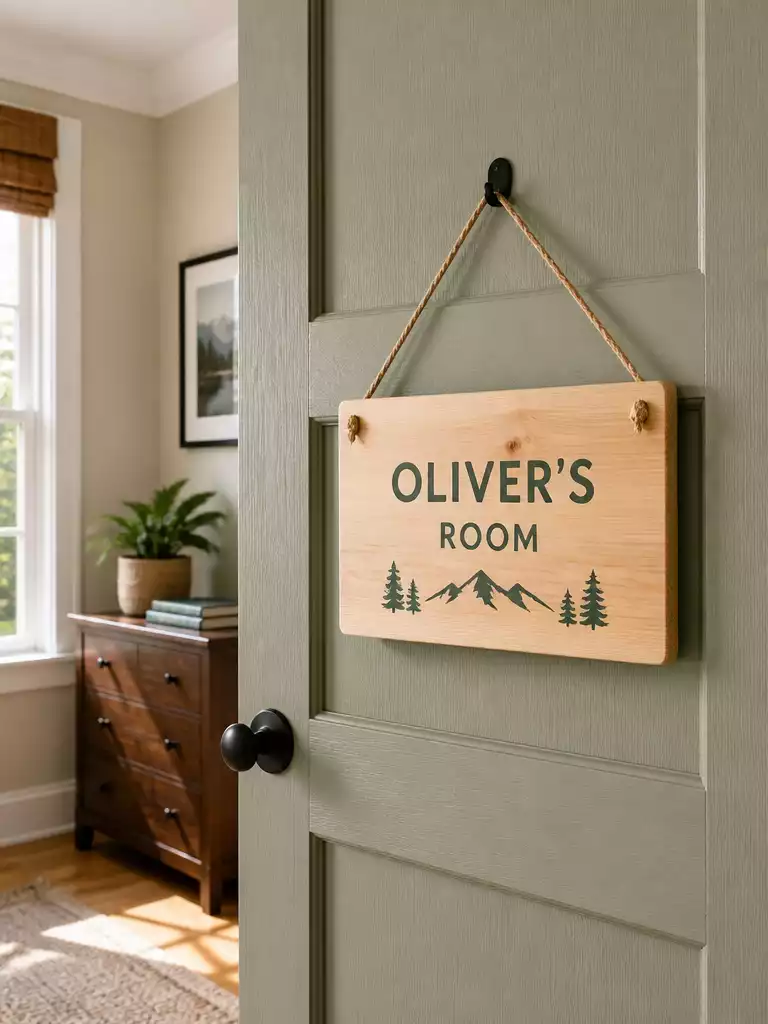
Infuse personality into standard interior doors with custom signage that defines your room’s unique mood.
A sterile bedroom or home office door often feels like an afterthought in a room’s design scheme. Adding a custom wooden or metal sign instantly breaks up that flat surface and signals exactly what the space is meant for.
Think beyond generic store-bought labels by choosing materials that match your home’s finishings. Laser-cut wood works perfectly for a natural, rustic vibe, while matte black metal cutouts offer a sharper, modern look.
Pro Tip: Avoid the annoying rhythmic “clack” against the wood every time you open or close the door. Use small squares of clear, double-sided mounting tape to hold the sign flush against the panel.
Placement matters just as much as the sign itself. Aim for eye level, or about 60 inches from the floor, to ensure it remains readable without feeling like it’s floating too high.
If you’re worried about damaging the door finish, consider these mounting methods based on your door type:
- Solid Wood: Use a lightweight adhesive hook designed for painted surfaces to avoid permanent holes.
- Hollow Core: Use double-sided mounting tape or a thin, decorative ribbon draped over the top of the door frame.
- Metal Doors: Opt for a heavy-duty magnetic backing to skip adhesives entirely.
When selecting your font, prioritize clarity over flourish. A clean, bold typeface ensures your message is legible from across the hallway, keeping the door area feeling curated rather than cluttered.
.
⚖️ Quick Decision Guide: Choosing Your Sign Style
- Choose laser-cut wood if: You want a warm, tactile aesthetic that feels organic and fits well in farmhouse or transitional rooms.
- Skip the metal option if: Your space is primarily soft, cozy, or traditional, as metal can feel overly industrial or cold here.
- Pair it with: A simple, high-contrast door paint color like charcoal or navy to make white lettering or wood tones pop.
Bedroom Door Name Plaque
Give your guests or kids a sense of belonging with a personalized door marker.
A name plaque does more than just identify a room; it defines who the space belongs to and adds an instant layer of personality. Whether you are outfitting a kid’s bedroom or a dedicated guest suite, these small markers turn a standard slab door into something distinctly individual.
When selecting your materials, consider these popular options based on the room’s overall vibe:
- Laser-cut wood: Ideal for a modern, clean look that can be left natural or painted to match the room’s trim.
- Brass lettering: A classic choice that feels upscale and works perfectly against dark-painted doors.
- Fabric banners: A soft, tactile option that is perfect for nurseries or bohemian-style spaces.
- Chalkboard panels: Great for high-traffic bedrooms where the user wants to change their “room status” or doodle daily.
Pro Tip: Always use removable adhesive strips, like command strips, to mount your plaques. This allows the decor to grow with your child or be easily swapped out if you are prepping the room for different guests.
Placement is crucial for both visibility and style. Aim to mount your plaque at eye level, which is typically around 58 to 60 inches from the floor, to ensure it remains the focal point.
If you are installing these in a child’s room, ensure the plaque is lightweight and securely fastened to avoid damage during active play. Keep the design simple and readable from a few feet away to prevent the door from looking cluttered.
.
💸 Budget-Friendly Version
- DIY wood cutouts: Use premade wooden craft letters from a local store, painted to match the room’s color palette.
- Cardstock banners: String together heavy-duty cardstock triangles or letters using twine for an instantly charming, custom look.
- Where to spend: Invest in high-quality, removable adhesive strips so the door surface remains pristine and free of damage.
Layered Doormat Styling
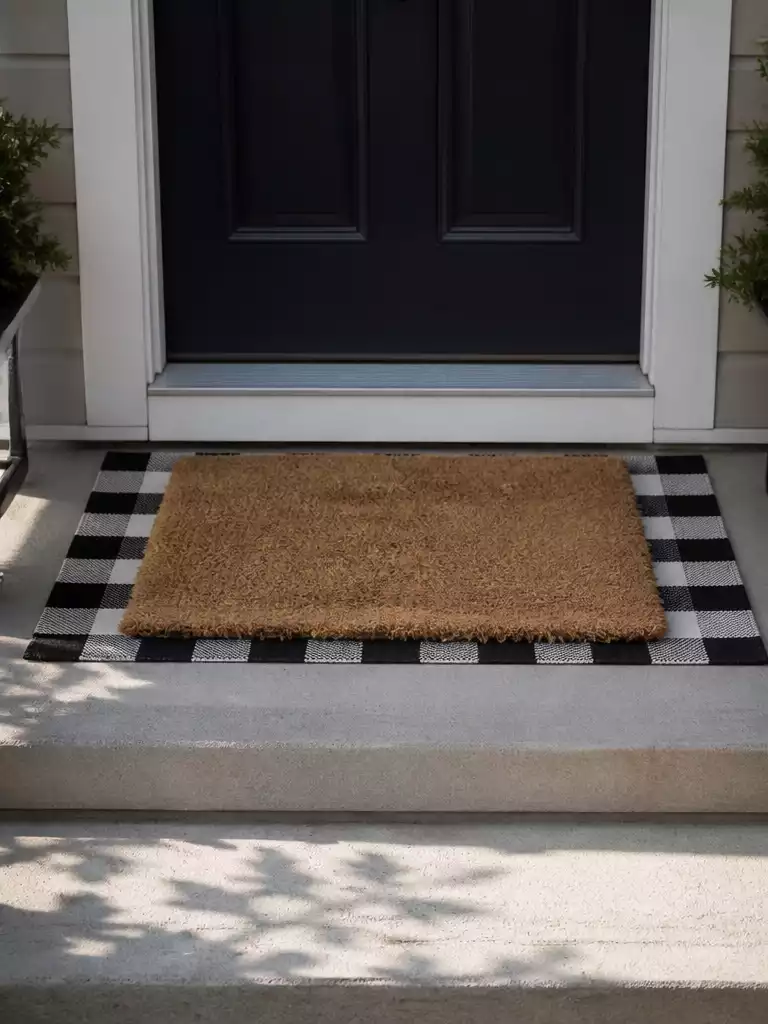
Create a welcoming, high-contrast threshold by stacking patterns and textures for instant porch personality.
Layering a high-contrast pattern beneath a textured coir mat is the fastest way to hide a worn-out porch floor or dated concrete. By using a wider base rug, you create a visual anchor that makes your entryway feel intentional rather than just utilitarian.
The secret to pulling this off is scale and safety. Always choose a base rug that is significantly larger than your top mat to avoid a cluttered, cramped appearance.
Safety Alert: Avoid the Trip Hazard
Always incorporate a non-slip underlay or rug pad beneath your base layer to keep both mats firmly in place. This prevents the edges from curling or sliding when guests step on them.
When selecting your materials, stick to weather-resistant fibers like polypropylene for the base rug since it will be fully exposed to the elements. Natural coir is perfect for the top layer because it effectively traps dirt before it tracks into your home.
.
✨ Small Details That Matter
Focusing on these subtle refinements ensures your layered look remains polished rather than messy, helping your entryway feel curated and intentional every day.
- Rug Thickness: Ensure your door has at least 3/4 inch of clearance to swing over both stacked mats easily.
- Visual Alignment: Align the base rug perfectly centered with the door frame to maintain clean, geometric lines for guests.
String Light Door Frame
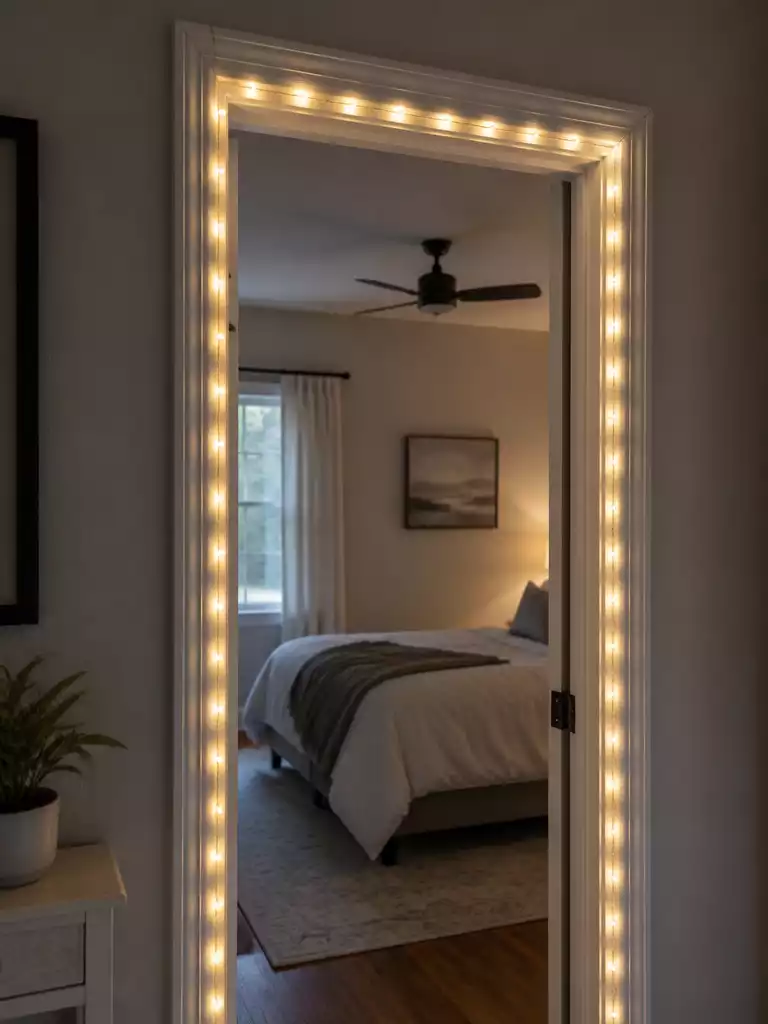
Create an inviting, soft-focus glow that transforms any standard doorway into a mood-setting feature.
Tracing your door casing with micro-LEDs adds an instant warmth that standard overhead lighting just can’t replicate. This setup works best for hallways, bedroom entrances, or patio doors where you want to define the architecture after the sun goes down.
You’ll want to stick to thin wire fairy lights rather than bulky traditional bulbs to keep the look clean and intentional. Because these are meant for ambiance, avoid using them as your primary light source; think of this as a soft accent for evening relaxation.
Pro Tip: Use clear, small adhesive command hooks to keep the wires tight against the frame. This prevents the lights from sagging or catching on clothing when you walk through the door.
Deciding between power sources usually comes down to the location of your nearest outlet. Battery-operated sets are perfect for interior bedroom doors where you don’t want to deal with visible cords running along the baseboards.
If you choose a plug-in set, use a paintable cord cover to hide the wire along the wall. This keeps the focus on the lights themselves rather than the messy power cable.
.
⚖️ Quick Decision Guide: Choosing Your Light Style
- Choose this if: You want a low-commitment, temporary way to add a festive or cozy atmosphere during holiday seasons.
- Skip this if: You have high-traffic doorways where wires could easily snag, or if your pets are prone to chewing cords.
- Pair it with: A simple, neutral-toned curtain or a minimalist wreath to ensure the lights remain the focal point of the transition.
Painted Accent Border
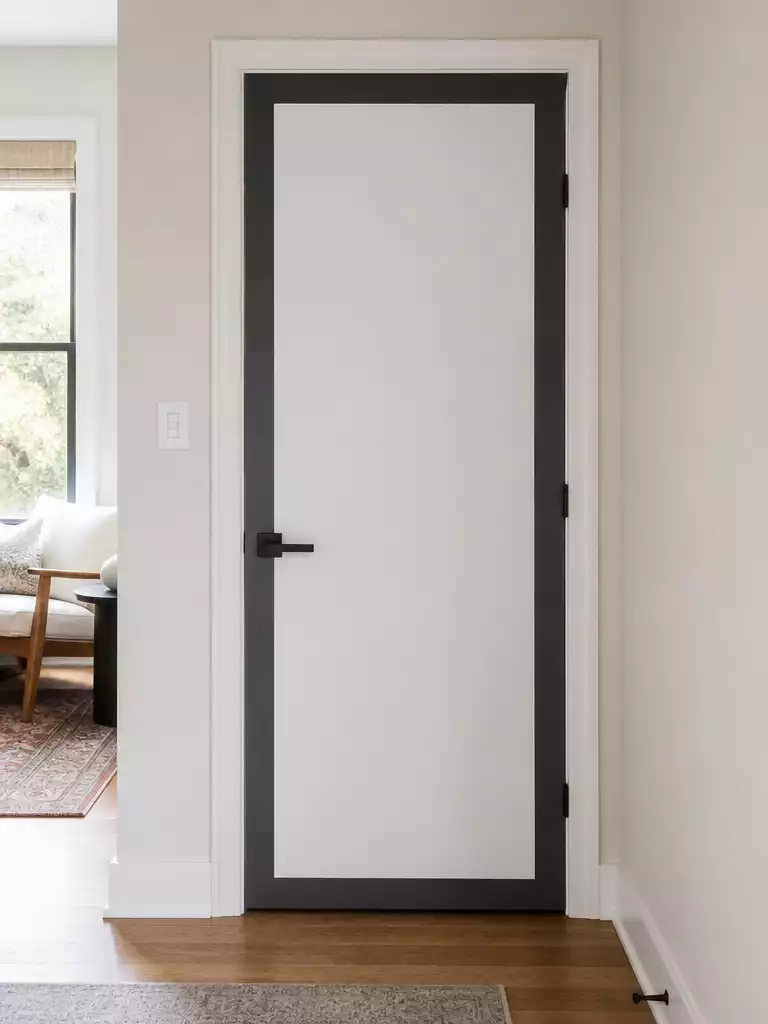
Define your home’s architecture with a high-contrast painted border for a high-end custom look.
Tracing the perimeter of a plain white door with a bold, contrasting paint color instantly transforms a builder-grade slab into a custom architectural feature. This project is ideal for anyone looking to add depth to a room on a shoestring budget.
You should skip this if your doors have heavy texturing or deep graining, as getting a crisp line on uneven surfaces can be incredibly frustrating. Stick to smooth-faced or flat-panel doors for the cleanest results.
Pro Tip: Use high-quality painter’s tape designed for delicate surfaces to avoid peeling the base coat when you pull it away. Always remove the tape while the final coat is still slightly damp to ensure the cleanest edge possible.
To get started, consider these finish and technique pointers for the best outcome:
- Finish Selection: Use a semi-gloss or satin finish for the accent border; the slight sheen helps the frame pop against a matte door surface.
- Tooling: A small, 2-inch high-density foam roller works better than a brush for long, straight runs to prevent visible bristle marks.
- Prep Work: Lightly sand the area where the paint will go with 220-grit sandpaper to ensure total adhesion.
- Color Palette: Charcoal or navy works well for a modern hit of contrast, while metallic gold or bronze gives a more luxe, gallery-inspired appearance.
.
💡 Why This Works
This technique creates a “trompe l’oeil” effect that tricks the eye into perceiving more depth and architectural intention on a flat, lifeless slab. By framing the door’s perimeter, you essentially create a visual focal point that draws the eye toward the center, making standard doors look custom-built and thoughtfully considered.
Visual Impact: A high-contrast border acts like a frame for a painting, instantly elevating the door’s presence in your room.
Pantry Door Chalkboard Panel
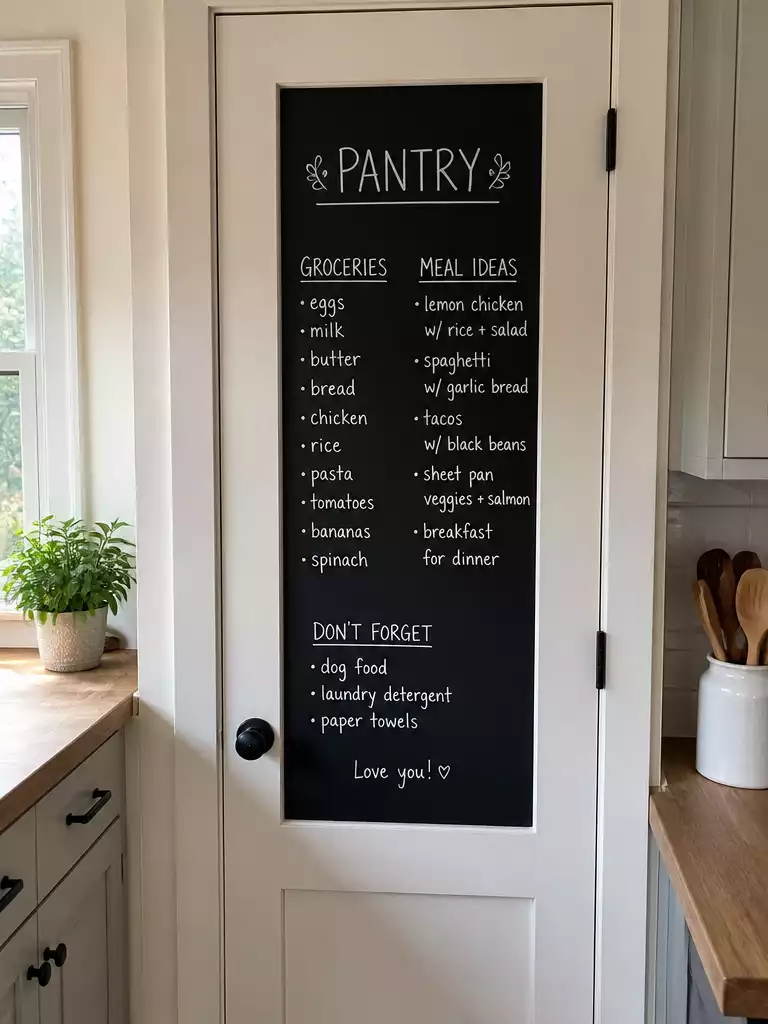
Transform your storage space into a functional family communication hub with a simple DIY finish.
Turning a plain pantry door into a chalkboard panel is the ultimate way to blend utility with home organization. It creates a dedicated space for grocery lists or meal schedules that sits right where you need it most.
Pro Tip: Skip the messy traditional chalk sticks that leave dust on your kitchen floor. Use liquid chalk markers to get crisp, clean lines that stay put until you are ready to wipe them away with a damp cloth.
The application is straightforward, but success relies on your prep work. You will need to lightly sand the door panel and apply a high-quality primer before brushing on at least two coats of chalkboard paint.
Keep these maintenance and setup points in mind to ensure your panel stays looking fresh:
- Curing Time: Let the paint sit for at least 3 days before writing on it to avoid permanent ghosting.
- Seasoning: Rub the side of a piece of standard white chalk over the entire surface after it cures, then erase it to create a proper writing base.
- Frame Choice: Leave the existing door casing unpainted to keep a clean transition between the pantry and your kitchen walls.
If you want to take this a step further, apply a coat of magnetic primer underneath the chalkboard paint. This allows you to use decorative magnets to hold up recipes or coupons alongside your handwritten notes.
.
🔢 The Right Sequence
Getting the order right preserves your door’s finish and ensures the chalkboard surface remains smooth for daily use over many years.
- Surface Prep: Lightly sand the door panel to remove existing gloss and improve paint adhesion.
- Primer Application: Apply a high-quality primer to ensure the chalkboard paint bonds securely to the wood.
- Final Curing: Allow the finish to cure for three full days before introducing chalk or markers.
With all ten decorative styles in front of you, the path to a refreshed entry becomes much clearer. Selecting the one or two accents that genuinely complement your home is far better than attempting every look on the list. A few deliberate choices carry the entire room, providing character without overwhelming the space.
Focus on the door you use most frequently and decide on a single upgrade that fits your personal aesthetic. Whether you prefer coordinated design elements or a simple seasonal refresh, the result will feel intentional. Once you secure that first change, the rest of your home styling will fall into place naturally.