
Spending thousands on wooden double front doors only to face warping or rot within years is a gut punch. This guide prioritizes structural engineering over aesthetics to ensure your investment survives decades. It starts with the foundation: the wood species itself.
Wood Species: The Cellular Foundation of Rot Resistance
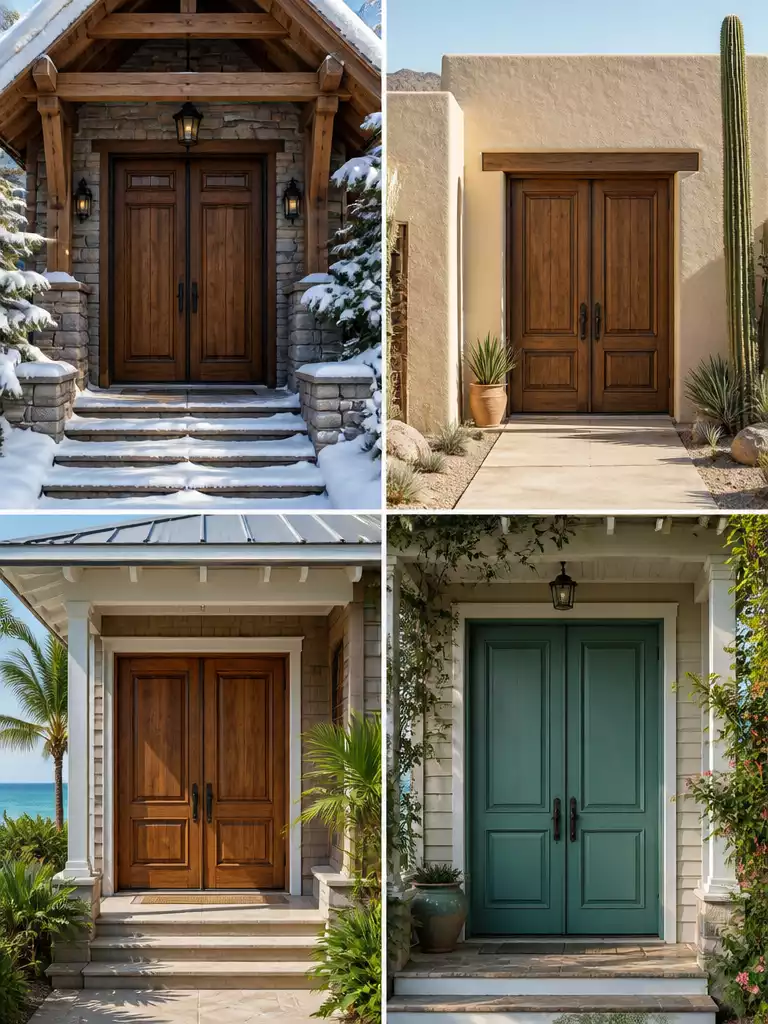
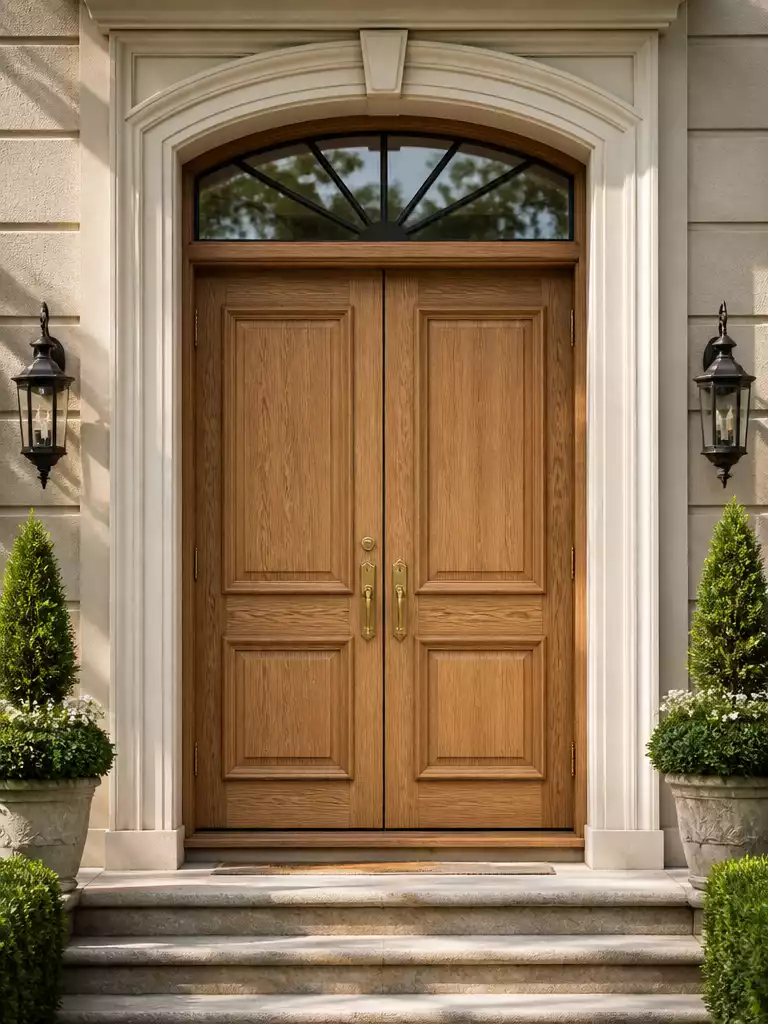
Choose a species with natural oil density to ensure your grand entrance withstands the elements.
As an Amazon Associate I earn from qualifying purchases. Affiliate links may earn me a commission at no extra cost to you.
Before you fall in love with a specific stain color, you need to look at the invisible chemical makeup of the timber. Do you know the Janka rating or the natural tannin content of your preferred wood?
These cellular properties are what actually dictate whether your expensive double doors will rot from the inside out within a few winters. Choosing a species based on a Pinterest photo alone is how many homeowners end up with a door that buckles under the first sign of humidity.
| Wood Species | Pore Structure | Moisture Risk |
|---|---|---|
| Red Oak | Open Pore | High (Acts like a bundle of straws) |
| White Oak | Closed Pore | Low (Naturally water-resistant) |
| Mahogany | Dense/Oily | Very Low (Best for humidity) |
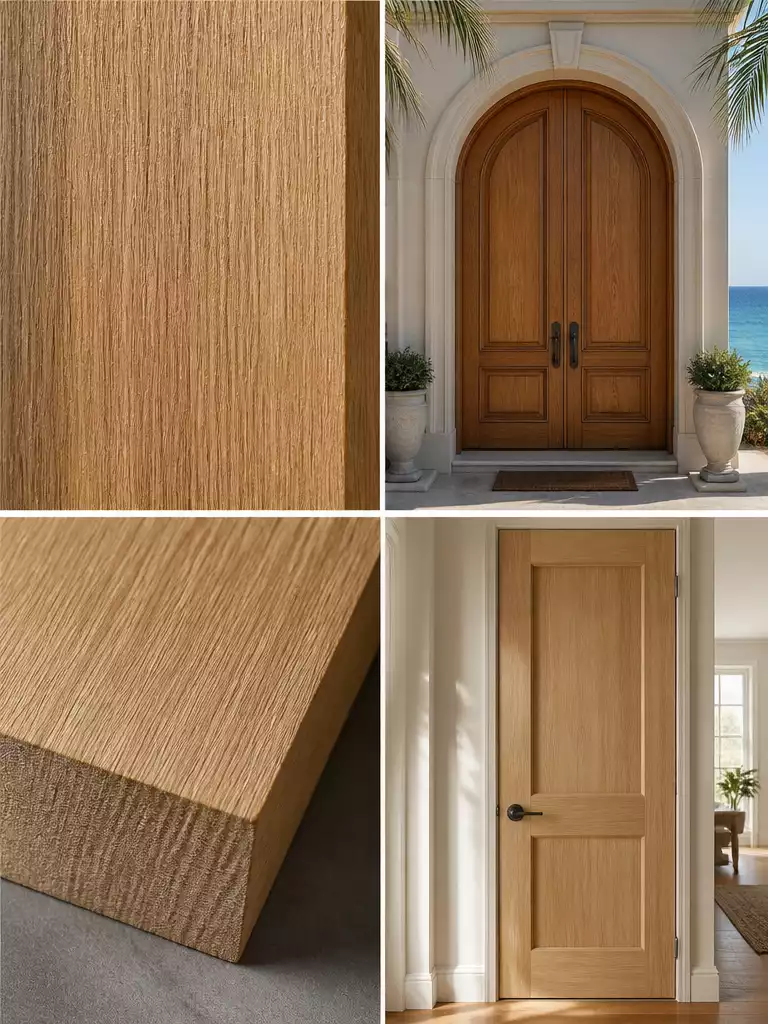
Species like Red Oak have an “Open Pore” structure, which means they effectively suck up ground-splash moisture and humidity. For high-UV environments or coastal homes, Teak or Iroko are the gold standards because their high natural oil content prevents the “silvering” and brittleness found in cheap softwoods.
Stability is the biggest challenge for double doors because you have two massive leaves that must stay perfectly aligned to latch. This is why Quarter-Sawn lumber is the only viable choice; its straight grain orientation prevents the doors from bowing away from each other at the center over time.
The Expert Insight: Tannin Bleed & Species Warnings
- Douglas Fir & Red Cedar: These species are beautiful but prone to “Tannin Bleed.” You must use oil-based primers to prevent ugly black streaks from surfacing within six months.
- The Pine Trap: Never use “Paint-Grade” Pine for exterior double doors. It lacks the dimensional stability and rot resistance needed for such a large, heavy opening.
- Dimensional Stability: Always verify that your manufacturer is using Quarter-Sawn cuts rather than Plain-Sawn to ensure the center gap remains tight and weather-sealed.
Investing in the right species is essentially buying insurance for your home’s entryway. Even the most beautiful finish cannot save a wood species that is fundamentally mismatched for your local climate.
While the wood type provides the foundation, even the best species will eventually fail if the internal core isn’t engineered to fight off the natural urge of wood to warp and twist.
.
📋 What to Check First Before Choosing Your Wood Species:
- Local Climate Match: Confirm your wood species’ resistance suits your region’s humidity and UV exposure levels.
- Quarter-Sawn Confirmation: Verify your door is made from quarter-sawn lumber to ensure dimensional stability over time.
- Finish Compatibility: Check that your species pairs well with oil-based primers to avoid tannin bleed and staining issues.
Solid vs. Engineered Core: Fighting the Warp
Internal stability ensures your grand double doors stay perfectly aligned and functional for decades.
There is a persistent myth in home renovation that “solid wood” is the gold standard for quality. While a solid slab of oak sounds impressive, in the world of 8-foot double doors, it is often a recipe for a door that won’t latch by year three.
Real wood is a living material that breathes, and a single massive slab will inevitably bow or twist as it reacts to humidity. To prevent your doors from “walking” away from each other at the center, you need internal engineering that cancels out these natural forces.
The Core Hierarchy
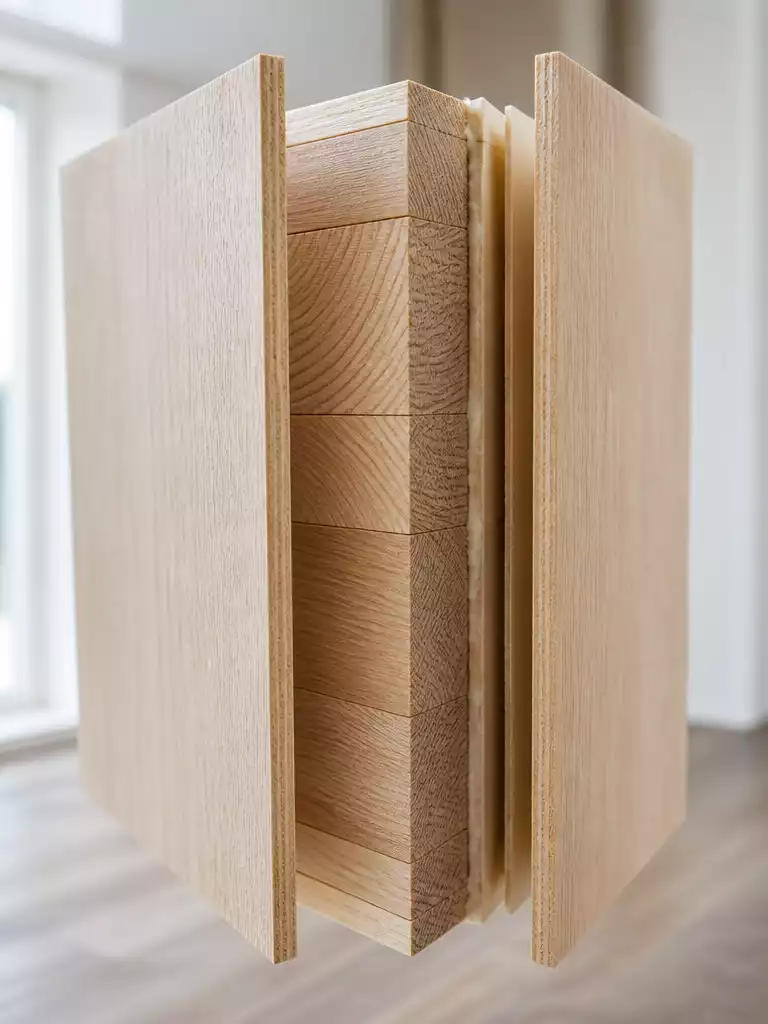
- Stave Core: This construction uses small blocks of wood laminated together with the grain running in opposing directions. This “tug-of-war” prevents any single block from warping the entire door leaf.
- LVL (Laminated Veneer Lumber): This is the nuclear option for structural rigidity. It is mandatory for oversized modern double doors to ensure they remain arrow-straight regardless of height.
- The 1/4 Inch Rule: High-quality engineered doors use a “thick-cut” wear layer. Avoid paper-thin 1/16 inch veneers that delaminate easily and cannot be sanded or refinished if the door gets scratched.
The Knock Test: Give the door a sharp rap with your knuckle. A quality stave-core or LVL door feels vibration-free and solid; if it sounds hollow or “tinny,” it has internal voids that will trap condensation and trigger rot from the inside out.
The primary risk with cheap engineered doors is delamination, where the exterior skin peels away from the core. By insisting on a thick wear layer and a stave core, you get the aesthetic beauty of real wood with the structural insurance of modern science.
| Core Type | Stability | Best For |
|---|---|---|
| Solid Slab | Low (High Warp Risk) | Small interior doors |
| Stave Core | High | Standard 6/8 Double Doors |
| LVL Core | Maximum | 8ft+ Grand Entrances |
Choosing the right core is about more than just physics; it’s about ensuring your investment doesn’t become a maintenance nightmare. A door that stays square is a door that stays weather-tight for decades.
.
📋 What to Check First Before Choosing Your Core:
- Door Height: Confirm if your double doors exceed 8 feet tall—LVL cores become essential to avoid bowing.
- Core Thickness: Verify the veneer thickness is at least 1/4 inch to allow future refinishing without risking delamination.
- Sound and Feel: Perform the knock test on sample doors to sense solid construction and avoid hollow, moisture-trapping cores.
Joinery and Construction: The Mechanical Skeleton
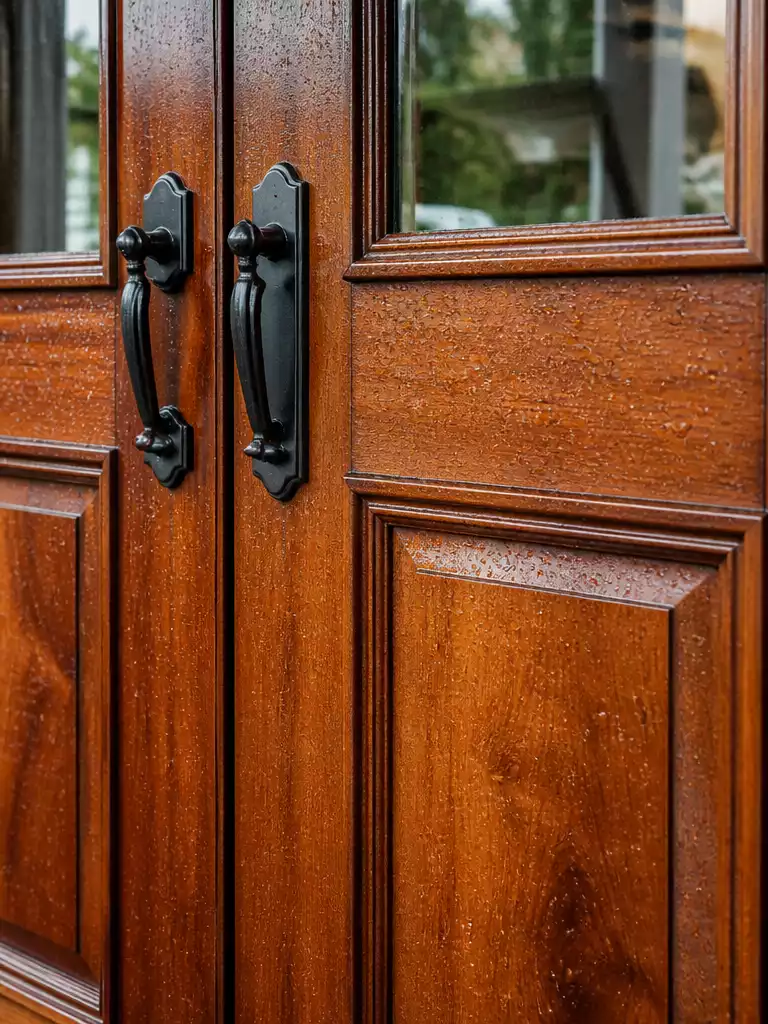
Masterfully crafted joints provide the structural integrity needed to keep heavy double doors perfectly aligned.
The “sag” is the silent killer of grand entryways. It starts the moment a 150lb door leaf begins to drag against the threshold because the internal corner joints simply weren’t built to carry the load.
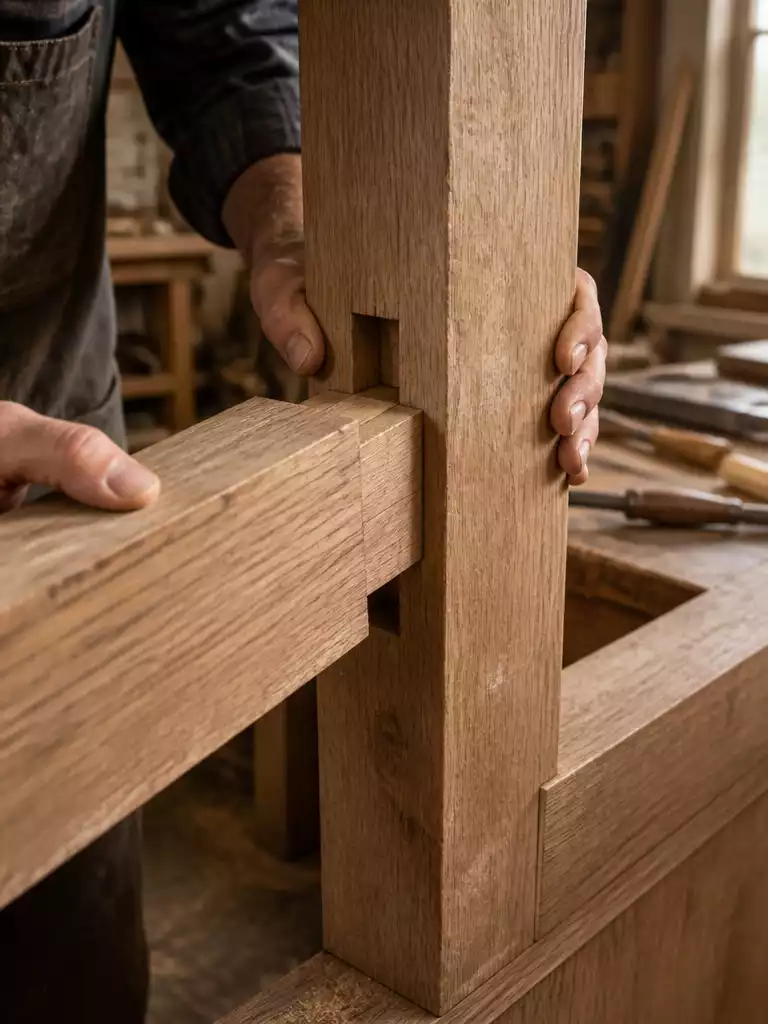
For double doors, the mortise and tenon joint is the gold standard for a reason. Unlike simple dowel joinery—which relies almost entirely on glue—a deep-seated mortise and tenon creates a wood-on-wood interlock that resists the massive leverage forces of an oversized door.
The Joinery Hierarchy
- Through-Tenons: The strongest option where the wood extends all the way through the stile, often secured with a wedge to ensure a square fit even if glue fails over time.
- Copeland (Integral) Profile: A construction method where panels are fitted into stiles in a way that prevents water from pooling in the grooves, protecting the joints from internal rot.
- Floating Panels: A mandatory requirement where the center panels are never glued or nailed, allowing them to “breathe” as they expand and contract with humidity.
If those center panels are fixed in place, they will eventually crack or pull the entire frame out of alignment during a dry winter. A true quality build uses Type-III waterproof adhesives to ensure that moisture-heavy environments don’t dissolve the skeleton of your door.
Expert Insight: Look for through-tenons with wedged ends. This traditional technique provides a mechanical lock that keeps the door square for thirty years, regardless of glue degradation.
The “Dowel” Red Flag: Avoid manufacturers who use only dowels for 8-foot double doors. While fine for interior doors, they lack the surface area and mechanical strength to prevent heavy exterior leaves from racking and sticking.
When investigating a manufacturer, ask specifically about how they handle the “Stile-to-Rail” connection. A door is only as durable as the hidden geometry holding its corners together under pressure.
.
📋 What to Check First Before Committing to Joinery:
- Joint Type Confirmation: Confirm the door uses mortise and tenon with through-tenons, not simple dowels or pocket screws.
- Panel Movement Space: Ensure the center panels are designed to float inside the frame to allow natural wood expansion and contraction.
- Adhesive Quality: Ask if Type-III waterproof glue is used to guarantee durability in humid or varying weather conditions.
Climate Suitability: Matching Material to Moisture
Choose a wood species engineered to withstand your local humidity and UV exposure levels.
A door that thrives in the arid Arizona heat will literally pull itself apart in the humid sprawl of Florida. Local weather isn’t just a backdrop; it is the primary force that dictates whether your wood fibers stay stable or begin to check, split, and rot.
Regional Material Matching
- Coastal Zones: Salt air is brutal on open-grain woods like Oak, as salt crystals lodge in the pores, expand, and shatter the finish. Opt for Accoya wood or Mahogany, which offer the density required to repel corrosive seaside air.
- High-Humidity Regions: Success depends on the Equilibrium Moisture Content (EMC). You must verify the door was kiln-dried to the specific average humidity of your installation zip code to prevent massive expansion after the first storm.
- Arid Climates: The danger here is “Shrink Rings.” When wood dries too rapidly, panels shrink back and expose an unfinished white line around the edges, making the door look aged and neglected within months.
In extreme climates, the environment on a construction site is rarely stable enough for a high-performance application. This is why I always suggest a factory pre-finish over site-applied stains.
Applying the sealant in a controlled, dust-free environment results in a coat that is significantly more durable than anything brushed on in a humid driveway. It ensures the “armor” is baked on before the wood ever meets the elements.
Expert Insight: If you live in a South-facing home in the desert or a high-salt coastal town, the factory finish isn’t just a luxury—it’s your primary insurance policy against the wood “silvering” and becoming brittle.
Climate dictates the wood species you invest in, but the sealant you choose next acts as the physical shield. This armor takes the first hit so your structural joinery doesn’t have to.
.
📋 What to Check First for Climate Compatibility:
- Local Humidity Range: Confirm your area’s average annual humidity to match kiln-dried wood and avoid excess expansion.
- Exposure Direction: Note if your door faces south or west; these spots need extra UV-resistant wood and finishes.
- Overhang Protection: Check if your porch or awning adequately shields the door from direct rain and sun to extend lifespan.
Making it this far means you’re building a strong foundation for a door that truly endures. Every detail you consider adds up to long-lasting quality, even if it feels like a lot to absorb. Taking a balanced approach lets you navigate these choices with confidence instead of overwhelm.
⚡ Keep This in Mind:
- Climate factors shape the door’s lifespan — explore durability criteria in depth.
- Core construction and joinery are the unseen heroes of door stability — understanding these helps guide choices.
- Progress isn’t perfect — focusing on these essentials means your door will serve well for decades, not seasons.
List 5 Finish and Sealant
A high-performance finish acts as the invisible shield that preserves your investment against the elements.
Most homeowners choose a finish based on the gloss level they see in a showroom, but the real decision lies in how that coating behaves under stress. You are essentially choosing between a film-forming barrier that sits on top of the wood or a penetrating oil that lives inside the fibers.
A film-forming finish, like a high-end Spar Varnish or Urethane, creates a stunning, glass-like shield that is highly water-resistant. However, the tradeoff is a high-stakes maintenance cycle: once that brittle film cracks or peels, moisture gets trapped underneath, requiring you to sand the entire door back to bare wood to fix it.
The Protective Coating Showdown
| Finish Type | Performance | Failure Mode | Maintenance |
|---|---|---|---|
| Film-Forming (Urethane) | High-gloss, rigid barrier | Cracking and peeling | Full sand-down required |
| Penetrating Oil (Osmo/Rubio) | Natural look, breathable | Gradual fading | Wipe-on refresh (No sanding) |
If you prefer a low-stress lifestyle, penetrating oils like Osmo or Rubio Monocoat are the smarter play for double doors. They don’t peel; they simply fade over an 18-month cycle, allowing you to perform a simple wipe-on refresh in the “weather zone” without ever touching a piece of sandpaper.
Longevity also depends on the “Six-Side Rule” during the application process. You must insist that the top and bottom edges—the hidden end grain—are sealed as heavily as the front face to prevent the door from “drinking” ground-splash moisture.
The finish is the armor that takes the first hit from the environment. While the sealant protects the surface, the physical shape of the door determines how it handles the structural stress of those seasonal shifts.
.
🛠️ Practical Tips for Applying and Maintaining Your Finish:
- Seal All Edges: Apply multiple coats to the top, bottom, and sides—don’t overlook the end grain for moisture protection.
- Use Thin Layers: Build up your finish in several thin coats rather than one thick coat to avoid cracking and peeling.
- Schedule Refreshes: For penetrating oils, plan simple wipe-on maintenance every 18 months in high-exposure areas to extend protection without sanding.
6. Panel Style and Proportions: Structural Movement
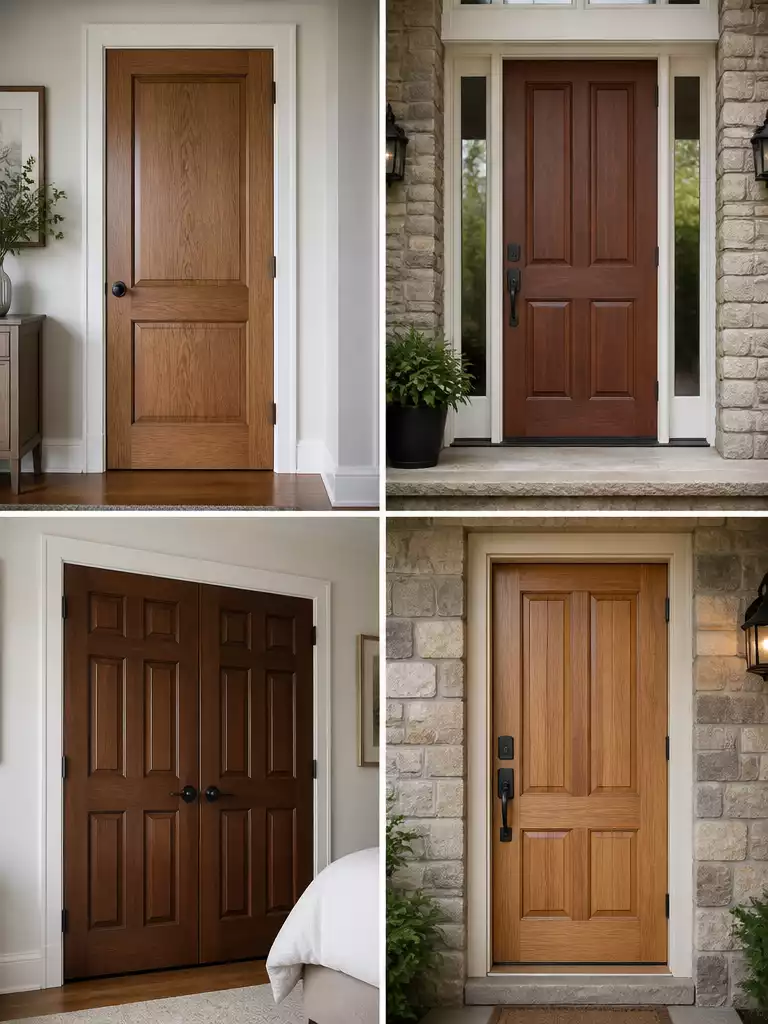
Expertly proportioned panels ensure your grand entrance remains structurally square and beautiful for decades.
In double doors, style isn’t just about matching your home’s aesthetic; it is a functional strategy for managing the sheer weight of two massive moving objects. When you choose a panel layout, you are actually deciding how the door will distribute internal tension and environmental stress over the next twenty years.
The “Vertical Grain” Mandate
For the vertical outer edges of your door (the stiles), Vertical Grain (VG) lumber is non-negotiable. This specific grain orientation prevents “helicoptoring”—a structural twist where the doors gap at the top while hitting at the bottom—ensuring your double doors always meet perfectly in the center.
The thickness of your panels also acts as a hidden structural brace. While flat panels offer a clean look, thick raised panels provide significantly more rigidity to the door leaf, acting as a buffer against heavy wind loads that can cause thinner doors to rattle or flex.
| Design Element | Longevity Benefit |
|---|---|
| Multi-Panel Layout | Divides natural wood movement into 3 or 4 smaller, manageable sections. |
| 10-12″ Bottom Rail | Provides a “splash zone” buffer and keeps the heavy leaf from sagging. |
| Floating Panels | Allows the wood to expand and contract without cracking the frame. |
Warning: Avoid “Single-Lite” designs where one massive piece of wood fills the entire leaf. These are highly prone to dramatic warping; look for designs that break the surface into smaller panels to neutralize movement.
Finally, pay close attention to the “Stile-to-Rail” ratio. A door with a skimpy bottom rail is far more likely to rot from ground-splash or lose its squareness under its own weight over time.
.
📋 What to Check First Before Choosing Panels:
- Stile Grain Direction: Verify that the outer stiles use vertical grain lumber to minimize twisting over time.
- Panel Thickness: Confirm panels are thick enough to add rigidity but still allow for natural expansion and contraction.
- Bottom Rail Height: Measure the bottom rail to ensure it’s at least 10 inches tall for structural support and moisture resistance.
Glass Options: Thermal Pumping and Seal Integrity
Achieve long-term clarity and energy efficiency with high-performance glazing and expertly engineered seals.
The primary reason for “foggy” glass in double doors isn’t usually a defect in the glass itself. It is a result of the wood frame expanding and contracting, which eventually breaks the silicone seal and allows moisture to seep in.
To prevent this, you need to look for Insulated Glass (IG) units that utilize dual-seal technology. This system uses a primary seal to hold the insulating gas and a secondary seal to provide the structural strength needed to withstand the wood’s natural movement.
Key Glazing Specs for Longevity:
- Low-E Coatings: These are essential for heat rejection, preventing the sun from “baking” the interior wood and drying out your door’s joinery.
- Removable Wood Beads: Ensure your glass is held by beads on the interior side; this allows for glass replacement without destroying the door leaf.
- Tempered Safety Glass: Standard for entry doors, but verify it meets local impact codes if you are in a high-wind zone.
While larger glass panes are popular for modern double doors, the weight becomes a significant mechanical factor. If you are considering triple-pane glass, be prepared to upgrade your hardware.
⚠️ Weight Warning
Triple-pane glass can easily exceed 80lbs per door leaf. Never install these without upgrading to 5-knuckle ball-bearing hinges to prevent the door from sagging and dragging against the threshold.
Ultimately, the glass should work in harmony with the wood. By choosing high-performance coatings and structural seals, you shield the door’s internal components from the “thermal pumping” that leads to premature failure.
.
📋 What to Check First Before Choosing Glass Options:
- Frame Compatibility: Confirm your door’s wood species and core can handle the thermal expansion stresses glass will add.
- Hinge Strength: Verify if your hinges support the weight of thicker glass, especially triple-pane units over 80lbs.
- Glass Size and Placement: Measure panel dimensions to ensure glazing beads fit securely without interfering with door movement.
8. Hardware Compatibility: Weight-Bearing and Rot Prevention
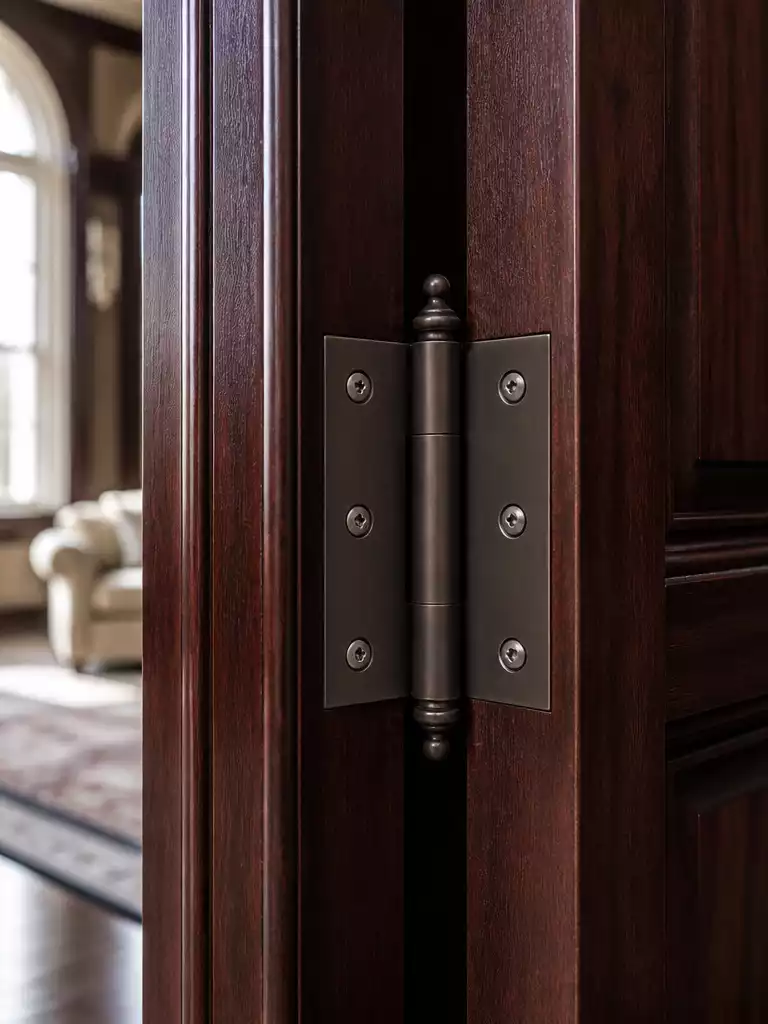
Heavy-duty hardware ensures your grand entrance stays perfectly aligned and structurally sound for decades.
A 200lb mahogany door leaf hanging on three standard residential hinges is a “season” door, not a “decade” door. When dealing with the massive weight of double doors, your hardware choice determines whether the leaves stay square or begin to sag and drag against the threshold within months.
The Heavy-Duty Hardware Checklist
- Hinge Count and Grade: Double doors require at least four 4.5″ x 4.5″ ball-bearing hinges per leaf to prevent the common “hinge bind” caused by vertical tension.
- Multi-Point Locking Systems: These systems engage at the top, middle, and bottom simultaneously, “pulling” the wood into the weatherstripping to counteract the natural warping forces of sun and moisture.
- The Astragal Choice: Opt for a metal-wrapped astragal rather than a wood version to seal the gap between the active and inactive leaves; it provides a much tighter barrier against drafts and high-velocity rain.
The chemical reaction between your fasteners and the wood species is a frequently overlooked failure point. You should use stainless steel screws exclusively, as zinc-plated screws will eventually react with the natural tannins in woods like Oak and Cedar.
This reaction triggers “black rot” holes that form directly around the hinge plates, softening the wood until the screws can no longer hold the door’s weight. Investing in high-grade, non-reactive hardware prevents these structural “leaks” before they start.
⚠️ Longevity Alert: The Screw Hole Trap
Any time a screw enters the wood, it creates a path for moisture. Ensure your installer “back-fills” hinge screw holes with a dab of waterproof sealant to prevent internal rot from starting behind the metal plates.
.
🛠️ Practical Tips for Durable Hardware Installation:
- Pre-Drill Screw Holes: Prevent wood splitting and ensure secure fastening by always pre-drilling before installing screws.
- Use Weather-Resistant Lubricants: Apply dry graphite on hinges to keep them smooth without attracting moisture or dirt.
- Check Hinge Alignment Regularly: Inspect hinge positioning annually to catch early sag and adjust before it damages the door frame.
9. Sizing and Standard Openings: Avoiding Custom Flex
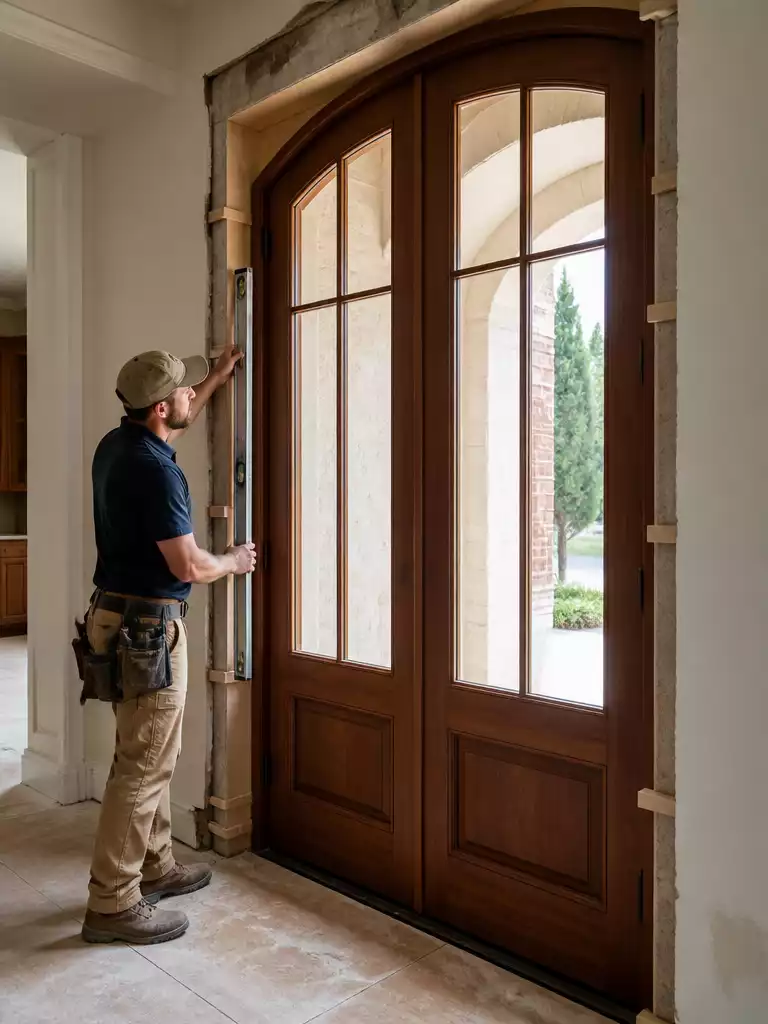
Precision measurements ensure your grand entrance remains perfectly aligned and draft-free for decades.
The “standard” 60-inch or 72-inch double door opening is often a trap for unsuspecting homeowners.
If your rough opening is even 1/2 inch out of plumb, a standard-sized door will never seal correctly, leading to air leaks and mechanical strain.
Success starts with the Rough Opening (RO) Buffer.
You must maintain a 1-inch “wiggle room” around the entire frame to allow for shimming the door into a perfectly square position, regardless of how the house has settled.
The Precision Measurement Checklist
- 📐 The Diagonal Check: Measure the rough opening diagonally from both corners; if they aren’t within 1/8 inch of each other, the frame requires a custom-built solution.
- 📏 Net Frame Height: Account for your “finished floor” thickness, such as hardwood or tile, to prevent the bottom sweep from dragging or catching.
- 🏗️ Structural Stiffeners: Any oversized door exceeding 8 feet in height or 42 inches in width per leaf requires internal steel stiffeners to prevent long-term sagging.
Oversized doors look magnificent, but they come with significant physics-based risks.
The sheer weight of a custom-flex door can pull the jamb out of alignment if you haven’t accounted for the extra structural support needed in the wall itself.
When you move into custom territory, the engineering must match the aesthetic.
Prioritizing a perfectly plumb frame over a “close enough” standard fit is the only way to ensure the two leaves meet seamlessly in the middle for the life of the home.
.
📋 What to Check First When Measuring for Double Doors:
- Wall Plumbness: Verify the wall framing is straight by checking vertical and horizontal levels before measuring the rough opening.
- Floor Thickness: Measure the final floor finish height to ensure door clearance avoids scraping or gaps at the threshold.
- Frame Squareness: Assess the diagonal measurements carefully; even slight differences require a custom frame or adjustment in installation plans.
10. Installation Quality: The “Water Management” Phase
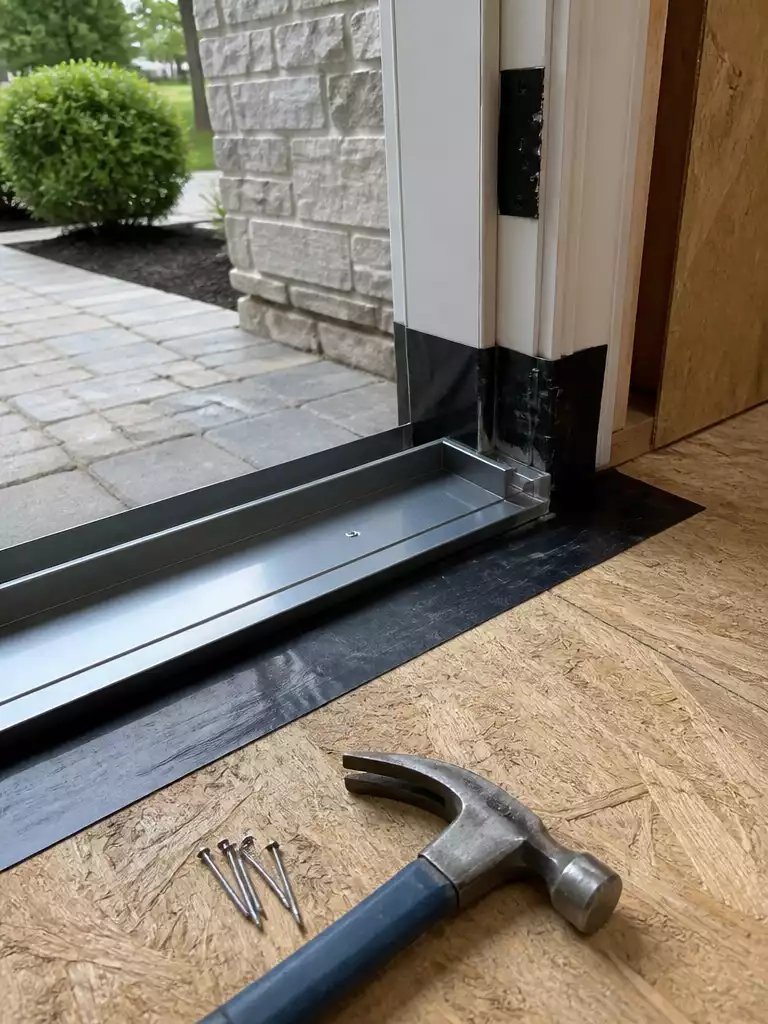
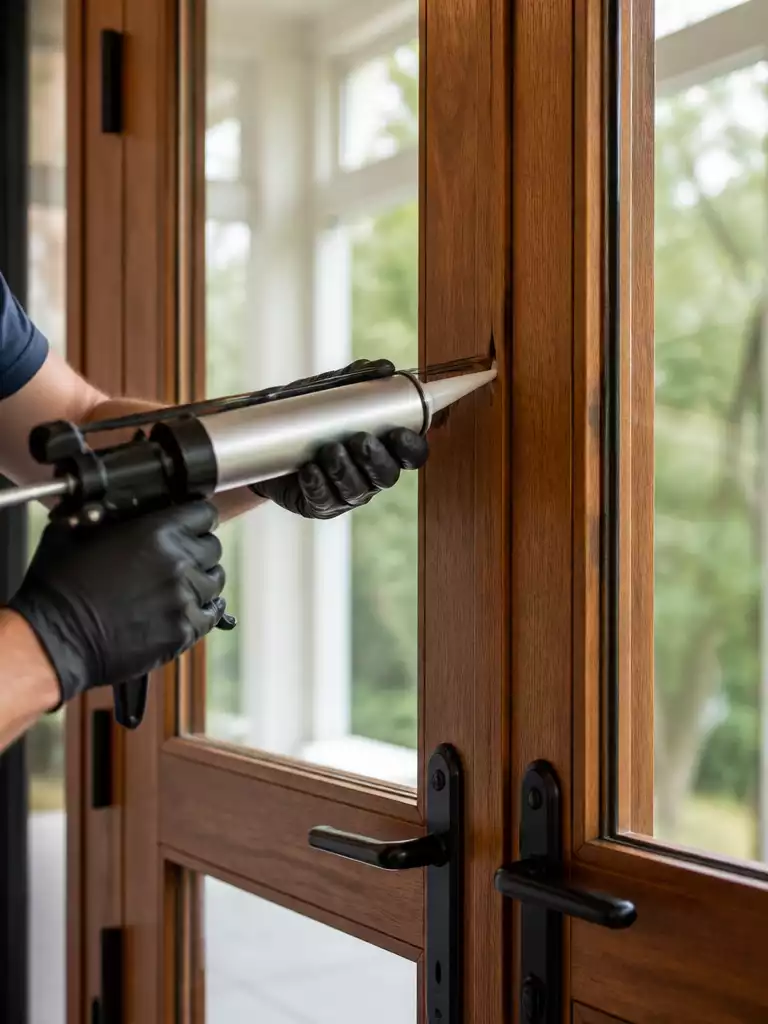
Precision installation ensures your investment remains dry and structurally sound for decades to come.
You can buy the most expensive mahogany slab in the world, but it will still rot if the installation ignores basic physics. Research indicates that 90% of wood door rot begins in the bottom two inches of the unit, usually because water was allowed to pool or wick into the end grain.
The solution isn’t just more caulk; it is a comprehensive water management strategy that treats the threshold like a mini-levee. This phase determines if your “decade door” survives its first rainy season without structural compromise.
The Critical Installation Checklist
- Sill Pan Flashing: Every double door must sit in a plastic or metal sill pan—a tray that catches any water bypassing the weatherstripping and drains it back outside.
- Shimming Strategy: Shims must be placed directly behind the hinge locations to prevent the heavy frame from bowing inward under the weight of 150lb+ door leaves.
- Back-Caulking: Installers should apply a heavy bead of sealant to the back of the exterior brick-mould before it is nailed to the house to create a hidden secondary seal.
- Plumb and Square: The rough opening must be checked for “cross-corner” accuracy to ensure the two leaves meet perfectly in the center for a weather-tight seal.
The “Paper Test” Reality Check: After the door is hung, close it on a single sheet of paper. You should feel significant resistance when pulling that paper out at any point along the perimeter; if it slides out easily, your weatherstripping isn’t compressed, and water will eventually follow.
Properly supporting the weight of double doors requires mechanical stability within the frame itself. If the shims are loose or the sill pan is omitted, the doors will eventually sag, breaking the air seal and allowing moisture to migrate into the subfloor.
Expert Insight: Always insist on stainless steel fasteners for the threshold and hinges. Zinc-plated screws react with the natural tannins in high-quality woods like Oak or Cedar, creating “black rot” holes that permanently damage the wood fibers.
.
🛠️ Installation Tips That Make a Difference:
- Hinge Shim Placement: Place shims precisely behind hinges—not just anywhere—to maintain door straightness under heavy use.
- Sealant Timing: Apply back-caulking before nailing brick-mould to avoid trapped moisture and ensure a lasting secondary barrier.
- Weatherstrip Compression: Use the paper test during installation to confirm an even, tight seal that blocks drafts and water intrusion.
11. Maintenance Schedule: The “Ounce of Prevention”
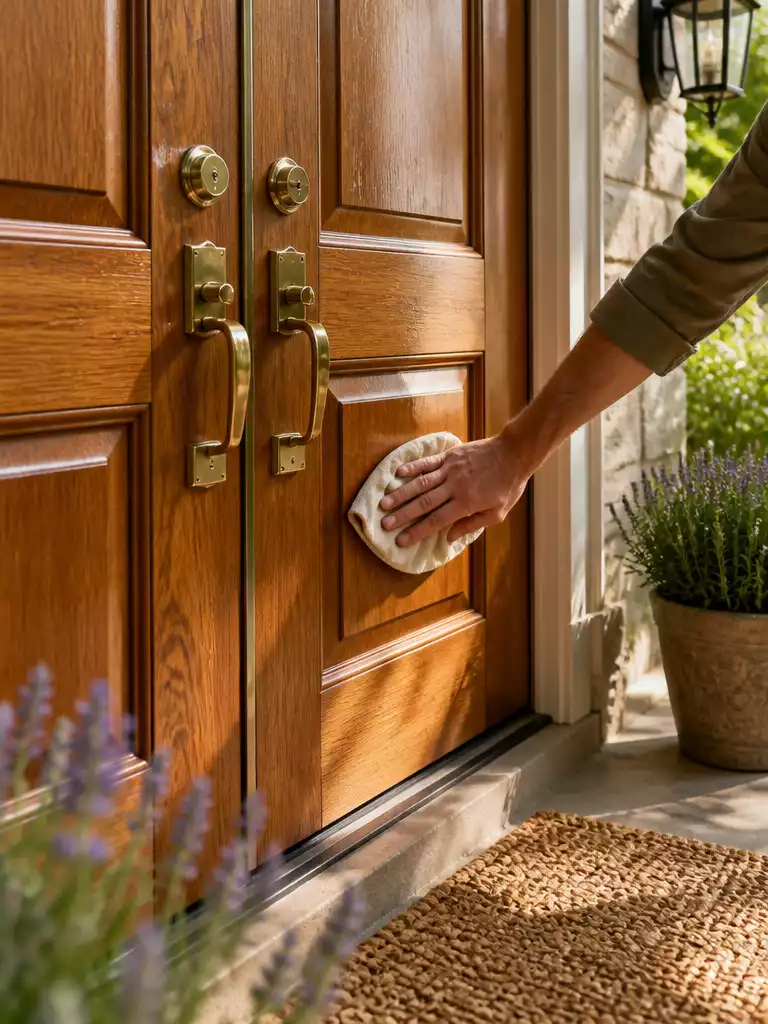
Preserve the deep glow and structural integrity of your investment with proactive, gentle care.
Waiting until your wood door looks dry, parched, or grey to start maintenance is a common mistake that can cost you five years of its total lifespan. By the time the color fades, the wood fibers are already losing their cellular bond, making them vulnerable to deep-seated rot.
The Annual Longevity Inspection
Every spring, perform a walk-through to catch micro-failures before they require a professional sand-down.
- Bottom Rail Check: Look for hairline cracks in the finish where water can wick into the end grain.
- Lock Bore Scrutiny: Inspect the area around the handle and deadbolt for signs of finish thinning or moisture rings.
- Joint Integrity: Ensure the vertical stiles and horizontal rails show no signs of separation or glue failure.
- Weatherstripping Compression: Verify the seal is still pliable and not flattened or cracked from UV exposure.
When it comes to cleaning, a light touch is mandatory. Never use a pressure washer on a wooden double door, as the high-pressure stream can force moisture deep into the joinery and cause internal delamination.
If you have opted for a high-quality oil finish, maintenance is remarkably simple compared to film-forming varnishes. A “clean and recoat” should be performed every 2-3 years, specifically targeting the bottom half of the door, often called the weather zone, where ground splash and sun exposure are most aggressive.
Consistency is the secret to a door that looks as grand in twenty years as it did on installation day. A proactive schedule transforms a daunting renovation project into a simple afternoon of preventative care.
.
📋 Before You Start Maintenance
- Surface Condition: Confirm the finish is intact without deep peeling before applying any new sealant or oil.
- Hardware Fit: Check hinges and locks for tightness and smooth operation to avoid stress on the door frame.
- Drainage Paths: Ensure thresholds and drip edges are clear to prevent water pooling beneath the door.
Cost vs. Longevity: The ROI of Over-Engineering
Investing in structural integrity today secures a grand entrance that matures beautifully for generations.
Thinking about a five-figure price tag for a front door can feel like a massive hit to the renovation budget. However, the math on entryways is deceptively simple: a $3,000 door that fails in a decade costs you $300 every year, while a $9,000 over-engineered door that lasts 50 years drops your annual cost to just $180.
When you choose a “contractor grade” double door, you aren’t just saving money upfront; you are often opting into a cycle of replacement. These cheaper units usually lack the stave-core stability and high-end sealants required to survive real-world weather, leading to warped frames and delaminated veneers that require a full tear-out and labor-intensive reinstall within years.
The Real Cost of Ownership
| Factor | Budget Double Doors | Over-Engineered Doors |
|---|---|---|
| Initial Investment | $3,000 – $5,000 | $9,000 – $15,000+ |
| Expected Lifespan | 5 – 12 Years | 30 – 50+ Years |
| Maintenance Style | Sand & Strip ($1k+) | DIY Oil Refresh (Low Cost) |
| Resale Value Impact | Neutral/Negative | High ROI (Top 3 Item) |
High-quality wood double doors are consistently cited by Remodeling Magazine data as one of the top three items for home resale value retention. Beyond the aesthetic “wow factor,” savvy buyers recognize the difference between a door that rattles and one that closes with the solid “thud” of a luxury vault.
If your budget is under pressure, prioritize the “Core” and the “Species” above all else. You can always swap out a standard handle for designer hardware or upgrade to decorative glass later, but you can never retroactively fix a cheap wood species once the rot has taken hold of the internal frame.
“In the world of luxury entryways, durability is the ultimate discount. Spending more on the engineering today prevents the $15,000 headache of a failed system tomorrow.”
Ultimately, a well-chosen door is a one-time purchase. By investing in structural integrity and climate-appropriate materials, you ensure your home’s first impression remains as solid and impressive in thirty years as it is on the day of installation.
.
📋 What to Check First Before Installation:
- Verify Sill Pan Fit: Confirm the sill pan dimensions match your rough opening for proper water drainage and no gaps.
- Shim Placement: Identify exact hinge locations to place shims directly behind them for solid load support.
- Back-Caulking Prep: Check the brick-mould surface is clean and dry before applying sealant to ensure a lasting waterproof bond.
You now have a clear framework to evaluate wooden double front doors beyond just looks, focusing on the essential elements that ensure durability and lasting protection. There’s no need to tackle everything at once; rather, choose the aspects that fit your home’s needs and your comfort level.
Taking even one thoughtful step toward a well-constructed, weather-resistant door sets you on a path to investing in long-term quality and peace of mind. Your front entry can become a lasting symbol of care and craftsmanship, adding value and warmth to your home.