

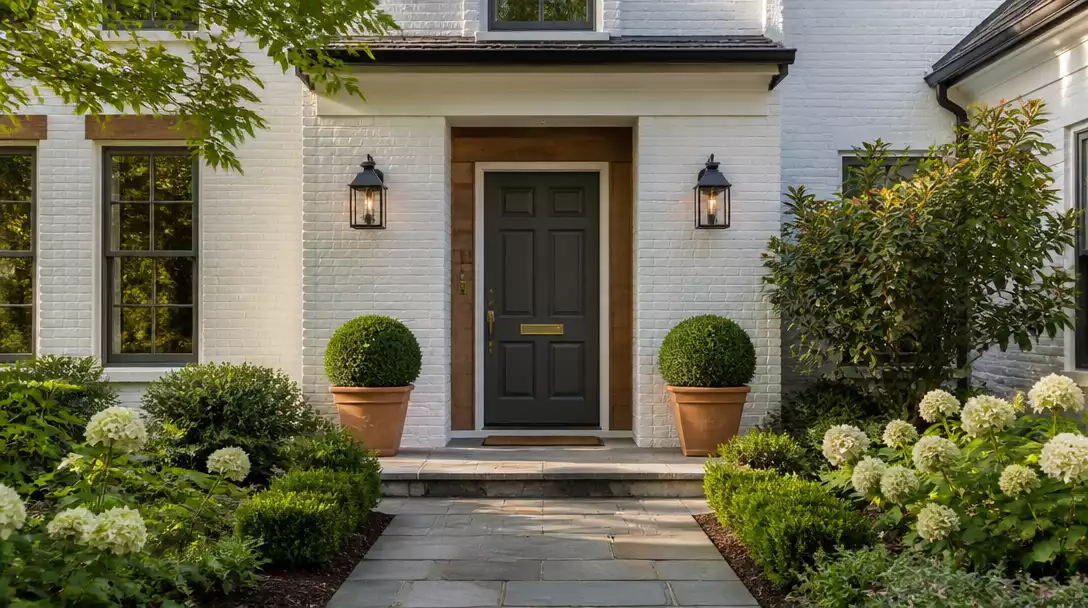
Curb appeal is the result of intentional design choices across your home’s entire exterior, from balance to material cohesion. This guide rounds up 17 front of the house ideas worth saving, helping you identify the right strategy to polish your street presence. Let’s look at your facade layout.
Symmetrical Facade Layout
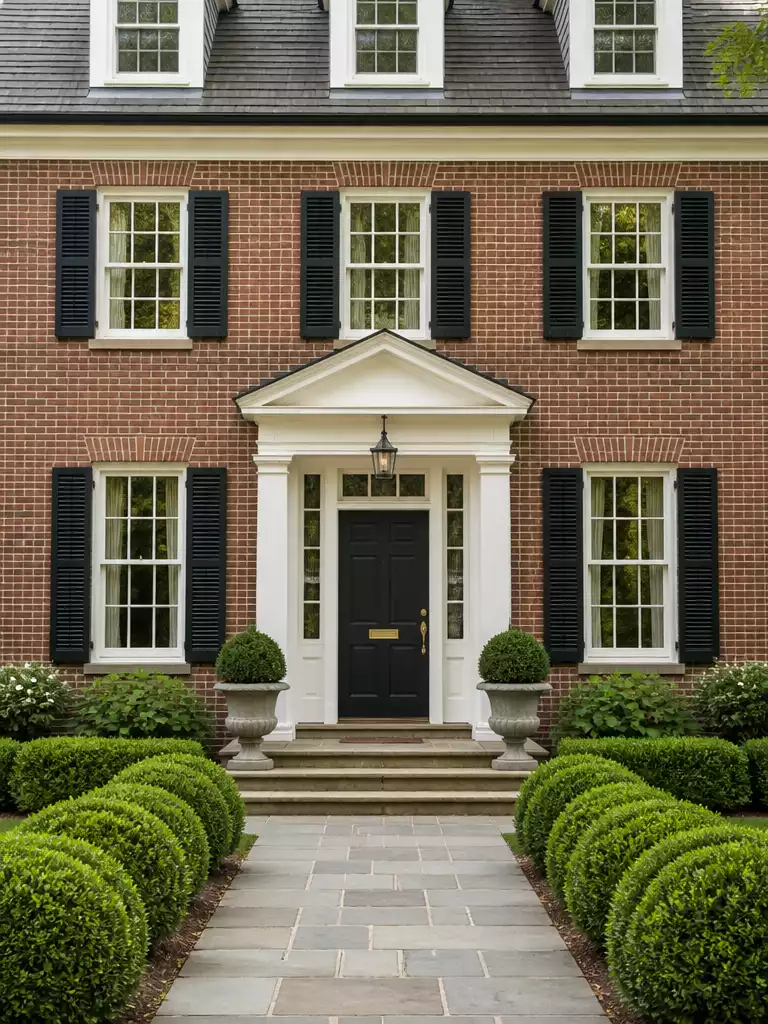
Achieve professional-grade order by aligning your facade around a clear, central focal axis.
As an Amazon Associate I earn from qualifying purchases. Affiliate links may earn me a commission at no extra cost to you.
Symmetry creates a sense of formal tension that instantly makes a home look more expensive and intentional. This design strategy relies on the central focal axis, where the massing of the house, window placement, and the front door are mirrored across an imaginary vertical line.
If your home lacks natural symmetry, you can use accessories to simulate it. Place identical, large-scale planters or matching topiary shrubs on both sides of the front door to anchor the entry and draw the eye toward the center.
The “Accidental Asymmetry” Check
Many homes suffer from off-center windows or mismatched architectural detailing that feels like a mistake rather than a design choice. You can fix this by using window trim or shutters to visually “stretch” or shrink window frames, bringing them into alignment with the rest of the facade.
Remember that massing and alignment are significantly more important than individual decorations. If the underlying geometry of your house is unbalanced, no amount of paint or trim will solve the issue.
This approach is ideal for owners of classic, traditional, or mid-century homes looking to elevate their curb appeal. If you prefer a highly modern or erratic architectural style, you may find this level of rigidity too restrictive for your vision.
⭐ Top Welcome Mats for Your Front Porch
Natural Coco Coir Welcome Door Mat
Funny Welcome Mat for Front Entrance
Heavy Duty Rubber Backed Entryway Mat
Designer Note: Mastering Visual Equilibrium
Symmetry acts as a visual shorthand for quality, signaling to the eye that every element belongs. When working with an existing facade, focus on the “weight” of your accessories—two undersized planters will fail to anchor a large entry just as effectively as a single, oversized one would overwhelm a narrow doorway. Always prioritize proportional consistency over mere repetition to ensure your home feels intentional rather than staged.
Rendered Or Painted Walls
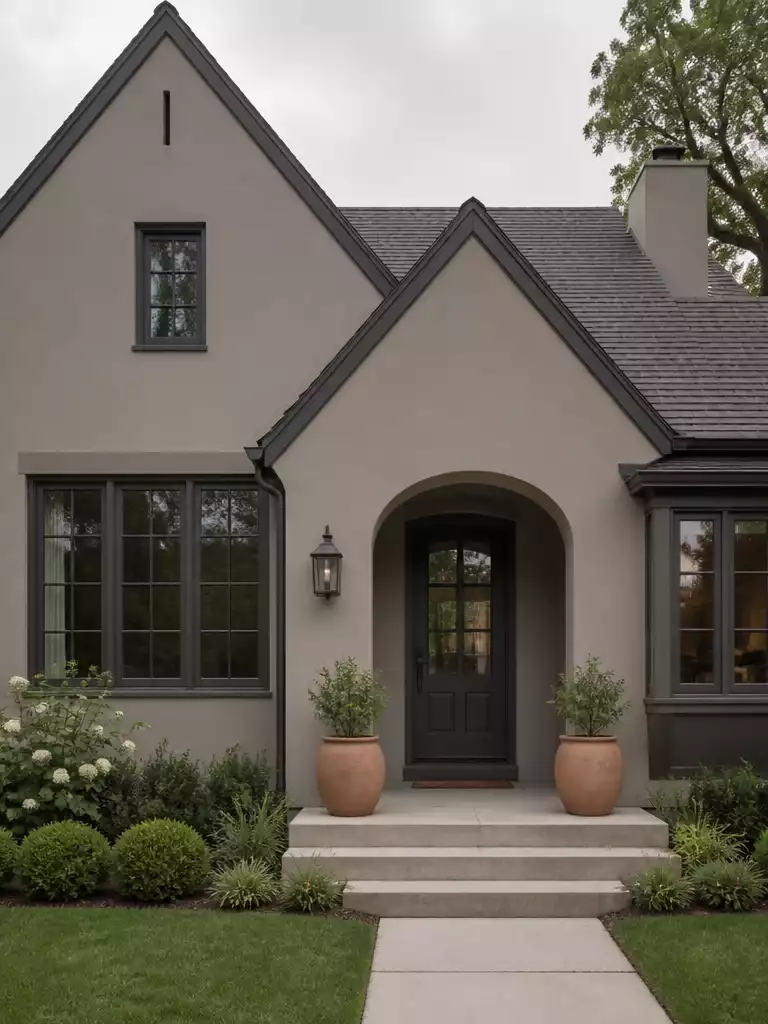
Refresh your home’s exterior with a unified palette for an instant, high-impact curb appeal upgrade.
A fresh coat of paint or a clean render acts as a reset button for an aging home. It covers decades of wear and gives the building a crisp, intentional presence from the street.
The secret to a professional result is colour cohesion. You should extend your chosen palette to the trim, eaves, and window frames to avoid a disjointed, patchwork look that breaks up the house’s silhouette.
Choose your finish wisely. Matte finishes are often the better choice for older masonry because they hide minor cracks and surface imperfections that high-gloss options tend to highlight.
Avoid the common mistake of selecting too many contrasting colours for your architectural details. If you use different tones for the gutters, window frames, and doors, you risk making the house look smaller and busier than it actually is.
Before you commit to a colour, test it on a large board rather than a tiny patch on the wall. Watch how the hue changes throughout the day to ensure it works with the natural light hitting your facade.
⭐ Essential Painting Supplies for Home Renovations
Exterior Front Door Frame Insert Kit
Sturdy Five Step Ladder with Tray
Paintable Solid Wood Pocket Hole Plugs
⚠️ Common Mistakes to Avoid:
- Ignoring surface prep: Painting over dirt or loose render guarantees the fresh coat will peel within a season.
- Testing in shade: Relying on a tiny paint sample can fail if it looks different under direct sunlight.
- Over-contrasting trim: Using too many bright, clashing tones makes the facade look busy and shrinks the silhouette.
Exposed Brick Elevation
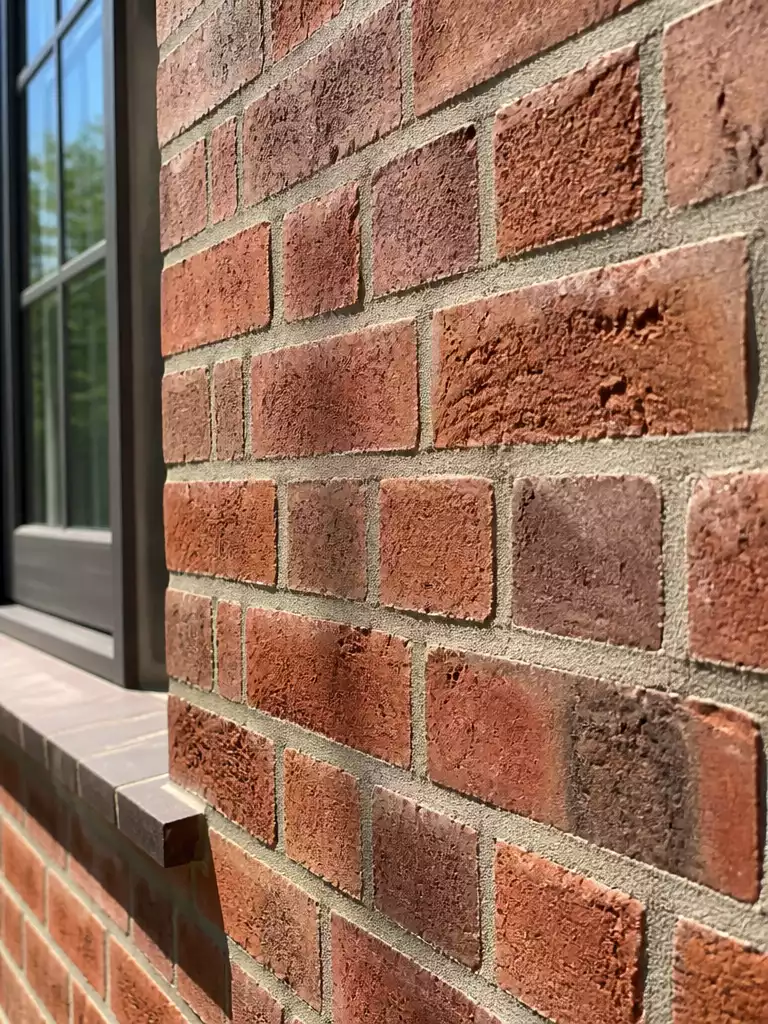
Refresh your home’s character by prioritizing masonry health and subtle, modern tone adjustments.
An aging brick facade often loses its curb appeal not because of the material itself, but because the mortar has begun to crumble or the surface has become stained. Before considering a full paint job, treat your brick as a maintenance-first asset that requires a deep clean and structural check.
The Patchwork Trap: Never patch mortar with a different shade than the original mix. A mismatched mortar line is immediately visible from the street and ruins the visual unity of the entire elevation.
If the original brick tone feels dated but you want to keep the texture, consider limewashing. Unlike heavy masonry paint, limewash allows the brick to breathe while softening the colour, creating a chalky, mineral-rich finish that looks intentional rather than covered up.
This approach is right for homeowners who want to respect the history of their home while removing the “neglected” look that comes with weathering. Skip this if your bricks are crumbling, spalling, or moisture-damaged, as these issues require professional masonry intervention beyond a simple cosmetic refresh.
⭐ Durable Masonry and Brick Sealing Solutions
Professional Exterior Wood Stain and Sealer
🔢 The Right Sequence for Lasting Masonry:
Tackling structural repairs before cosmetic updates prevents wasted effort and ensures your home stays protected against the elements.
- Structural stabilization: Repair loose or missing mortar joints first to prevent water ingress and loose bricks.
- Deep cleaning: Remove dirt and salt efflorescence using a masonry-safe cleaner before applying any treatments.
- Final finishing: Apply limewash or breathable sealants only after the surface is fully dry and repaired.
Timber Or Stone Cladding
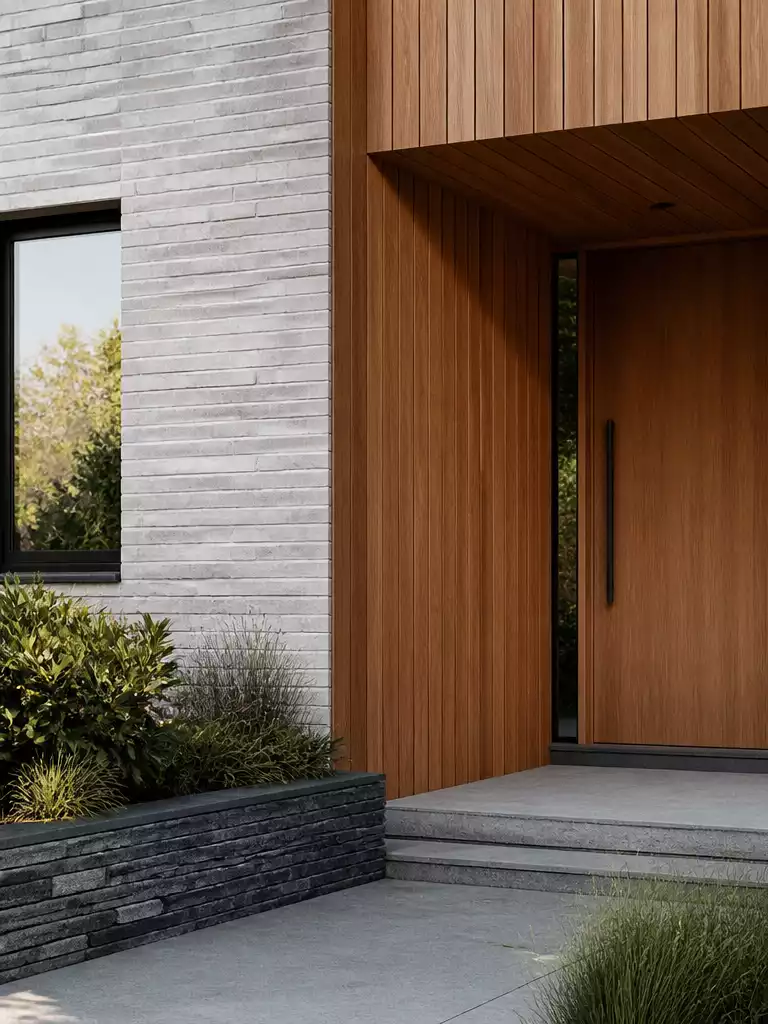
Introduce tactile contrast to your facade to define key architectural features and ground the home.
Adding timber or stone cladding is the most effective way to break up the monotonous look of a standard brick or rendered home. Instead of covering the entire elevation, use these materials for visual zoning to highlight specific areas like the entryway or a gable end.
This approach works best for homeowners who feel their house lacks character or depth. If your facade is a single, flat material, adding a feature wall of stone or timber provides the necessary contrast to make the architecture feel intentional.
Pro Tip: The Bridge Effect
Repeat your chosen cladding material in your hardscaping, such as using the same stone for path borders or garden beds. This creates a cohesive bridge that connects the house structure directly to the surrounding landscape.
When selecting your materials, consider the scale of your home. Use stone for lower-level accents to provide a sense of weight—this grounding effect anchors the building to the site and makes it appear more permanent.
Skip this upgrade if your home already features complex architectural details or too many competing textures. Adding more materials to an already busy facade will only create visual clutter rather than the intended focus.
⭐ Accent Wall Panels That Elevate Style
Peel and Stick Wall Molding Panel
Premade Paintable Wainscoting Wall Panel Kit
MDF Arch Style Accent Wall Panels
💡 Why This Works:
Introducing natural stone or timber cladding transforms a flat facade by creating depth and shadow lines that simple paint cannot replicate. By zoning these materials at the base or around the entry, you anchor the home to its site, making it feel like a permanent, well-considered part of the landscape rather than an isolated structure.
The Anchoring Effect: Using stone at the lower levels provides visual weight that grounds your home’s architecture to the ground.
Stepping back to the sidewalk often clarifies which design elements truly dictate your home’s curb appeal. You rarely need to overhaul every architectural detail to achieve a cohesive exterior, as a few well-chosen adjustments provide the visual weight needed to elevate your entrance.
Focusing on two or three high-impact upgrades creates a more polished street presence than spreading your budget across seventeen minor, disconnected changes.
Roofline And Gable Shape
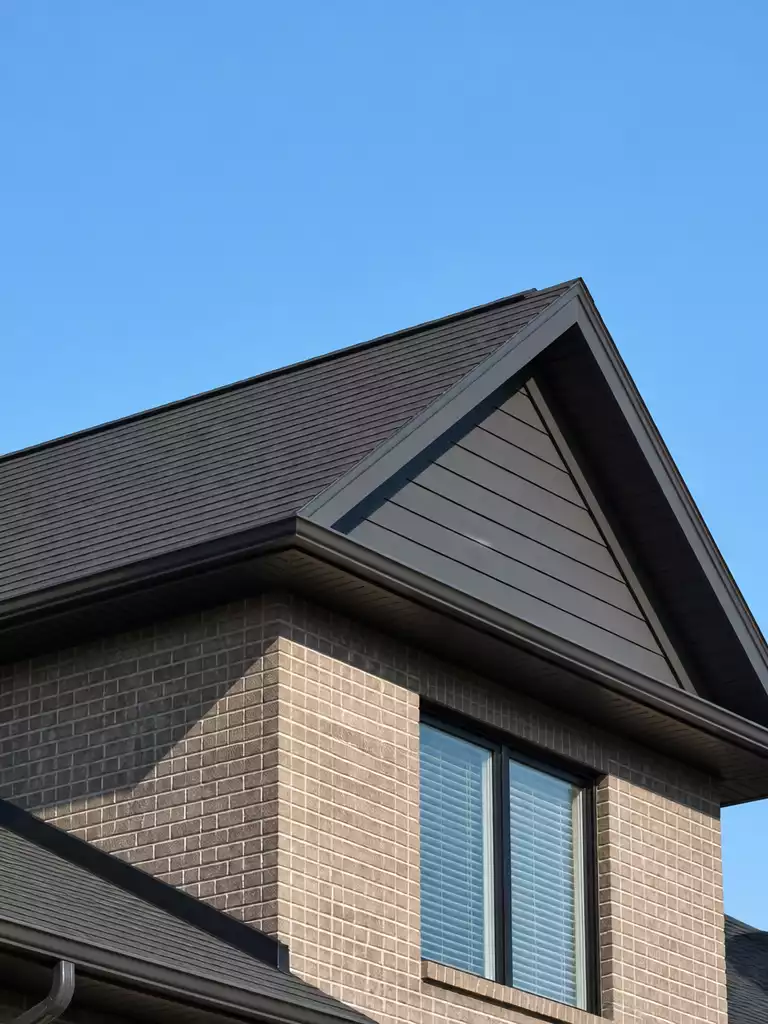
Define your home’s silhouette and ground its height with clear, intentional roofline geometry.
Your roofline is the first thing a passerby sees against the sky, acting as the definitive silhouette of your home. The shape of your gable—whether it is a steep, traditional pitch or a low-profile modern slant—tells the story of your house’s architectural era.
If you have multiple gables, they must speak the same architectural language to avoid a chaotic, “tacked-on” look. Mismatched roof pitches often reveal poorly planned additions rather than a cohesive design.
The Condition Check: Fascia boards and soffits are the unsung heroes of your roofline. If these are peeling or water-stained, they drag down the entire elevation, regardless of how new your roof shingles appear.
Colour tone plays a massive role in how a house sits on its site. A dark-toned roof typically makes a home feel anchored and grounded, which is excellent for houses that feel like they are floating or lack a solid presence.
Conversely, a roof that is too light or bright can overwhelm the facade, making the upper portion of the house look top-heavy. When selecting roofing materials, consider the scale of your home:
- Small cottages: Benefit from mid-tone, neutral shingles that don’t dominate the limited wall space.
- Large, multi-story homes: Handle dark, high-contrast roofing well, as it helps define the house silhouette against large sky backgrounds.
- Modern facades: Often rely on hidden gutters and crisp, minimal fascia to emphasize the gable edge.
Warning: Avoid high-gloss paint on fascia or trim boards. A matte finish is always better at masking minor imperfections in the wood and prevents the roofline from looking plasticky or cheap.
⭐ Exterior Trim and Roofline Protection Kits
Universal Sliding Door Vent Seal Kit
Automotive Trunk Lid Weather Stripping Seal
Flood Protection Starter Sealer Kit
✨ Finishing Touches for Your Roofline
Beyond the primary gable shape, these small architectural details prevent your roofline from feeling disconnected or unfinished against the sky.
- Gable Brackets: Consider adding timber corbels or decorative brackets to the gable peak for a classic, custom-built appearance.
- Hidden Gutters: Upgrade to seamless, low-profile gutters that mirror your roof color to keep the silhouette clean and minimalist.
Window Proportion And Grouping
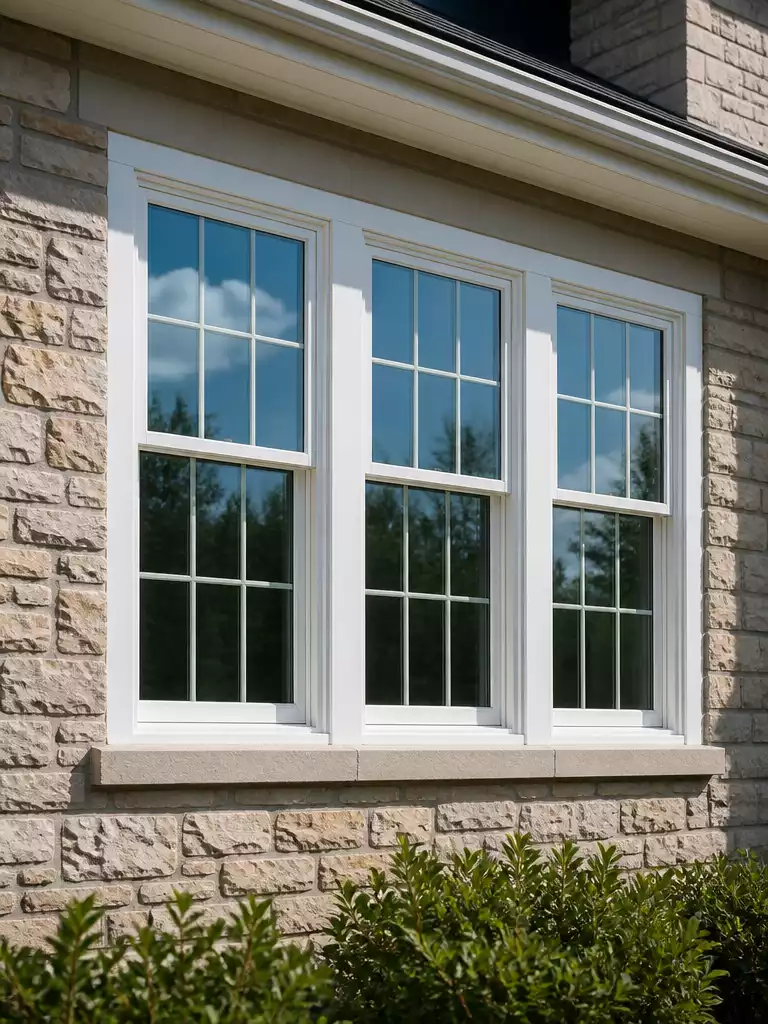
Create a deliberate visual rhythm by aligning windows to frame your home’s structure perfectly.
Do your windows look like they were placed based on the interior floor plan alone, or do they feel like a deliberate part of the home’s exterior identity? When windows appear scattered or mismatched, the entire facade loses its sense of order.
Visual rhythm is the secret to making a house look intentional rather than accidental. You can achieve this by grouping individual windows into pairs or triples, which creates a stronger, more graphic statement than a single, lonely window ever could.
The Repair Rule: No matter how high-end your window style, peeling paint, cracked caulk, or broken seals will ruin the perceived value of your home.
Treat window maintenance as a primary aesthetic choice rather than just a chore; it is the physical evidence that you care for your home’s envelope.
If you are looking to update your home’s curb appeal, use this checklist to assess your current window groupings:
- ✔ Check for alignment: Do the top and bottom lines of your windows align across the facade?
- ✔ Inspect seals and glazing: Are there visible gaps or crumbling putty that draw the eye for the wrong reasons?
- ✔ Evaluate grouping: If you have two small windows side-by-side, can you unify them with a single custom trim or shutter treatment to make them look like one deliberate feature?
Avoid the “Afterthought” Trap: Never let window placement dictate your exterior look if those windows are off-center or oddly sized. Use window trim or custom exterior shutters to visually “stretch” or “center” windows that don’t naturally fit the facade’s symmetry.
⭐ Window Trim and Shutter Hardware Essentials
Heavy Duty Magnetic Door Catch Set
Decorative Primed MDF Rosette Corner Block
Decorative Beach House Mermaid Exterior Shutter
📋 Quick Reality Check: Window Integrity
- Check for rot: Probe wooden sills with a screwdriver to ensure they haven’t softened from years of untreated moisture exposure.
- Test operational ease: Ensure windows open and close smoothly; stuck sashes often indicate frame warping that requires professional structural adjustment.
- Inspect finish thickness: Verify that paint hasn’t built up to the point of obscuring frame details or preventing proper drainage at the sill.
Shutter And Window Trim
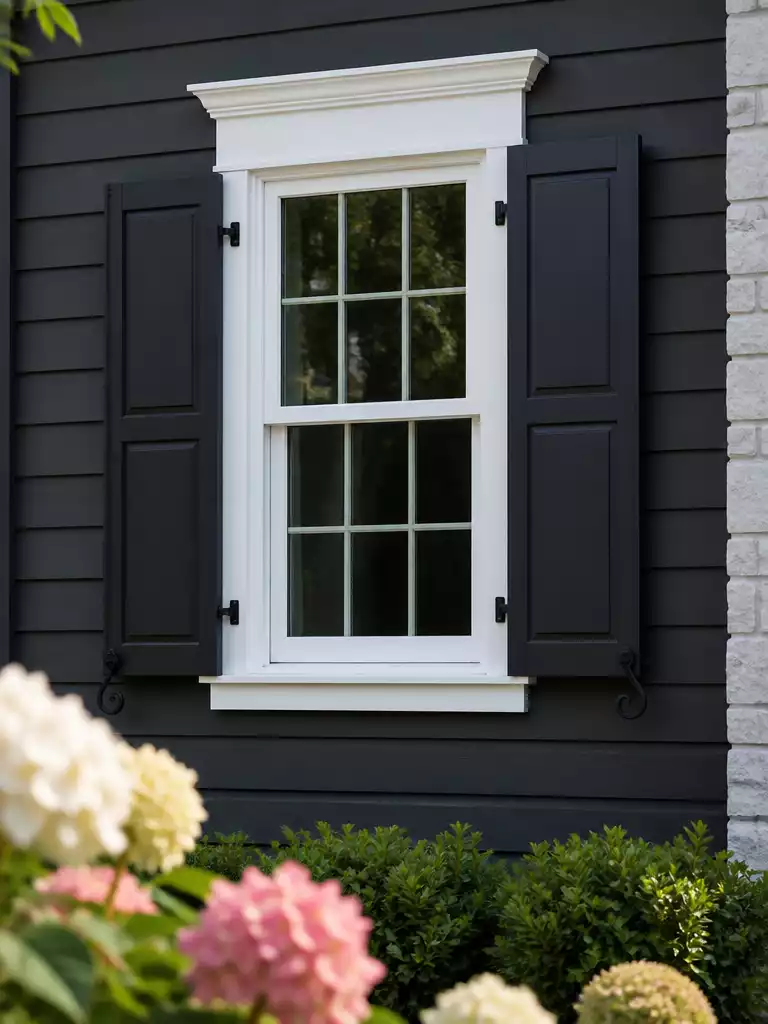
Define your home’s architectural edges with scale-accurate trim and functional, cohesive shutter styling.
Think of trim as the frame that gives your windows a finished, intentional look. Without a defined casing, even the highest-quality windows can look like they were simply punched into the wall.
The rule of cohesion is your best friend here. If you choose a bold or contrasting color for your shutters, that same tone must appear elsewhere on the facade—such as your front door or eaves—to tie the elevation together.
Avoid the “fake” look: Shutters should always be sized as if they could actually cover the window glass. If your shutters are clearly too narrow or mounted flat against the wall without hardware, they draw attention to their lack of authenticity.
When selecting your trim, focus on the relationship between the frame depth and the house style. A thicker, more prominent casing works well on traditional homes to create a sense of substance.
Use this quick guide to determine if your current window setup needs an update:
- Missing trim: If your windows sit flush with the siding, adding a simple trim board can instantly inject character.
- Peeling frames: Damaged frames ruin the perceived value of your home; scrape, sand, and repaint to restore the “crisp” line.
- Isolated colors: A shutter color that doesn’t repeat on the front door or porch creates a disjointed “floating” effect.
- Scale mismatches: Keep shutters to half the width of the window opening to maintain a realistic, functional appearance.
Ultimately, your goal is to make the windows feel like a deliberate part of the wall structure. If a window feels like an afterthought, adding a robust trim profile is the fastest way to ground it back into the architecture.
⭐ Sophisticated Door Trim and Casing Kits
Self Adhesive Interior Door Trim Kit
Flexible Peel and Stick Door Molding
Universal Arched Doorway Frame Kit
Framed Front Entrance
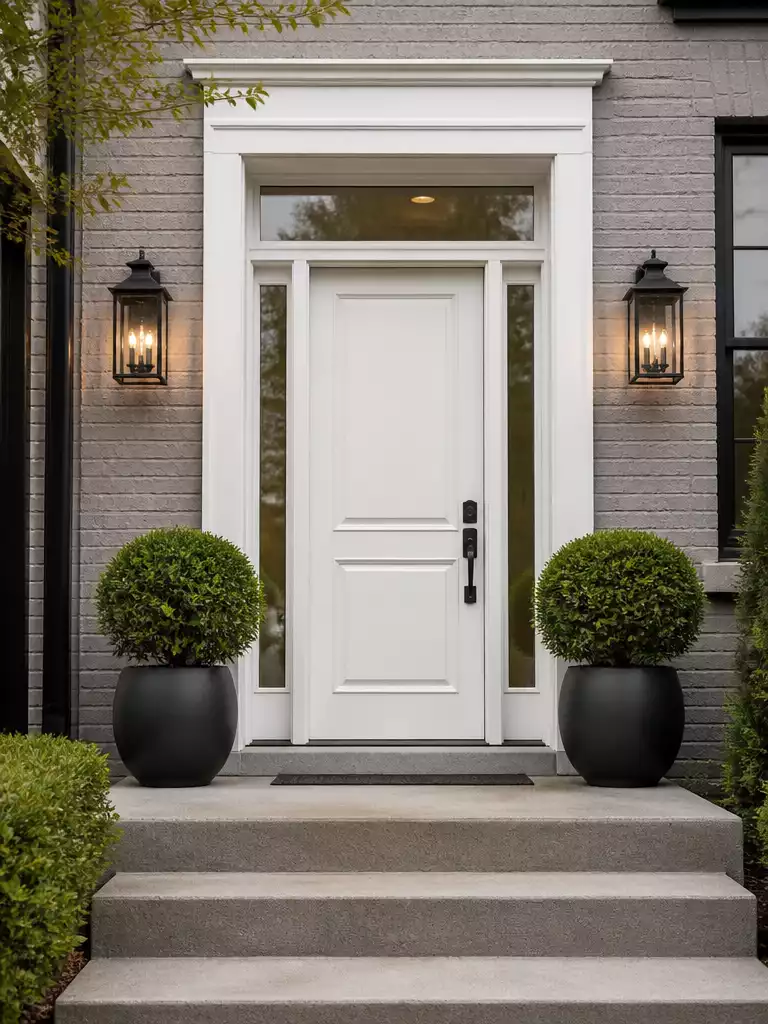
Create a powerful focal point that guides every visitor directly to your front door.
Your front door should be the most obvious point of arrival, yet many homes suffer from a “lost entry” effect where the door blends into the facade. You do not need a major renovation or a structural porch addition to solve this.
Instead, focus on the focal point theory: clear, intentional framing that tells the eye exactly where to look. By creating an “entry zone,” you signal to visitors that this is the primary transition point into your home.
Pro-Tip: Lighting as a Frame
Flank your door with high-quality wall-mounted fixtures to create a perimeter of light. This is the most cost-effective way to add architectural weight to a flat entrance.
If your entryway lacks a formal portico, use these three design elements to build a frame that feels substantial and permanent:
- Oversized Planters: Place a pair of large, matching containers on either side of the door. Use evergreen shrubs to provide consistent height and visual mass throughout the year.
- Architectural Surrounds: Add trim or molding around the door casing to thicken the visual frame. This makes a standard door appear larger and more integrated with the surrounding wall.
- Layered Lighting: Install dedicated uplights or sconces that specifically highlight the door frame. This creates a theatre-like effect that draws the focus toward the threshold at night.
This approach works best for homes with flat facade layouts where the door might otherwise be overlooked. If your entrance already has a deep-set porch, skip the architectural molding and focus on lighting and symmetry instead to avoid cluttering the space.
⭐ Porch Lighting That Enhances Your Home
Waterproof Exterior Wall Sconce Lantern
Exterior Porch Light with GFCI Outlet
Dusk to Dawn All Metal Porch Light
<div style="background: #ffffff; border: 2px solid
Covered Porch Or Portico
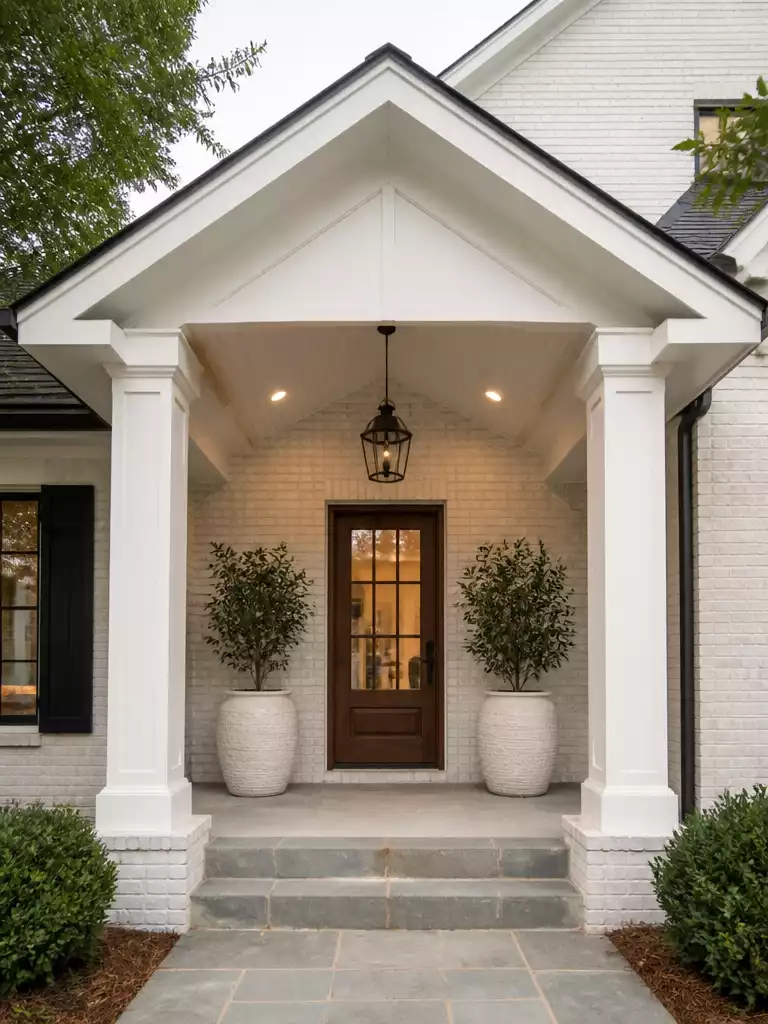
Add immediate architectural depth while creating a legible, sheltered arrival point for every guest.
A covered porch or portico functions as the architectural “handshake” of your home. By introducing a roofed structure over your threshold, you create a distinct sense of depth that breaks up a flat, uninspiring facade.
This addition is perfect for homes where the front door feels lost or flush with the wall. It provides immediate visual legibility, telling visitors exactly where the point of entry is without needing a sign.
The Scaling Rule: The biggest mistake is installing a portico that feels like an afterthought or a “bolted-on” box.
Ensure the pitch of your portico roof matches or complements the existing roofline to prevent the structure from looking heavy or disproportionate to the rest of the house.
Consider these two primary ways to introduce this feature depending on your budget and existing home structure:
- The Portico: A smaller, lightweight roof structure supported by columns or decorative brackets that specifically frames the door. This is ideal for period homes or cottages where a full-width porch would overwhelm the elevation.
- The Full Porch: A deck-style extension that spans a larger portion of the front facade. This suits farmhouse or traditional styles, offering space for additional seating and a more grand sense of arrival.
Avoid the “Visual Bulk” Trap
If you have a small home, resist the urge to build a massive, heavy-duty porch that blocks natural light from reaching your front windows. Choose slim-profile supports and keep the roof height modest to maintain the balance of your home’s original lines.
⭐ Secure Fence and Gate Hardware Picks
Waterproof Solar Garden Fence Hanging Lanterns
Outdoor Solar Security Fence Motion Lights
Antique Black Wrought Iron Gate Latch
💡 Why This Works:
Introducing a porch or portico adds essential “massing” to a flat front elevation. By projecting outward, it creates a deliberate shadow line that catches the eye and defines the entryway as a destination, preventing the front door from appearing sunken or disconnected from the house’s overall architectural silhouette.
Design Takeaway: Depth is the key to presence; a slight physical projection makes the entire facade feel more substantial.
Front Boundary Wall Or Fence
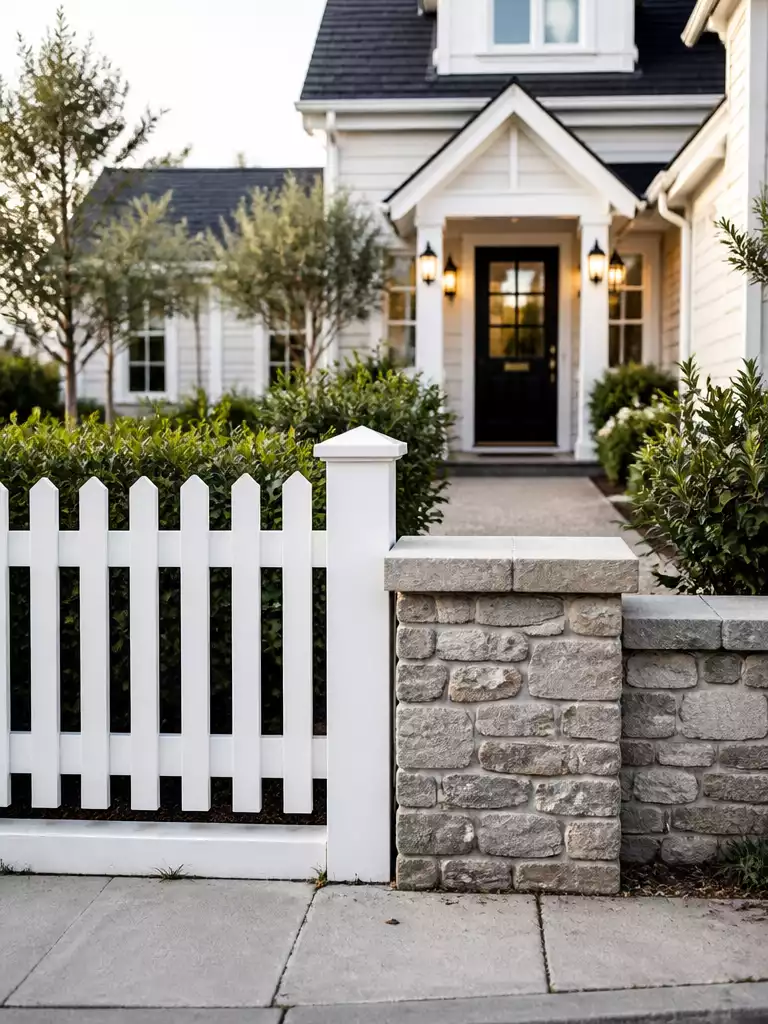
Define your property line with structure that frames your home rather than closing it off.
Your front boundary acts as the curtain for your home’s curb appeal, marking where the public street ends and your private space begins. The most successful boundaries reinforce your home’s architectural style rather than creating an impenetrable wall that hides the facade.
Choose your material based on what your house actually needs:
- Picket Fences: These are ideal for cottage-style homes, offering a classic, permeable look that feels welcoming to visitors.
- Low Stone Walls: Perfect for modern or mid-century homes, these provide a solid, grounded anchor that adds texture without blocking the view.
- Hedges: Use these when you need natural privacy; they soften the line between the street and your garden without the rigid look of man-made materials.
Pro Tip: Use your fence line to hide unsightly utility elements. A strategically placed section of lattice or a tidy hedge can effectively mask bins, meters, or garden clutter from street view.
When planning your boundary, the goal is always visibility. You want to frame the view of your front door, not obstruct it. If you find yourself needing to hide the entire house behind a high fence, reconsider your planting strategy instead.
A boundary that feels “prison-like” is the fastest way to kill curb appeal. Keep your fence or wall at a height that allows passersby to see your home’s character, ensuring the boundary acts as a frame, not an obstacle.
⭐ Reliable Hardware for Garden Gates
Heavy Duty Two Way Farm Gate Latch
White Iron Hook and Eye Latch
Stainless Steel Security Hook Gate Latch
💡 How to Keep It Polished:
- Consistent Edging: Keep garden beds along your fence line neatly trimmed and mulched to prevent the “overgrown” look that quickly ruins a clean, structured boundary.
- Seasonal Refresh: If using hedges, prioritize twice-yearly pruning to ensure the foliage remains dense and uniform; a ragged hedge creates visual chaos rather than order.
- Hardscape Alignment: Ensure your fence materials—whether stone or timber—repeat the tones found in your path or porch to create a unified, professional-grade visual language.
Gated Frontage
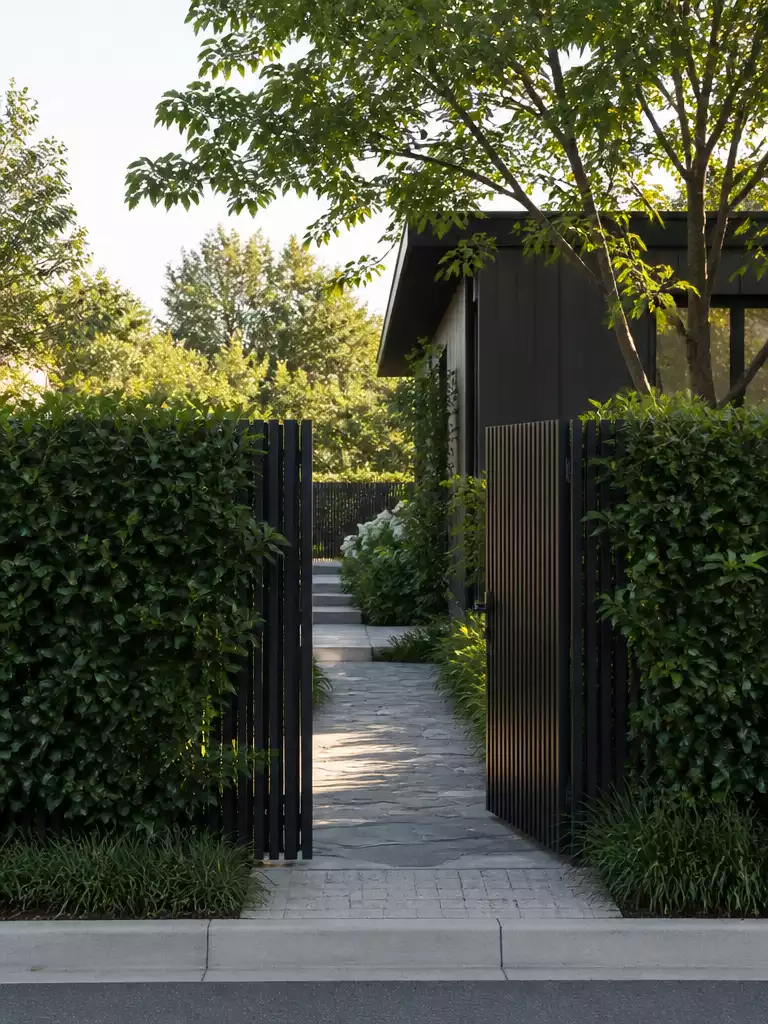
Create a welcoming threshold that connects your home to the street with intentional design.
A gated frontage serves as the primary filter between your private sanctuary and the public street. When designed poorly, it creates a defensive barrier that feels detached from the neighborhood.
To keep the transition inviting rather than closed-off, the landscaping must bleed past the gate into the public verge. This visual trickery softens the boundary and makes the home feel like a natural part of the streetscape.
Design Strategy: Visual Integration
The gate should never look like an afterthought bolted onto the property line. Match your gate materials—whether timber, iron, or steel—to existing elements like your path edging or facade cladding to ensure the design feels cohesive.
The biggest mistake homeowners make is choosing a gate that cuts the house off from the garden entirely. If you have a front garden, ensure the gate allows a clear line of sight to the entry, or it will look disconnected from the rest of your elevation.
If you prioritize high privacy, consider using a gate that incorporates slats or lattice rather than a solid wall. This maintains the security you want while still allowing the house to breathe and interact with the street.
⭐ Our Picks for Garden Pathway Lighting
Round Upholstered Storage Ottoman Footrest Stool
💰 What This Really Costs
- The baseline investment: Custom gating and professional installation ranges significantly based on material choice, often requiring specialized hardware and structural footings.
- Hidden structural costs: Don’t forget to budget for site grading, potential electrical runs for automated openers, and the necessary concrete footings for stability.
- Strategic savings: Opt for simplified, manual gate designs that match your existing fence line to avoid the premium pricing of complex, automated security systems.
Path And Driveway Layout
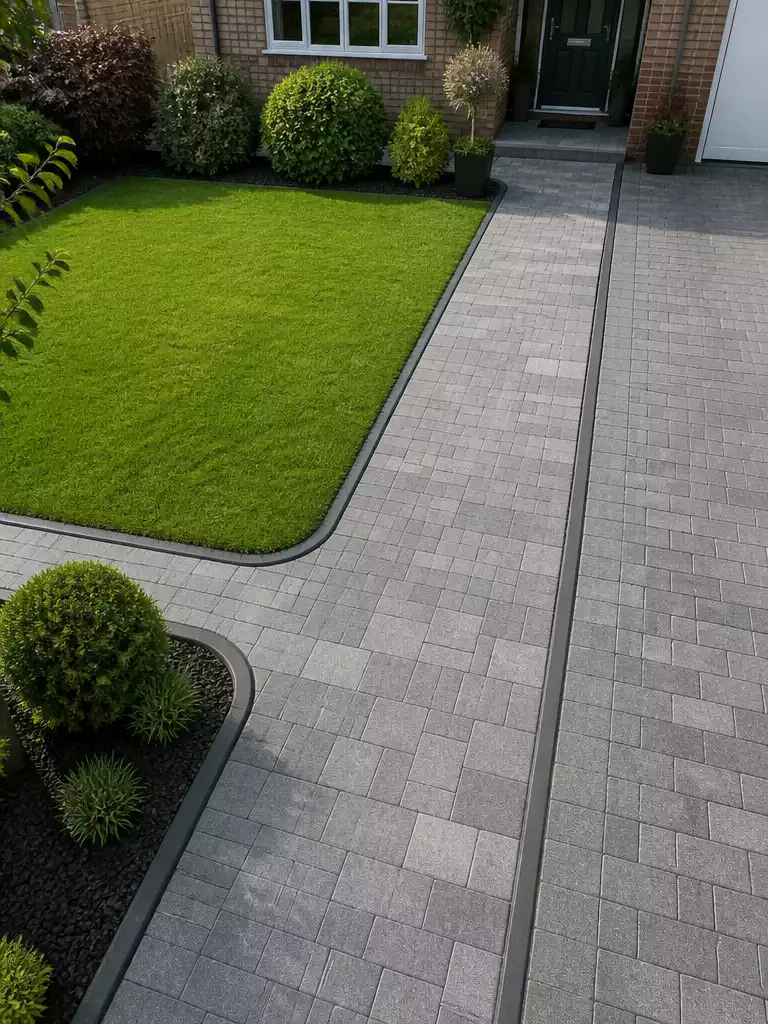
Create a clear, intentional arrival sequence that naturally guides every visitor to your front door.
Your path and driveway serve as the subconscious map for every guest visiting your home. If the route is cluttered or visually disconnected, visitors often feel hesitant about where to approach first.
Visual continuity is the secret to a high-end look. Using the same paving material for both the driveway and the front path physically links your parking area to your primary entry point, making the entire frontage feel like one cohesive design.
The Edging Rule: Never leave paving edges loose or unfinished. Installing steel, brick, or stone edging provides a clean, professional “frame” that prevents grass from creeping onto your path and keeps your hardscape looking sharp.
Consider the “path of least resistance” when reviewing your layout. If your current path makes a sharp, unnecessary ninety-degree turn, you will likely find people trampling the corner of your lawn to save time.
If you are looking to upgrade, here are the most effective materials for creating a stable, high-contrast path:
- Natural Stone: Best for adding organic texture that softens modern architecture.
- Brick Pavers: Perfect for traditional homes; they age well and provide excellent slip resistance.
- Concrete Pavers: The most budget-friendly option for achieving a clean, uniform geometric look.
Keep your hardscape free of weeds and moss with a seasonal pressure wash. A clean, well-defined path instantly makes the entire front elevation feel more cared for and accessible.
⭐ Best Exterior Lighting to Brighten Outdoors
Extra Bright Solar Powered Security Light
Hardwired Motion Sensor Outdoor Security Light
Adjustable Head Solar Motion Security Light
🔢 The Right Sequence to Avoid Rework:
Hardscaping is a permanent commitment, so it must be built in an order that protects your investment from settling, drainage issues, and unnecessary damage.
- Grade the site: Ensure the ground slopes away from the foundation before laying any base materials.
- Install the edging: Set your bricks, steel, or stone borders first to create a rigid mold for paving.
- Lay the surface: Fill the framed area with your chosen pavers, ensuring every piece is leveled and compacted.
Front Garden Planting
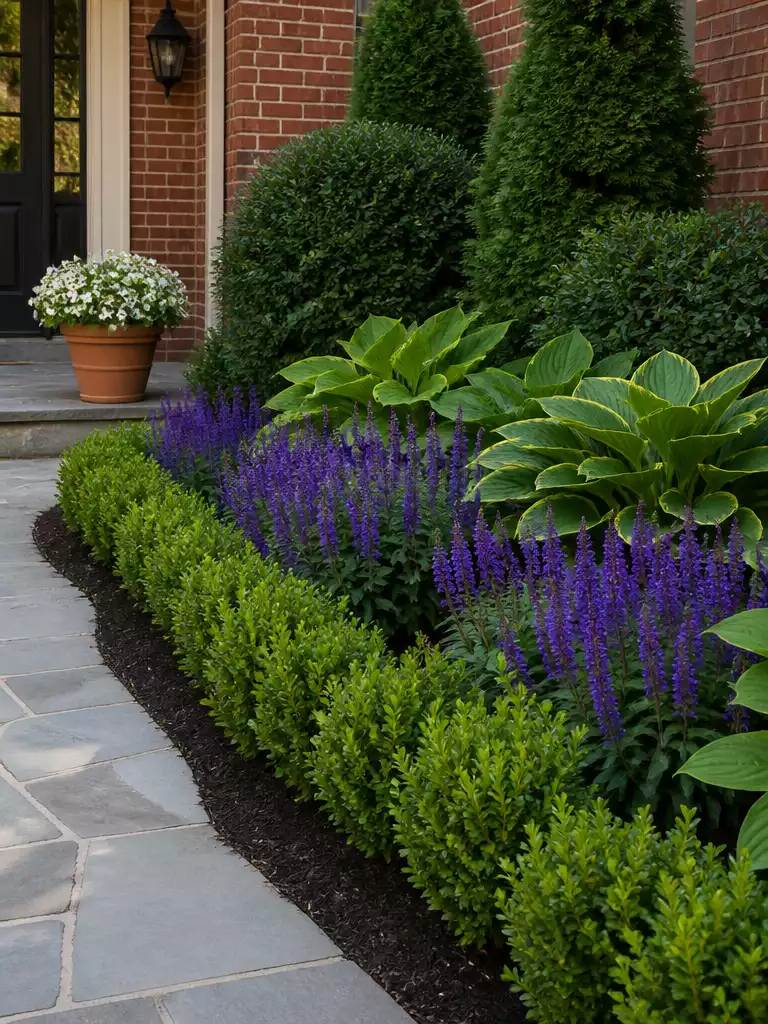
Layer your plantings to add texture and year-round color without obscuring your home’s architecture.
The secret to a polished facade is moving away from a single row of shrubs and toward a tiered, layered approach. By placing lower-growing perennials at the front of your beds and taller evergreens against the foundation, you create depth that makes your home feel more grounded and substantial.
Common Mistake: The Window-Blocker. Avoid planting fast-growing shrubs directly under low windows. Always check the mature height of a plant before digging, or you will end up with a dark interior and a facade that looks like it is being swallowed by greenery.
Maintenance is the true multiplier for curb appeal, often mattering more than the species you choose. A small, perfectly pruned bed creates a more high-end feel than a large, overgrown garden that hides your front door or path.
To keep the front of your house looking intentional throughout the year, focus on these three maintenance pillars:
- Mulched Beds: A fresh layer of dark mulch suppresses weeds and provides a clean, uniform color that makes your plants pop.
- Defined Edging: Use steel, brick, or stone to create a sharp line between your lawn and your garden, which immediately signals a cared-for home.
- Seasonal Rotation: Keep a pair of high-impact containers near the entrance that you refresh with seasonal bulbs or flowers, ensuring the entry feels alive even in the off-season.
If you don’t have the time for intensive gardening, prioritize evergreen structure over fussy flowering varieties. This ensures your home maintains a consistent, green silhouette against the street even during the winter months.
⭐ Standout Exterior Security Lights for Gardens
Wide Angle Motion Sensor Solar Light
Super Bright Four Head LED Security
Dual Head Hardwired Security Lighting Fixture
💡 Practical Tips for Garden Longevity:
- Site-Specific Selection: Choose plants based on your home’s unique wind, drainage, and sun patterns to avoid constant replacements.
- Pruning Strategy: Schedule twice-yearly trims to keep growth away from siding and windows, preserving your home’s structural integrity.
- Hydro-Efficiency: Group plants with similar water needs together to simplify your routine and ensure every plant thrives.
Climbing Plants On The Facade
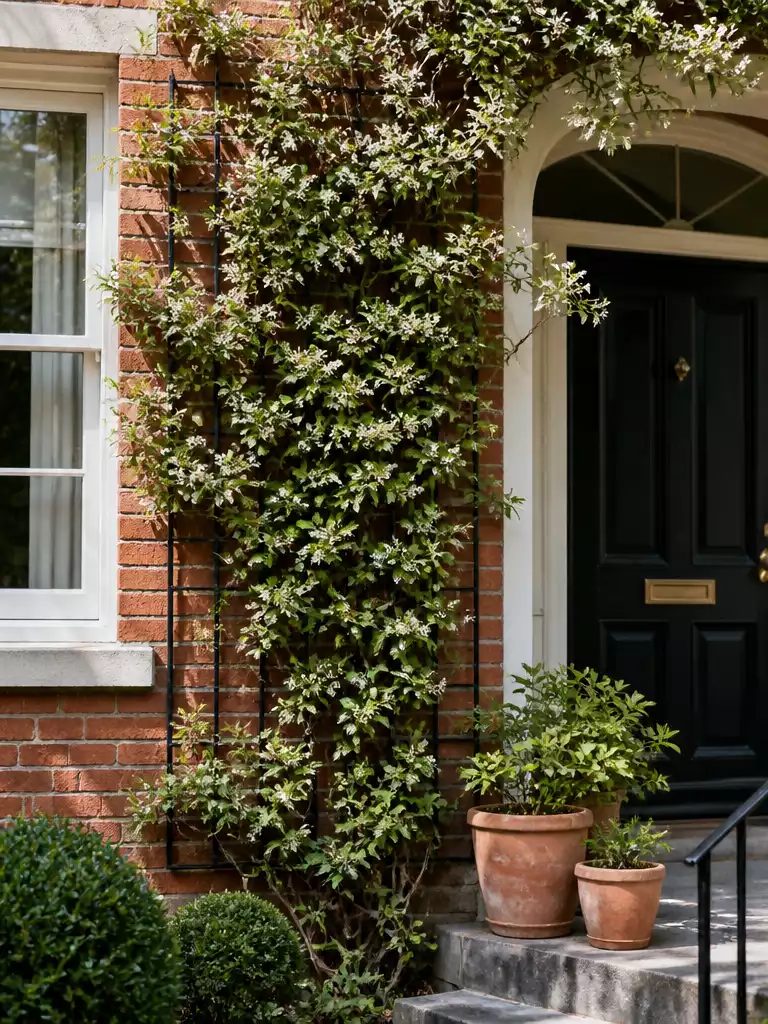
Soften rigid masonry lines with controlled vertical greenery that highlights your home’s best features.
Climbing plants are the most effective way to bridge the gap between hard architecture and the surrounding garden. Instead of letting vines grow directly onto your walls, use trellises or steel cables to guide their path and protect your brickwork or render from moisture damage.
This approach works best for homes with plain, flat elevations that feel too stark or imposing from the street. If your facade is already busy with intricate brick patterns or decorative trim, skip the climbers to avoid creating a cluttered, overgrown appearance.
Pro-Tip: Use Verticality to Direct the Eye
Install climbing roses or jasmine near your front doorway on narrow obelisks or wall-mounted supports. This creates a natural frame that draws visitors toward your entrance while adding height to the lower story.
Maintenance is non-negotiable when you invite plants onto your facade. You must prune growth back regularly to ensure it never obscures windows, blocks gutters, or weaves into roof shingles.
Always choose your plant species based on the orientation of the wall. A sun-drenched southern wall demands hardy, sun-loving varieties, while a shaded northern wall requires ferns or creepers that thrive without direct light.
⭐ Effective Pathway and Security Lighting Solutions
Solar Security Flood Light Visual Display
Adjustable Cable Solar Flood Lighting Kit
Outdoor Waterproof Solar Wall Sconce Lantern
✨ Small Details That Matter
Choosing the right hardware and support system ensures your greenery enhances the home’s architecture rather than looking like an overgrown afterthought.
- Hardware Finish: Opt for stainless steel cables or powder-coated brackets to match your existing exterior light fixtures and door hardware.
- Support Placement: Mount supports at least two inches away from the masonry to allow for essential airflow, preventing trapped moisture against your walls.
Facade And Path Lighting
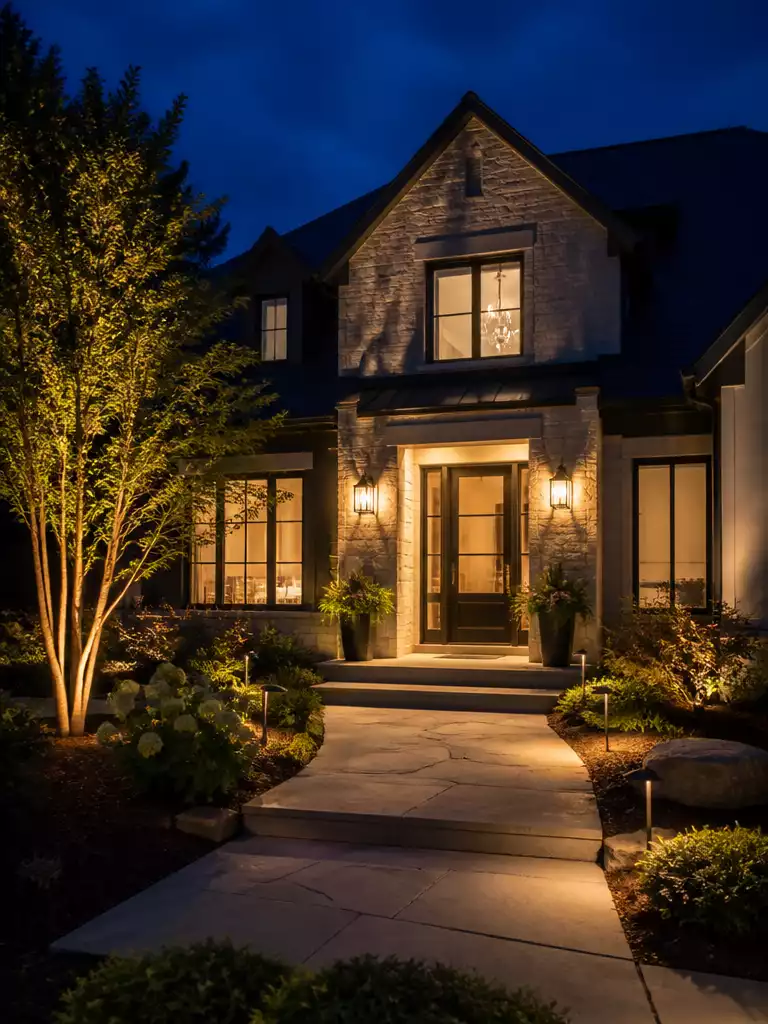
Transform your home’s night-time presence with professional lighting that guides guests and highlights architecture.
Most homes suffer from a total lack of night-time curb appeal, leaving them invisible or uninviting once the sun goes down. A successful lighting scheme operates on two distinct levels: pathway guidance for safety and façade accenting for drama.
The Two-Tier Lighting Strategy
- Path Lights: Place low-profile bollards or recessed markers along your driveway and entry path. These should define the journey to the door without creating a landing-strip effect.
- Accent Lights: Use directional uplights to wash light over stone textures, gable peaks, or large specimen trees. This draws the eye to your home’s most interesting architectural features.
If you want a formal, high-end look, symmetrical lighting is your most effective tool. Install identical, high-quality fixtures on either side of your front door to ground the entrance and create a sense of balance.
Pro Tip: Avoid the “orange glow” of cheap solar lights which often look messy and dim. Invest in hard-wired, low-voltage LED systems with warm-white color temperatures for a professional, crisp finish.
⭐ Personalized House Number Signs That Impress
Customizable Victorian Style Acrylic Door Sign
Family Name Wooden Custom Name Sign
Custom Metal Address House Number Sign
💡 Why This Works:
Lighting acts as a silent host, subconsciously directing visitors toward your front door while softening the transition between the dark street and your home’s architecture. By layering light, you create depth and drama, transforming a flat facade into a welcoming focal point that feels significantly more expensive and secure.
Layered visual impact: Properly aimed lights eliminate “black hole” corners, making your home appear larger and more intentional.
House Number And Signage
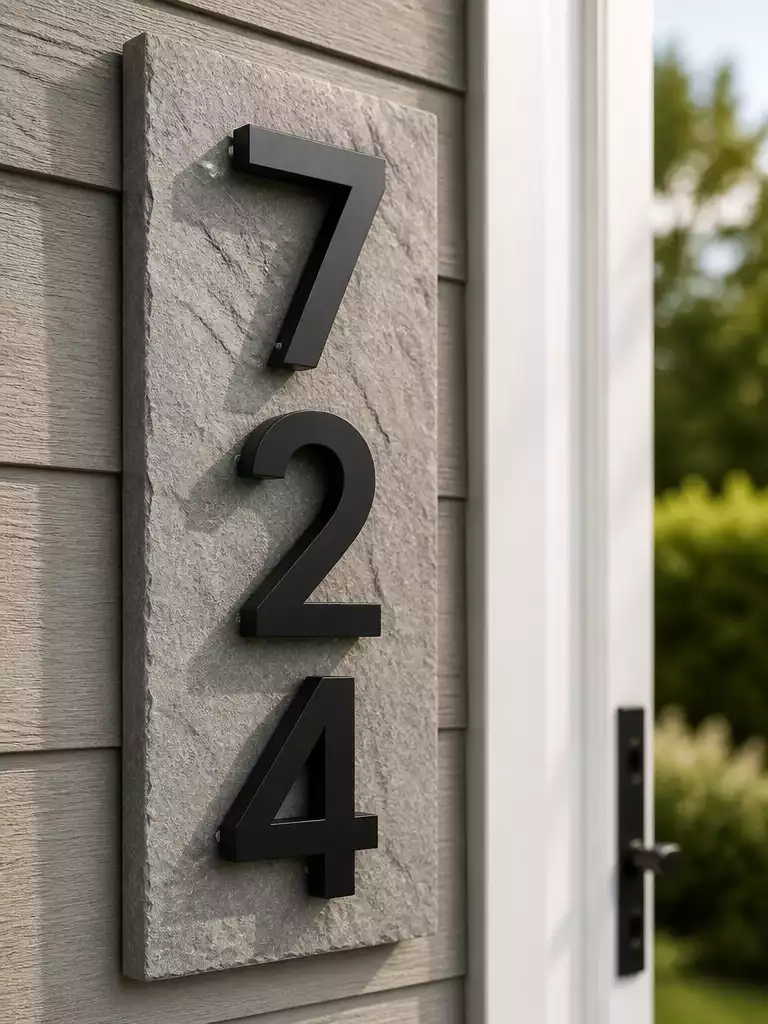
Boost your home’s legibility and curb appeal with high-contrast, professional-grade address signage.
Your house number is the most functional element of your facade, yet it is frequently treated as an afterthought. A high-contrast, legible sign acts as an instant identifier for delivery drivers and visitors, making it the highest-ROI update you can perform on a budget.
Pro-Tip: Always mount your numbers on a backing board that matches your home’s existing timber or stone cladding. This creates a cohesive, intentional detail rather than having the numbers appear as if they were simply tacked onto the wall.
When selecting your signage, prioritize readability from the street at night. If your entry lacks direct illumination, consider backlit LED numbers or ensure your existing porch light hits the sign directly.
Avoid small, ornate script fonts that are difficult to read from a moving car. Stick to bold, clean sans-serif typefaces to ensure your address stands out as a clear, professional statement.
⭐ Standout Address Plaques for Your Entrance
Rustic Personalized Metal Entrance Home Sign
Personalized Engraved Message Plaque for Home
Personalized Classroom Door Welcome Sign
🔢 The Right Sequence to Save Rework:
Installing your numbers after a facade update is crucial; doing it too early often results in mismatched holes or numbers that don’t align with new architectural features.
- Finalize the wall finish: Ensure paint, cladding, or masonry repairs are fully cured and dry.
- Test for visibility: Hold your chosen numbers against the wall at night to verify light levels.
- Mount with precision: Use a template to drill holes only once, ensuring the sign is perfectly level.
Seasonal Doorway Styling
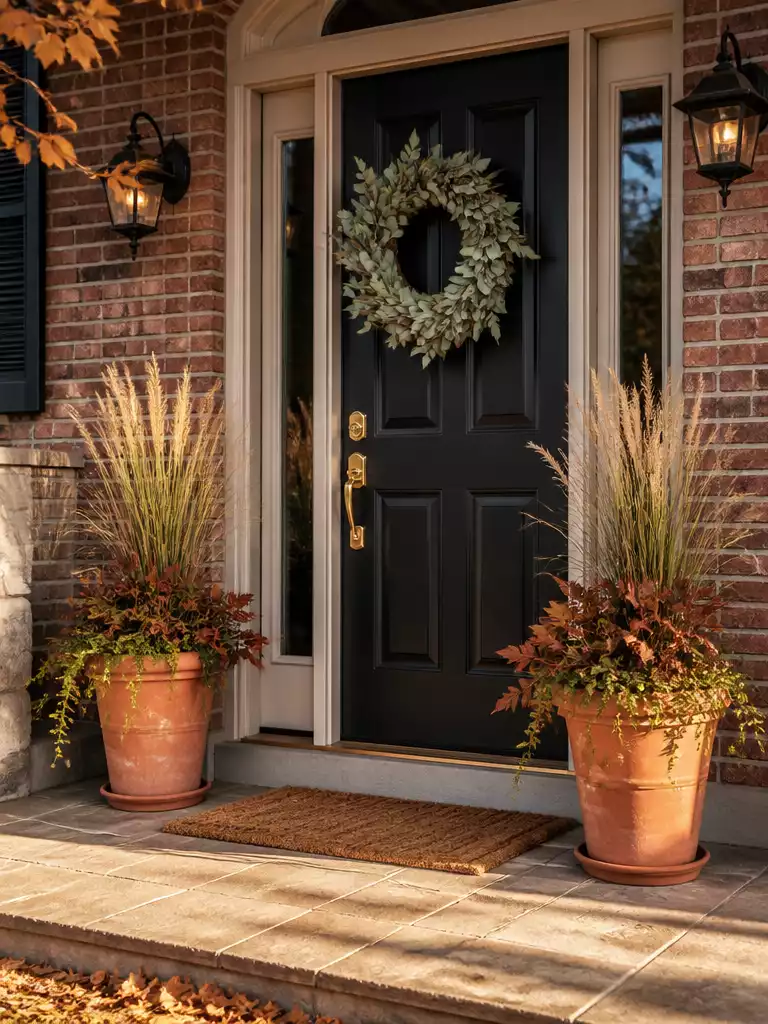
Refresh your entry sequence with intentional layers that celebrate the changing time of year.
Seasonal styling acts as the final polish for your curb appeal, making a home feel lived-in and cared for. It is the easiest way to inject personality into your facade without making permanent structural commitments.
The goal is to create a rhythm of change that aligns with the calendar. Focus on these three high-impact areas to keep your arrival sequence fresh:
- Container Plantings: Swap out annuals or foliage in your primary entryway planters every three to four months.
- Door Mats: Rotate your floor mat to suit the weather, opting for durable, high-texture coir for heavy traffic or woven patterns for warmer months.
- Wreaths: Select one high-quality piece that mirrors the scale of your door, ensuring it doesn’t obstruct the view of the hardware.
Avoid the “Clutter Trap” by keeping your styling secondary to your architecture.
If your entryway is already busy with structural details like ornate moulding or detailed sidelights, stick to just one or two items. A single large planter and a simple, high-quality wreath are more effective than a collection of small trinkets.
This approach is right for homeowners who want to keep their home feeling current and inviting without expensive renovations. It is not for anyone who prefers a completely hands-off exterior; the effectiveness of this look relies entirely on your willingness to rotate items throughout the year.
⭐ Seasonal Doorway Styling for Every Occasion
Adjustable Heavy Duty Metal Wreath Hanger
Layered Front Porch Welcome Mat Set
Ultra Thin Metal Wreath Door Hanger
✨ Small Details That Matter
The secret to a polished seasonal display isn’t just about the items themselves, but how they anchor to the architectural features of your specific doorway.
- Hardware coordination: Choose wreath hangers or planter finishes that match your existing door handle or house numbers for visual continuity.
- Lighting integration: Ensure your entry lights illuminate the seasonal display at night, preventing the door area from looking like a dark void.
With all seventeen ideas for your facade now in view, the path to a standout elevation becomes much more manageable. Focusing on the one or two updates that align with your home’s existing architecture is far more effective than attempting to implement every structural suggestion at once.
A cohesive street presence typically stems from a few deliberate, high-impact decisions. When you refine your front approach or update your entry door style, you create a lasting impression that feels entirely intentional.




