

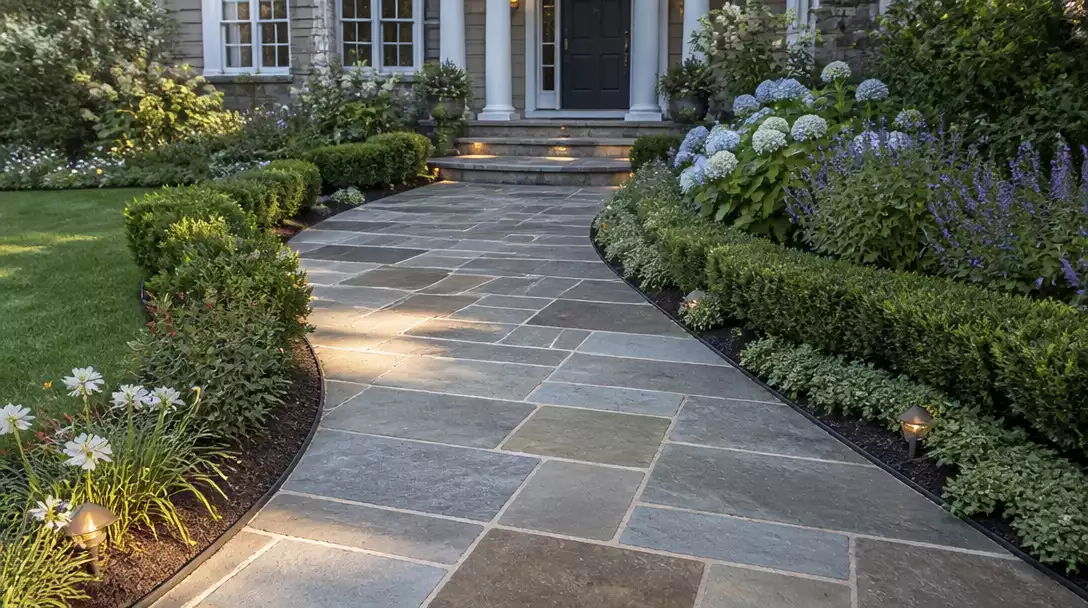
A well-planned front approach design turns a confusing entry into a clear, welcoming path. This guide rounds up 17 ideas worth saving to help you build an arrival sequence that fits your home’s architecture. Start here to find the right flow for your space.
Straight Direct Route
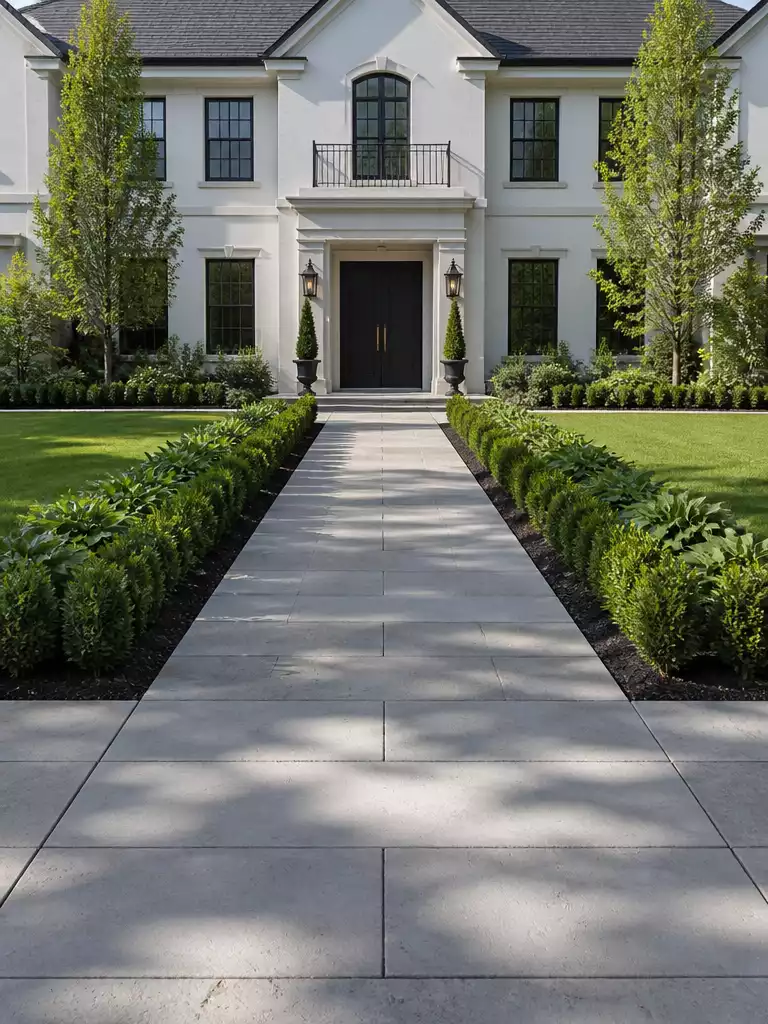
Create a clear, authoritative path that guides visitors directly to your front door with precision.
As an Amazon Associate I earn from qualifying purchases. Affiliate links may earn me a commission at no extra cost to you.
The straight, direct route commands authority and is the hallmark of formal architecture. It functions as the shortest distance between two points, instantly solving the “lost arrival” problem by creating a clear, unyielding line that anchors a symmetrical home design.
This layout is ideal if your home features a central entry and a balanced facade. To keep the experience comfortable, ensure the path maintains a uniform width of at least 48 inches so two people can walk side-by-side without stepping into the garden.
Professional Installation Insight: A straight path is unforgiving when it comes to site preparation.
You must install a 2% slope away from the house foundation to prevent water from pooling at your threshold. Without professional base compaction, even a slight shift in the ground will create noticeable cracks or “heaving” that destroys the crisp aesthetic of the line.
If you fear the path will look like a sterile airport runway, use strategic side-path plantings to soften the transition. Layering low-growing ground cover against the hard edges helps the path feel integrated into the landscape rather than floating on top of it.
⭐ Top Entry Mats for Your Home
Natural Coir Welcome Door Mat
Funny Welcome Outdoor Entryway Door Mat
Heavy Duty Rubber Backed Entryway Mat
💡 The Detail That Pulls It Together:
To avoid a sterile look, treat the vertical edges of your path as a frame for the garden. Using distinct edging materials—like steel, stone, or brick—creates a deliberate transition between the hard surface and the greenery. This contrast highlights the geometry of the route while making the surrounding plantings feel intentional rather than like an afterthought.
Curved Sweeping Route
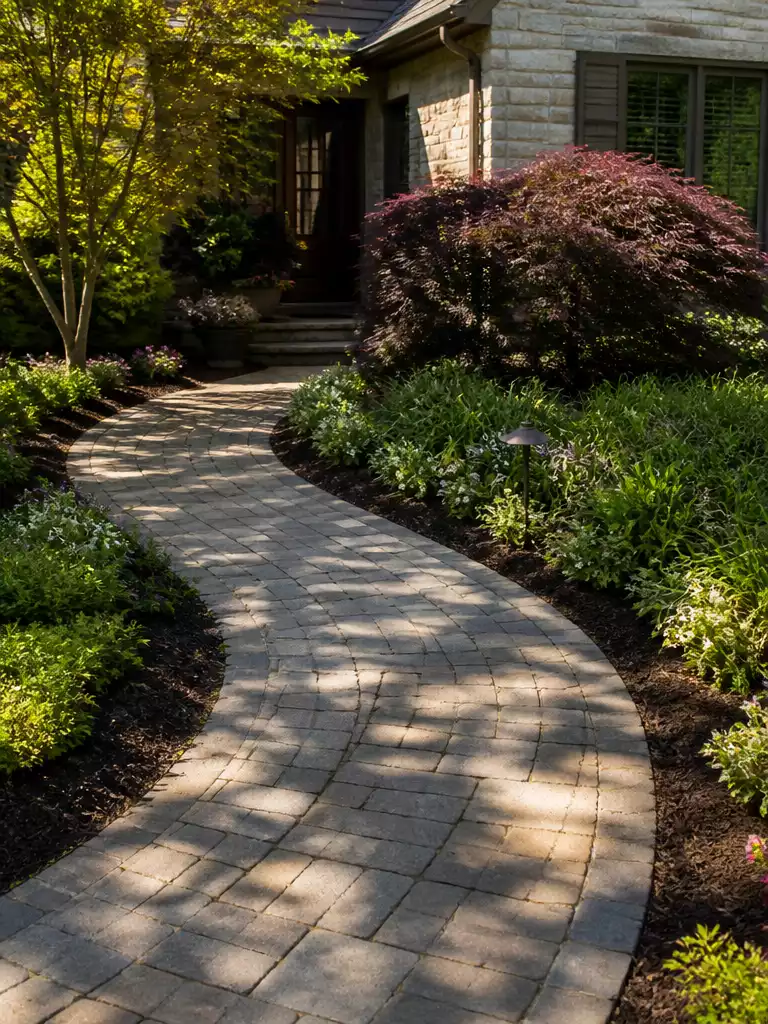
A deliberate, winding path that transforms a mundane walk into a journey of discovery.
A sweeping curve forces visitors to slow their pace, naturally transitioning them from the fast-paced environment of the street to the slower rhythm of your home. By obscuring the front door until the final turn, you layer a sense of anticipation and discovery into the arrival sequence.
This design style thrives when the geometry is dictated by your existing landscape rather than forced by arbitrary lines. If your garden has established focal points or mature trees, let the path flow around these elements to make the terrain feel integrated.
Pro-Tip: The Hose Test
Before you commit to cutting sod or digging, lay a garden hose along the intended route to map out the curve. Walk the path yourself to test the sightlines and ensure the transition feels natural rather than awkward or forced.
Maintaining a clean aesthetic on a curved path presents unique challenges compared to a straight run. You must ensure consistent edge integrity, as the curves make it difficult to prevent material drift or uneven gaps between the path edge and the planting beds.
Choose this route if your home architecture is less rigid or if you want to highlight a large front garden. Skip this design if your space is extremely narrow, as curves can quickly consume the limited width needed for two people to walk side-by-side.
⭐ Curved Mats for Sweeping Routes
Watermelon Shaped Half Round Entrance Mat
📋 Quick Reality Check: Before You Commit to a Curve
- Clearance requirements: Measure your path width to ensure it stays at least 48 inches wide at its tightest corner to comfortably accommodate two people walking side-by-side.
- Drainage patterns: Observe where water naturally flows across your property during rain; avoid curves that create “traps” where water might pool against your home’s foundation.
- Utility access: Verify the location of underground lines before you start any excavation, as curved paths often require deeper and more irregular trenching than straight ones.
Stepped Route On A Slope
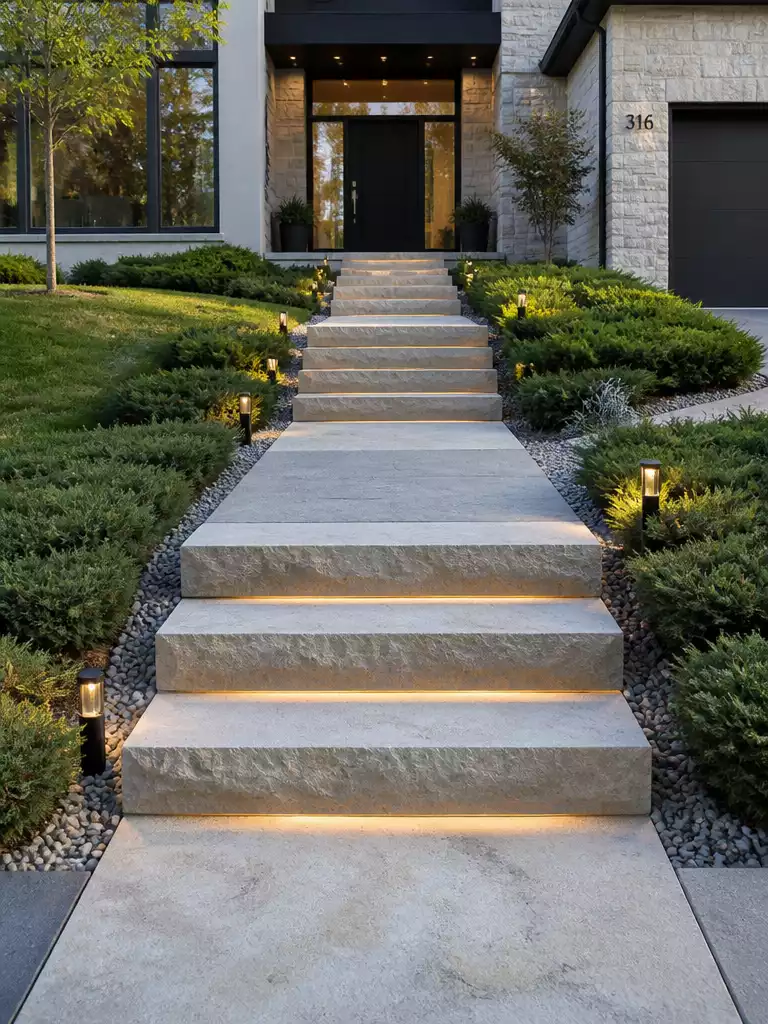
Elevating your home above street level creates a grand, deliberate transition that defines your arrival.
When your front door sits well above the street, the path transition becomes a matter of rhythm and safety. A staggered ascent shouldn’t feel like a chore; it should feel like a guided tour toward your front door.
The most common failure in hillside design is inconsistent riser heights. Even a half-inch difference between steps causes a trip hazard that your brain will notice immediately as you climb.
The 7-Inch Rule: Aim for a consistent 7-inch riser height across the entire flight. This standard creates a steady, comfortable pace that prevents visitors from stumbling during the ascent.
If your route covers a significant elevation change, do not build one continuous flight of stairs. Integrate flat landings every 5 to 7 steps to break up the visual weight and provide a necessary place to pause.
Safety is the primary metric for success on a slope. If you live in an area with rain, ice, or snow, prioritize materials with high-friction textures to prevent slipping.
Professional masonry is non-negotiable for this project. Structural weight and potential frost-heave issues mean that a DIY build will likely sink or shift within two seasons.
Always verify your local frost depth requirements before pouring foundations for stairs. Investing in a proper subsurface drainage system now will save you from expensive repairs later.
⭐ Best Step Mats for Slopes
Heavy Duty Indoor Outdoor Welcome Mat
Absorbent Non Slip Modern Entry Mat
📋 Quick Reality Check Before You Dig:
- Site Drainage: Confirm the slope directs water away from your foundation to prevent long-term moisture damage.
- Frost Depth: Verify local requirements for deep footings, as shallow bases will shift when the ground freezes.
- Structural Load: Ensure the sub-base is engineered for masonry, as stone stairs carry significant weight that settles unevenly.
Stone Flag Paving
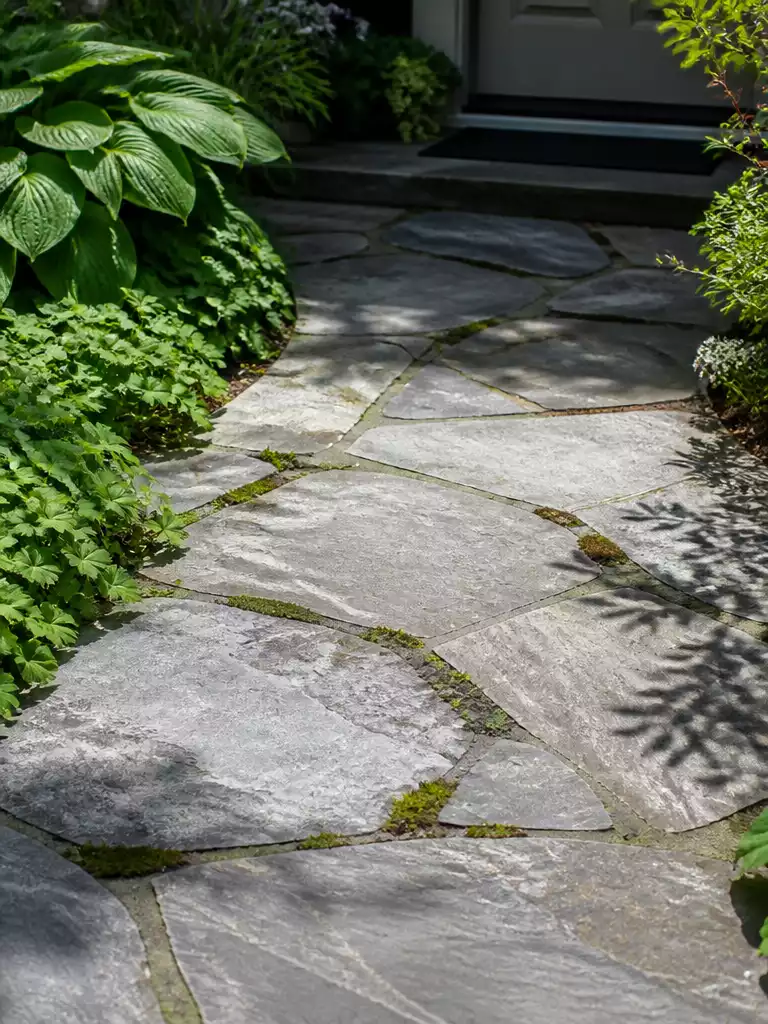
Create an grounded, organic path by using natural stone flags with soft, permeable joints.
Stone flag paving delivers a grounded, premium character that manufactured pavers struggle to replicate. This approach relies on the natural, irregular geometry of the stone to guide visitors toward your front door.
Because every slab is unique, the finished look depends entirely on the skill of the installer. If you are dealing with thin or irregular pieces, professional masonry is necessary to ensure the stones do not rock underfoot.
Avoid Common Failures
Never lay flagstones directly onto soil, as this leads to inevitable settling and cracked pieces. A properly compacted base layer of crushed stone is the only way to prevent stones from rocking after the first winter cycle.
For the best results, select flagstones that are at least 1.5 to 2 inches thick. This thickness provides the structural integrity needed to withstand heavy foot traffic and freeze-thaw cycles without spalling.
⭐ Stone Paving Accents We Love
Cotton Woven Striped Indoor Outdoor Rug
Checkered Cotton Woven Small Area Rug
Soft Machine Washable Checkered Porch Rug
💰 What This Really Costs: Navigating the Budget
- The cost reality: Natural stone flag installation carries a premium price point, often fluctuating based on regional labor rates and the specific slab thickness required for durability.
- Hidden site prep: Don’t forget that extensive excavation and the necessary crushed stone base layer add significant labor hours, which often exceed the material costs themselves.
- Long-term investment: Spending more on professional base preparation and thicker 2-inch slabs pays off by preventing costly future repairs like cracked stones or uneven surfaces.
Designing a home entry often feels like a high-stakes puzzle where every piece demands equal weight. In reality, the architectural character of your home does the heavy lifting, allowing you to prioritize only a few high-impact details rather than obsessing over every minor variation.
Focusing on the correct architectural alignment ensures your final choice feels intentional, authentic, and naturally suited to your home’s unique footprint.
Brick Laid Path
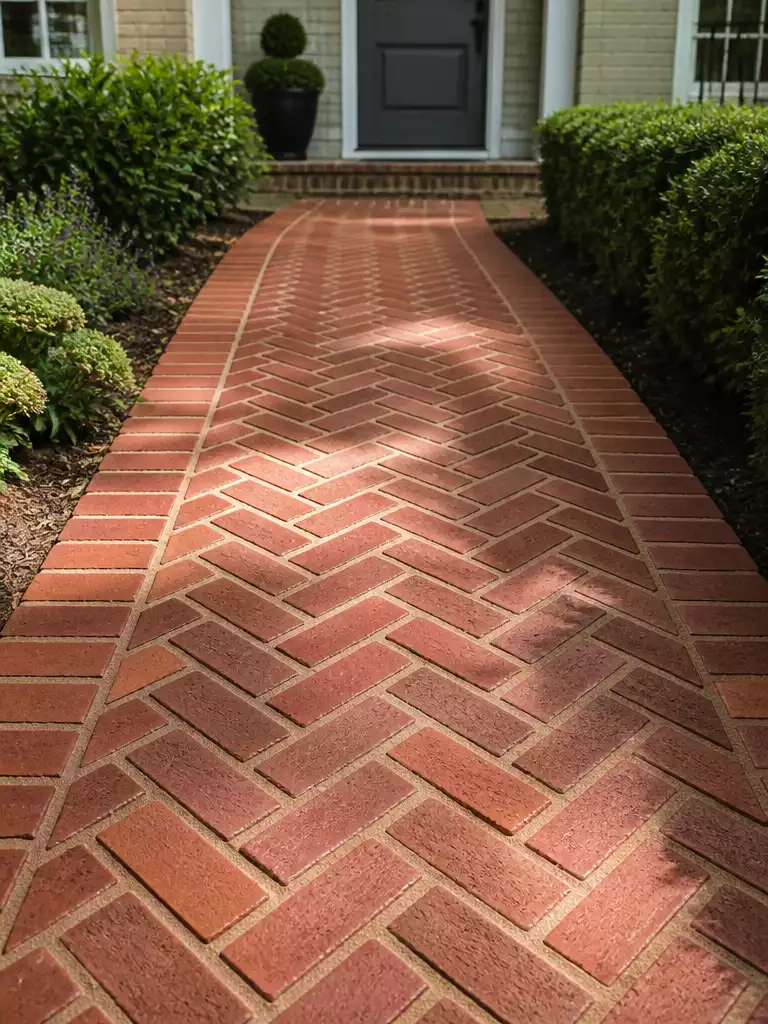
Warm clay tones and structured patterns guide guests directly to your front entrance.
A brick-laid path brings an immediate sense of warmth to a home’s exterior that cold concrete simply cannot replicate. Herringbone patterns are the gold standard here, as the interlocked bricks create a strong, directional visual cue that naturally pulls the eye toward your front door.
This path style is highly effective for homes with traditional or cottage-inspired architecture. It creates a grounded, solid feeling underfoot that age and weather only seem to improve.
Installation Reality Check
Straight walks with simple borders are manageable for experienced DIYers. However, large entryways or intricate herringbone patterns require professional installation to ensure the interlocking is tight enough to prevent movement over time.
If you are planning the layout yourself, keep a close eye on the edges. Without a firm restraint system, brick paths can suffer from “creeping,” where the perimeter bricks shift outward and ruin the clean lines of your entry sequence.
Pay attention to your climate before choosing your brick type. Use only kiln-fired, exterior-grade pavers to ensure they can withstand freezing temperatures without spalling or cracking.
⭐ Brick Path Rugs to Buy
Hand Woven Black and Khaki Rug
Black and White Striped Porch Rug
Striped Cotton Washable Front Porch Rug
🔢 The Right Sequence for Lasting Brickwork
Building a brick path is more about what happens underground than the pattern on top. Follow this sequence to prevent your path from shifting, sinking, or separating after the first freeze.
- Excavate and Stabilize: Remove organic soil and install a deep, well-compacted crushed stone base for structural integrity.
- Set Perimeter Restraints: Install steel or heavy-duty plastic edging before laying bricks to lock the entire perimeter firmly.
- Lock the Joints: Sweep polymeric sand into all gaps and activate with water to create a rigid, weed-resistant bond.
Tiled Path Pattern
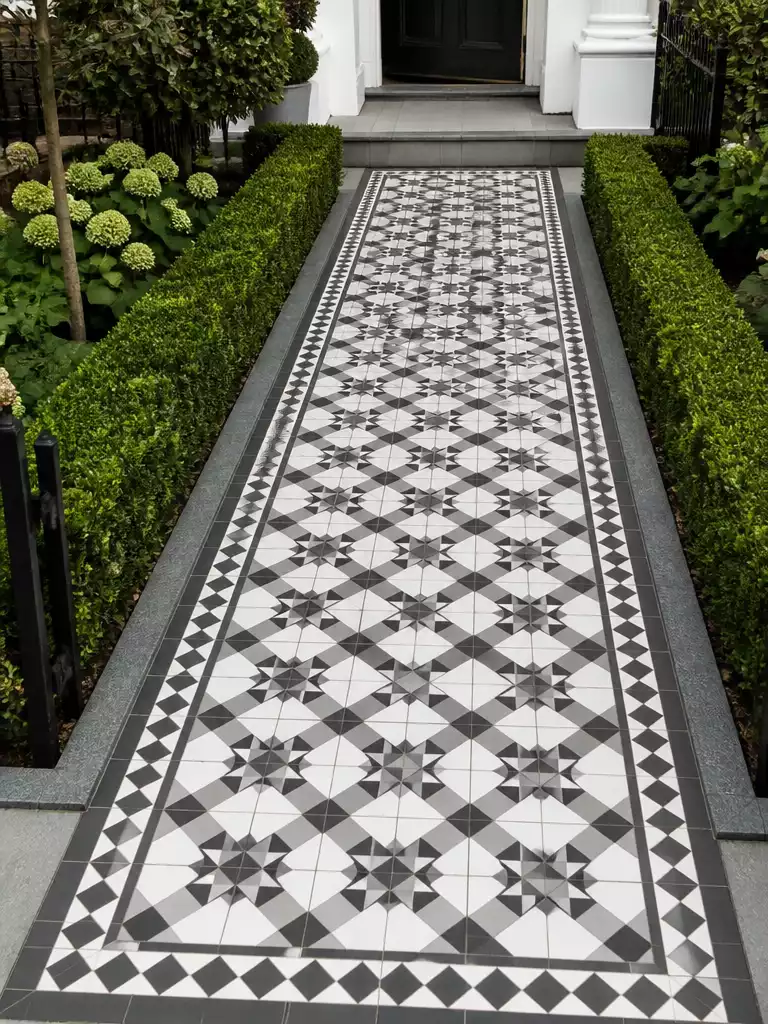
Crisp, architectural geometry that turns your front entry into a defined, high-contrast focal point.
A tiled path pattern creates a deliberate, high-design arrival that feels more like an extension of the home’s interior than a standard walkway. This approach relies on precise geometry, making it ideal for homeowners who want to lean into a modern or curated aesthetic.
You cannot use standard indoor floor tiles for this application. You must source materials explicitly rated for exterior freeze-thaw cycles to prevent cracking and delamination during the winter months.
Professional Installation Required: Because these paths rely on complex substrate systems and precise waterproofing to survive the elements, this is rarely a successful DIY project. Improper setting methods will lead to loose tiles and water penetration within the first season.
When selecting your pattern, consider the scale of your walkway. Large, bold motifs can dominate a narrow path, while smaller, repeating patterns often provide a more comfortable and visually balanced experience for visitors.
If you live in a region with heavy snowfall, be mindful of your snow removal equipment. Metal shovel blades can easily chip or scratch decorative tile surfaces, so use plastic-edged tools to protect your investment.
⭐ Tiled Pattern Mats for Entrances
Floral Neutral Scalloped Entry Rug Mat
Checkered Cotton Farmhouse Front Porch Runner
Beige and Black Striped Layered Rug
Gravel With Firm Edging
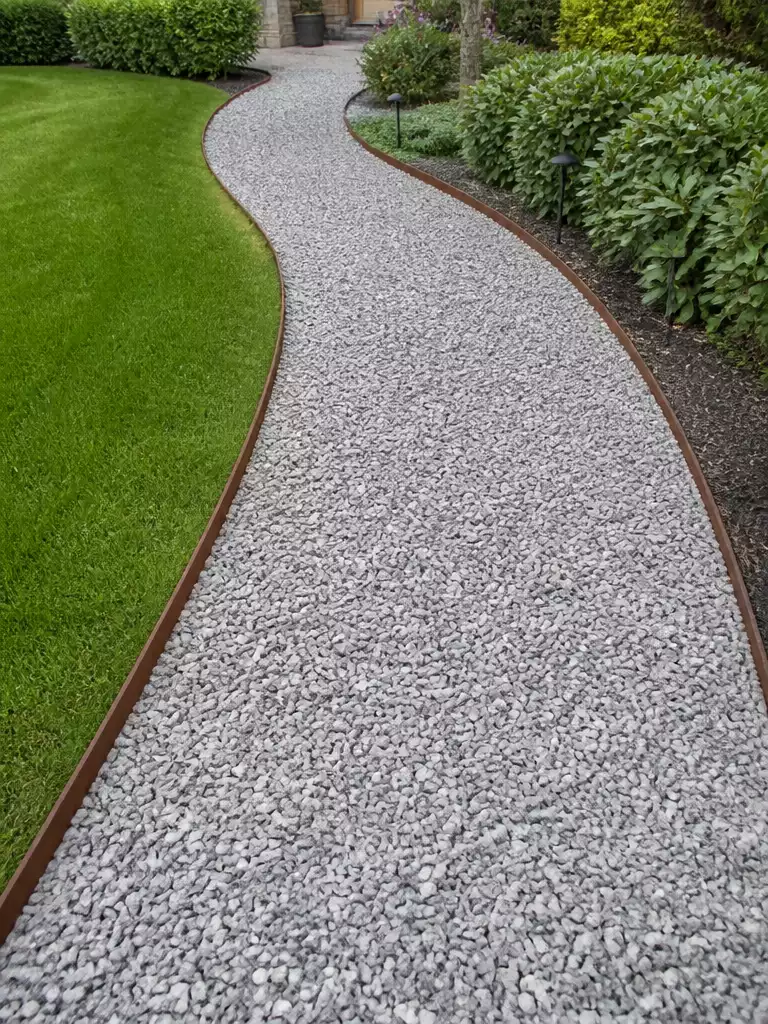
Create a rustic, texture-rich arrival that feels intentional with sharp, low-profile containment borders.
Gravel offers a budget-friendly way to texture your entryway, but it is prone to wandering without a rigid containment system. Use steel, heavy-duty plastic, or stone headers to keep the aggregate in its lane and away from your garden beds.
This style works best for casual, cottage-inspired homes where a crunch underfoot adds to the experience. If you frequently use strollers, wheelchairs, or high heels, you should skip this option in favor of a solid surface.
Pro-Tip: Maintenance Essentials
Expect to rake periodically to level out high-traffic spots and top up the material every few years as it settles. Laying a heavy-duty landscape fabric beneath your base prevents weeds from pushing through your clean surface.
This is a highly accessible DIY-friendly project for homeowners who can handle basic site excavation. If your route requires managing significant slope-related drainage, consult a professional to ensure the base doesn’t wash out during heavy rain.
⭐ Gravel Mats for Firm Edging
Heavy Duty Rubber Drainage Entrance Mat
Brown Entrance Carpet Shoe Scraper Mat
Welcome Front Door Entrance Scraper Mat
📋 Quick Reality Check: Is Gravel Right for Your Doorway?
- Mobility access: Consider if frequent visitors use strollers, wheelchairs, or walking aids, which gravel makes difficult.
- Footwear comfort: Think about your daily routine; loose aggregate is notoriously difficult to navigate in thin heels.
- Drainage slope: Ensure your base is graded properly, as gravel can easily wash out or pool during heavy rain.
Cobble Or Sett Surface
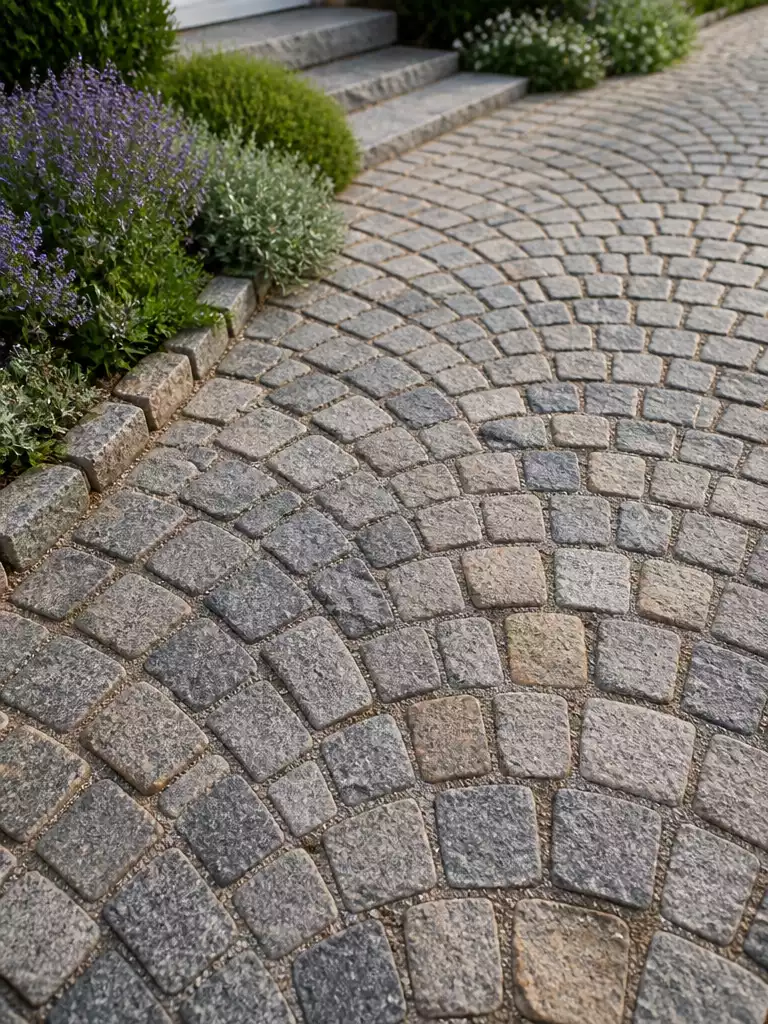
Create a sense of historical permanence with a textured surface that naturally slows your visitor’s pace.
Cobble and sett surfaces offer a high-character aesthetic that suggests your home has been rooted in its landscape for generations. This material choice is best for homeowners who prioritize architectural weight and a traditional, artisanal feel over effortless suburban uniformity.
Accessibility Warning
These surfaces are notoriously difficult for strollers, wheelchairs, and high heels due to the irregular stone faces and wide joints. If your approach must serve as a primary accessible route, consider a different material or reserve cobbles for decorative border accents only.
The success of this surface relies almost entirely on the quality of the installation. Because individual stones can shift over time, you need a robust, rigid sub-base to prevent the rocking that creates trip hazards.
Professional tip: If you are committed to the look but worried about the uneven surface, ask your installer about “sawn-top” setts. These provide the historical edge of natural stone while offering a much flatter, more predictable walking plane.
⭐ Cobble Surface Mats to Consider
Leaf Green Non Slip Door Mat
Heavy Duty Rubber Backed Gray Mat
⚖️ Quick Decision Guide: Cobble vs. Sett Surfaces
- Choose this if: You want a high-character, historical look and aren’t concerned with smooth rolling for strollers or wheelchairs.
- Skip this if: Your front path is a high-traffic entry point for aging family members or requires frequent snow clearing.
- Pair it with: A mortar-set stone or brick border to lock individual stones in place and prevent the entire path from spreading.
Stepping Stone Run

Create a natural, rhythmic transition that invites visitors to slow down and enjoy the garden.
A stepping stone run uses individual pavers to create a path that feels more like a part of the landscape than a rigid structure. It is the ideal choice for informal, low-traffic garden routes where you want to maintain a relaxed, organic aesthetic without paving over your entire lawn.
Professional Placement Tip: Stones must be set perfectly flush with the surrounding grade to avoid them becoming hidden trip hazards. If you are using this as your primary entryway, ensure the gaps between stones are filled with firm, compact material or tight-growing groundcover to prevent mud accumulation during wet seasons.
Before you commit to this style, consider the reality of your daily foot traffic. While these runs look effortless, they can be difficult for strollers, wheelchairs, or anyone wearing high heels to navigate safely.
If you choose this route, pay close attention to the spacing between stones. Each stone should be placed to match a natural human stride, otherwise, the walk will feel awkward and forced rather than intuitive.
⭐ Runners for Stepping Stone Paths
Blue Flower Round Button Tufted Ottoman
💡 Designer Note: Achieving Visual Balance
To keep your stepping stone run from looking like a cluttered path, focus on consistent stone size and color palette. Using irregular, natural shapes works best when you alternate their orientation to create a sense of organic movement. Tuck low-growing, durable groundcovers around the stones to soften the hard edges and anchor the run into your garden beds.
Gated Threshold At The Street
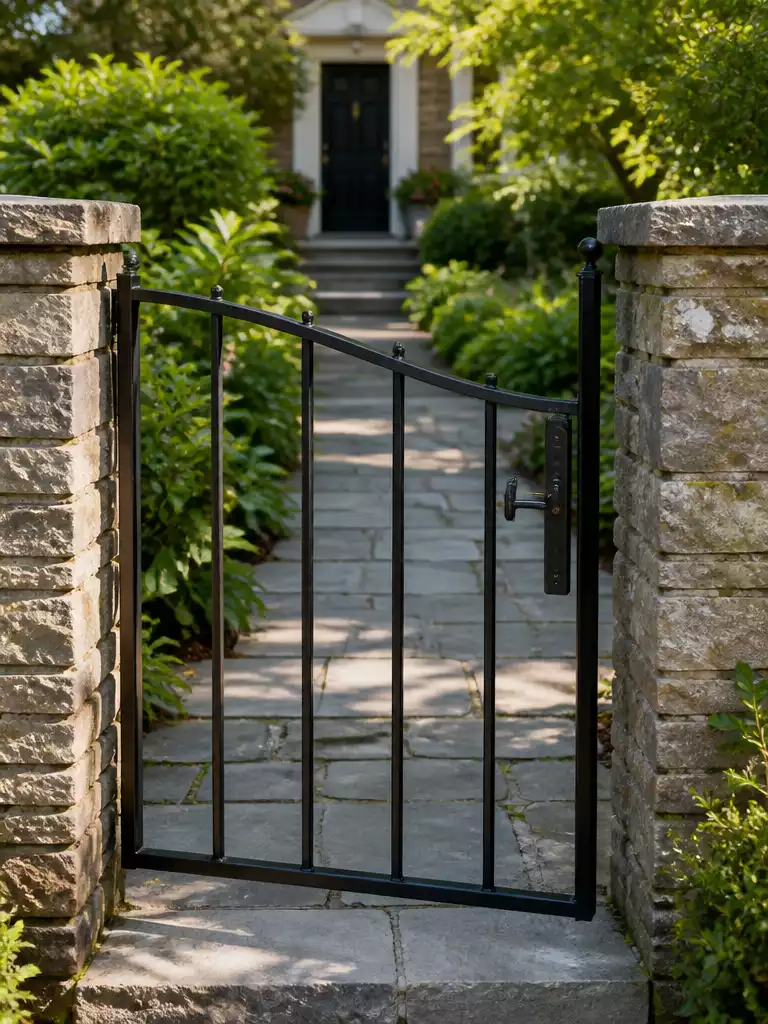
Define your property line and build anticipation with a clear, physical transition from public to private.
A gated threshold acts as a psychological stop sign, effectively separating the public sidewalk from your private arrival sequence. It forces a momentary pause, signaling to visitors that they have officially moved from the street into your home’s unique domain.
Decision Guide: This is a high-impact choice for homes where the front door is too close to the road or lacks a natural boundary. If your home has an open, sprawling lawn without clear edges, a gate provides the missing architectural focus.
You must prioritize structural integrity over decorative flourish when selecting your gate. Because the gate will swing repeatedly, heavy-duty hinges and deep, frost-resistant post footings are non-negotiable to prevent sagging or binding over time.
Avoid the common mistake of ignoring clearance requirements during the planning phase. Ensure your chosen swing radius doesn’t obstruct the public sidewalk or force guests to step backward to open it.
Warning: Improperly set posts will suffer from frost heave within two winters. Always consult local building codes regarding setbacks and gate height if you live in a historic or restricted zone.
⭐ Gated Threshold Mats We Love
Wild Flower Spring Summer Entrance Mat
Non Slip Funny Entrance Floor Mat
Funny Welcome Outdoor Classroom Entry Mat
💡 Why This Works:
By installing a gate at the property line, you create a sense of “arrival” that standard open walkways lack. It visually resets the visitor’s pace, turning the walk to your front door from a simple chore into an intentional, curated experience that feels distinctly private and secure.
Psychological benefit: The gate serves as a clear boundary marker that signals to guests they have entered your home’s private sanctuary.
Pillar And Post Framing
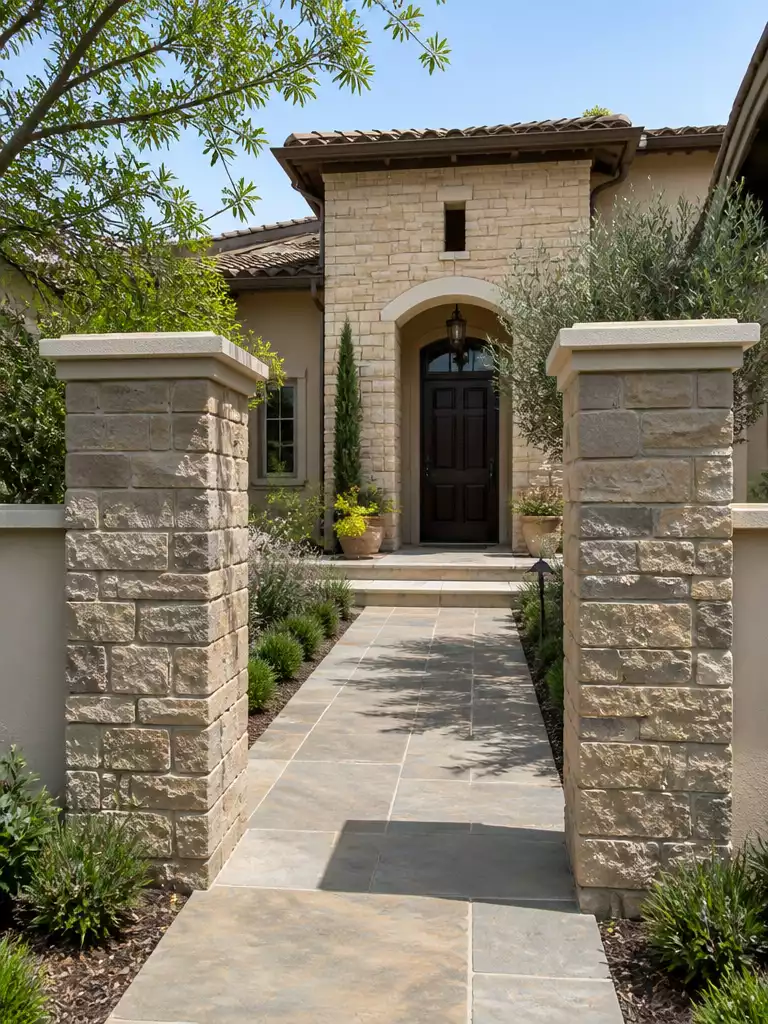
Create a definitive sense of arrival by architecturally framing the transition to your home.
Pillar and post framing acts as a visual anchor that announces the start of your private property. By placing these structures at the junction where your path meets the driveway or sidewalk, you turn a casual walk into an intentional journey.
This design element is best for homes that need a stronger sense of enclosure or clear wayfinding. It is particularly effective for large properties where the front door might otherwise get lost in the facade.
Critical Planning Note: Even decorative pillars require substantial concrete footings to prevent leaning or movement over time. Always check your local frost depth requirements before ordering materials to ensure your structures remain plumb for years.
When selecting your materials, consider the architectural style of your home to ensure the framing feels integrated rather than added on. Use the following guide to match your post style to your exterior:
-
✔
Masonry or Stone Pillars: Ideal for traditional or craftsman homes; these provide a heavy, permanent feel that signals prestige. -
✔
Timber or Cedar Posts: Perfect for cottage or ranch-style homes; these add warmth and can be paired with natural landscaping. -
✔
Wrought Iron or Steel Frames: Best for modern or industrial architecture; these offer a clean, minimalist silhouette that doesn’t block sightlines.
Skip this option if your path is already quite narrow or if the pillars would obstruct the view of your house number or front door from the street. You want to frame the destination, not hide it.
⭐ Pillar Framing Floor Mats
Rustic Welcome Bedroom Living Room Mat
Funny Opossum Entrance Entryway Door Mat
Funny Guest Outdoor Entrance Door Mat
🧰 Questions for Your Installer:
- Foundation depth: Will these footings be poured below the local frost line to prevent seasonal shifting?
- Utility clearance: Can we verify all underground gas, water, and electrical lines before breaking ground?
- Structural longevity: What specific drainage or flashing details will prevent water from rotting the base over time?
Covered Porch Landing
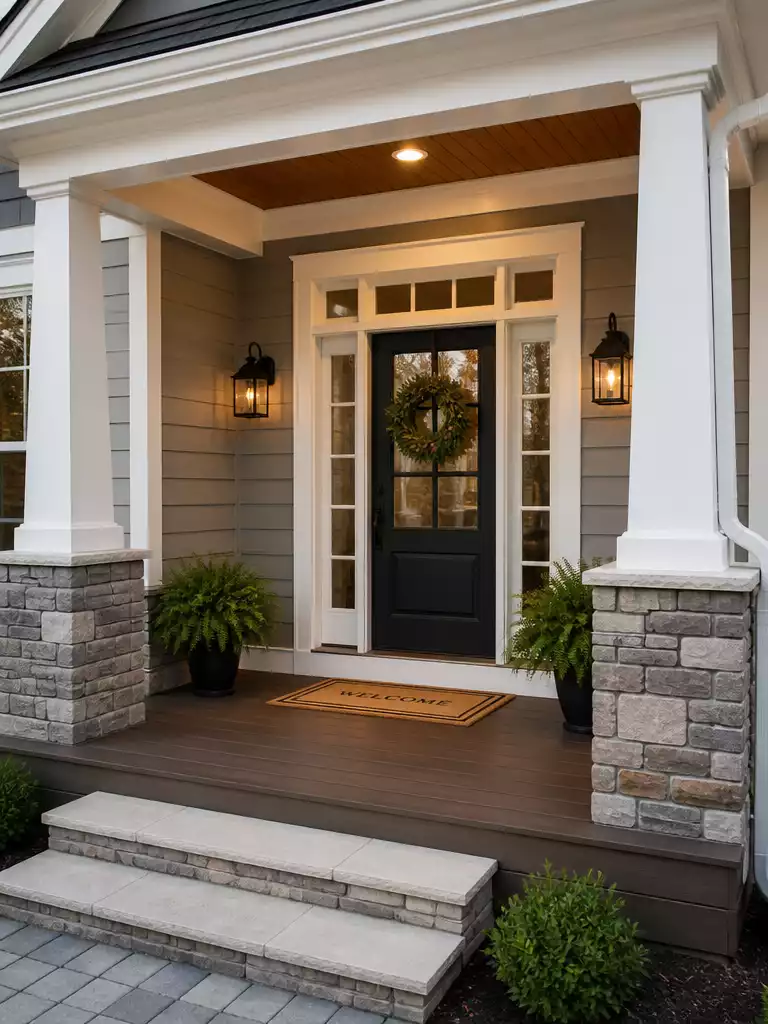
A sheltered landing creates a deliberate pause, transforming the entry into a true destination.
A covered porch landing does more than keep guests dry while they fumble for their keys. It acts as a structural pivot point, marking the official transition from the public front path to the private interior of your home.
This design element is ideal for homeowners who want to give their front door more visual weight and presence. If your home currently lacks a clear focal point, extending the roofline to create a dedicated landing area immediately solves the issue.
Important Structural Warning: Because a porch landing requires integration with your existing roofline and requires load-bearing supports, this is almost always a professional-level task. Avoid DIY attempts that involve cutting into existing roof shingles or rafters to prevent long-term leaks and rot.
When planning your landing, consider these three critical factors to ensure the space feels intentional rather than like an afterthought:
- Proportional Depth: Ensure the landing is deep enough—at least 5 to 6 feet—to allow a door to swing open fully without forcing a guest to step backward into the rain.
- Roof Integration: The pitch and material of the porch roof should mimic or complement the primary roofline to maintain architectural cohesion.
- Clearance and Code: Check local building codes regarding the height of the landing, as anything over a certain elevation will require railings for safety.
If you have the budget, invest in high-quality materials for the porch floor, such as natural stone or composite decking. These materials handle high-traffic arrival zones better than painted wood and require significantly less upkeep over time.
⭐ Porch Landing Mats to Consider
Non Slip Indoor Front Porch Mat
💡 Why This Works
By creating a sheltered zone, you provide a natural “decompression chamber” where visitors can settle in, check their appearance, and transition from the noise of the street to the calm of your home. It effectively grounds your doorway, preventing it from feeling like a flat surface tacked onto an exterior wall.
Design Benefit: A well-proportioned porch landing adds essential depth, creating a welcoming shadow line that draws the eye directly toward your front door.
Portico Over The Door
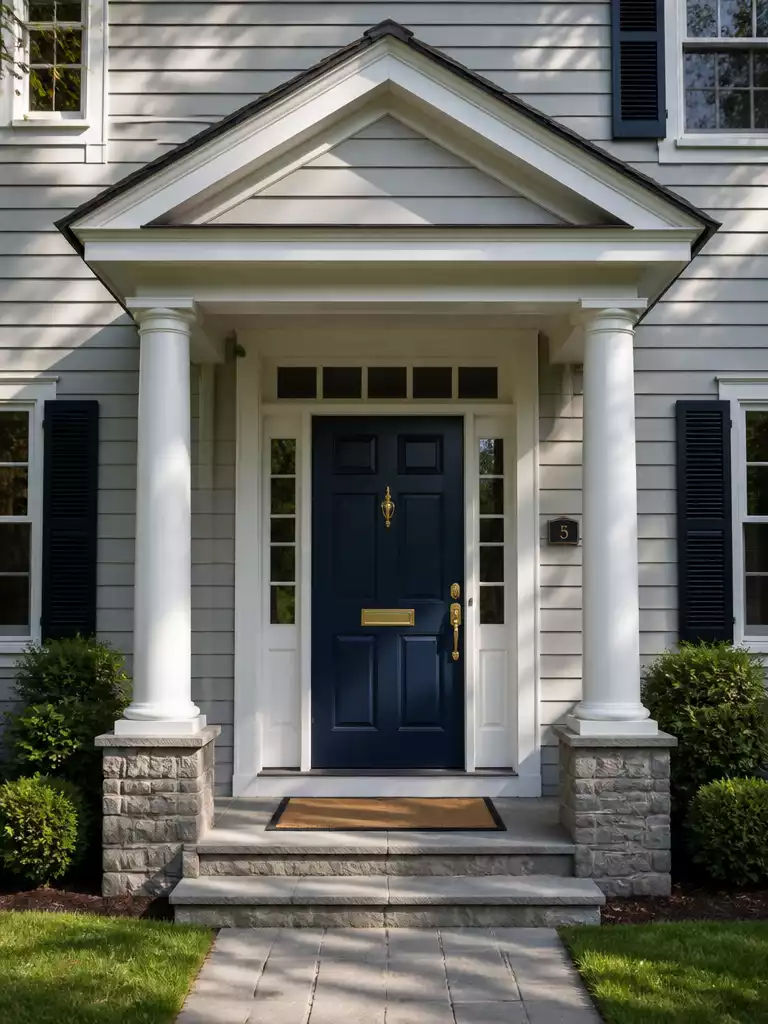
Create a sheltered transition that marks your front door as the definitive home destination.
A portico acts as a structural announcement, signaling exactly where a guest should head after leaving the driveway. By adding a roofed canopy, you provide a necessary physical pause that protects visitors and your door hardware from the elements while they search for their keys.
This design element is most effective for homes with flat, featureless facades that struggle with wayfinding. If your entryway feels like just another window or wall, a portico adds the depth and vertical height needed to draw the eye toward the center of the house.
Design Tip: Proportions are everything here. Your portico should mimic the scale of your existing roofline or window trim to avoid looking like an afterthought that was simply bolted onto the siding.
Consider these structural factors before committing to a design:
- Roof Pitch: Match the slope to your home’s main roof to maintain architectural cohesion.
- Column Placement: Ensure the support posts land firmly on your existing porch or walkway, not in the middle of a garden bed.
- Integrated Lighting: Recessed fixtures installed in the ceiling of the portico offer a much cleaner, more modern look than wall-mounted sconces.
Warning: Because a portico involves attaching new framing to your home’s exterior, it requires professional structural assessment to ensure proper flashing. Poorly sealed connections will lead to water rot behind your siding, which often goes unnoticed until the damage is severe.
⭐ Portico Lighting for Your Door
Porch Light With Built In Outlets
Solar Motion Sensor Outdoor Flood Light
Bright LED Security Hardwired Motion Light
📈 Does It Add Value?
A well-proportioned portico is one of the few exterior additions that consistently improves curb appeal and perceived property value. Because it defines the entry sequence, it helps your home stand out in a neighborhood of similar builds. While it requires a significant initial investment, its durability—when properly flashed—makes it a long-term asset that buyers notice immediately.
Resale Insight: A cohesive portico acts as a permanent architectural upgrade that signals pride of ownership to potential future buyers.
Clipped Hedge Borders
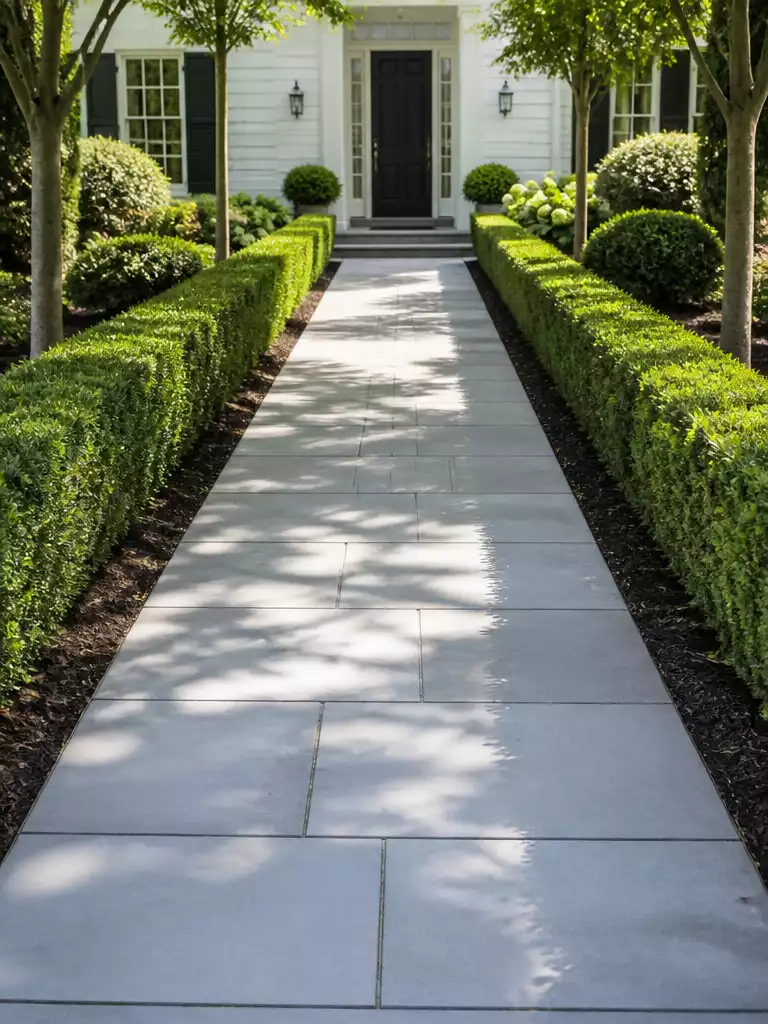
Define your path with sharp greenery to create a crisp, intentional arrival sequence.
Clipped hedge borders provide formal geometry that forces the eye toward the front door. This approach works best for traditional home architectures that rely on symmetry and clear, defined boundaries.
If your front approach feels like an ambiguous scramble across a lawn, a pair of parallel hedges instantly solves the problem. They act as a living guide, removing any guesswork for guests about where the walkway begins.
Maintenance Reality Check: Clipping isn’t a one-time event; it requires seasonal attention to maintain that sharp, architectural edge. If you cannot commit to 2-3 prunings per year, the hedge will quickly look ragged and unkempt.
When selecting your plants, focus strictly on mature size rather than current appearance. You need a variety that stays compact so it doesn’t eventually narrow your walking path or block sightlines from the driveway.
- Choose slow-growing cultivars: This minimizes the frequency of pruning while keeping the geometry tight.
- Leave a buffer: Keep the hedge at least 6 inches back from the paving edge to prevent foliage from dragging against visitors’ clothing.
- Avoid shallow-rooted species: Roots can eventually heave your paving stones, creating an uneven walking surface.
This design style is perfect for homeowners who appreciate a structured, tidy look. Skip this if you prefer a wild, informal cottage garden, as hedges will feel too rigid and deliberate for that aesthetic.
⭐ Hedge Border Decorative Mats
Positive Coffee Theme Indoor Entrance Mat
Funny Welcome Porch Decorative Floor Mat
Witchy Halloween Gothic Style Entrance Mat
Layered Planting Either Side
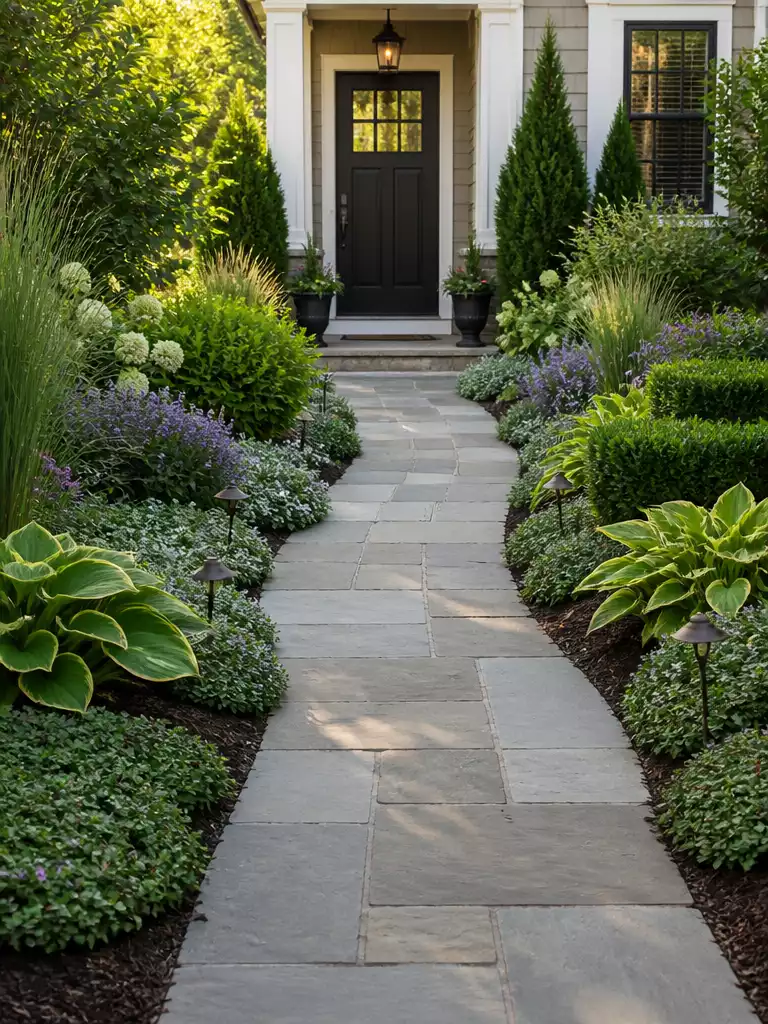
Create a lush, inviting garden transition that guides visitors naturally to your front door.
Layered planting transforms a sterile concrete or stone path into a deliberate, garden-focused arrival. By arranging vegetation by height—groundcovers at the edge, perennials in the middle, and shrubs at the back—you add visual depth that prevents the path from feeling like a narrow, utilitarian chute.
The Three-Tier Strategy
- Front Edge: Use low-growing groundcovers like creeping thyme or sedum to soften the transition between hard paving and soft soil.
- Middle Layer: Incorporate perennials like coneflower or salvia for seasonal color and texture.
- Backdrop: Anchor the design with evergreen shrubs to maintain structure and privacy during winter months.
This layout is ideal for homeowners who want to hide less attractive foundation lines or soften the architecture of a new build. It works best when you keep the plants at least 18 inches away from the path edge to prevent branches from encroaching on your walking space.
Common Pitfall: Overcrowding
Avoid planting fast-growing shrubs too close to the path edge, as they will quickly block sightlines and force guests to walk in a single file. Always check the mature width of your plants before digging to ensure the path remains spacious for two people.
While this is a highly DIY-friendly project, professional help is recommended if your path requires significant irrigation modifications. Coordinating your plant heights with your existing hardscape will create a cohesive look that feels intentional rather than cluttered.
⭐ Planting Border Entrance Mats
Artificial Cedar Topiary Trees Four Pack
Inspired Entrance Door Mat Sixteen Inch
🔢 The Right Sequence for Planting
Planting in the correct order prevents damage to your new hardscape and ensures your garden beds establish successfully alongside the path.
- Define hard edges: Finalize path borders and drainage paths before adding any soil or plants.
- Install structural greenery: Place larger evergreen shrubs first to anchor the design and provide scale.
- Layer inner perennials: Add lower-growing perennials and groundcovers last to soften the immediate path perimeter.
Path And Step Lighting
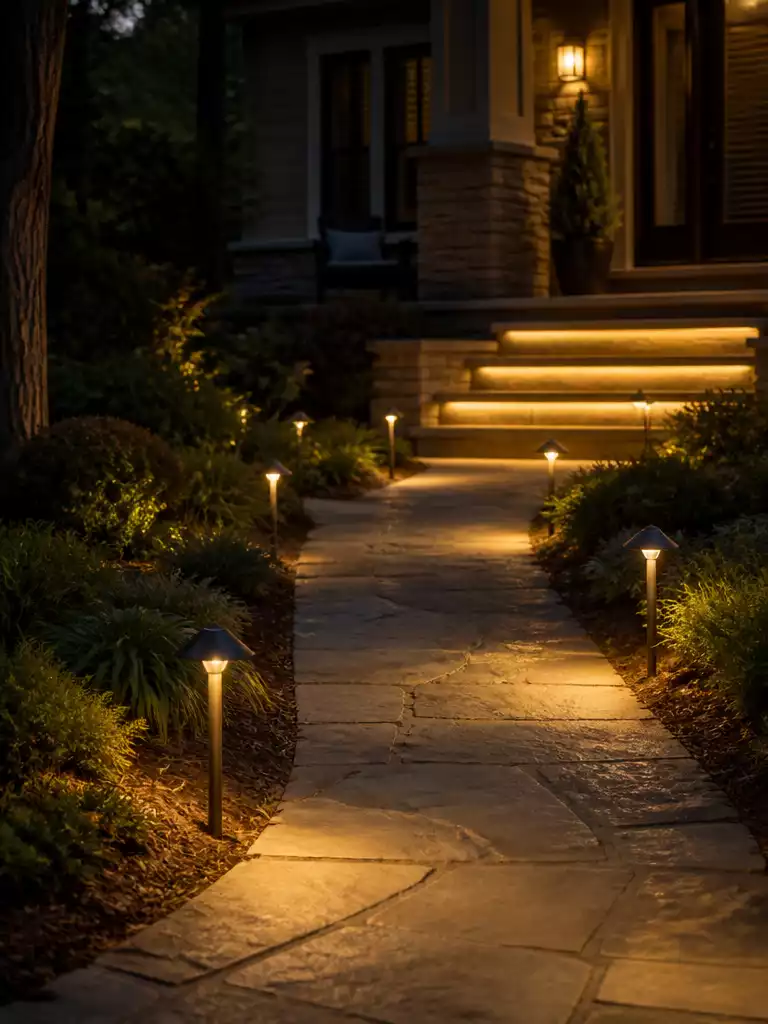
Transform your nighttime arrival into a safe and welcoming experience with targeted, low-glare illumination.
Effective lighting is the difference between a trip hazard and a clear, inviting route. You should focus on revealing edges and level changes rather than flooding the entire yard with light.
Spacing is key for maintaining a professional look. Place your path fixtures roughly 6 to 8 feet apart to create a gentle rhythm that guides visitors without creating a runway effect.
Pro Tip: Color Temperature Matters
Stick to a color temperature between 2700K and 3000K. Anything higher will look harsh and clinical, while this range provides a warm, welcoming glow that complements most home exteriors.
When deciding on your system, consider the installation requirements carefully. Low-voltage systems are highly accessible for DIY projects and offer plenty of flexibility.
Avoid common mistakes by checking your work at night before locking in any fixtures. If you see bright spots of light or blinding glare, adjust the shielding or angles to direct the beam strictly toward the path surface.
Warning: Watch for Water Ingress
Ensure all connections are properly sealed to prevent water damage to your cables. Proper base preparation also protects your wiring from being crushed or severed during future landscaping tasks.
⭐ Best Path Lighting for Stairs
Adjustable Head Motion Sensor Security Light
Bright Solar Motion Sensor Wall Light
Four Head Solar Motion Security Light
📋 Quick Reality Check Before You Wire
- Check local code: Verify if your municipality requires specific burial depths or conduit types for outdoor electrical wiring.
- Confirm power source: Locate your nearest exterior GFI outlet to ensure your transformer has a dry, accessible connection.
- Test sightline glare: Temporarily set up your fixtures at night to ensure the light doesn’t blind approaching guests.
House Number And Signage Placement
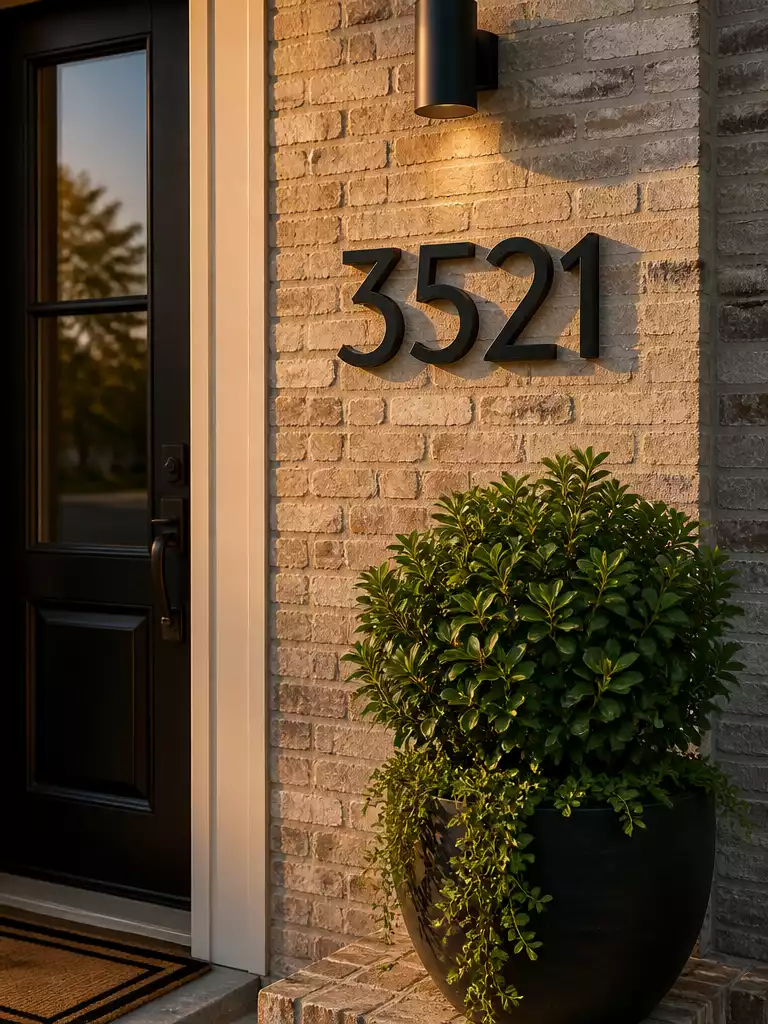
Clearly defined signage eliminates guest hesitation and completes your home’s exterior arrival sequence.
Effective signage serves as the final, silent guide for your visitors. When placement is handled correctly, it removes the “where is the door?” friction that often occurs once a guest steps off the driveway.
Visibility Tip: Place your house numbers where they are directly visible from the street, but ensure they don’t force a delivery driver or guest to stand in the middle of your garden beds to read them. Ideally, mount them at eye level to the side of the door or on a pillar near the entry path.
Before you commit to a permanent location, hold your chosen signage against the wall during different times of the day. A location that looks clear at noon might disappear into deep shadows by early evening.
Consider these quick-check criteria when finalizing your sign location:
- Contrast: Ensure the number finish stands out sharply against the wall material (e.g., polished brass on dark wood or matte black on light stone).
- Obstruction: Double-check that nearby porch lights, hanging baskets, or seasonal wreaths won’t obscure the characters as plants grow or wind blows.
- Consistency: Keep the sign at a height that remains legible even if a guest is carrying a package or approaching from an angle.
Avoid the “clutter trap” by keeping signage separate from other decorative elements like wall art or ornate sconces. If your numbers are fighting for visual space with a doorbell camera or a mailbox, the signage will inevitably lose its primary purpose of quick identification.
⭐ Personalized Signs for Front Doors
Victorian Fancy Customized Acrylic Door Sign
Custom Metal Address House Number Sign
Wooden Festive Christmas Door Welcome Sign
💸 Budget-Friendly Version: Smart Signage Upgrades
- DIY vinyl decals: Use high-contrast custom vinyl lettering on glass sidelights or smooth metal surfaces for a professional, modern look.
- Refinished hardware: Spray paint existing, dated numbers with a durable matte black or oil-rubbed bronze finish for instant visual impact.
- Prioritize readability: Invest your budget in high-quality, large-scale numbers rather than ornate frames; clear, bold typography is the most effective wayfinding tool.
With seventeen potential directions for your front approach now mapped out, the path forward becomes significantly more manageable. You do not need to integrate every structural detail or paving pattern to achieve a professional result. Selecting the one or two elements that align with your home’s architecture will carry the entire design.
A polished arrival sequence is built from a few deliberate, high-impact choices rather than a collection of scattered ideas. If you are ready to refine the look of your home’s exterior, consider which entry door styles best anchor your chosen route. Decide on your primary approach today, and the remaining details will naturally fall into place.




