

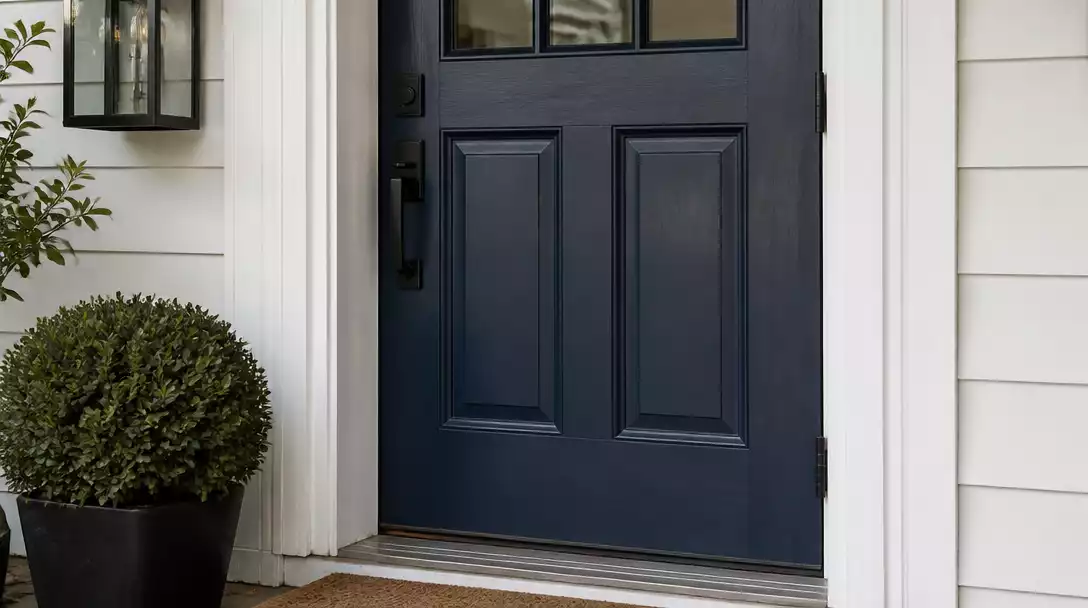
Your front door is the first impression your home makes, but you don’t need a massive budget to fix it. This guide rounds up 10 weekend-friendly door makeovers worth saving to help you find the right update for your entry. Let’s get to work.
Faded Paint to Fresh Coat
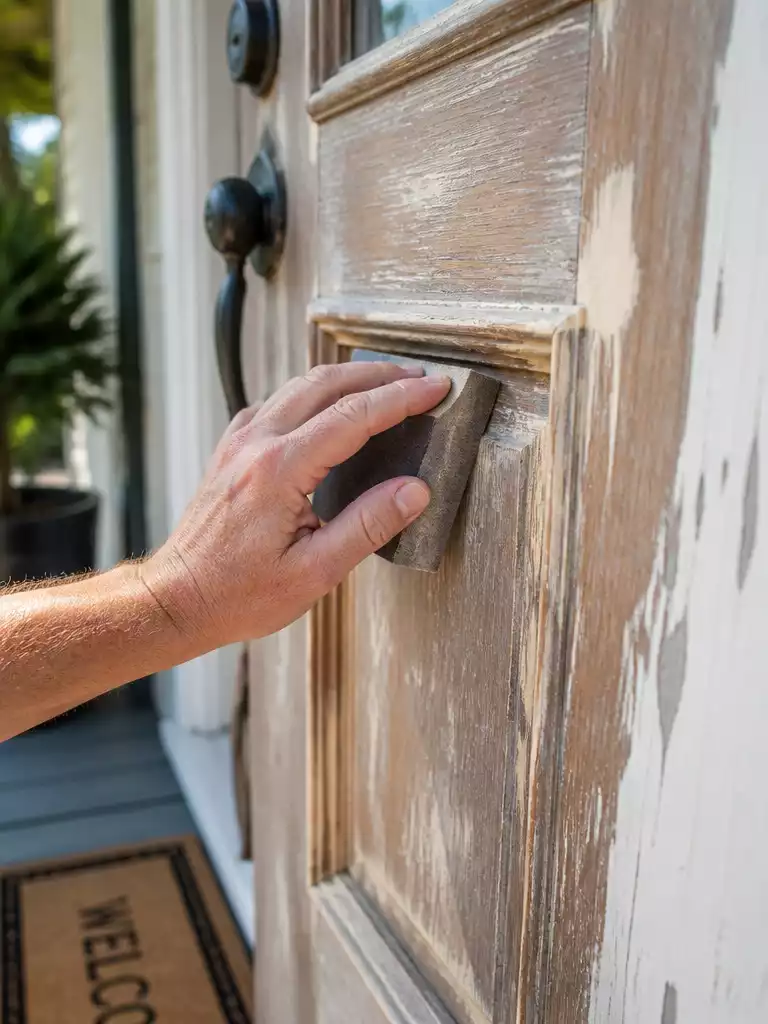
Refresh your home’s curb appeal with a durable, professional-grade finish that survives the elements.
As an Amazon Associate I earn from qualifying purchases. Affiliate links may earn me a commission at no extra cost to you.
That chalky, sun-bleached look on your front door is more than just a cosmetic issue. It is a sign that the existing finish has lost its ability to protect the wood from moisture and humidity.
You need to approach this as a prep-to-paint project. If you skip the heavy lifting in the beginning, that new coat of paint will start peeling by the next season.
The Prep-to-Paint Checklist
- Surface Prep: Use medium-grit sandpaper to remove loose paint and create a profile for the new finish to grip.
- Repair: Fill all dings and scratches with exterior-grade wood filler before sanding smooth.
- Crevice Technique: Always use a paintbrush to cut in the recessed panels first, then use a roller for the flat surfaces.
- Primer: Apply a high-hiding primer if you are transitioning from a dark color to a light one to prevent bleeding.
Timing your project is just as important as the materials you choose. Check your local weather forecast to ensure you have at least 24 hours of dry, temperate conditions.
Avoid painting if the dew point is high or if rain is in the immediate forecast. Humidity causes paint to trap moisture against the door, which leads to immediate failure later on.
Painting over a glossy surface without sanding or priming is the fastest way to waste your weekend. The new coat will bond to the old paint rather than the door, causing it to peel in sheets under direct sun.
⭐ Fresh Paint Coats for Front Doors
Durable Satin Finish Front Door Paint
High Coverage Exterior Satin Paint Primer
One Step Matte Furniture Paint Kit
The Right Sequence to Save Rework:
Painting a door is a project where the order of operations prevents unsightly drips and protects your hardware from accidental spills.
- Remove all hardware or meticulously mask handle sets and hinges with painter’s tape.
- Fill and sand the surface, then wipe away all dust before applying your primer.
- Paint the recessed panels and frame edges first, finishing with the large flat surfaces.
Flat Finish to Semi Gloss
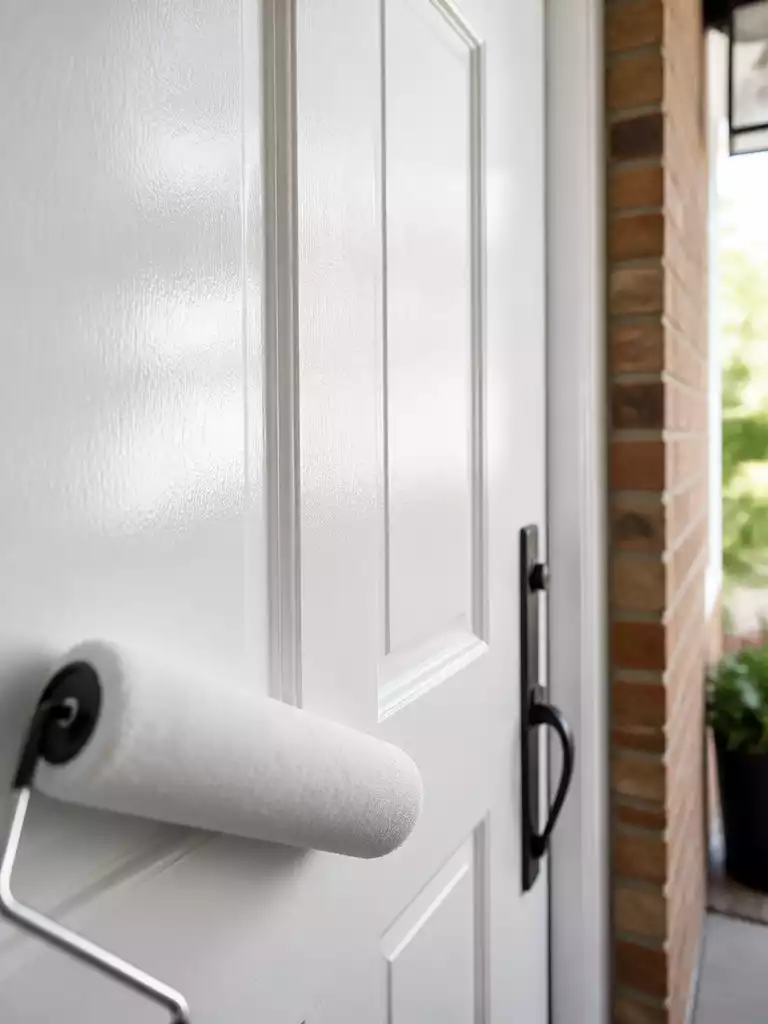
Swap the muddy look of flat paint for a crisp, light-reflecting sheen that resists grime.
Flat-finished exterior doors often soak up dirt and hand oils, leaving the entryway looking perpetually dingy and tired. Upgrading to a semi-gloss sheen offers a harder, more durable barrier that wipes clean with a damp cloth.
Because semi-gloss acts like a spotlight, it will highlight every single dent, scratch, or wood grain imperfection on your door. If your door has deep gouges, you must invest the time to fill and sand them before you even think about opening a paint can.
Pro Tip: Use a foam roller for your final pass. A traditional woven nap roller leaves behind a “stipple” texture that kills the smooth, glass-like finish you’re aiming for.
The secret to a professional-grade finish lies in how you handle the sanding process. You aren’t just sanding for smoothness; you are sanding to create a “bite” for the new paint to grip the old surface.
This project is perfect for homeowners who want a low-cost, high-impact weekend facelift. Skip this if your door has significant structural damage, as the high-gloss shine will only emphasize the flaws you haven’t repaired.
⭐ Best Semi Gloss Enamels for Doors
Multi Surface Semi Gloss Repair Paint
Semi Gloss White Touch Up Pen
Wood Look Garage Door Paint Kit
💡 Why This Works:
Moving to a semi-gloss sheen does more than just protect the door; it creates a visual “pop” that draws the eye toward your entryway. By reflecting more light, the surface gains a sense of depth and cleanliness that flat paint simply cannot replicate, making your home look significantly more curated and well-maintained.
The Visual Benefit: High-reflectivity finishes turn a standard front door into a clean, professional focal point.
Plain Slab to Applied Molding Panels
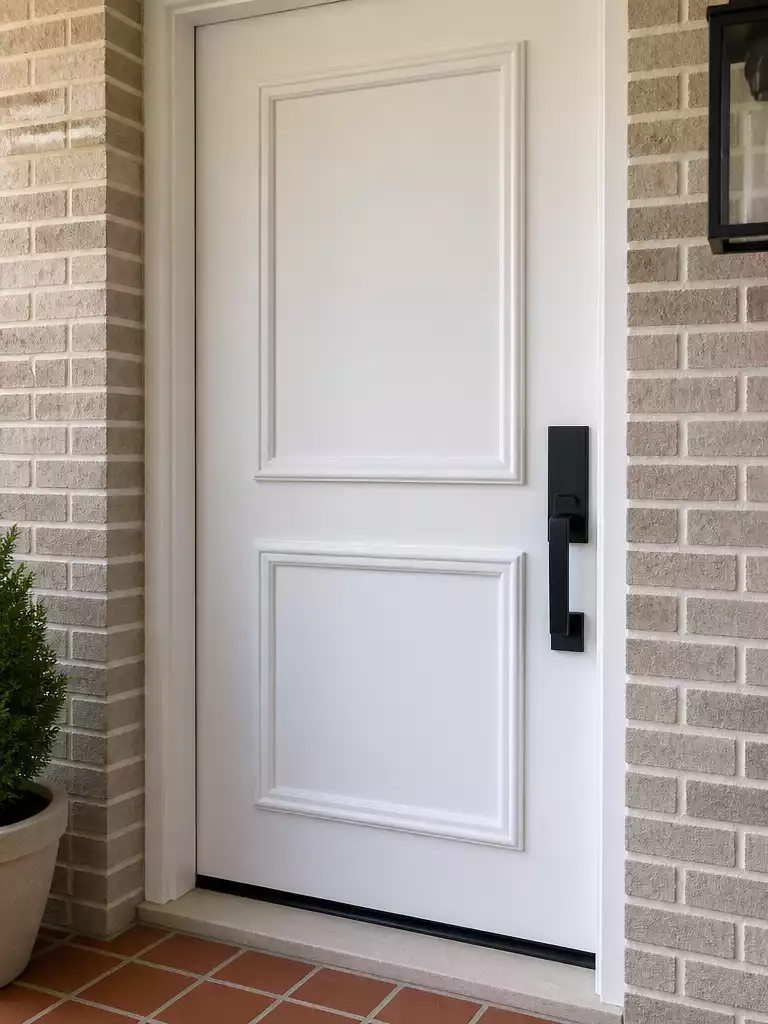
Give your hollow-core slab door custom architectural character with lightweight, budget-friendly composite trim.
That plain, flat slab door is often the biggest culprit behind a home feeling builder-grade and uninspired. You can easily fix this “hollow slab” syndrome by adding applied molding panels to create a shaker-style aesthetic that mimics a much more expensive door.
Pro Tip: Achieving a factory-made look depends entirely on your caulking technique. Use a high-quality exterior-grade paintable caulk to fill every seam, making the trim look like it was part of the door from the start.
Before you commit to the design, spend time taping out your pattern directly onto the door using painter’s tape. This allows you to adjust the “reveal”—the distance from the edge of the door—to ensure the spacing looks balanced and professional before you cut any trim.
When you are ready for installation, follow these essential steps to ensure the trim stays secure for years to come:
- Measure your desired panel boxes with a level to ensure everything is perfectly square.
- Use a miter saw to cut your composite trim pieces at exact 45-degree angles for a seamless corner fit.
- Apply a strong construction adhesive to the back of each piece, then reinforce with small finish nails.
- Fill all nail holes with wood filler, sand them smooth, and apply a final coat of paint to unify the surface.
This project is perfect for homeowners who want a high-end architectural look without the cost of a full door replacement. Avoid this if your door is severely warped or compromised by rot, as applied molding will not fix structural integrity issues.
⭐ Elegant Molding Panels for Plain Doors
Peel and Stick Door Molding Kit
Decorative Unfinished Wood Beaded Trim
Paintable PVC Wall Molding Trim Kit
Builder Brass to Matte Black Hardware
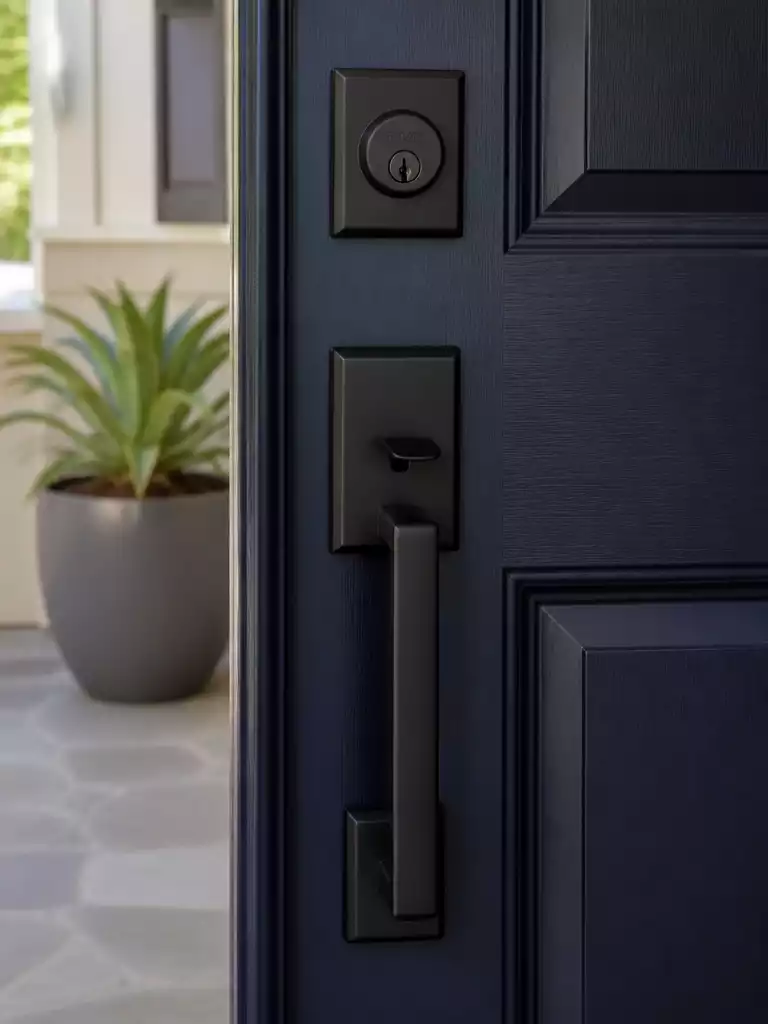
Swap outdated brass for a sleek, modern finish that instantly sharpens your home’s curb appeal.
That tarnished, yellow-toned builder brass is the fastest way to make a home look stuck in the 1990s. Updating to matte black hardware provides a crisp, high-contrast look that works with almost any door color.
You have two paths to take depending on your budget and the condition of your current handle. Replacing the entire set is ideal for longevity, while refinishing is a great low-cost weekend hack.
If you choose to spray paint the existing hardware, do not reach for standard interior paint. Only UV-resistant enamel will survive the harsh sun and porch humidity without flaking.
To get a professional finish without overspray, use the “cup hack.” Spray a small amount of paint into a disposable container and apply it to the hard-to-reach crevices with a fine-tipped craft brush.
Avoid the Chisel Trap
Before buying new hardware, check the hinge profile on your door. If the replacement hinges don’t match your existing mortise, you will be forced to chisel the wood to get them to sit flush.
For those doing a full swap, ensure your new handle set matches the current bore hole spacing to avoid drilling extra holes in the door slab. Once finished, test the latch swing multiple times to ensure the new mechanism doesn’t bind or stick.
⭐ Matte Black Hardware for Modern Doors
Matte Black Passage Door Lever Set
Modern Front Door Handle Lock Set
Oil Rubbed Bronze Wave Door Lever
⚠️ Watch Out for These Hardware Pitfalls:
- Surface prep neglect: Skipping a light sanding before spray-painting causes the finish to chip off within months.
- Overspray disasters: Failing to mask the door face properly leaves messy paint artifacts on your freshly painted surface.
- Internal binding: Forcing a misaligned handle or hinge creates tension that causes the mechanism to fail prematurely.
Upgrading your exterior hardware is often the most effective way to elevate the entire entryway without needing a total overhaul. A few thoughtful shifts in durable hardware can completely change how a home feels to neighbors and guests alike.
Focusing on the tactile details, like high-quality handles and hinges, carries more visual weight than any other single decision in your entry project.
Scuffed Kick Plate to Brushed Nickel
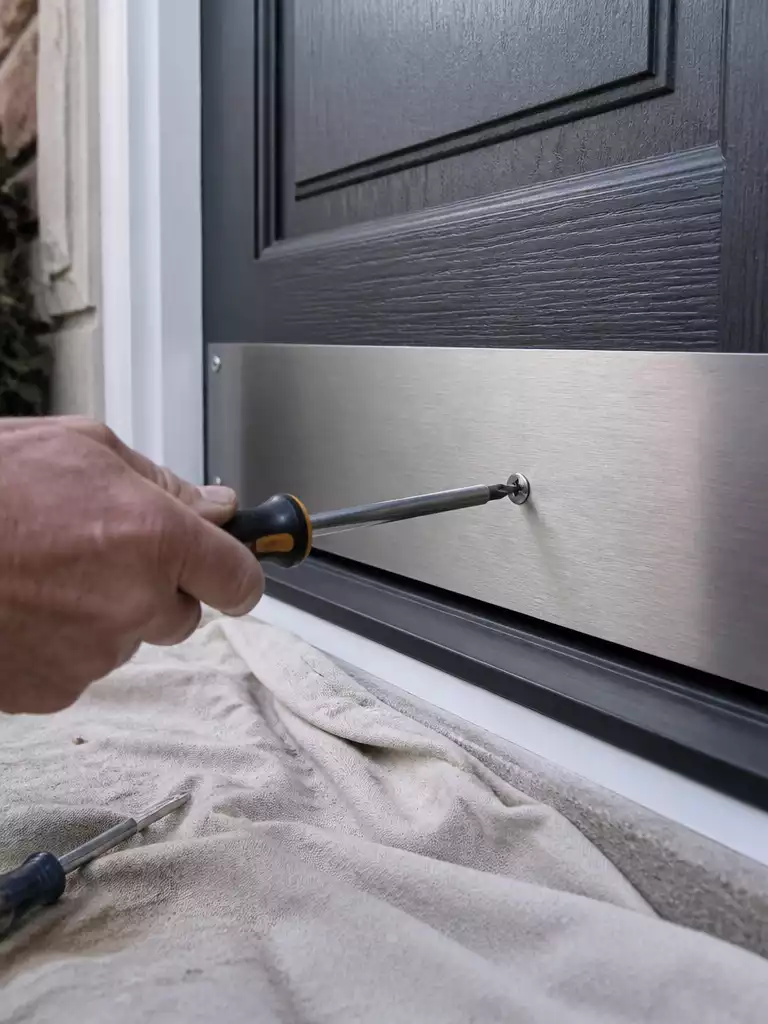
Protect your entryway from heavy foot traffic while adding a clean, modern metallic upgrade.
The bottom edge of your door is a high-impact zone that takes constant abuse from shoes, pets, and heavy groceries. A brushed nickel kick plate acts as a sacrificial barrier, shielding the wood from deep gouges and unsightly scuff marks.
This project is perfect for homeowners dealing with a weathered door base who want a high-end look without replacing the entire unit. If your current plate is dented or tarnished, this simple hardware swap provides an immediate aesthetic boost.
PRO TIP: If your new kick plate doesn’t align with the existing holes, do not force the screws. Use a high-quality wood filler or a stain-match stick to disguise the old holes before drilling new pilot holes for a clean, professional fit.
Installation requires just a few basic tools and careful measurement to ensure the plate sits perfectly level across the door sweep. You should always drill small pilot holes to prevent the wood from splitting, especially if you are working with an older solid-wood door.
Kick Plate Selection Guide
For those on a tighter budget, you don’t necessarily need to buy a new plate. You can remove your existing kick plate and give it a fresh life with metal-grade spray paint, provided you apply light, even coats to avoid drips.
⭐ Brushed Nickel Plates for Door Protection
Stainless Steel Push Door Kick Plate
Brushed Nickel Deadbolt Strike Plate Set
Self Adhesive Stainless Steel Kick Plate
📈 The Long-Term Payoff:
A kick plate is one of the most effective “set it and forget it” upgrades for your curb appeal. By shifting the wear and tear from your door’s wood veneer to a durable metal surface, you prevent the kind of moisture-wicking damage that often leads to expensive door replacements down the road. It signals to potential buyers that the entryway has been actively maintained against daily life.
Resale Advantage: Installing a high-quality brushed nickel plate preserves the structural integrity of your door’s base for years.
Clear Glass to Frosted Film
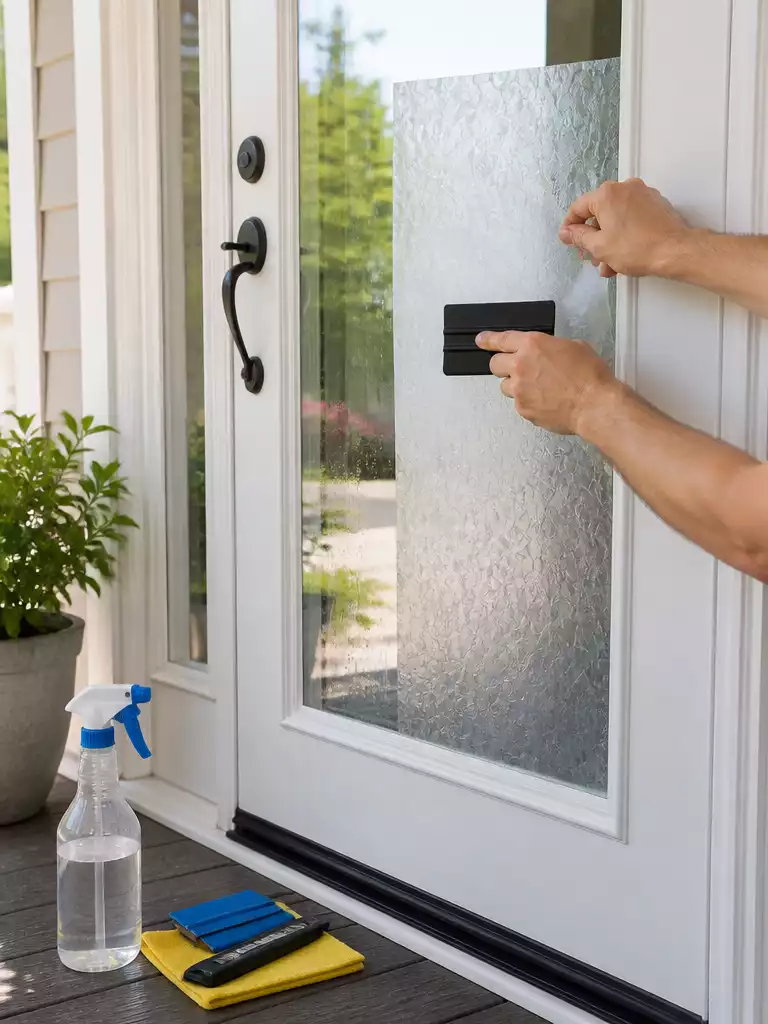
Instantly transform your entryway with custom privacy that filters light while blocking unwanted views.
Clear glass front doors are architectural dead zones that leave your entry exposed to every neighbor and delivery driver passing by. Applying a frosted window film is the most effective weekend fix to reclaim your privacy without the permanence of replacing the glass.
Unlike spray-on frosting, which often yellows under direct UV exposure and looks streaky, high-quality film provides a consistent, clean finish that stays durable for years. It is a completely reversible choice, making it perfect for renters or homeowners who want to test the look before committing to permanent glass changes.
Pro Application Tip: Use a spray bottle filled with water and a single drop of dish soap to mist the glass before positioning your film. This allows you to slide the material into the perfect spot before it bonds, ensuring a flawless, bubble-free finish.
To get a professional result that won’t peel in the summer heat, follow these specific installation steps:
- Clean the glass thoroughly with a non-ammonia cleaner to remove all oils and dust.
- Use a sharp utility knife to trim the film, leaving a 1/16th-inch gap between the edge of the film and the door frame.
- Always squeegee from the center toward the edges in long, firm strokes to push out all excess water.
- Wrap your squeegee in a thin microfiber cloth to prevent scratching the surface of the film while you press out bubbles.
Common Mistake: Never cut your film flush to the very edge of the glass. Glass expands and contracts with temperature shifts, and a film cut too tightly will buckle or peel within the first few weeks.
.
⚖️ Quick Decision Guide: Choose the Right Version
- Choose film if: You want a clean, bubble-free privacy solution that stays durable for up to five years.
- Skip film if: You prefer a permanent, etched-glass look and enjoy the DIY challenge of precision spray-masking.
- Pair it with: A modern brushed nickel handle to contrast the soft, diffused light of your newly frosted glass.
Worn Threshold to New Weatherstripping
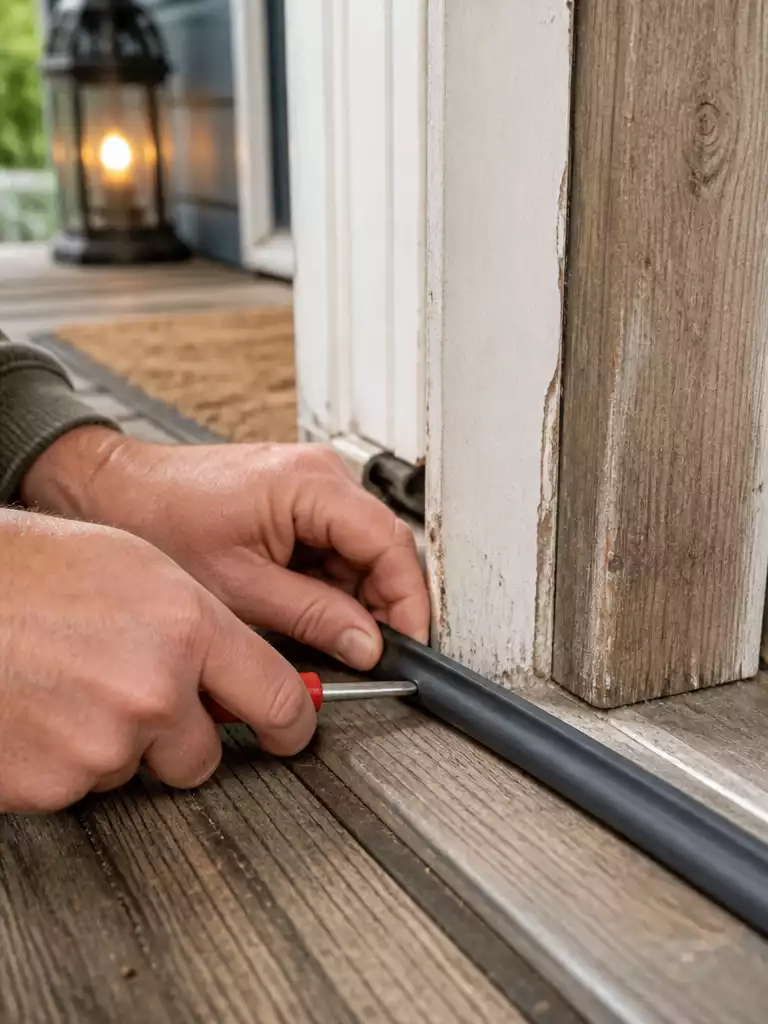
Eliminate drafts and protect your entryway from the elements with a simple, weekend-ready seal.
That persistent whistling sound during a windstorm or the tell-tale sliver of light visible at the bottom of your door usually points to a failing threshold seal. Fixing this is one of the most high-impact weekend tasks because it directly improves your home’s energy efficiency.
Before you head to the hardware store, you need to identify exactly where the gap is coming from. Use a flashlight at night to spot light leaks, then choose your material based on the specific gap size.
The secret to a lasting seal is meticulous preparation of the door jamb. Use rubbing alcohol to wipe away all grime and old adhesive residue before applying any new material.
If you skip the cleaning step, even the strongest adhesive will fail once the temperature drops during the first winter freeze. Always cut your strips slightly long and compress them into the corner for a truly airtight finish.
Avoid the “Stiff Door” Trap
A seal that is too thick will prevent the door from latching properly. Test your door swing after every six inches of installation to ensure the tension remains manageable.
⭐ Weather Seals for Worn Door Thresholds
Garage Door Bottom Rubber Seal Kit
Double Door Astragal Horseshoe Boot Seal
Universal Garage Door Threshold Seal Strip
🔢 The Right Sequence
Installing weatherstripping effectively requires a clean slate; doing it in the right order ensures the adhesive bonds properly rather than peeling away after a few weeks.
- Remove all old seals and scrape away remaining adhesive residue completely.
- Wipe the entire door jamb surface with rubbing alcohol to remove hidden oils.
- Measure twice and cut your new stripping slightly long to ensure a snug, gap-free compression fit.
Yellowed Peephole to Modern Viewer
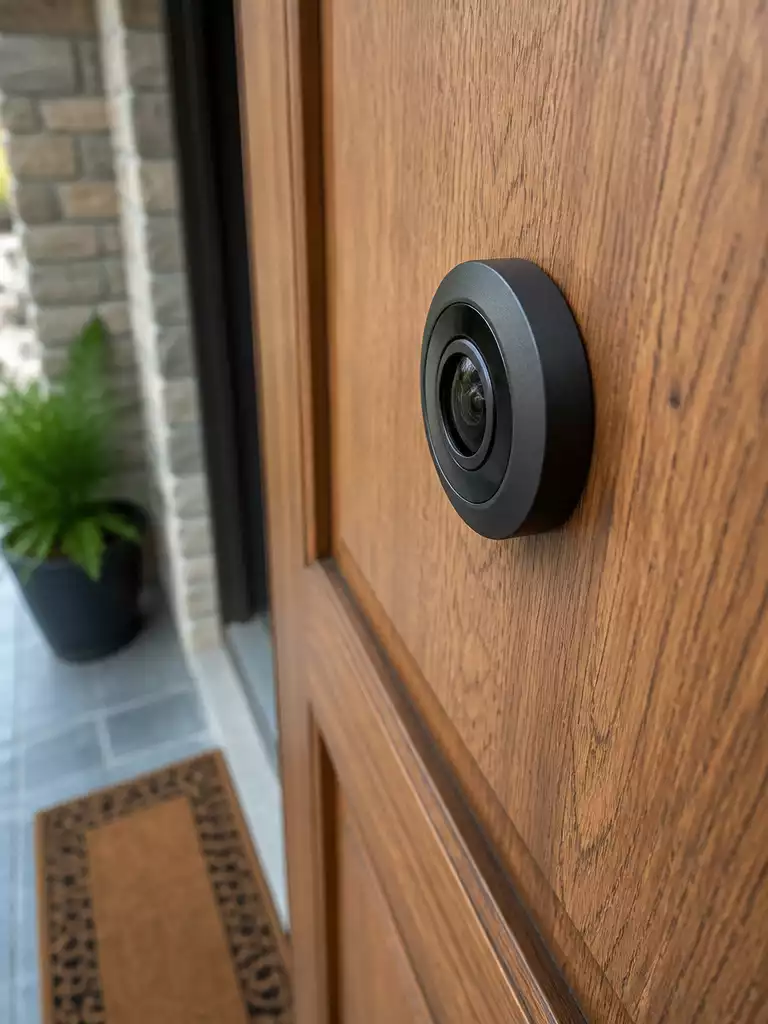
Upgrade your security for a crystal-clear, high-definition view of every porch visitor.
That distorted, yellowed fish-eye lens on your front door is more than just an eyesore; it’s a security blind spot. Replacing a standard, aging viewer with a modern wide-angle optical lens provides a sharp, clear sightline that makes identifying guests effortless.
Pro Tip: Apply a tiny drop of thread-locker to the viewer threads during installation. This simple step prevents the hardware from loosening every time the door slams shut.
Before buying a replacement, measure the existing hole diameter in your door to ensure the new viewer fits snugly without requiring extra drilling. Most standard residential doors use a 1/2-inch or 9/16-inch opening.
Installation is a quick task if you have a helper on the other side of the door. Use this two-person method for a perfect, secure fit:
- Loosen the interior portion of the old viewer with a flathead screwdriver or the installation tool provided in the kit.
- Once the old unit is removed, insert the new lens barrel through the exterior side of the door.
- Have your helper hold the exterior lens steady while you thread the interior viewer housing into place from the inside.
- Tighten both halves together until the assembly is flush and firm against the door surface.
Common Mistakes to Avoid:
- Don’t overtighten the viewer, as this can crack the internal lens or damage the door veneer around the hole.
- Avoid installing the viewer at an awkward height; ensure it is centered at your eye level for maximum comfort.
- Skip the “force-fit” approach; if the hole is too small, use a metal file to widen it slightly rather than jamming the new unit in.
⭐ Modern Viewers for Front Door Security
Wide Angle Door Viewer Privacy Cover
Wide Angle Peephole with Drill Bit
Digital LCD Screen Door Eye Viewer
⚖️ Quick Decision Guide: Choosing Your Viewer
- Choose this if: You want a crisp, wide-angle view that eliminates the “blur” of dated, small-diameter glass lenses.
- Skip this if: Your current door has a decorative metal plate or complex trim that blocks the installation area.
- Pair it with: A matching metal finish for your handles and hinges to keep your entryway aesthetic clean and intentional.
Bare Slab to Stained Wood Finish
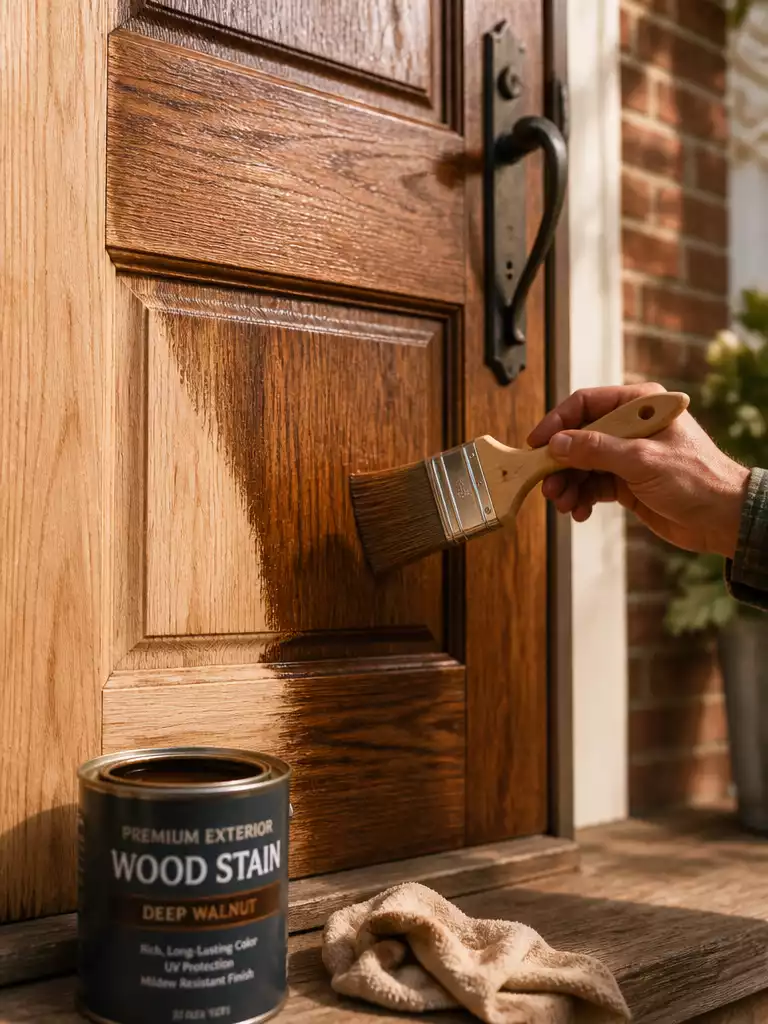
Strip away years of paint buildup to reveal the natural character of your entryway.
Stripping a paint-caked door down to the raw material is a labor-intensive project, but it is the only way to restore the natural grain of a solid wood entry. This makeover is best suited for homeowners who have identified that their door is solid wood rather than a hollow-core composite or a metal skin.
The Stain Sequence: Start by sanding with an 80-grit paper to remove old layers, then transition to 120 and finally 220-grit for a smooth surface. Never sand across the grain, as this creates permanent, visible scratches that the stain will only highlight.
Once you reach clean wood, do not skip the pre-stain conditioner. This step prevents the wood from absorbing stain unevenly and avoids the blotchy look that often ruins amateur furniture flips.
After staining, your work is only half finished. You must apply multiple coats of an exterior-grade spar urethane to shield the wood from the elements.
If you skip the UV-resistant sealant, your hard work will gray and warp within a single season of direct sun exposure. This is a high-maintenance finish, so be prepared to re-apply a fresh coat of sealer every few years to keep the wood protected.
⭐ Stained Wood Finishes for Bare Doors
Brown Walnut Wood Stain and Sealer
Wood Stain Touch Up Bundle Set
Water Based Furniture Stain Wood Varnish
🏡 How This Works in a Real Home:
- Test on hidden spots: Apply your stain to the bottom edge of the door first to verify the final color.
- Manage door traffic: Plan this project for a weekend when you can use an alternative entrance to allow curing.
- Natural grain look: Keep the original character by opting for a semi-transparent stain rather than a heavy, opaque solid finish.
Chipped Edges to Sanded and Sealed
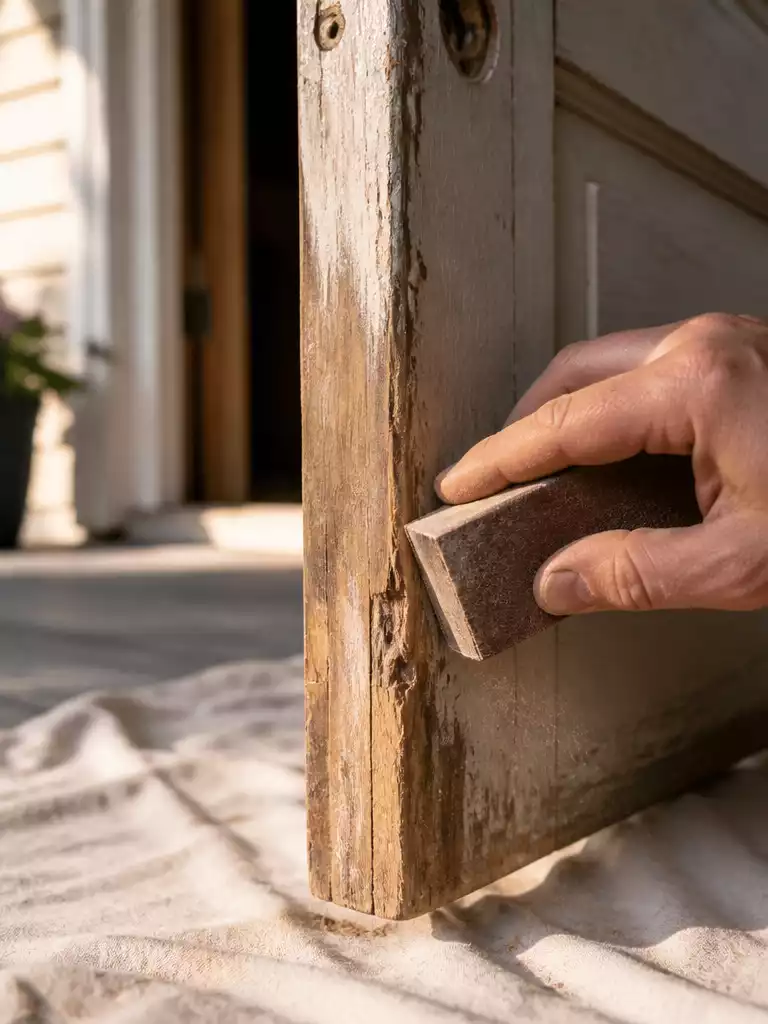
Restore the structural integrity of your door by sealing out moisture and preventing further decay.
That jagged, splintered side of your door is more than just an eyesore; it is a direct path for rainwater to soak into the door’s core. Left untreated, this moisture causes the wood to swell, eventually leading to rot that shortens the life of your entire entryway.
Avoid interior-grade fillers here. Standard wood filler will crumble after the first heavy rain, leaving you right back where you started.
To fix this, you need to be aggressive with your prep work. Start by sanding the damaged edge to a smooth radius rather than a sharp, 90-degree corner, as paint and sealant cling much better to rounded edges.
Follow these steps to ensure a long-lasting, weather-tight repair:
- Clear the debris: Use a utility knife to scrape away any loose, peeling paint or soft, water-damaged wood fibers until you reach solid material.
- Fill the voids: Apply an exterior-grade wood filler to any deep gouges, overfilling slightly to account for shrinkage as it dries.
- Sand to finish: Once cured, sand the filler flush with the door surface using medium-grit paper, finishing with a fine-grit pass for a smooth texture.
- Seal the surface: Apply a high-quality, exterior-grade sealant along the entire edge to lock out moisture and prevent future swelling.
This repair is essential for any homeowner dealing with a wooden door that has been exposed to years of harsh weather. If your door is made of metal or fiberglass, focus your efforts on checking the door sweep instead, as these materials do not suffer from the same edge-splintering issues as natural wood.
⭐ Sanded and Sealed Door Edges
High Performance Two Part Wood Filler
Washable Sanding Sponge Sandpaper Assortment
Wax Putty Stick for Wood Repair
🔢 The Right Sequence for Lasting Repairs:
Tackling edge damage requires a strict order of operations to ensure your filler adheres properly and your sealant provides a truly moisture-proof barrier.
- Clean and clear: Remove all loose debris and soft wood fibers before applying any filler material.
- Fill and cure: Apply exterior-grade filler and allow it to fully harden based on product instructions.
- Sand and seal: Smooth the surface flush to the door and apply sealant immediately after painting.
With all ten ideas in front of you, the path to a refreshed entry becomes much clearer. Pick the one or two updates that best suit your home and focus your weekend there rather than attempting every item on the list.
A polished front door comes from a few deliberate choices that highlight your home’s character. By knowing how to choose for your specific needs, you avoid the overwhelm of a full renovation. Decide on the most impactful change first, and the rest of your entryway will fall into place.




