Flat, uninspired entryways often stall a home’s personality, but simple styling can fix that instantly. This guide gathers 10 door decoration ideas worth saving to help you find the perfect look for your space. Here is how to upgrade your doors with real, actionable style.
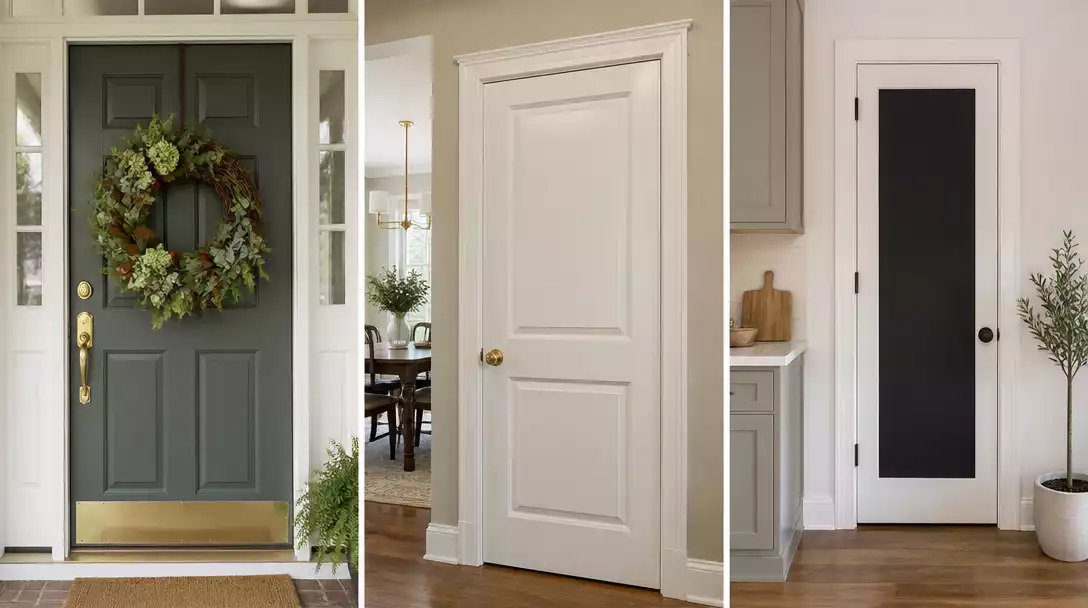
Seasonal Door Wreath
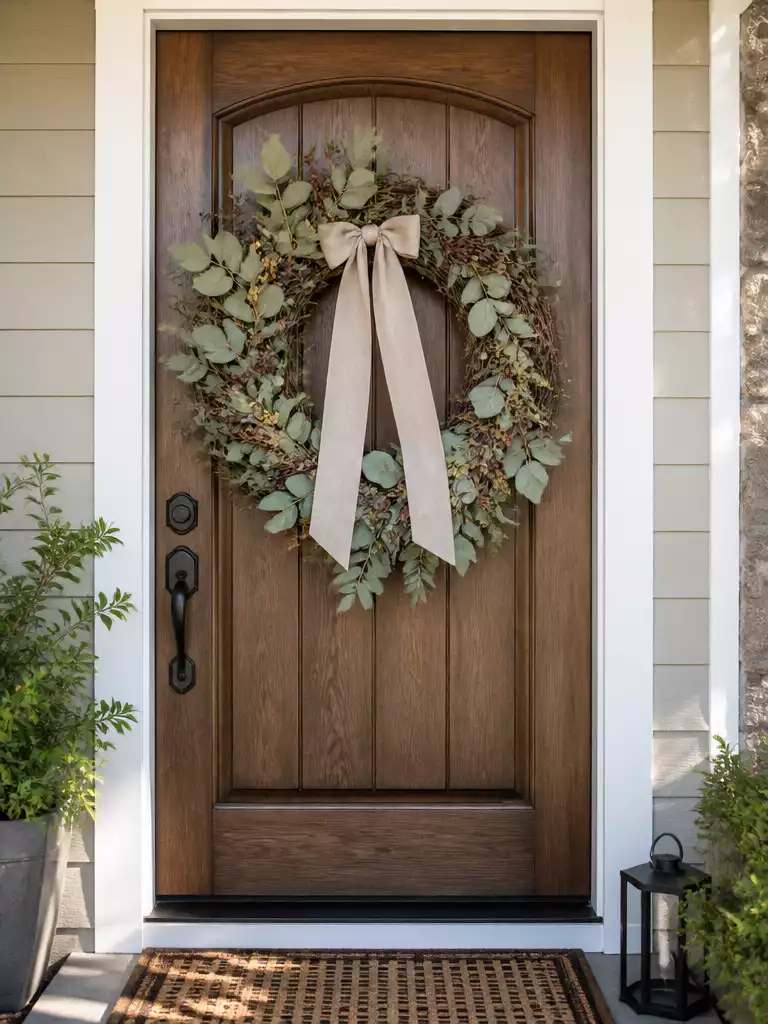
Refresh your entryway instantly with a seasonal focal point that anchors your entire facade.
As an Amazon Associate I earn from qualifying purchases. Affiliate links may earn me a commission at no extra cost to you.
A wreath acts as the singular visual anchor for your front porch, signaling a change in season before a guest even reaches the doorbell. Instead of treating this as a permanent fixture, embrace a seasonal rotation where you swap out the greenery to match the mood of the month.
For the best look, choose a grapevine base as your foundation. These provide a sturdy, natural structure that works with almost any decor style throughout the year.
Watch Out for Wreath-Crush.
Avoid picking a wreath so thick that it prevents the door from closing properly or rubs against your paint. A wreath that drags against the door will leave permanent, unsightly scratches over time.
When selecting your materials, look for colors that echo existing hardware, such as brass accents in your ribbons or dried florals that match a brass handle. This simple step ties the decor to the architecture, making the addition feel intentional rather than an afterthought.
.
📋 Quick Reality Check Before You Hang:
- Door clearance: Verify there is at least one inch of space between the door and your storm door to prevent crushing.
- Hook security: Ensure your hanger or adhesive hook is rated for the total weight of the wreath, especially for heavier, fresh-cut foliage.
- Finish protection: Inspect your door’s paint or stain for existing chips; add a small clear felt pad behind the wreath to prevent new surface abrasions.
Framed Door Trim Molding
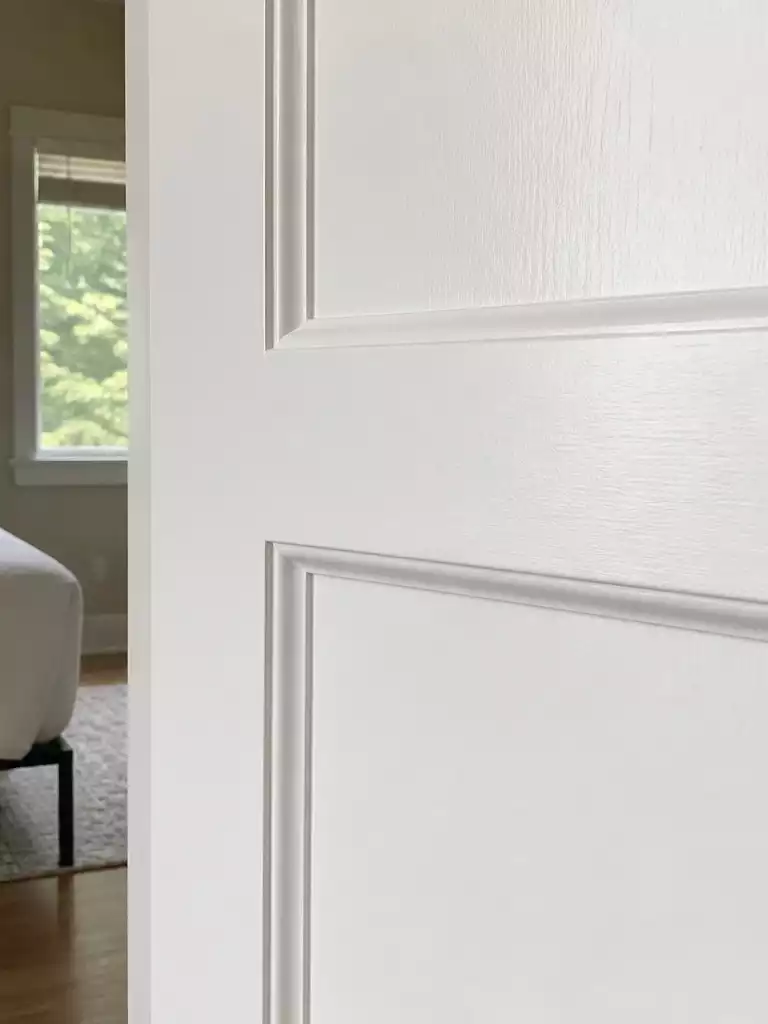
Transform flat slab doors into custom architectural features using simple, lightweight molding strips.
Framed door trim acts as architectural jewelry, turning standard, hollow-core builder-grade doors into custom millwork pieces. This project relies on applying lightweight adhesive-backed molding strips to create the illusion of deep, recessed panels.
Tools You Will Need:
- Miter box and hand saw for precise 45-degree corner cuts.
- Construction-grade adhesive or heavy-duty double-sided mounting tape.
- High-quality painter’s tape for crisp paint-line protection.
- Caulk to fill any tiny gaps at the mitered corners before painting.
The secret to a professional look lies in the paint finish. Use a matte finish for the main door surface and a semi-gloss for the added trim molding to create a subtle, high-end visual contrast.
Pro Warning: Removing painter’s tape after the paint has fully cured often results in jagged, chipped edges. Pull the tape back slowly while the paint is still tacky to maintain a razor-sharp line.
.
🔢 The Right Sequence to Avoid Rework
Adhering to a strict installation sequence ensures your new trim looks integrated rather than “stuck on,” preventing messy paint bleed and corner gaps.
- Prep and Clean: Wipe the door surface with a degreaser to ensure adhesive strips bond securely.
- Layout and Miter: Measure twice, then cut your mitered molding corners before removing any adhesive backings.
- Paint and Seal: Apply your semi-gloss finish to the trim, then caulk the seams once the paint dries.
Potted Plants Flanking a Door
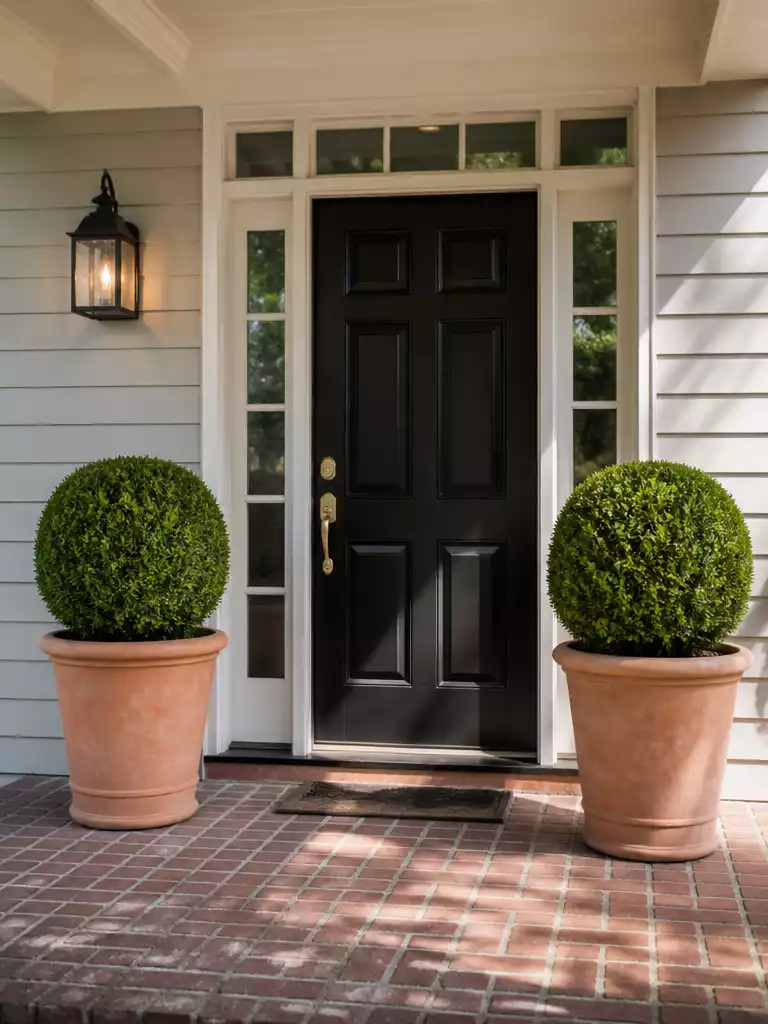
Create a welcoming entryway embrace by using vertical greenery to frame your front threshold.
Potted plants work best when they leverage the rule of symmetry to pull the eye upward toward your door. Choosing a matching pair of planters creates an immediate sense of order, making even a small, builder-grade entryway feel intentional.
The Pot-in-Pot Method: Keep your plants in their original plastic nursery pots before placing them inside your decorative planters. This allows you to swap out seasonal annuals or dying greenery in seconds without the mess of repotting.
The type of plant you choose should reflect the formality of your home’s exterior. Use this guide to decide which pairings suit your space:
Always prioritize planters with functional drainage holes to protect your porch flooring from water damage. If you have a tight entryway, skip large, sprawling shrubs that brush against guests and opt for vertical, narrow-profile evergreens instead.
.
🏡 How This Works in a Real Home:
- Daily maintenance: Keep a small watering can near the door to ensure your greenery stays hydrated without constantly hauling heavy buckets.
- Porch clearance: Check your door’s swing radius before placing large pots; ensure guests have plenty of room to enter comfortably.
- Natural styling: Mix plant heights by placing a trailing vine or lower foliage in front of a taller topiary for depth.
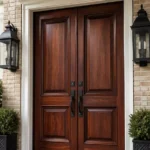
Decorative Garland Drape
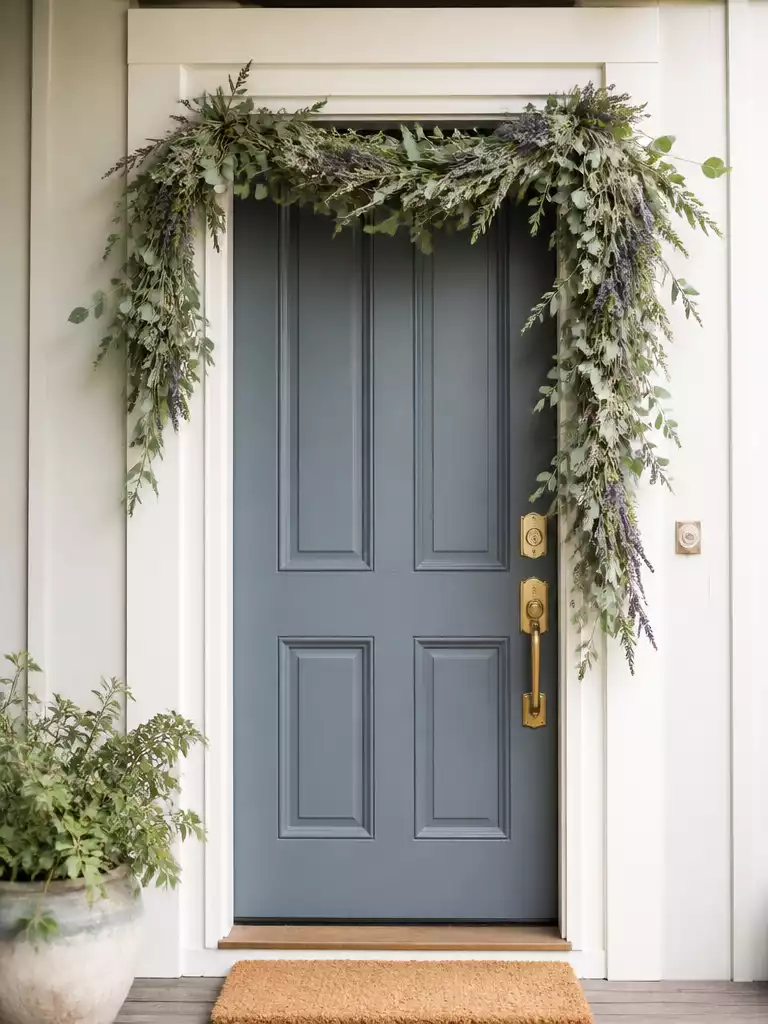
Soften rigid door silhouettes with a romantic, non-seasonal drape that frames your entryway perfectly.
A garland drape is the ideal way to soften a rigid doorway silhouette without relying on holiday-specific decor. This approach works best for homeowners who want a permanent, romantic architectural accent that elevates the entrance through every season.
The secret to a polished look lies in how you secure the greenery to your door casing. Avoid nails or heavy hardware that can mar your wood; instead, use clear, damage-free command hooks or floral wire that blends into the frame.
Pro Placement Tip: Never let your garland drop past the top third of the door frame. It should frame the archway without interfering with the visual openness of the entrance or catching on the door as you enter.
Choosing your style depends on the mood you want to set. Use these two classic arrangements to guide your installation:
- The Top-Down Drape: Best for traditional homes, this creates a heavy, symmetrical look by hanging the garland across the entire top rail with gentle dips on both sides.
- The Diagonal Sweep: Perfect for a modern or airy feel, this style attaches the garland to one upper corner and allows it to drape gracefully down one side of the frame.
Warning: Avoid mixing too many competing materials like fabric ribbons, lights, and heavy metal swags all at once. Too many elements will make the drape look cluttered instead of composed.
.
💡 Essential Tips for Garland Installation:
- Test frame clearance: Before finalizing your drape, open the door completely to ensure the bulk of the greenery doesn’t catch on the hinges or wall.
- Weight-bearing limits: Use adhesive-backed hooks rated for the specific weight of your garland, especially if using real, moisture-heavy greenery.
- Secure loose ends: Tuck stray floral wires into the center of the garland to prevent scratching the door finish or snagging clothing.
Designing a cohesive entryway is less about exhausting every possibility and more about creating a unified sensory story. When you look at how to blend exterior charm with your home’s interior, the right balance of texture and light does the heavy lifting for you.
Focusing on two or three high-impact details creates a more curated, intentional connection than an overly busy facade ever could.
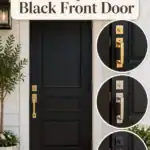
Hanging Door Signs
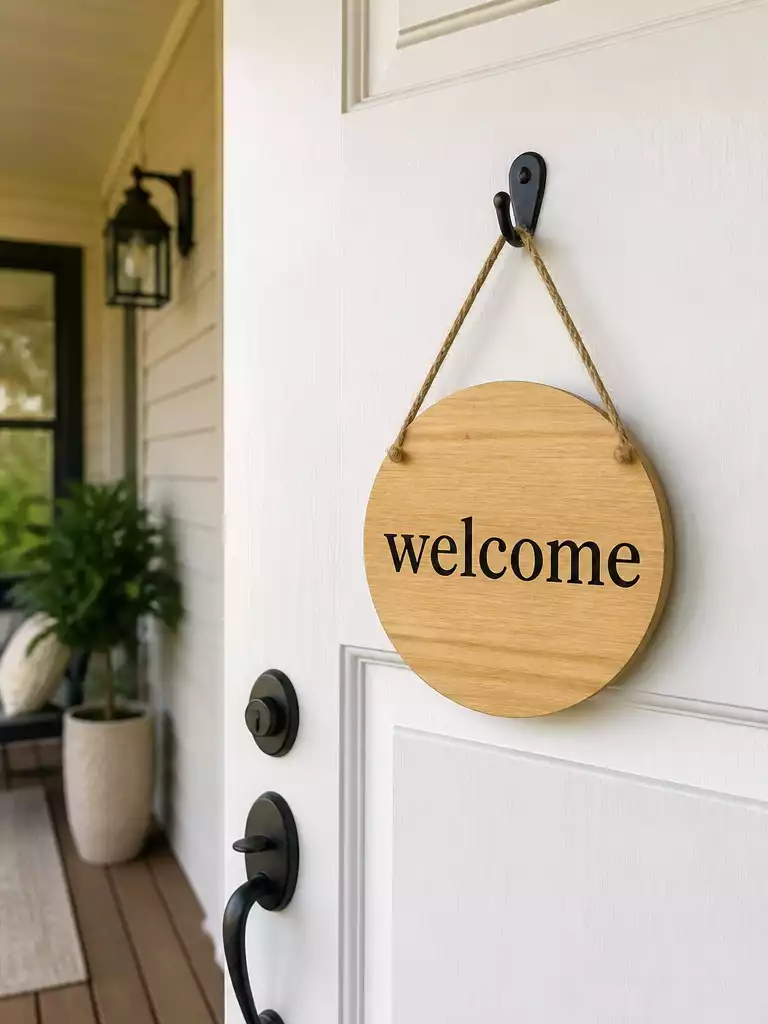
Instantly define your home’s personality with a sharp, high-contrast sign that greets every guest.
A hanging sign acts as the primary voice of your entryway. It is the most efficient way to communicate a welcoming vibe without cluttering the porch with excessive decor.
For the best results, prioritize high-contrast materials. A black metal sign against a white door, or white painted lettering on a dark stained wood surface, ensures your message is legible from the curb.
Pro Tip: The Four-Word Rule
Keep your greeting or name under four words. Long, cursive phrases often lose their clarity when viewed from more than five feet away.
Before you commit to a style, consider how the material interacts with your current door hardware. Use this guide to match your sign to your home’s existing finish:
This decor style is ideal for homeowners who want a quick, replaceable update. If you prefer a more permanent architectural look, you might find these signs feel too temporary or casual for your specific taste.
.
💡 Why This Works:
A hanging sign succeeds because it introduces a human element to an architectural transition. By focusing on a short, high-contrast message, you create an immediate focal point that draws the eye upward, effectively breaking up the vertical monotony of a standard door while signaling your home’s personality before a guest even knocks.
The Takeaway: Minimalism increases impact; a single, clear word often conveys more warmth than a crowded design.
Bedroom Door Name Plaques
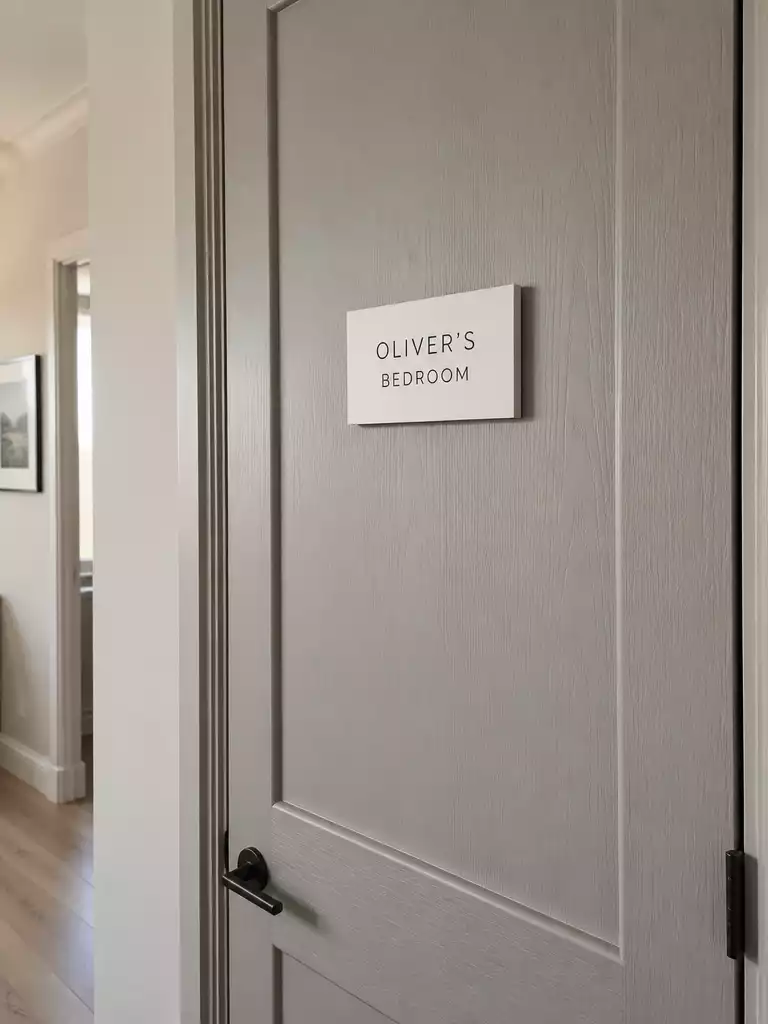
Clearly define private zones while adding a polished, custom touch to children’s or guest rooms.
Bedroom door name plaques turn a simple passage into a deliberate space, making it easy to identify private rooms in a busy household. This approach works best for families looking to add a layer of organization or those wanting a personalized detail that feels intentional.
Mounting Tip: Skip the nails and hammer. Use heavy-duty, removable poster strips to secure plaques on interior doors, which allows you to swap them out as kids grow without damaging the door finish.
Choosing the right material ensures the plaque complements your existing interior design rather than clashing with it. Consider these options to match your home’s aesthetic:
- Acrylic: Best for modern or contemporary bedrooms, offering a clean, sharp look that stands out against painted doors.
- Wooden Blocks: Ideal for rustic, farmhouse, or traditional rooms, adding a warmth that feels natural and grounded.
- Painted Metal: Suits industrial or minimalist spaces, providing a durable and sleek contrast to matte door surfaces.
When installing, consistency is the key to a professional outcome. Mount all plaques at the same height—typically at eye level—to maintain a uniform flow across your hallway.
If you prefer a clutter-free hallway, keep the scale modest. A plaque that is too large or ornate will quickly dominate the door and distract from the room’s actual design.
.
💡 Why This Works:
Installing name plaques acts as a visual “anchor” for private spaces, effectively reducing household confusion while adding a touch of intentional design. By clearly identifying rooms, you create a sense of personal territory that makes a house feel more organized and considered, especially in busy, multi-resident homes.
Design Takeaway: Coordinate your plaque material with existing door hardware to ensure the detail feels cohesive rather than misplaced.
Layered Doormat Styling
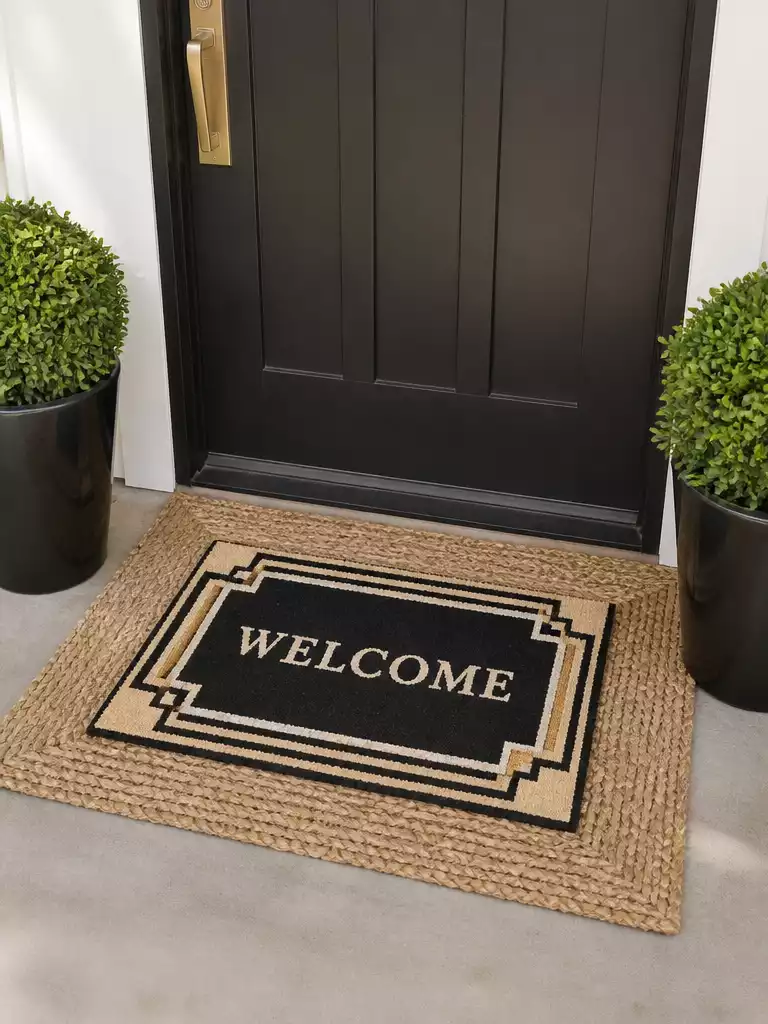
Ground your entryway by using a larger fabric base to anchor your primary doormat.
A solitary doormat often looks like it is floating in space, making your entryway feel unfinished. Layering a larger rug beneath your standard mat provides the visual weight needed to anchor the entire threshold.
The secret to nailing this look is all in the dimensions. Your bottom rug should be at least double the width of your top mat to ensure the proportions feel intentional rather than accidental.
When selecting your materials, lean into natural fibers like jute for the base because they hold their shape well against the elements. Stick to synthetic materials for the top mat so you can easily hose it off when it gets muddy.
Steer clear of curling edges by choosing a base mat with a sturdy, weighted weave rather than thin, lightweight fabric. If you live in a high-wind area, consider using rug tape underneath the base to keep your layers from shifting.
This styling approach works for almost any home, but it is especially effective for small entryways that lack architectural detail. If your front door area is already very busy with complex trim or bright paint, keep the patterns on your mats neutral to avoid visual clutter.
.
String Light Door Frame
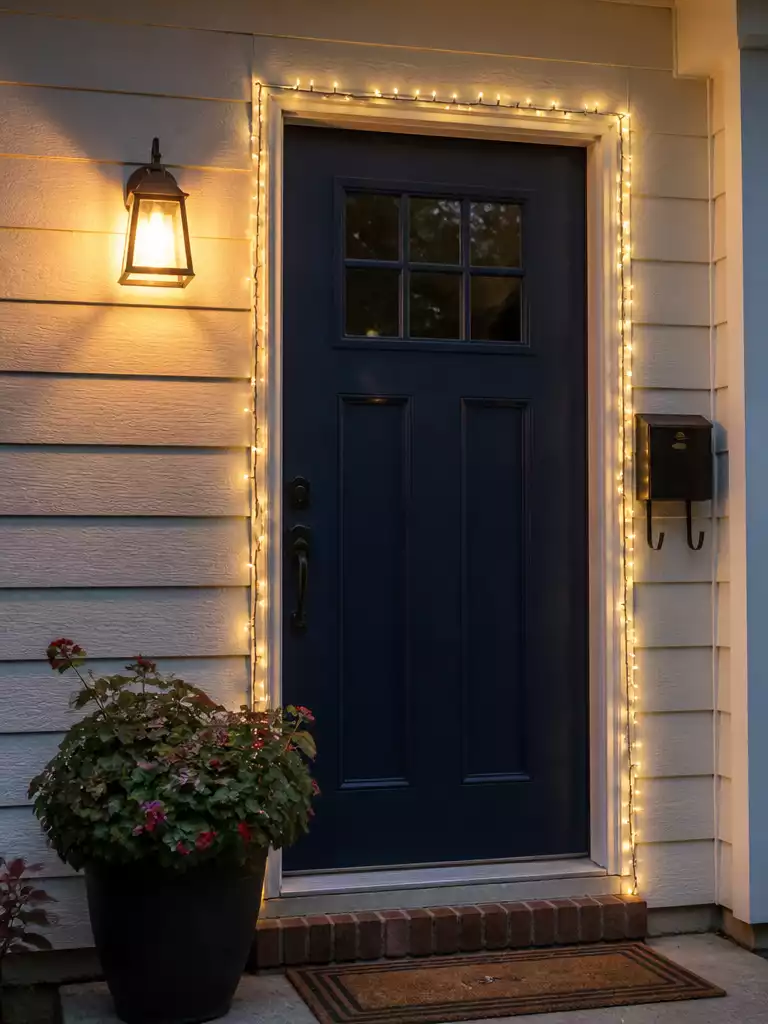
Define your entryway silhouette after sunset with a soft, glowing architectural light border.
Use light to define the shape of your entry rather than attempting to flood the porch with harsh downward beams. String light door frames create a whimsical glow that invites visitors inside while highlighting the structure of the doorway itself.
When selecting your lights, consider the difference between indoor-style fairy lights and sturdier porch-rated options. Fairy lights provide a delicate, jewelry-like outline, while larger globe lights offer a more industrial, heavy-duty appearance.
Focus on the run of the light by outlining the door casings rather than draping the strands across the center of the door. This protects the finish of your door and ensures the light acts as a frame, not an obstruction.
Pro-Tip: Use battery-operated LED units with built-in timers to maintain a consistent glow each evening. This removes the need to manually toggle switches or worry about proximity to an exterior outlet.
This look is ideal for homeowners who want to boost evening curb appeal without installing permanent hardwired fixtures. If your door features intricate molding, consider using small clear adhesive clips to ensure the light strand follows the contours of the wood perfectly.
.
🔢 The Right Sequence: Installation First
Follow this specific order to ensure your lights are securely mounted, perfectly aligned, and fully functional before the sun sets.
- Measure and map: Gently trace your intended light path around the frame to ensure you have enough length.
- Secure the clips: Attach your adhesive hooks or clips to the casing while the door is closed.
- Thread and test: Feed the light strand into the clips and test the timer before tucking away cords.
Painted Accent Border
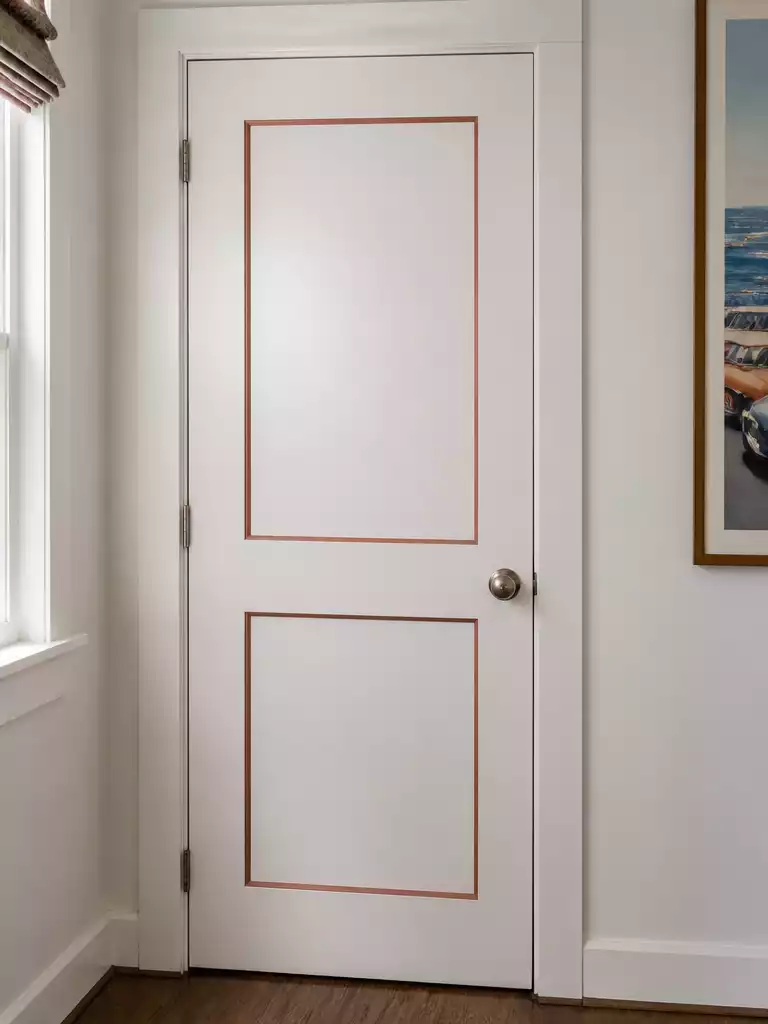
Define your door architectural details with a precise, high-contrast band of color.
A painted accent border transforms flat, builder-grade doors into custom millwork pieces. By highlighting the recessed panels or the door perimeter with a secondary color, you create visual depth without needing to replace the entire slab.
The Edge-Seal Technique: To prevent paint bleed, apply a thin coat of your base door color along the tape edge first. Once dry, this seals the gap, ensuring your accent border remains razor-sharp when you apply the final color.
This project is best suited for homeowners comfortable with steady handwork and basic prep. If you have doors with existing recessed panels or simple molding, the border will naturally follow those lines for a professional finish.
Avoid this project if your door surface is heavily textured or damaged, as the paint lines will appear jagged. Always stick to high-quality painter’s tape; cheaper versions often allow paint to seep underneath, ruining the crisp graphic look you are aiming for.
.
💡 Why This Works
Accent borders manipulate the eye by creating a graphic frame that highlights a door’s inherent architecture. By isolating specific panels or perimeters with color, you add a layer of depth that makes a standard, flat door feel like a custom, high-end millwork piece without the cost of a full renovation.
Design Takeaway: High-contrast borders provide a sophisticated focal point that instantly elevates the personality of a space.
Pantry Door Chalkboard Panel

Turn your kitchen utility door into a functional planning hub with a clean, graphic aesthetic.
A pantry door chalkboard panel functions best as an intentional planning surface rather than a catch-all for clutter. By applying a dedicated panel or high-quality chalkboard paint to the center of a flat-panel door, you create a minimalist graphic element that serves the entire household.
Pro Tip: Skip traditional dusty chalk. Use liquid chalkboard markers instead to achieve crisp, legible lettering that stays clean and resists smudging.
Choose your application method based on how much you want to commit to the look. Adhesive chalkboard panels are ideal for renters or those who want a perfectly smooth, factory-like finish without the risk of brush strokes.
If you prefer a custom, built-in feel, use high-quality chalkboard paint applied with a high-density foam roller. This option allows you to frame the chalkboard with existing door molding for a more architectural appearance.
To keep the space looking curated, establish a weekly maintenance schedule for your panel. Wipe down the entire surface every Sunday evening to clear out old lists and start the new week with a fresh, organized slate.
.
🧰 Questions for Your Installer:
- Panel compatibility: Does the door’s current finish require a specific primer to ensure the chalkboard surface adheres properly?
- Hardware clearance: Will the added thickness of an adhesive panel interfere with the existing door hinge or latch alignment?
- Surface longevity: Should we seal the perimeter with a thin bead of caulk to prevent the panel edges from peeling?
You have now navigated ten distinct ways to style your home’s entries, from exterior thresholds to functional pantry panels. The final look for your home is achieved by choosing the one or two applications that align with your architecture, rather than attempting to incorporate every concept.
Select the element that truly fits your layout to elevate your entry, and you will find that a few deliberate, high-impact decisions carry the weight of the entire design. For more structural guidance on finding the right fit, you can browse how to choose a front door that complements your home’s character perfectly.