A single gallon of paint acts as a vertical canvas to change the mood of any room. This guide rounds up 10 door painting ideas worth saving so you can find the perfect look for your home. Let’s get into the first option.
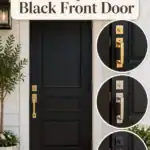
Bold Front Door Color
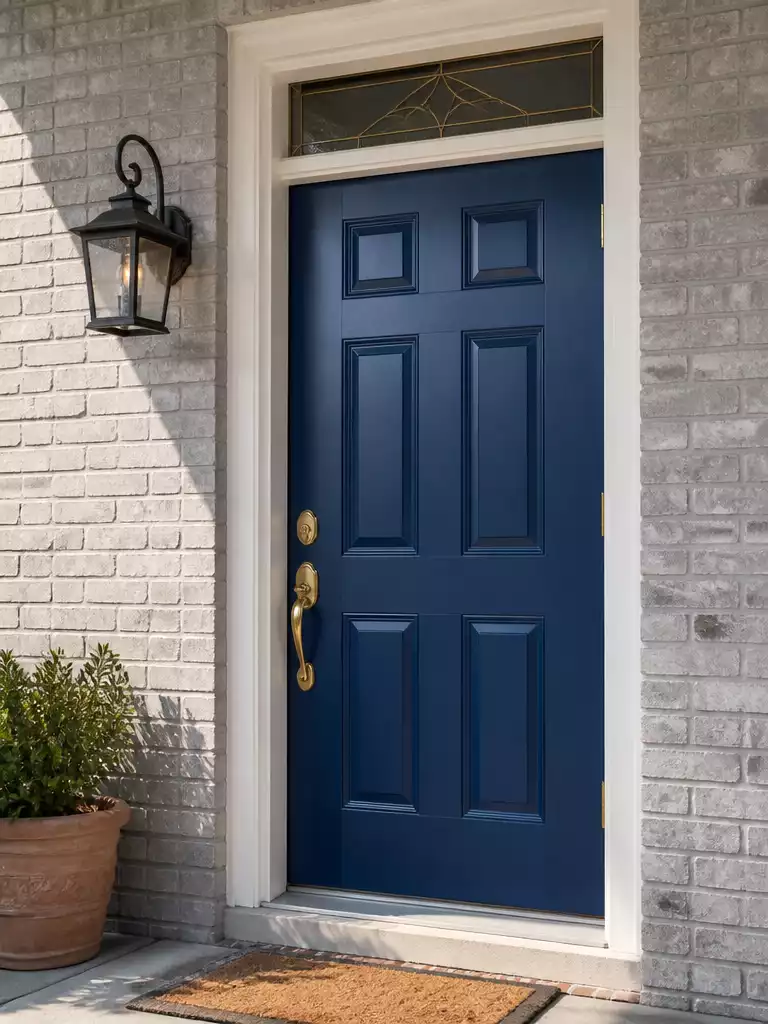
Boost your curb appeal instantly with a high-impact, saturated paint color choice.
As an Amazon Associate I earn from qualifying purchases. Affiliate links may earn me a commission at no extra cost to you.
Your front door is the first thing guests touch and see, making it the most important curb appeal factor for your entire home. Deep, saturated pigments like navy blue, emerald, or plum function as a permanent accessory that defines your facade’s personality.
The Prep-or-Fail Rule
Because your door faces the elements directly, proper surface prep is the make-or-break step. If you skip cleaning, scuff-sanding, or priming, even the most expensive high-pigment paint will flake off within a single season.
When selecting your paint, choose a satin or semi-gloss finish to ensure the surface remains wipeable and weather-resistant. These sheens stand up to constant handling and seasonal temperature shifts far better than flat alternatives.
Warning: Always apply two full coats to achieve true color depth and UV protection. Rushing the drying process between coats will lead to uneven pigment and premature peeling.
.
📈 The Long-Term Payoff:
Painting your front door is one of the most effective ways to boost home value without a massive renovation. Because this surface covers such a small area, a high-quality, weather-resistant paint finish provides an outsized visual impact that prospective buyers notice immediately, signaling that the home is well-maintained and cared for.
Resale Advantage: A bold, well-executed entry color creates a memorable first impression that helps your property stand out.
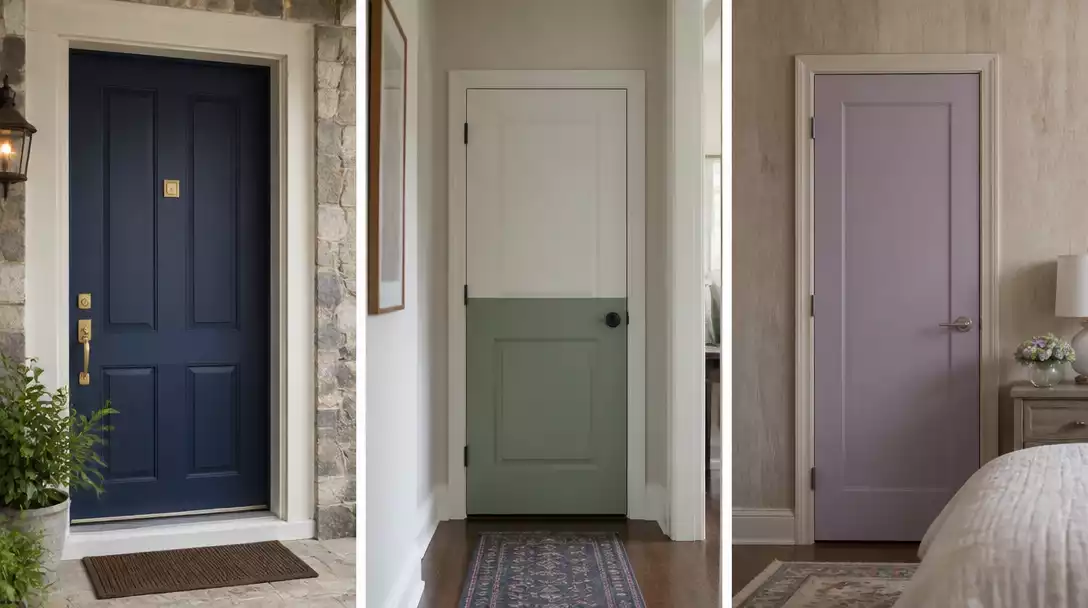
Two Tone Painted Door
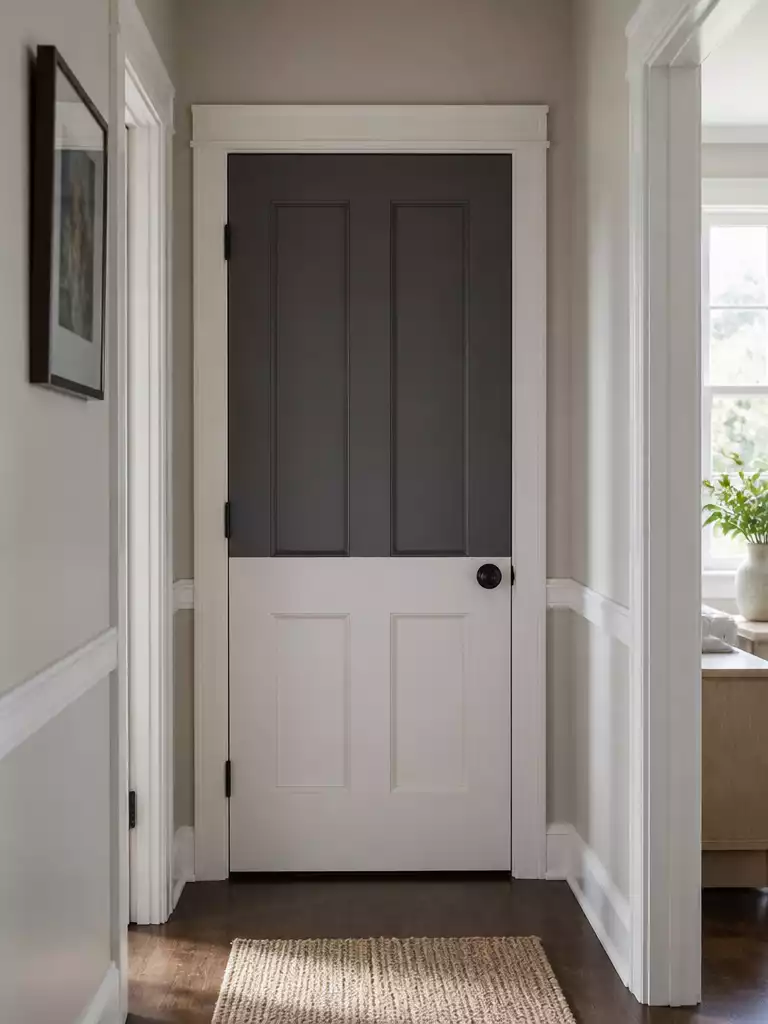
Control your room’s visual height and width with a precise, high-contrast horizontal color split.
A two-tone door is the best way to manipulate the perceived scale of a narrow hallway. By painting the bottom third of a door to match your baseboards and the top portion to blend with the wall, you can effectively “lower” a high ceiling or make a confined space feel more architectural.
The Tape-Pulling Trap: The most common mistake is waiting until the paint is fully cured before removing your painter’s tape. If you wait too long, the dried paint film will shatter along the line, leaving you with a jagged, unprofessional edge.
To get that razor-sharp line, remove your painter’s tape while the final coat is still slightly tacky. Use a high-quality, medium-adhesion tape designed specifically for delicate surfaces to prevent pulling up your primer.
For the best results, stick to acrylic latex paint in a satin or semi-gloss finish. This sheen provides the durability needed for high-traffic door surfaces while making those clean, contrasting lines pop against your room’s existing color palette.
.
🔢 The Right Sequence to Save Rework:
Achieving a clean two-tone finish depends on the order of your applications; painting in the wrong sequence often leads to color bleeding or uneven lines.
- Apply the lighter color base coat to the entire door surface and let it cure fully.
- Tape off your precise boundary line using high-quality painter’s tape once the base layer is safe.
- Paint the second color and remove the tape while the film is still slightly tacky.
Geometric Pattern Door
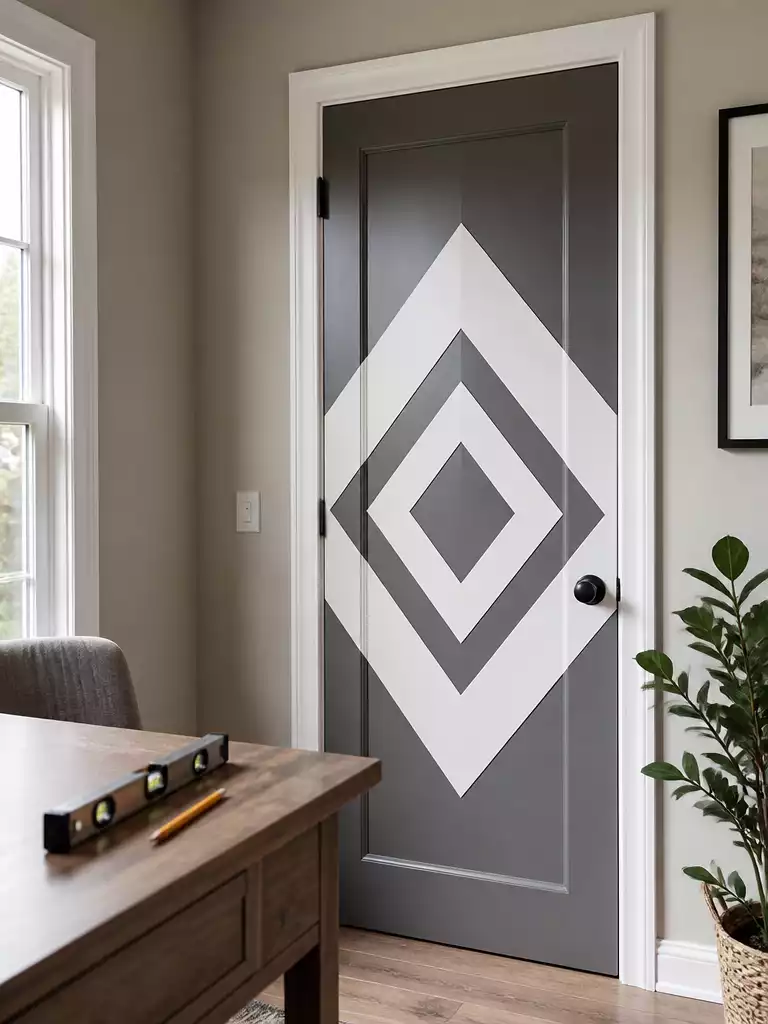
Transform a standard flat-panel door into a custom architectural feature with precise geometric linework.
The geometric pattern door is a high-impact choice specifically for playrooms or home offices where you want to add visual energy without changing the room’s furniture. This project is a classic “low-cost, high-labor” endeavor that relies entirely on your patience during the planning phase.
Pro Planning Tip: Before you touch a brush, map out your diamonds, hexagons, or chevrons using a level and a pencil. Symmetry is the primary goal, and eyeballing the layout will inevitably lead to frustration once the tape is applied.
Success with this look comes down to how you handle your tools. Thin, multiple coats of paint are your best defense against the dreaded “leaking” that ruins sharp corners.
Follow these steps to ensure your lines stay crisp:
- Use high-quality, low-tack painter’s tape to prevent edge lifting.
- Apply a thin layer of your base color over the edges of the tape to “seal” them before painting your contrast color.
- Never overload your brush or roller, as excess paint is the primary cause of bleed under the tape.
- Remove the tape while the final coat is still slightly tacky to avoid pulling up dried paint film.
Avoid this mistake: Do not attempt this project on a heavily textured wood-grain door. This technique works best on shaker-style flat panels where the smooth surface allows for perfect tape adhesion.
.
💡 Designer Note: Achieving Visual Balance
Geometric patterns pull the eye toward the door, effectively turning it into a piece of wall art. To keep the space feeling intentional rather than chaotic, limit your palette to two or three related tones. Using a high-contrast color for the lines and a muted shade for the filler shapes prevents the pattern from overwhelming the room’s overall aesthetic.
Ombre Gradient Finish
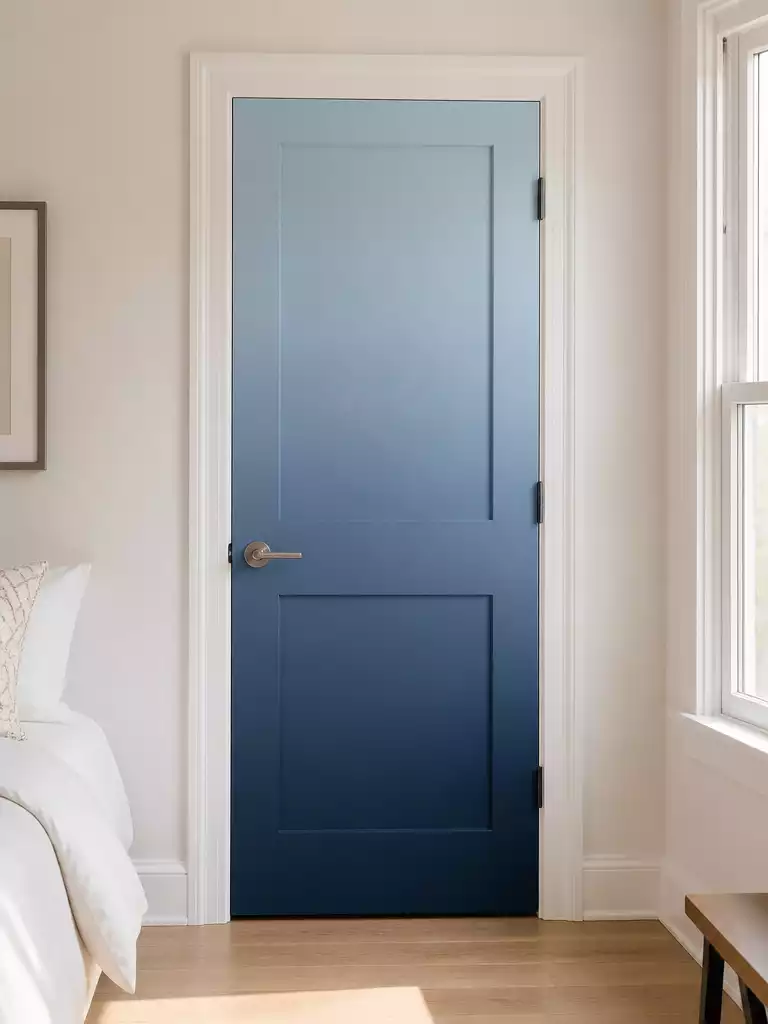
Create a custom visual transition that makes your door appear to dissolve into the wall.
An ombre gradient finish creates the visual illusion of a door dissolving into the surrounding wall space. This technique relies on damp-blending, where two colors of similar intensity are merged while the paint remains wet.
This is a high-reward project for those who want a custom, artistic look rather than a standard flat color. Because the success of this finish depends on the paint staying workable, you should avoid this project if you are a beginner looking for a quick, low-stress weekend job.
Pro Tip: The Wet Edge Rule. You must keep a “wet edge” to achieve a seamless blur between hues. Avoid rushing the process, as any dry time in the transition zone will result in visible, choppy lines instead of a smooth wash.
Essentials for an Ombre Finish
- Two-tone palette: Select colors that share a similar undertone to ensure they marry well during the blending process.
- Blending tools: Use a high-quality damp sponge or a large, soft-bristled brush to feather the colors together.
- Clear protective coat: Unlike solid paint, a gradient is sensitive to friction and scuffs; a clear topcoat is vital to ensure the blended area doesn’t chip from daily handling.
Avoid this mistake: Do not attempt this over a dirty or unprimed door surface. The gradient technique requires a perfectly smooth, primed canvas to allow the paint to move and blend without snagging on imperfections.
.
💡 Why This Works:
The ombre effect transforms a sterile, flat door into a dynamic focal point by using color to manipulate perceived space. By placing the lighter shade at the top, you draw the eye upward, effectively increasing the perceived height of your room while adding a sophisticated, artistically fluid transition that standard solid colors simply cannot achieve.
Visual Impact: Using a gradual light-to-dark transition softens harsh vertical lines, making the door feel like a custom architectural feature.
The anxiety surrounding color choice often stems from the fear that one misstep will disrupt the entire rhythm of your home. In reality, shifting the atmosphere of a room rarely hinges on getting every single detail perfectly aligned; for informed design decisions, focus instead on how specific hues anchor your space.
A single intentional color choice carries more weight than twelve perfectly executed but disconnected design elements.
Chalkboard Paint Door
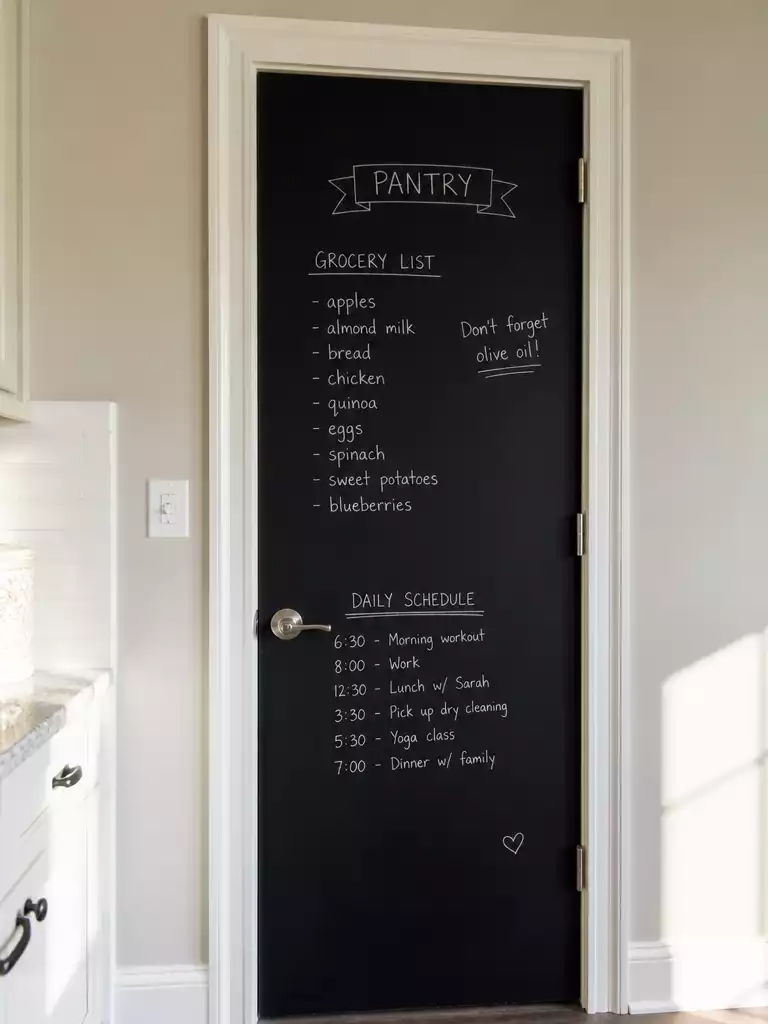
Turn your pantry or mudroom into a functional command center for the entire family.
The chalkboard paint door is the ultimate solution for busy households that need a dedicated space for grocery lists, reminders, and schedules. By utilizing the vertical surface of a pantry or utility door, you clear off your refrigerator and create a central hub for daily life.
The Golden Rule: Seasoning
You must “season” your new surface before writing on it for the first time. Simply rub the side of a piece of chalk over the entire door, then wipe it clean with a dry cloth to prevent your first message from ghosting permanently.
This project is perfect for high-traffic areas like kitchens and mudrooms where you need a durable, matte surface. However, if you prefer a sleek, high-shine aesthetic, you should skip this technique as it requires a flat, absorbent finish to function correctly.
Pro Tip for Longevity:
- Wait at least 24 to 48 hours after your final coat before performing the seasoning process.
- Use a damp microfiber cloth for deeper cleaning when the surface gets too dusty from chalk residue.
- Always ensure your door is properly primed before painting to guarantee the chalkboard pigment adheres for years of heavy use.
Avoid this common mistake:
Do not attempt to use the door during the curing window, as premature writing can leave permanent impressions in the finish. Patience during these first two days is the secret to a professional, long-lasting command center.
.
📋 Before You Try This: A Quick Reality Check
- Check door thickness: Ensure the door panel is sturdy enough to handle repeated pressure from chalk without warping or flexing.
- Confirm ambient humidity: High-moisture areas like laundry rooms can interfere with paint curing; ensure the space is well-ventilated during application.
- Verify existing finish: If your door has a high-gloss or wax-based finish, you must sand it down completely for the chalkboard paint to bond.
High Gloss Black Door
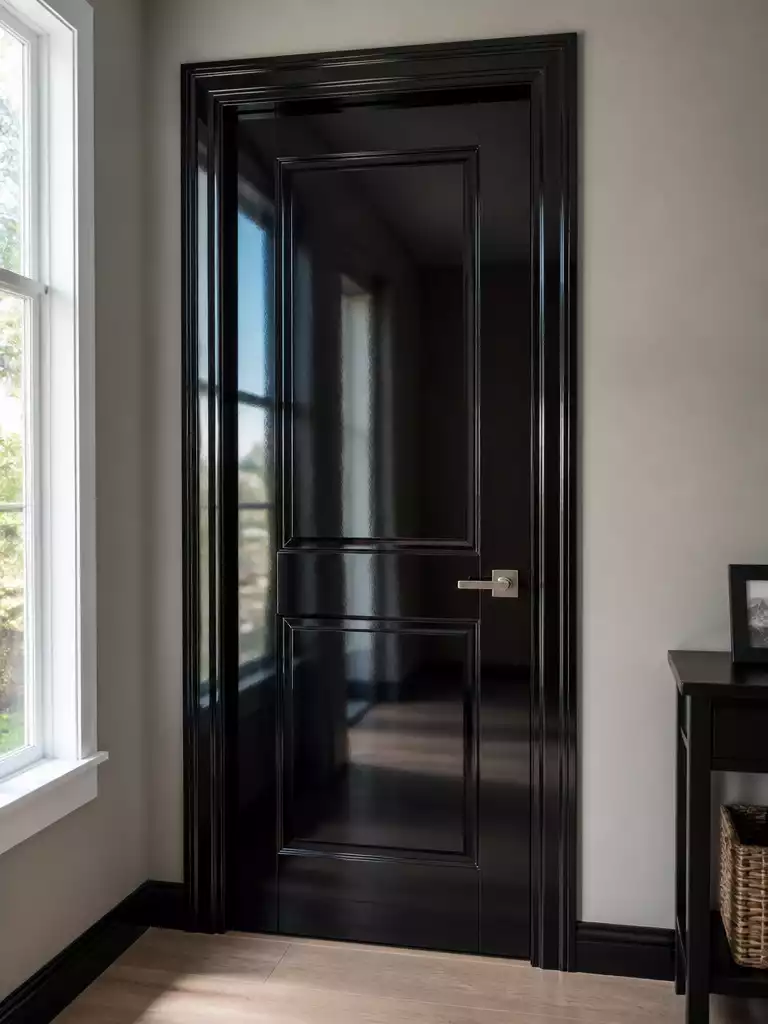
Create a sophisticated, mirror-like finish that brings high-impact drama to any interior space.
Think of a high gloss black door as the tuxedo of your home’s interior design. It offers a sharp, sophisticated look that instantly elevates the mood of a hallway or living area.
Surface prep is your biggest hurdle here. Because high-gloss paint acts like a mirror, it will highlight every single dent, scratch, or uneven sanding mark on your door.
You must sand between every single coat to achieve that liquid-glass appearance. This step is not optional if you want a professional, smooth result instead of a wavy, distorted reflection.
Consider these essential steps to ensure your high-gloss project succeeds:
- Sand thoroughly: Use fine-grit sandpaper to remove all existing imperfections before you even open the paint can.
- Control the environment: Paint in a room with minimal airflow to prevent dust “nibs” from settling into the wet finish.
- Apply thin coats: Multiple light applications are better than one thick coat, which often leads to drips and uneven drying.
This style is best for homeowners who value a bold, modern aesthetic and have the patience for meticulous prep work. If you prefer a forgiving finish that hides minor door damage, you should skip the gloss and opt for a satin sheen instead.
.
💡 Why This Works:
High-gloss paint manipulates light by creating a reflective, liquid-glass effect. This depth adds a sense of luxury and architectural weight to doors, transforming them from mere functional barriers into bold design anchors. It effectively draws the eye, making the door appear as a deliberate, polished accessory rather than just wood or composite.
Design takeaway: The high sheen creates a focal point that can elevate the perceived quality of standard builder-grade doors.
Color Blocked Panels
Refresh your room by highlighting architectural details with bold, contrasting color sections.
Painting individual door panels is a low-effort way to turn a standard builder-grade door into a custom 3D design feature. This technique works best if your door has clearly defined recessed or raised squares that provide natural borders for your color choices.
You do not need to replace your hardware to get a high-end look. Simply using a different hue on the panels compared to the frame creates the visual depth you are looking for.
Pro Tip: Use a high-quality angled brush to cut into the corners and grooves of the panels. Keeping these lines crisp is the difference between a custom paint job and a sloppy DIY project.
If you have a door with scuffs and dings, this is the perfect project for you. Applying a darker or more saturated shade to the panels is surprisingly effective at masking minor surface imperfections that would show up under a single flat color.
Planning Your Color Palette
Choose your colors based on the surrounding wall and trim. You want a contrast that feels intentional rather than accidental.
- Complementary approach: Select a muted tone for the panels that picks up a secondary color from your room’s rug or throw pillows.
- Monochromatic approach: Use two different shades of the same base color to create a subtle, sophisticated layered effect.
- High-contrast approach: Pair a clean white frame with a deep charcoal or navy panel for a bold, modern graphic look.
Watch Out: Avoid paint buildup in the deep grooves of the door panels. Apply thin, even coats to prevent drips that can dry into visible ridges along the inner edges.
.
🔢 The Right Sequence
Taping your panels correctly is the secret to avoiding rework; you must protect the surrounding frame before you start the detail work.
- Tape the outer frame edges first, ensuring the adhesive is pressed firmly into the corners.
- Apply the panel contrast color using a small brush, working from the center toward the edges.
- Remove the tape while the paint is still slightly tacky to prevent the dried film from shattering.
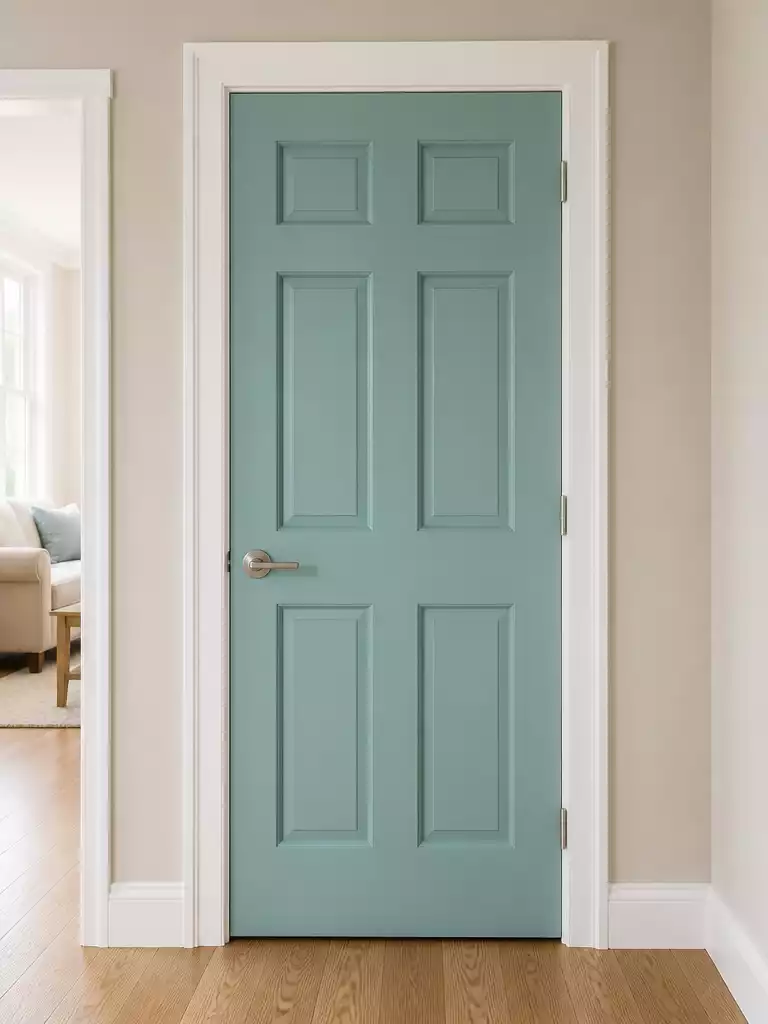
Pastel Bedroom Door

Create a soothing transition to your sleep space with soft, muted color tones.
A pastel door acts as a visual reset button, signaling to your brain that you are leaving the high-energy zones of your home. Choosing a cool blue or a desaturated sage green lowers the visual weight of the door, making the entrance to your sanctuary feel less obstructive.
Pro Tip: Pastels have a tendency to look washed out in dimly lit hallways or low-light corners. Always test your paint samples on the door at different times of the day to ensure the color holds its character under your specific indoor lighting.
When transitioning from a previously dark or saturated color, you must use a high-quality white primer. Without this layer, the underlying pigment will bleed through your new light shade, creating a muddy or uneven result.
This project is perfect for homeowners who want a tranquil room aesthetic without committing to bold, high-contrast wall colors. If you prefer high-energy, eclectic design, however, you may find these muted tones too subtle for your space.
.
⚖️ Choose the Right Version
- Choose this if: You want a serene, low-stimulus environment that helps you unwind immediately after entering your bedroom.
- Skip this if: Your hallway has very little natural light or cool-toned lighting, which can make pastels appear muddy.
- Pair it with: Brushed brass or matte black hardware to ground the soft color and provide a sophisticated contrast.
Faux Wood Grain Finish
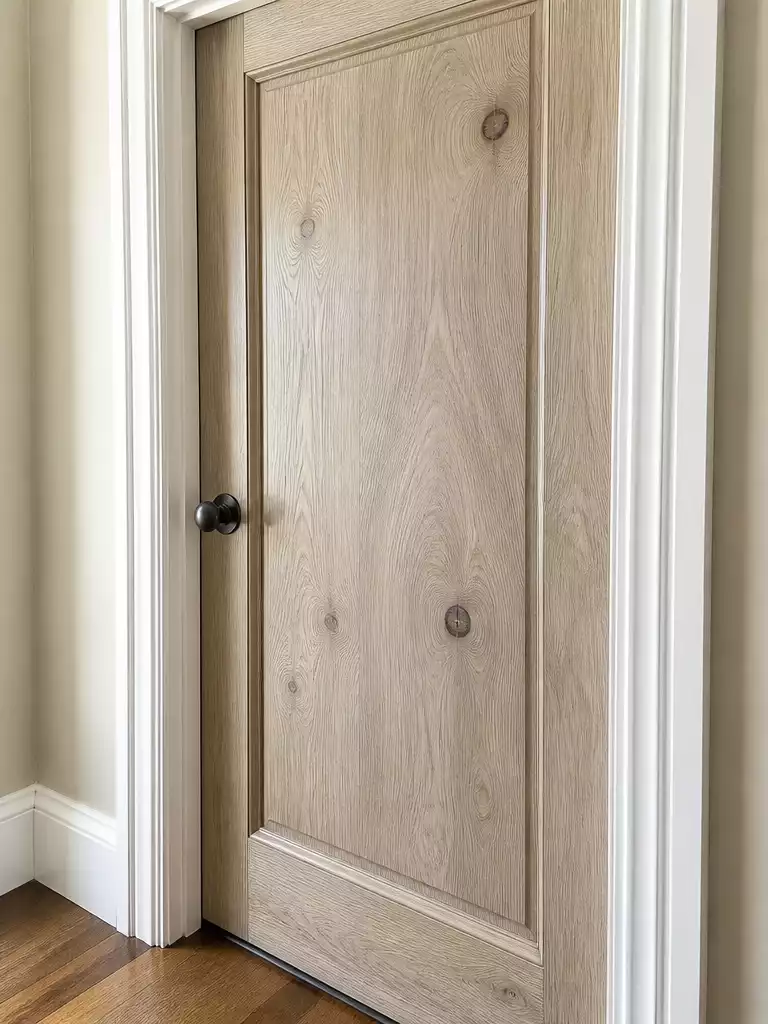
Capture the warmth and character of natural timber without the high cost of replacement.
A faux wood grain finish is the ideal move for homeowners who want the organic warmth of timber on a budget. This technique involves applying a base coat and then layering a darker, translucent glaze that you partially wipe away to reveal the pattern beneath.
Embrace the imperfections. Wood grain is never perfectly uniform, so avoid trying to make every stroke look identical or symmetrical.
This project requires more patience than a standard single-color paint job because the finish is entirely dependent on your hand-wiping technique. You must allow your base coat to cure completely before applying the glaze to ensure the layers don’t pull or clump.
Consider the following steps to achieve a realistic, non-uniform look:
- Map your grain: Use a dry brush to practice your stroke direction before touching the door.
- Work in sections: Focus on one panel or rail at a time to prevent the glaze from drying before you can create your texture.
- Control your pressure: Vary the amount of pressure when wiping the glaze to create natural-looking variations in the depth of the grain.
Common Mistakes to Avoid
- Over-perfecting: Repeating the same pattern too many times makes the finish look like printed contact paper rather than real wood.
- Rushing the dry time: Trying to layer the glaze too soon will lift your base coat and create a muddy, unattractive mess.
- Lack of blending: Leaving harsh, unblended lines where the glaze meets the trim will highlight that the finish is artificial.
.
💡 Why This Works
Faux wood graining succeeds because it leans into the psychological comfort of organic textures. By layering glazes rather than relying on flat, solid pigments, you break up the monotony of standard interior doors. This visual depth tricks the eye into perceiving premium quality, effectively upgrading the room’s overall “warmth” without the expense of solid timber.
Design takeaway: Use subtle, non-uniform strokes to ensure the grain feels authentic rather than manufactured.
Stenciled Accent Design
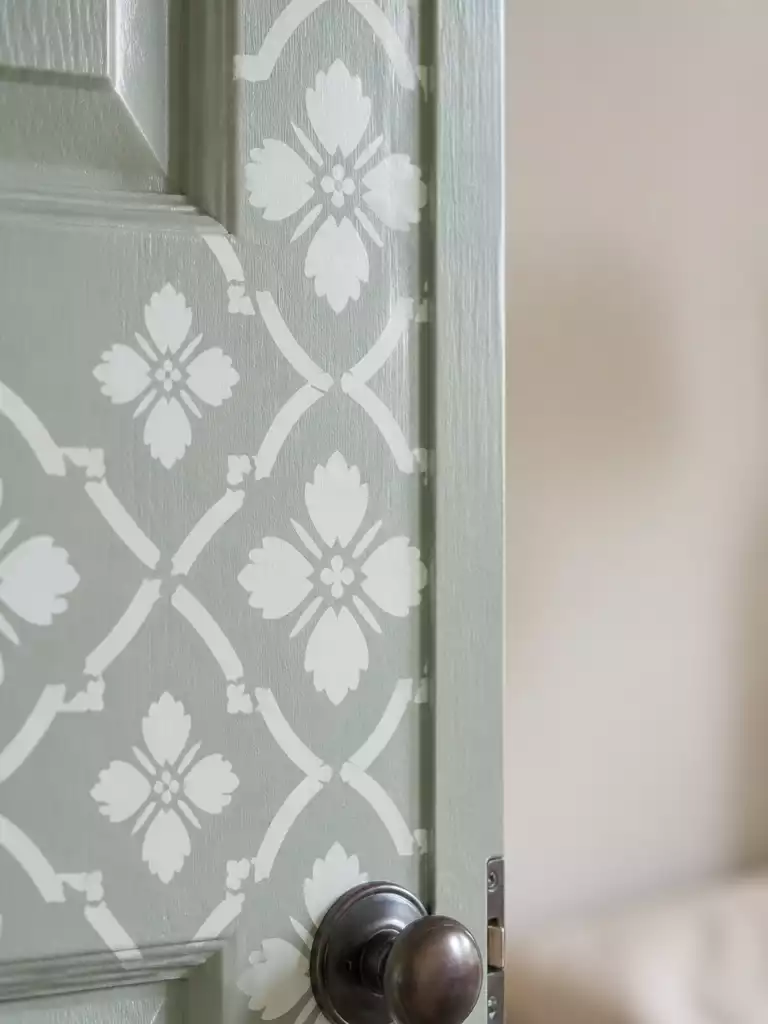
Create custom, high-end patterns on your doors using simple stencils and steady technique.
Think of this as bespoke wallpaper for your door panels. It is the perfect project if you want to add intricate, high-impact detail to a shaker-style or flat-panel door without the cost of decorative millwork.
Success here depends entirely on your paint-to-tool ratio. The most common mistake is overloading your applicator, which forces pigment under the stencil and ruins those crisp, sharp lines.
Pro Tip: Use a low-tack spray adhesive on the back of your stencil before pressing it against the door. This keeps the design from shifting while you work, ensuring your repeat patterns stay perfectly aligned.
When you start, use a high-density foam roller or a dedicated stencil dabber rather than a standard brush. You want the paint to be applied in thin, light layers to prevent pooling.
Follow these steps to ensure a professional finish:
- Map your spacing with a pencil and level before you touch a paint tool.
- Use a very small amount of paint on your roller; it should look almost dry to the touch.
- Work from the center of the stencil outward to keep the edges tight against the door surface.
- Hold the stencil firmly in place while dabbing to prevent any blurred edges.
This technique works best for those who enjoy precise, repetitive work. If you prefer a quick, one-afternoon refresh, you might find the layout and drying time between stenciled sections a bit more demanding than a solid-color update.
.
💡 Why This Works:
Stenciling transforms a door into a custom focal point, effectively using pattern to draw the eye away from architectural flaws or worn surfaces. By layering intricate motifs over a base coat, you create a depth that feels like expensive, hand-applied wallpaper or custom woodwork, providing a sophisticated designer look at a fraction of the cost.
Visual Benefit: Patterned surfaces reduce the perceived scale of a large, plain door, adding texture and character to your room’s overall design scheme.
You now have ten distinct ways to refresh your home, ranging from high-gloss drama to subtle geometric patterns. Focus on the one or two techniques that align with your existing space rather than trying to incorporate every option.
Choosing a specific look that suits your home’s character is more effective than applying a dozen trends at once. If you are ready to refine your entryway design, pick the method that feels most permanent and start there.