

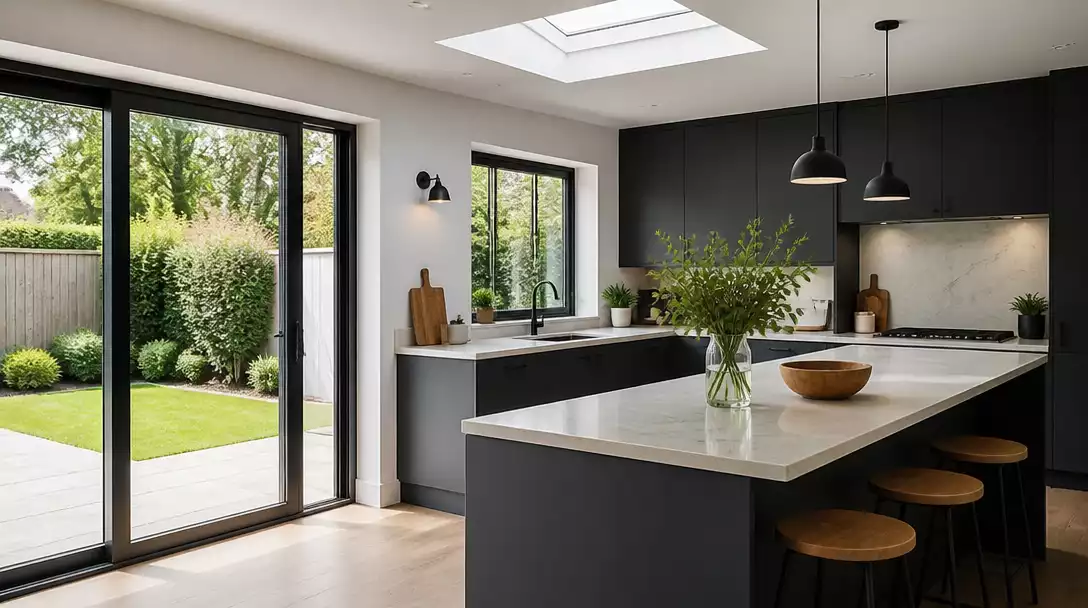
Balancing kitchen layouts with sliding doors and skylights is the secret to eliminating mid-day gloom. This guide rounds up 10 practical design configurations worth saving so you can choreograph daylight to suit your specific floor plan. Let’s look at the first layout.
Galley Kitchen With End Wall Slider
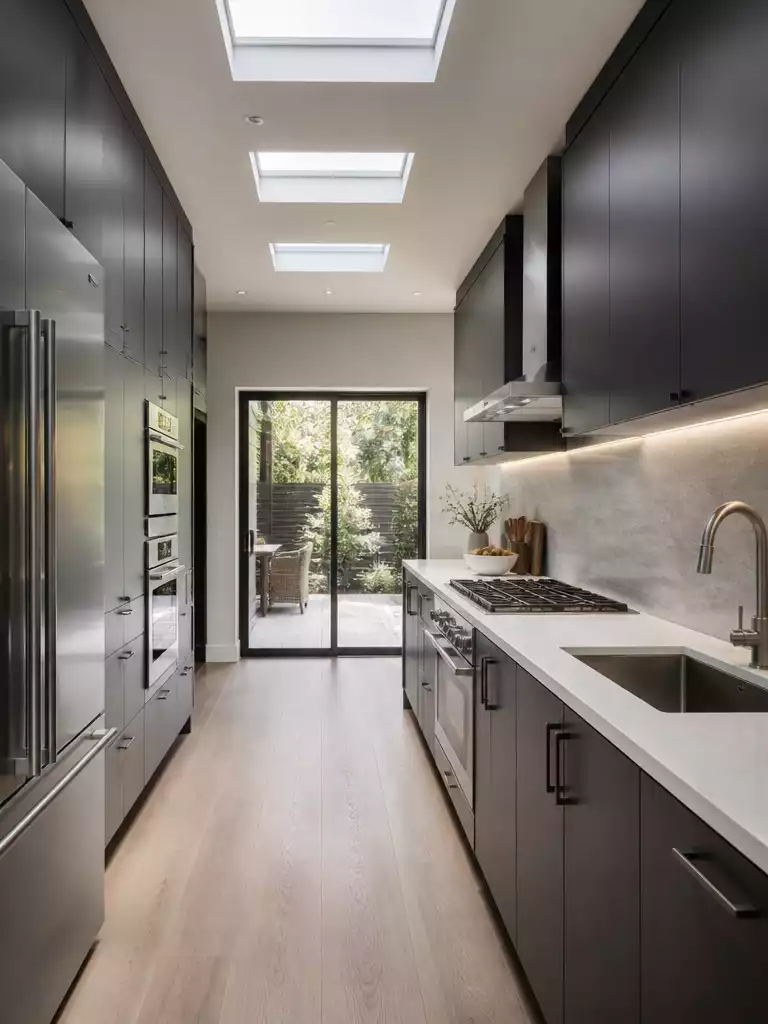
Eliminate the tunnel effect by stitching light from the end wall to the ceiling.
As an Amazon Associate I earn from qualifying purchases. Affiliate links may earn me a commission at no extra cost to you.
The classic galley kitchen often suffers from a tunnel effect, where the light from an end-wall slider creates a bright focal point, leaving the center of the kitchen feeling like a dim, flat cave. To fix this, you must treat the ceiling as a secondary light source that stitches brightness into the middle of the workspace.
Instead of installing one massive skylight, opt for a series of multiple small apertures. These smaller units are structurally easier to fit between existing roof rafters, allowing you to create an even, rhythmic wash of light along the length of your cabinets.
The Prep Zone Rule
To keep the kitchen functional, orient your primary prep surfaces so you are standing with your back or side to the end-wall slider. This ensures you aren’t silhouetted or blinded by direct, low-angle sun during the afternoon.
This layout is ideal for homeowners with narrow, linear floor plans who want to maximize the feeling of length without sacrificing task lighting. If you have deep, high-walled cabinets, ensure the skylights are positioned directly over the walkway to prevent casting harsh shadows on your primary work surface.
⭐ Best Security Bars for Sliding Doors
Adjustable Security Bar for Sliding Doors
Sliding Glass Door Security Lock
Adjustable Sliding Closet Door Floor Guide
📋 What to Check Before You Commit:
- Roof Rafter Spacing: Measure the clear span between your existing rafters to confirm multiple small skylight units will fit without requiring expensive structural header changes.
- Sun Exposure Path: Observe where the low-altitude afternoon sun hits your primary work area to ensure your prep zone placement won’t create constant, blinding glare.
- Joist Integrity: Consult with a professional to verify that adding several distinct apertures won’t compromise the load-bearing capacity of your roof structure, especially if snow or wind loads are significant.
Island Under Central Skylight
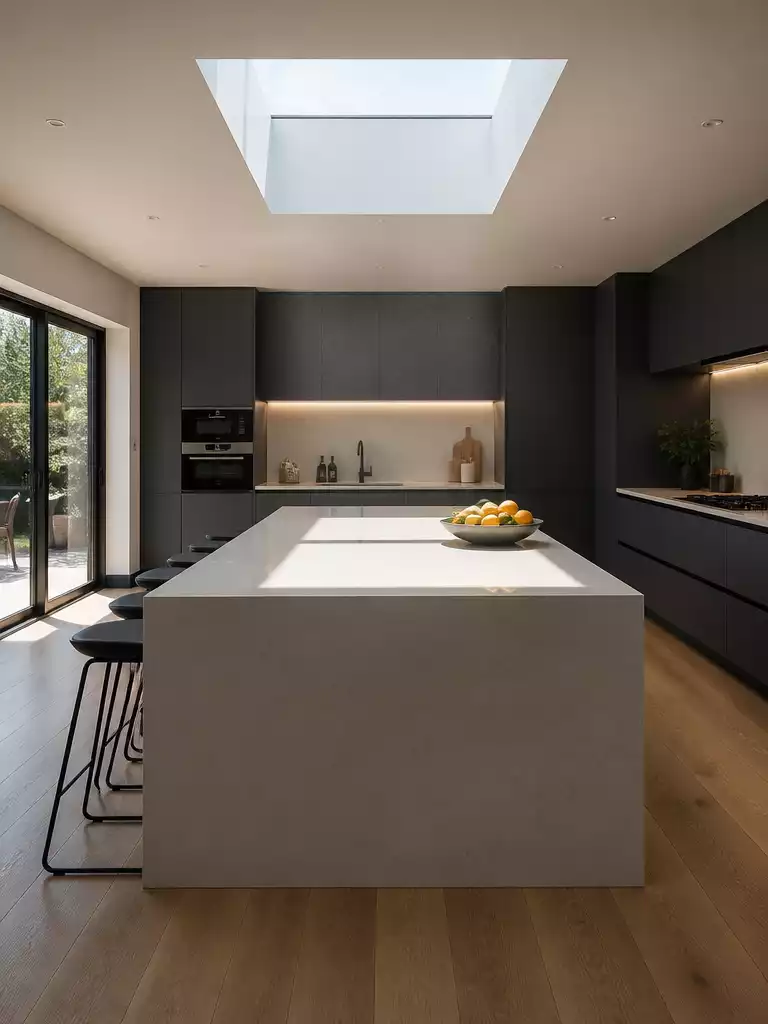
Anchor your kitchen workspace with a balanced, shadow-free spotlight that defines the heart of the room.
This layout treats the kitchen island as the daylight anchor of the home. By positioning a skylight directly overhead, you create a vertical column of light that keeps the island from feeling like a dim cutout in a larger room.
This design is ideal for homeowners who prioritize prep-heavy cooking and want a bright, central hub that doesn’t rely entirely on perimeter lighting. If you have a deep floor plan where the middle of the kitchen often turns into a cavern, this direct overhead pairing is your best fix.
The Two-Beam Trap
Keep your island at least 1.5 to 2 metres away from your sliding door bank. This prevents the low, horizontal sun from the doors from colliding with the vertical light from the skylight, which often creates distracting glare patterns on your work surface.
Surface material is the most common failure point in this layout. Pale, high-gloss stone or polished metal counters will act like a mirror under a direct skylight, bouncing blinding reflections into your eyes while you work.
Opt for honed or matte finishes that diffuse the light rather than reflecting it. If you are in the planning stage, insist on checking the Solar Heat Gain Coefficient (SHGC) for your skylight glass.
This layout requires tight coordination between your kitchen designer and your structural engineer. You must account for existing ceiling joists and potential service runs for island ventilation before cutting into the roof.
⭐ Top Window Kits for Kitchen Layouts
Flush Mount Sliding Ventilation Window
Complete Replacement Window Kit for RVs
Magnetic Blackout Skylight Cover for Vents
💰 What This Really Costs
- Structural Engineering Fees: Expect to pay for a professional structural engineer to verify joist integrity and manage load-bearing requirements.
- Hidden Installation Costs: Don’t forget to budget for patching the ceiling, matching plaster finishes, and re-routing any hidden island ventilation.
- Performance Investment: Money is best spent on high-SHGC rated glass, which significantly increases long-term comfort by controlling interior heat spikes.
Corner Slider With Ridge Skylight Run
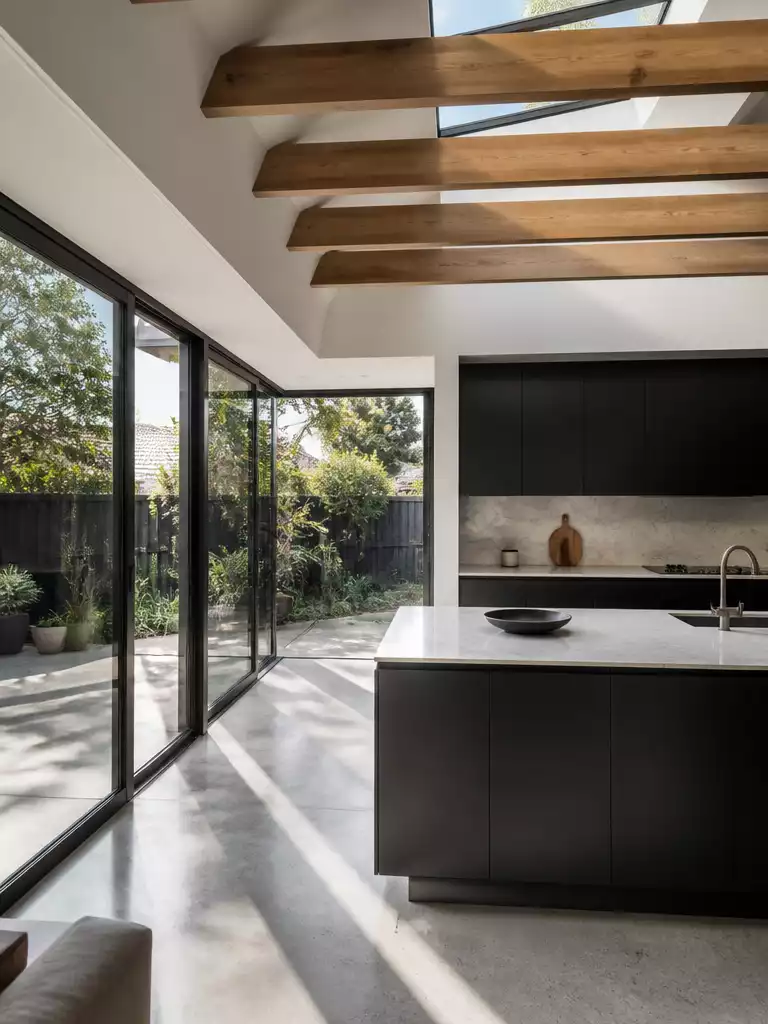
Harnessing dual light sources to create a bright, airy field of natural illumination.
This layout uses an L-shaped field of light to dissolve the boundary between your kitchen and the garden. By wrapping sliding doors around a corner and aligning a skylight with the roof ridge, you pull the eye—and the daylight—diagonally across the entire space.
The ridge-aligned skylight acts as a high-level anchor that prevents the kitchen from feeling like an enclosed box. It serves as a secondary light source that balances the horizontal intensity of the sliding glass walls.
Pro-Tip: Don’t fight the structure. Use the necessary structural support beams that cross the skylight as built-in sun baffles to break up intense noon heat.
Because these two daylight sources converge at a single point, the corner can become an area of extreme brightness. It is best to avoid placing high-precision tasks like knife work or detailed prep in this specific “overlap zone.”
Structural beam coordination is non-negotiable for this design. You must ensure your roof framing supports the ridge line while maintaining the clean, continuous look of the glass run.
⭐ Hardware for Corner Slider Installations
Top Hung Sliding Glass Door Hardware
Security Bar for Sliding Pet Doors
Pocket Door Frame Kit with Soft Close
💡 Why This Works: The Geometry of Light
This layout succeeds because it creates a sophisticated daylight gradient. While the corner slider provides a massive, ground-level wash of light, the ridge-aligned skylight acts as a high-level “volume filler.” By placing them together, you avoid the common mistake of extreme brightness at the floor with a dark, heavy ceiling, resulting in a balanced, three-dimensional light field.
Open Plan Kitchen Diner With Full Glass Wall
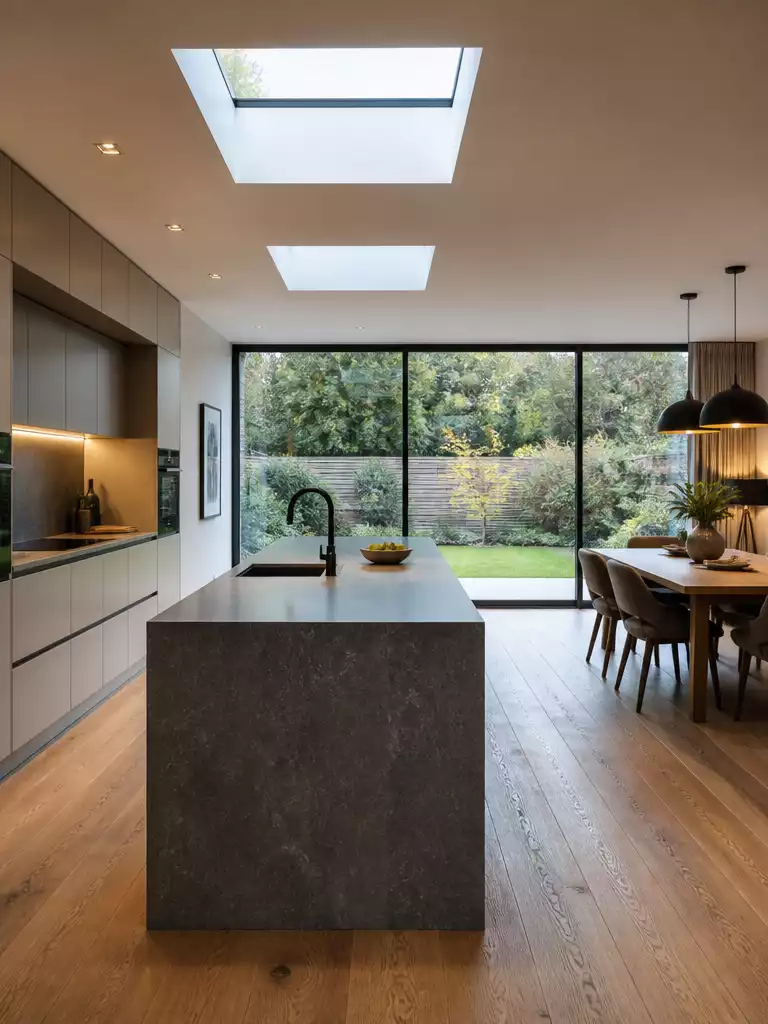
Use overhead light to anchor your kitchen island while the glass wall provides expansive views.
In a large open-plan space, a full glass wall often creates a horizontal brightness that lacks depth. Skylights here are not just for extra light—they serve as a critical zoning tool to visually anchor the kitchen within the larger room.
Without top-down illumination, the center of a deep open-plan kitchen often feels like a void. Positioning skylights directly over your prep zones pulls natural light into the “dark middle” of the floor plan.
Solar Amplification Warning
Large glass walls facing East or West are prone to massive heat spikes during the afternoon. You must select glazing with a high Solar Heat Gain Coefficient (SHGC) rating to prevent your kitchen from becoming uncomfortably hot.
When planning your layout, avoid putting your primary work surface directly in the path of low-angle sun coming through the glass wall. Instead, rely on the skylights to provide diffuse ambient light for your knife work and food prep.
This layout is an ideal choice for homeowners who prioritize visual connectivity to their outdoor space. If your kitchen area is deep, however, prioritize professional structural advice to ensure you aren’t creating a “baked” zone that requires constant cooling.
⭐ Glass Wall Solutions for Open Plans
French Interior Door with Frosted Glass
Venting Glass Replacement Kit for Doors
Adjustable Mortise Lock for Patio Doors
🔢 The Right Sequence for Open Plans
Installing skylights before addressing the glass wall framing is essential to prevent structural misalignment during the rough-in stage.
- Verify roof rafter spacing to accommodate skylight placement before finalizing the ceiling height.
- Install the structural header for the glass wall to ensure the roof load is balanced.
- Fit the skylights and seal the roofing membrane before installing the sliding door track system.
Designing a kitchen around natural light involves managing how the sun shifts across your surfaces throughout the day. Rather than trying to account for every possible sun angle, focusing on a few intentional light-path choices will provide the functionality you need, much like refining your entryway flow to match your lifestyle.
The most effective kitchens prioritize permanent light orientation over complex structural overheads to ensure long-term comfort.
Peninsula Facing Sliding Door Bank
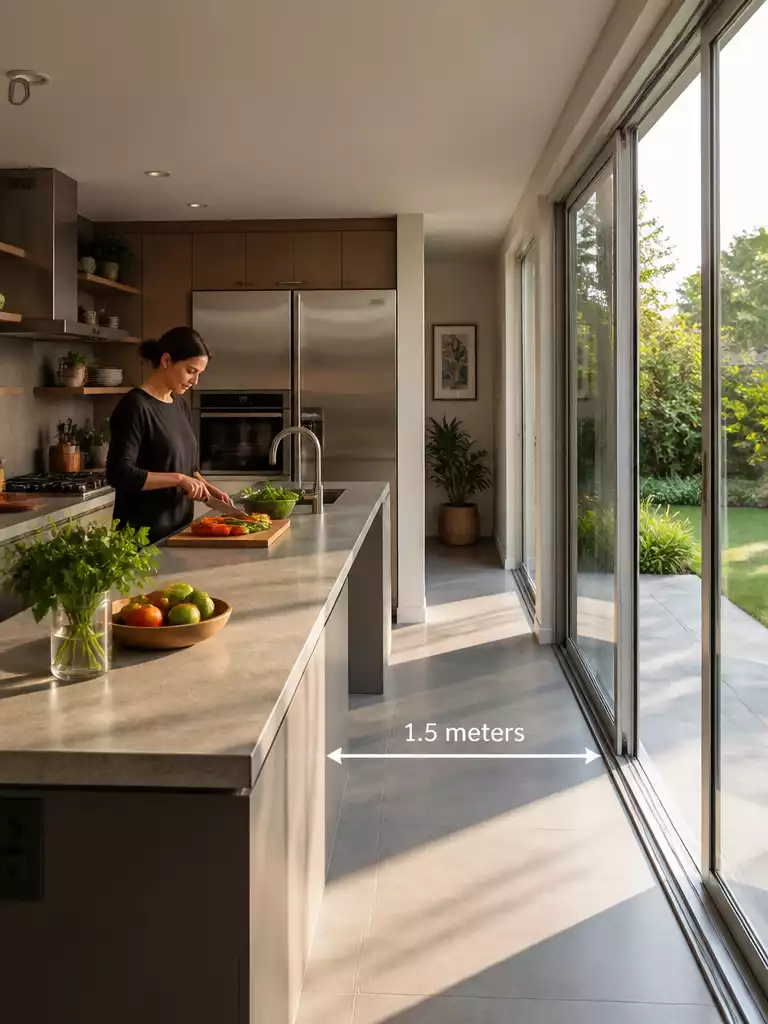
Create a functional, glare-free workspace that bridges the gap between your kitchen and garden.
The peninsula layout is a smart choice if you want to keep your kitchen anchored while maintaining an open line of sight to your outdoor space. It acts as a physical daylight boundary, separating your high-traffic circulation path from the dedicated cooking area.
To make this layout work, you need to be precise with your floor plan. Keeping a clear circulation gap of 1–2 metres between your peninsula and the sliding door bank is vital for maintaining a natural workflow without feeling cramped.
The Work-Across Rule:
Always orient your peninsula so you are prepping across the unit rather than facing the garden doors. This simple shift protects you from direct horizontal sun glare that can be blinding during the late afternoon.
Material selection is the other half of the success equation here. Since you are working so close to a large glass wall, avoid high-gloss or polished stone countertops that will bounce light directly into your eyes.
Stick to honed or matte finishes that absorb rather than reflect the light entering from the doors. This keeps your workspace stable and minimizes the need for extra shades or blinds during the brightest parts of the day.
⭐ Tracks for Peninsula Sliding Doors
Stainless Steel Track Cover for Doors
Sliding Door Track for Glass Panels
Adhesive Finger Pulls for Sliding Doors
💡 Why This Layout Works:
By creating a dedicated peninsula, you successfully carve out a “work triangle” that remains shielded from the high-traffic flow toward the garden. This setup prevents the kitchen from feeling like a hallway, ensuring that your prep zone stays focused and organized even when the sliding doors are fully open to the outdoors.
Design Takeaway: A peninsula acts as a natural visual anchor that keeps the kitchen feeling contained within the broader open-plan space.
Vaulted Ceiling Kitchen With Twin Skylights
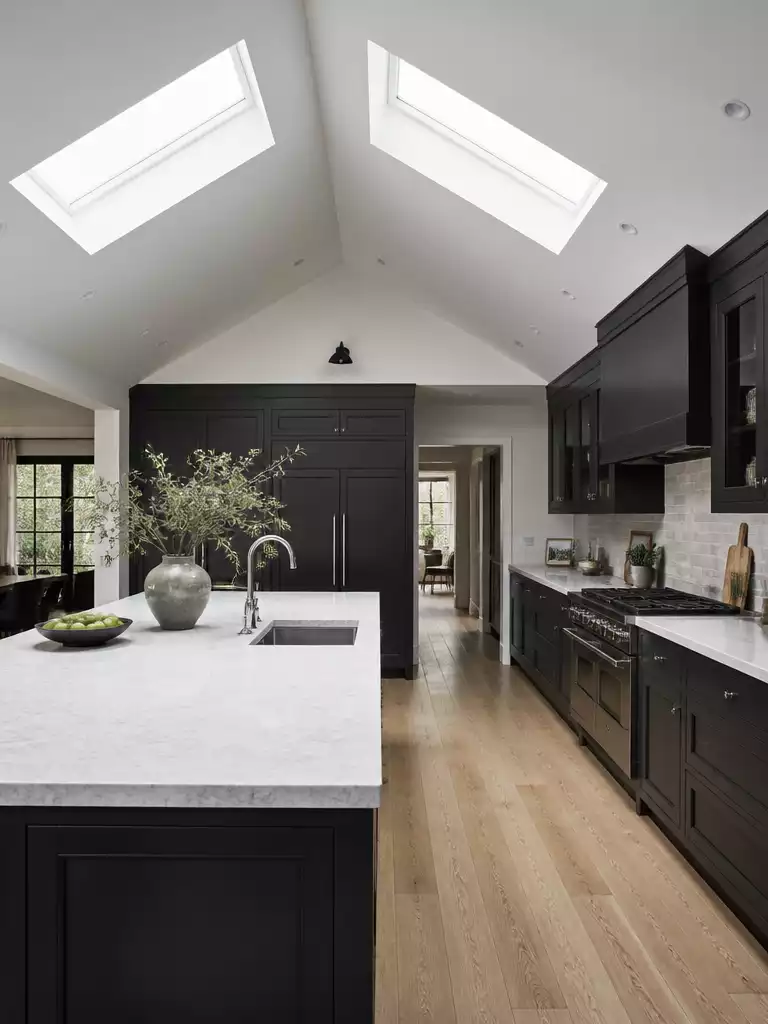
Elevate your space with a paired light ridge that brings even, expansive daylight indoors.
A vaulted ceiling changes the entire geometry of how light enters your kitchen. Instead of a single, harsh beam, twin skylights running parallel to the roof pitch provide a broad, consistent field of illumination that reaches deep into the room.
This layout is ideal if you have a high-volume ceiling and want to avoid the “tunnel” effect often found in flat-ceiling designs. By using two units, you gain better coverage over larger prep surfaces and central islands, effectively eliminating the dark corners that single apertures often leave behind.
Pro Tip: Symmetry is your best friend here. Align the twin units perfectly with your island or prep zone to ensure the light hits your work surfaces evenly without creating distracting, uneven hot spots during the brightest part of the day.
If you are planning this layout, consider the following performance factors to maintain comfort:
- Glazing Choice: Always select glass with a high Solar Heat Gain Coefficient (SHGC) rating to prevent the higher volume of air from trapping excessive heat.
- Pitch Alignment: Ensure the skylight frames follow the exact angle of your roof to prevent water pooling and to streamline the visual lines.
- Counter Materials: Avoid high-gloss or mirror-finish countertops. These surfaces will bounce the overhead light directly into your eyes, creating uncomfortable glare.
This layout is best for homeowners looking for a dramatic architectural feature that doubles as a highly functional lighting solution. Skip this if your roof structure is overly complex or segmented, as the internal framing required to support twin openings can become cost-prohibitive in older, non-vaulted homes.
⭐ Skylights for Vaulted Ceiling Kitchens
Clear Security Film for Glass Windows
Shatterproof Safety Film for Glass Windows
Sliding Window for Roof Skylight Vents
Side Return Extension With Roof Glazing
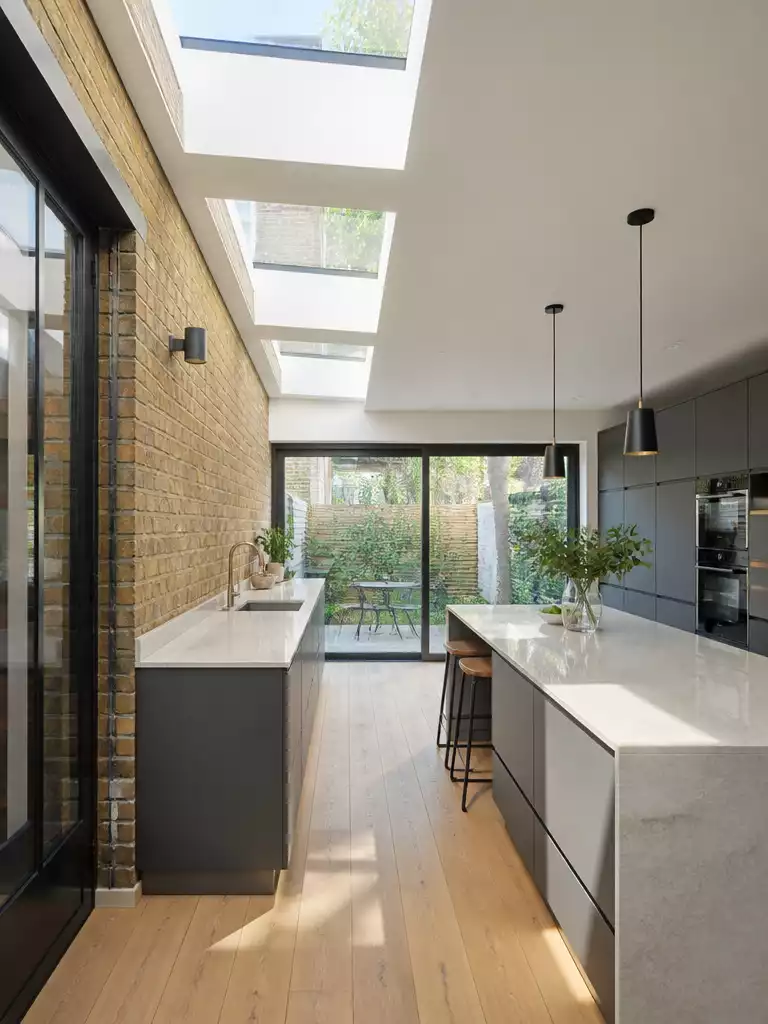
Transforming narrow, dark side returns into bright, functional kitchen arteries using overhead daylight.
A side return extension often suffers from “lost light” because the new footprint sits directly against a neighboring wall. Without deliberate planning, these spaces can feel like a tunnel, leaving your deep kitchen counters trapped in perpetual shadow.
Roof glazing here acts as a functional necessity rather than a luxury upgrade. By carving apertures into the roof, you force natural light deep into the floor plan, effectively compensating for the blocked side-wall windows.
The Overlit Strip Warning: Be careful not to place all your glazing in a straight line right next to the garden slider.
This creates a blinding, high-contrast strip of light at the rear while the rest of your kitchen remains dim and cave-like.
To keep the space balanced, distribute your roof lights along the length of the extension rather than clustering them at the threshold. This design strategy ensures your preparation surfaces receive diffuse illumination throughout the day.
Structural Alignment Checklist
- Steel Coordination: Ensure all roof light openings are positioned to align with your structural steel members or existing masonry.
- Depth Calibration: Place the primary prep area directly under the zone where the light throw is most consistent.
- Thermal Control: Because this layout creates an upper volume of high heat, prioritize glazing with a low SHGC rating to keep the kitchen comfortable.
This layout is ideal if you are working with a narrow terrace or period property footprint. If your kitchen requires deep-counter tasks, rely on the roof glazing to provide the shadow-free ambient light your workspace demands.
⭐ Glazing Solutions for Side Returns
Stained Glass Privacy Film for Windows
Frosted Privacy Film for Glass Windows
Heavy Duty Shatterproof Window Safety Film
🏡 Real-Home Application:
- Map the light: Track where the sun hits at noon to ensure your prep zone stays in the diffuse, comfortable light.
- Avoid the transition: Position your main workspace at least one metre away from the floor-to-ceiling glass to prevent eye-straining brightness.
- Soften the edges: Use matte-finish stone or wood countertops to avoid harsh reflections that bounce direct skylight glare into your workspace.
Pocket Slider With Flat Roof Lantern
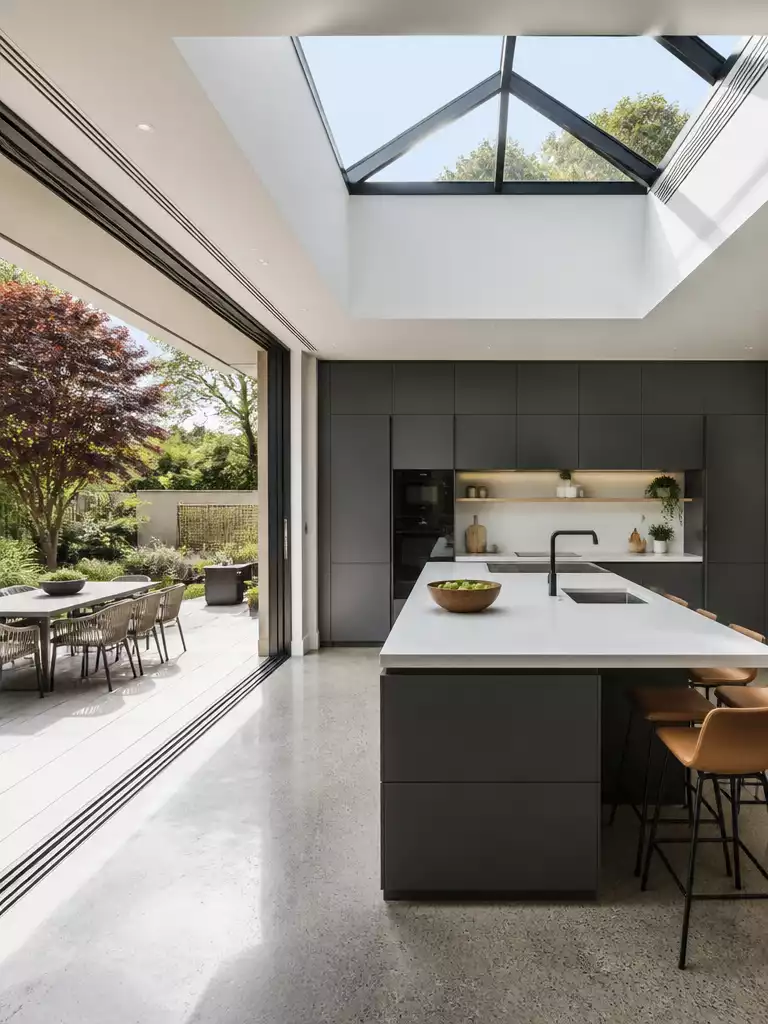
Maximize your floor space and ceiling height by tucking nature right into your wall.
Pocket sliders are the ultimate choice for homeowners who want an unobstructed threshold between their kitchen and the outdoors. Because the door panels disappear completely into a wall cavity, you lose the visual and physical barrier found in standard sliding or folding door systems.
Pairing this with a flat roof lantern provides a reliable “top-light anchor” that fills the room with steady vertical daylight. This combination prevents the kitchen from feeling like a tunnel, even when the pocket doors are fully stowed away.
Planning Note: You must account for the pocket cavity during the rough-in stage of your build. This requires thicker wall construction to house the door panels, which directly dictates your cabinetry layout and electrical placement.
When you are designing the kitchen footprint, keep your primary prep zones slightly offset from the center of the lantern. This simple adjustment prevents “double intensity” glare, where reflected sun from the garden path bounces off your work surface at the same time the overhead light is at its peak.
This layout is ideal if you have a mid-sized extension and want to maximize every inch of usable floor space. If you are working with a tight budget or a retrofit where structural wall thickness cannot be increased, you may be better off with a standard slim-frame slider.
⭐ Pocket Sliders for Flat Roofs
Clear Glass Pocket Door Kit
Privacy Lock for Pocket Sliding Doors
Replacement Rollers for Pocket Sliding Doors
🔢 The Right Sequence for Pocket Installations:
Integrating a pocket slider requires precise coordination because the wall cavity must be built before floors and finished cabinetry are installed.
- Structural rough-in: Confirm wall cavity depth with your architect before framing to ensure panels fully retract.
- Mechanical routing: Finalize electrical runs for switches or outlets near the pocket before closing the wall.
- Finish integration: Install internal tracks and trim during the drywall stage to achieve a seamless hidden door.
Sink Wall Under Skylight Opposite Slider
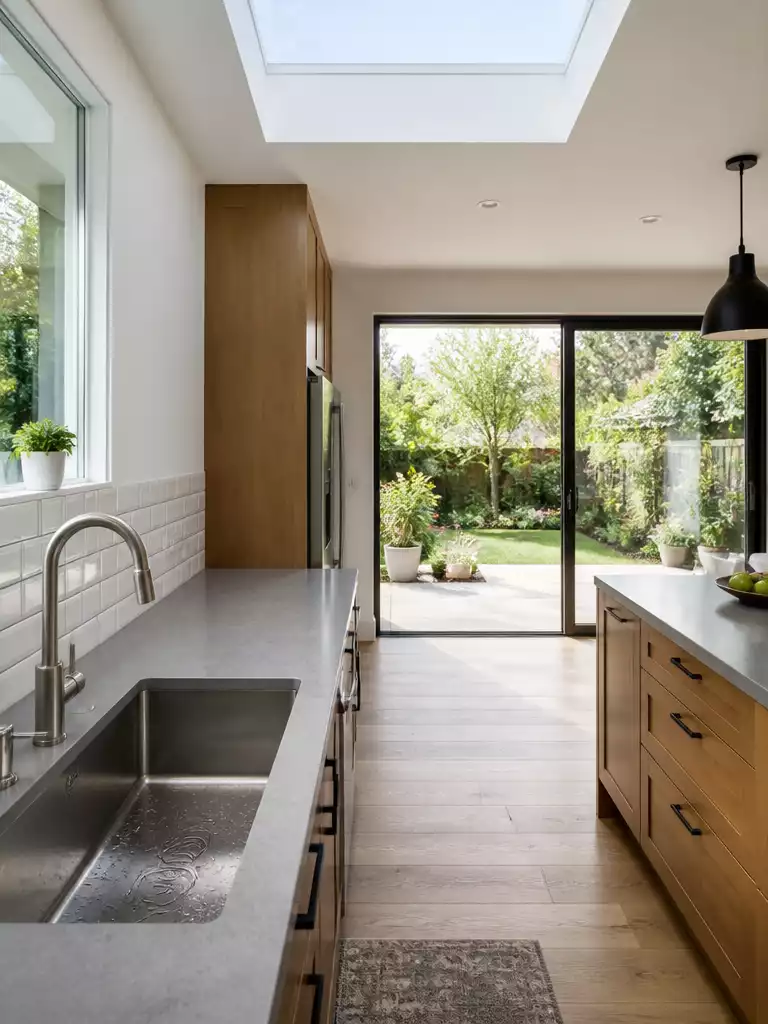
Harness the power of cross-light to brighten dark corners and sharpen your daily prep.
This layout relies on cross-light to solve the common issue of shadows falling across your hands while you work at the sink. By positioning the main wash station directly under a skylight, you gain bright, overhead task illumination that doesn’t rely on artificial bulbs during the day.
The sliding door on the opposite wall provides the necessary ambient fill, effectively erasing the “cave effect” often found in deep kitchens. This combination creates a balanced, shadow-free work environment that is ideal for homeowners who spend a lot of time on food prep.
Watch Out For Reflection Glare
Stainless steel sink bowls and high-gloss faucets can act like mirrors when the sun hits them from the side. If you choose this layout, opt for a matte-finish sink or a deeper undermount basin to minimize distracting light bounces during the peak afternoon hours.
To get the most out of this floor plan, keep your primary cutting and prep surface offset from the direct line of the slider. You want to avoid having the brightest glare point of the glass wall hitting your cutting board while you are using sharp knives.
This layout is perfect for narrow or galley-style kitchens that need a functional upgrade without moving plumbing. However, if your kitchen is wide and open, ensure the skylight is sized large enough to provide a sufficient “wash” of light, or the sink area may feel like a small island of brightness in a larger dim space.
⭐ Sink Accessories for Skylight Kitchens
Stainless Steel Sponge Holder for Sinks
💡 Why This Works
This layout successfully converts two competing light sources into a cohesive system. By separating your tasks, you eliminate the need for harsh artificial overheads during the day. The skylight provides consistent, shadow-free illumination for cleaning, while the sliding door offers softer, ambient side-light that prevents the room from feeling like a sterile, high-contrast tunnel.
Visual Benefit: Proper zoning ensures your high-precision prep work stays clear of distracting, direct-sun glare points.
Broken Plan Kitchen With Stepped Roof Glass
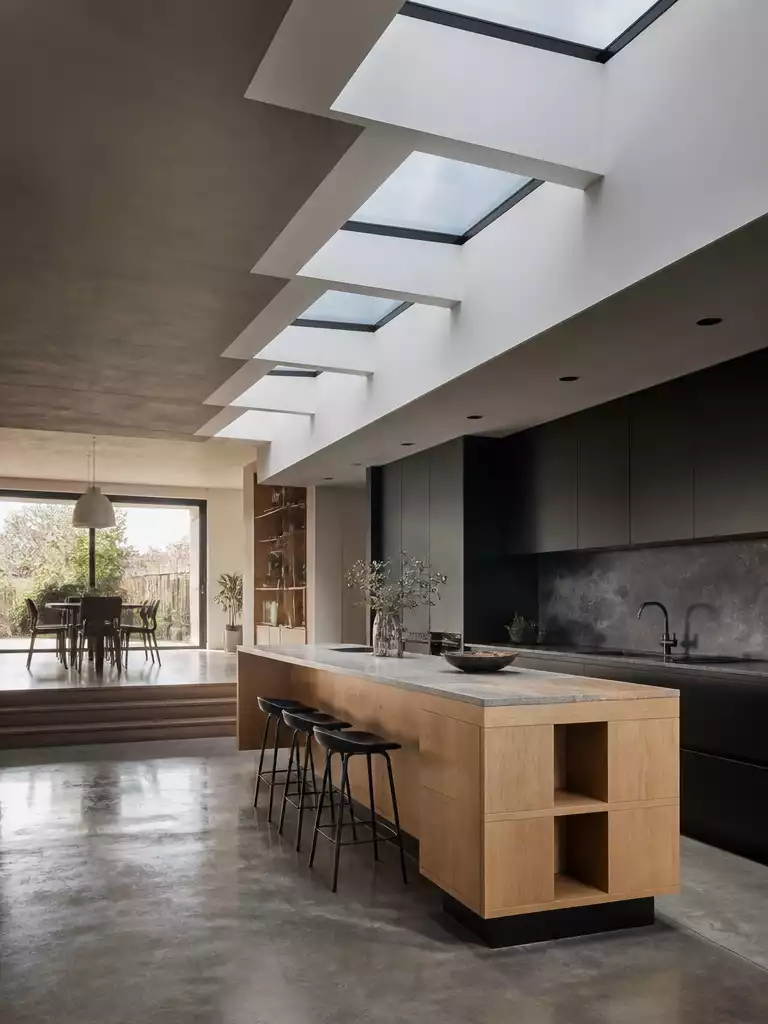
Define cooking and relaxation zones naturally using architectural light gradients and ceiling height changes.
This layout uses a stepped roof profile to create a hierarchy of light, visually separating your cooking space from the dining or lounge areas. By shifting the ceiling height, you gain a natural way to signal where one zone ends and another begins.
The transition between ceiling heights is where you place the glass, allowing light to cascade down in a controlled gradient. It is a highly effective way to keep the kitchen bright without letting that light wash out the rest of the room.
Structural Coordination Alert: This layout requires complex integration of beam paths and ceiling joists to accommodate the elevation changes.
Because this design involves multiple roof planes, you must consult a structural engineer early to manage load paths and ensure the glass segments align perfectly with your cabinetry footprint.
When planning your surfaces, treat each step in the ceiling as a distinct lighting zone. You should never place your high-precision prep areas directly under the lowest roof segment, as this can create a cramped, cave-like feel.
Follow these rules to balance the light:
- Zone Prep: Place your main cutting boards in the areas with the highest ceiling pitch to maximize light dispersion.
- Avoid Overlap: Ensure the pools of light from your stepped glass do not overlap with your primary task lighting, which prevents harsh shadows.
- Heat Management: Since you have multiple planes of glass, prioritize high-performance glazing to prevent the cooking zone from becoming an oven during peak afternoon hours.
This layout is best for homeowners undertaking a major structural renovation who want a sophisticated, zoned aesthetic. If you are working with a limited budget or minimal structural changes, this configuration is likely too complex to execute effectively.
⭐ Glass Roofs for Broken Plan Kitchens
Frosted Privacy Film for Glass Doors
🧰 Questions for Your Installer:
- Beam integration: Can you detail how the primary steel supports will be concealed within the stepped ceiling transition?
- Waterproofing: Since this design uses multiple roof planes, what is the plan for flashing the internal step junctions?
- Maintenance access: How will we safely reach the exterior glass segments on the upper tier for routine cleaning?
You have now seen ten distinct ways to combine sliding glass doors with overhead skylights, covering everything from galley setups to broken-plan layouts. Choose the one or two configurations that align with your specific kitchen footprint and start your planning there.
It is not necessary to incorporate every design element; success comes from managing the light-to-surface relationship correctly. Focus on how your light sources interact at midday to ensure your kitchen remains a workspace rather than a glare-filled oven. For more guidance on refining your space, explore additional door choices that balance function with your home’s architectural style.




