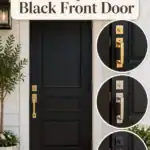
A weathered front door is a financial liability, but most are actually salvageable. This guide narrows the restoration process to 12 technical steps that protect your ROI and curb appeal. Start by determining if your door is a candidate for rescue.
Assess the Damage and Wood Condition

Determining the health of your wood grain ensures a restoration that lasts for decades.
As an Amazon Associate I earn from qualifying purchases. Affiliate links may earn me a commission at no extra cost to you.
Before you buy a single gallon of stain, you need to move past a simple visual check. You aren’t just looking for peeling paint; you are hunting for structural decay that could turn your weekend project into a total loss.
Grab a flathead screwdriver and head to the bottom rail and the lower corners, where water naturally pools. This is where you perform the “Screwdriver Test” to see what lies beneath the surface.
The Screwdriver Test Protocol:
- Press into the wood: Firmly push the tip of the screwdriver into the grain. If the wood resists, the damage is likely cosmetic “silvering” caused by UV rays.
- Identify soft spots: If the metal sinks in easily—like it’s hitting balsa wood or wet cardboard—you have active fungal rot. This requires structural epoxy rather than just a fresh coat of sealer.
- Check the Joinery: Inspect the stiles (vertical edges) and rails (horizontal pieces). If you see gaps wider than a nickel, moisture has likely breached the core of the door.
Don’t be discouraged by a “silvered” or gray appearance. This is usually just dead cellulose fibers killed by sun exposure, and while it looks terminal, it is typically only 1/32″ deep and sands away easily.
The Moisture Trap Warning
If your door is currently swollen and sticking in the frame, do not attempt to seal it today. Sealing a wet door traps moisture inside the wood fibers, which virtually guarantees internal rot within a few months.
Once you’ve confirmed the “bones” of the door are solid and dry, you’re ready to transition from assessment to action. The next step is creating a controlled workspace by getting that heavy slab off its hinges.
.
💰 Surprise Costs to Plan For:
- The real range: Budget under $200 for high-quality restoration materials, which is significantly cheaper than a $5,000 replacement.
- Hidden cost: Structural epoxy for rot is often sold separately from finish kits and can add $40 to your total.
- Worth it: Investing in a premium “Spar” topcoat now prevents moisture intrusion that causes permanent, expensive core rot later.
Remove the Door From the Hinges

Taking the door off the frame ensures a level surface for a drip-free, professional finish.
Refinishing a door while it is still hanging is the fastest way to end up with “curtain” drips in your finish and a massive backache by noon. Gravity is your enemy when applying stains and sealers, so moving to a horizontal workspace is the only way to achieve that glass-smooth look you see in showrooms.
The Hinge Pin Hack
Use a hammer and a large nail or a dedicated hinge pin punch to drive the pins up from the bottom. Never unscrew the leaves from the door jamb first; keeping the hardware attached to the frame maintains the door’s original alignment and prevents stripped screw holes.
Before you tap out that last pin, you need a “Hole in My House” plan to keep your home secure and the climate controlled. A heavy-duty tarp or a temporary sheet of plywood, cut to size beforehand, is mandatory for blocking the entryway while the door is out of commission.
Set up two sturdy sawhorses in a garage or covered workspace. To protect the “inside” face of the door while you labor over the weathered exterior, wrap the tops of your sawhorses in padded materials like old towels, carpet scraps, or foam pipe insulation.
Expert Labeling Strategy: Use painter’s tape to label each hinge as Top, Middle, or Bottom. Even if they look identical, hinges wear into specific positions over the years; swapping them during reinstallation is a leading cause of “door drag.”
Once the door is flat and stable on its padded perch, you have the perfect controlled environment. You can now move into the restoration phase without worrying about wind-blown debris or sagging varnish ruining your hard work.
.
💰 Surprise Costs to Plan For:
- The real range: Expect to spend under $200 in total materials for a full tactical restoration of a standard door.
- Hidden cost: Budget roughly $30–$50 for a temporary plywood security sheet if you lack a secondary locked screen door.
- Worth it / not: Investing in high-quality sawhorses is worth it to avoid a $5,000 replacement bill caused by accidental drops.
Strip the Old Finish
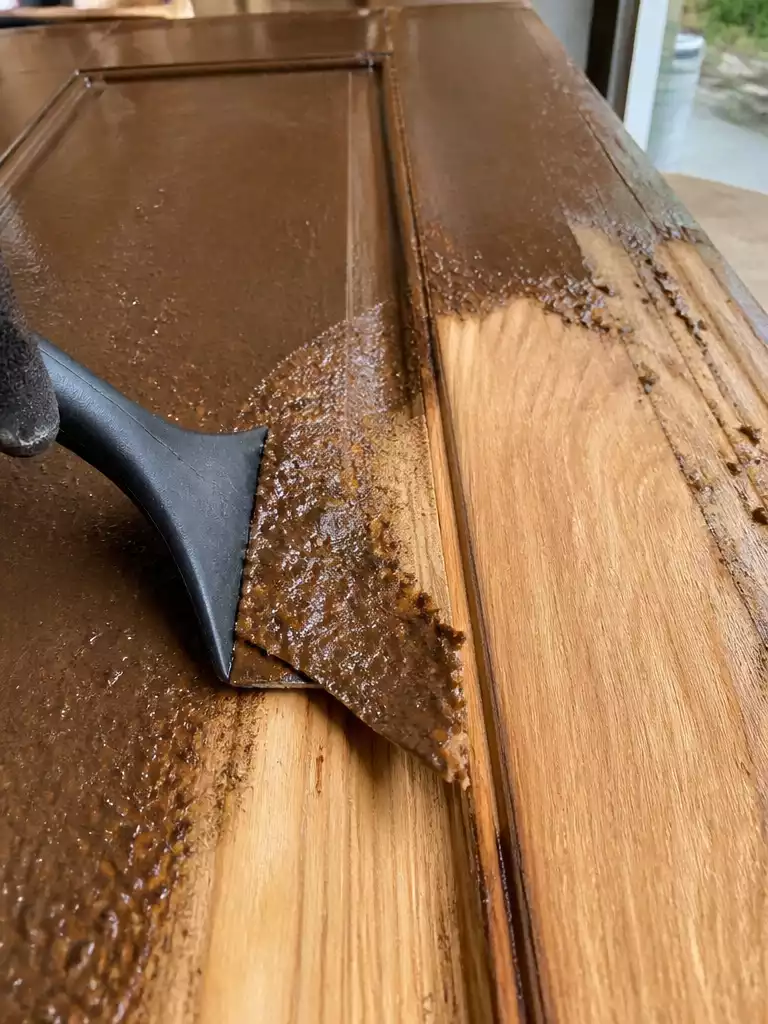
Revealing the hidden beauty of the natural grain by safely removing years of weathered failure.
Sanding off five layers of old spar urethane will clog ten packs of sandpaper and take three days; stripping it takes two hours. Chemical removal is the only way to reach the raw wood without destroying the profile of your moldings or creating a dust storm in your workspace.
To maximize your stripper’s performance, use the “Plastic Wrap” trick. Apply the gel thickly, then cover the entire surface with cheap plastic drop cloths to prevent the chemicals from evaporating.
This forces the active ingredients to work deeper into the wood grain rather than drying out on top. After the finish has bubbled, use a plastic scraper first to avoid gouging the softened wood, switching to a contour scraper only for the decorative molding profiles.
Chemical strippers must be neutralized—usually with mineral spirits or water, depending on the specific product instructions—or your new stain simply will not stick. Residual stripper acts as a barrier that prevents the new finish from bonding, leading to premature peeling.
Once the goop is cleared away, you’ll see the wood’s true condition for the first time. You must allow the wood to dry completely after neutralization before moving on to the leveling phase.
.
💰 Budget Reality: Stripping vs. Replacing
- The real range: Restoration materials typically cost under $200, compared to a $2,000–$5,000 bill for a professional door replacement.
- Hidden cost: Budget for extra stripping pads and mineral spirits; porous wood often requires more neutralizing agent than expected.
- Worth it: Investing in high-quality chemical strippers is well spent to avoid the labor-intensive cost of ruined sanding discs.
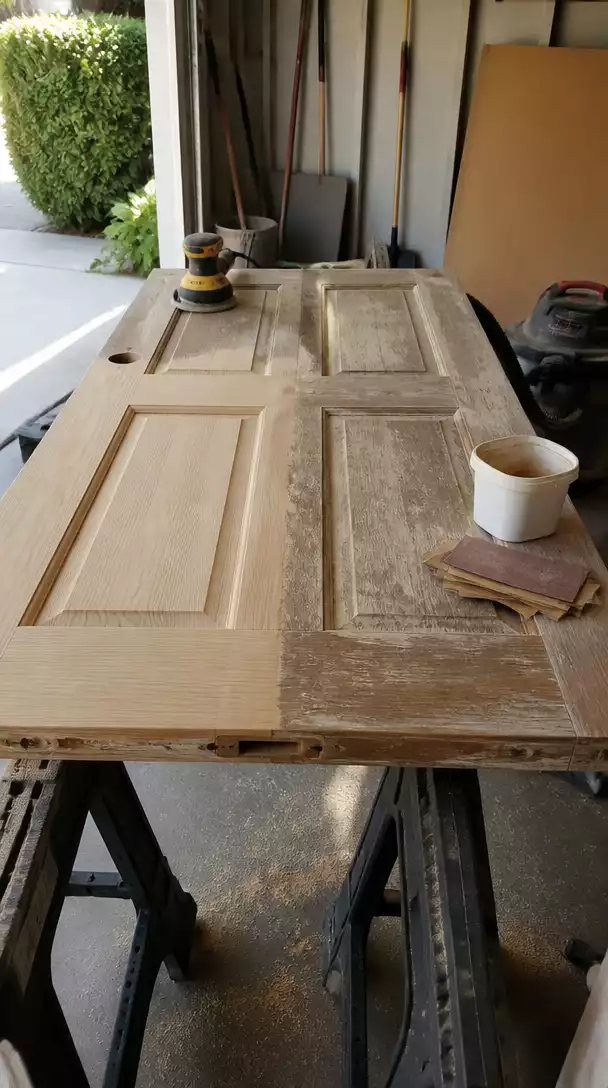
Sand the Surface Smooth
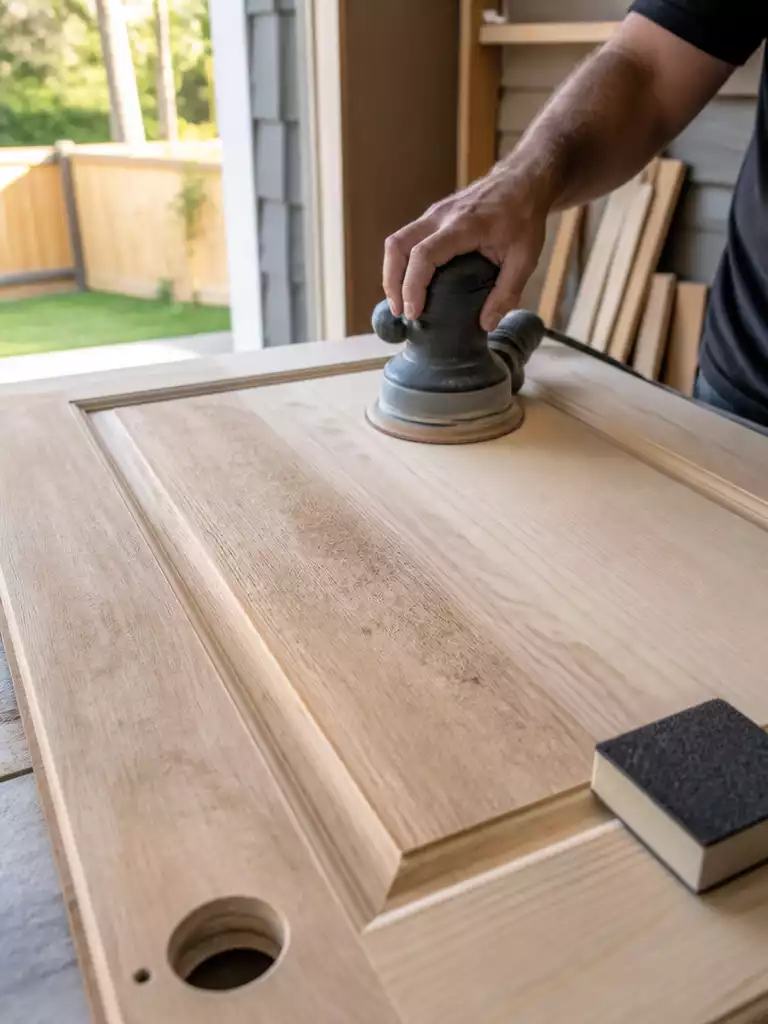
Achieve a professional, buttery-smooth finish that allows your new stain to penetrate deeply and evenly.
Sanding isn’t about “cleaning” the door; it’s about opening the microscopic pores of the wood so it can actually drink the new finish. If you skip this or rush it, your stain will simply sit on the surface, leading to a patchy look that peels off within a season.
Always sand in the direction of the grain. Cross-grain scratches might look invisible now, but they will show up as dark, ugly “swirls” the second you apply your stain.
Use a random orbital sander for the large, flat panels and stiles to save your arms the fatigue. For the “profiles”—those curvy, decorative moldings—switch to sanding sponges or a wooden dowel wrapped in sandpaper to reach into the crevices without flattening the details.
Pro Tip: The Pencil Trick
Lightly scribble pencil marks all over the door surface before you start each grit. When the marks disappear, you know you’ve sanded that section evenly and haven’t missed a spot.
Be careful not to over-sand with high grits; going higher than 220 actually “burnishes” the wood. This closes the pores and causes your stain to slide right off rather than soaking in.
With the wood perfectly smooth, any remaining imperfections like cracks or old hardware holes will now look like giant craters. It is officially time to fill them before moving to the finish phase.
⭐ Top Products for Surface Sanding
Multi-Grit Assorted Hand Sanding Sponge Set
⚠️ Where This Can Go Wrong
- Over-sanding: Going beyond 220-grit “burnishes” the wood, creating a slick surface that rejects stain and causes peeling.
- Cross-grain sanding: Scuffing across the grain creates microscopic valleys that trap excess pigment, resulting in permanent dark swirls.
- Rushing the 80-grit: If you don’t fully sand away the gray UV-damaged cells, your finish won’t bond structurally.
The technical details of restoration can feel heavy, but you only need to land a few specific steps to protect your investment. Most of the value in this project comes from the prep work and the final seal, rather than agonizing over every single sanding pass. A high-end result is the product of deliberate choices on materials that guard against the elements.
🎯 The Calls Worth Getting Right:
- Ensure your prep work matches the front door material requirements.
- Consider how different finishes look on expensive double doors before staining.
- Use high-quality filler to prevent weather-related shrinkage later on.
List 5 Repair Cracks and Dents
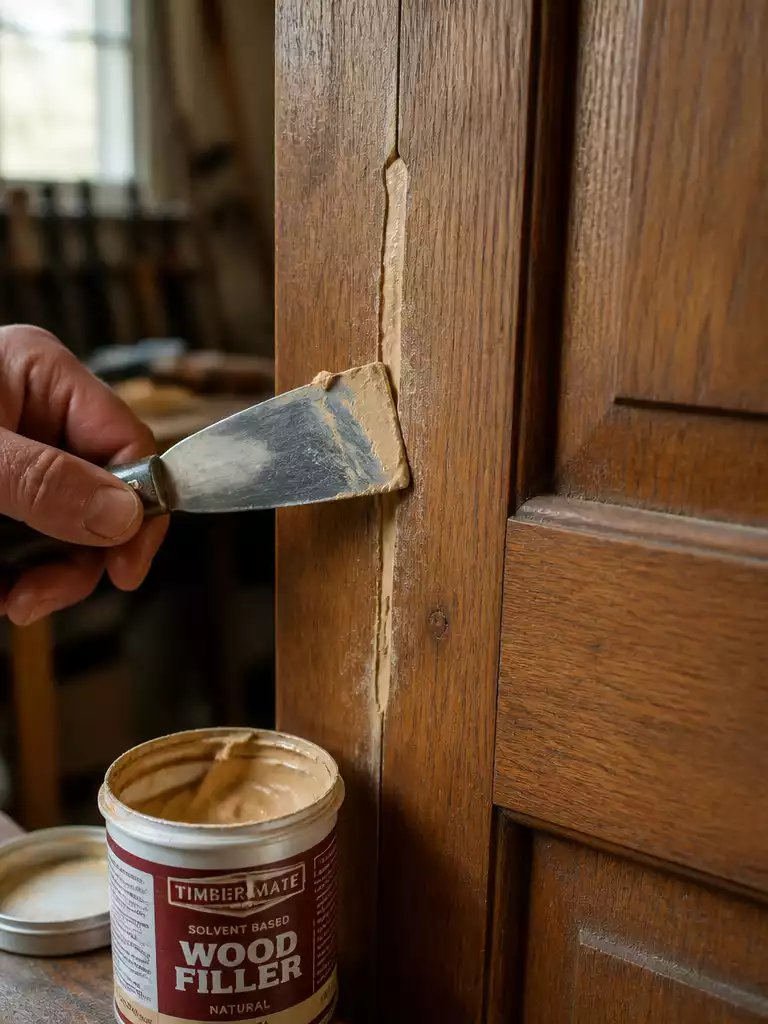
Restoring structural integrity and a smooth surface ensures your new finish looks flawless and professional.
Your front door is a living thing that “breathes,” physically expanding in the humid summer heat and shrinking when the winter air turns brittle. This constant movement is why standard wall putty is your worst enemy here; it lacks flexibility and will simply pop out of the cracks by July.
For small dings, shallow scratches, or narrow cracks, you need a high-quality, solvent-based stainable wood filler. While water-based options are easier to clean up, they often shrink too much during the curing process, leaving you with a noticeable dip where you wanted a flush surface.
The “Proud Fill” Rule
Always leave a slight mound of filler over the defect rather than scraping it perfectly flat. Because filler shrinks as its solvents evaporate, “overfilling” ensures that once it’s dry, you can sand it down to be perfectly level with the surrounding wood.
If your initial assessment in Step 1 revealed soft spots or deeper structural gaps, a standard filler won’t cut it. In these cases, two-part wood epoxy is the gold standard because it bonds chemically to the wood fibers and essentially becomes “plastic wood” that won’t rot or pull away.
For those working with a natural or light stain where color matching is notoriously difficult, try the sawdust paste hack. Mix a small amount of the fine sanding dust you saved from Step 4 with a drop of wood glue to create a customized paste.
This DIY filler is made from the exact wood species of your door, meaning it will react to the stain and age at the same rate as the rest of the surface. Once all your repairs have cured completely, give them a final light sand with 180-grit paper to ensure the transition is invisible to the touch.
.
⭐ Best Fillers for Cracks and Dents
Structural Wood Epoxy Restoration Kit
All Purpose Water Resistant Wood Filler
Complete Furniture and Floor Repair Kit
⚠️ Where This Can Go Wrong:
- The “Dip” Trap: Scraping filler perfectly flush while wet ensures a concave dip later as the solvents evaporate and shrink.
- Moisture Sealing: Using water-based fillers on an exterior door often leads to premature cracking when the wood swells in humidity.
- Sanding Scorch: Waiting too long to sand epoxy can make it harder than the surrounding wood, causing uneven “humps” during leveling.
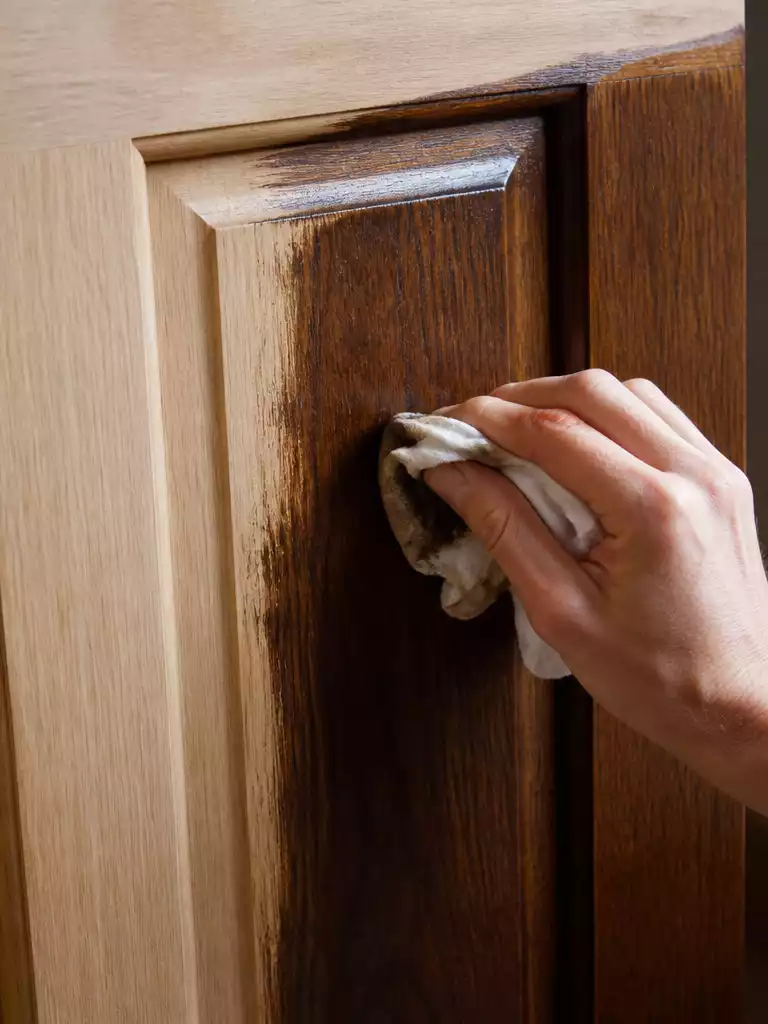
List 6 Clean Off All Dust and Residue
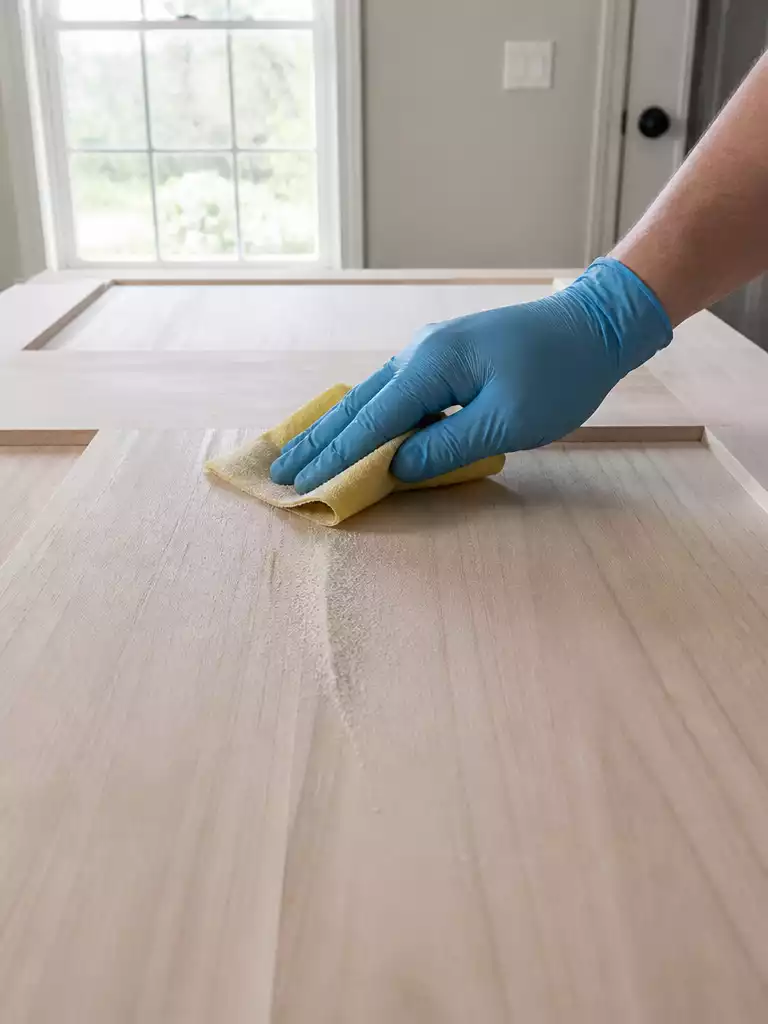
A surgically clean surface ensures your new finish bonds perfectly for a professional, glass-like result.
The biggest enemy of a professional finish isn’t your technique; it’s the invisible dust cloud sitting on your door. Even a microscopic layer of debris will create a “gritty” texture that ruins the smooth look you’ve worked so hard to achieve.
To get a flawless bond, you need to move beyond a simple wipe-down and follow a three-stage cleaning protocol. This process ensures that every pore of the wood is open and free of the fine particulates left behind by your 220-grit sanding.
The Three-Stage Decontamination Process:
- The Vacuum Phase: Start with a shop-vac and a soft brush attachment. Instead of blowing dust into the air, suck it directly out of the deep grain and intricate corners of the molding.
- The Tack Cloth Dance: Use a commercial tack cloth (a sticky cheesecloth) to lift remaining surface dust. Wipe in long, slow strokes, flipping the cloth frequently as it becomes dark or loses its “grab.”
- Mineral Spirit Wipe: Do a final pass with a lint-free rag dampened with mineral spirits. This removes any lingering oils and provides a “preview” of how the wood will look once your clear coat is applied.
The Static Warning: Avoid using synthetic microfiber cloths that aren’t specifically rated for finishing. These can generate static electricity that actually attracts more dust to the wood surface the moment you stop wiping.
If you are working with oily woods, that final mineral spirit wipe is non-negotiable. It strips away surface resins that could otherwise prevent your stain or sealer from penetrating evenly.
Once the mineral spirits have fully evaporated, do not touch the wood with your bare hands. The natural oils from your skin can leave “invisible” prints that show up as blotches once the stain hits the surface.
.
The provided JSON indicates that List Item 1 (“Top Products for Damage Assessment”) has an empty products array. Following the strict rules provided for empty lists, the required output is a single period.
🔢 The Right Sequence for a Dust-Free Zone:
Cleaning in the wrong order just recirculates debris back onto your door; follow this path to ensure the wood stays “surgical” for the next step.
- Blow out your garage or workspace and let the air settle for 30 minutes.
- Vacuum the door and sawhorses thoroughly to remove the heavy bulk of the sanding grit.
- Perform the tack cloth and mineral spirit wipes immediately before opening your can of conditioner.
Apply Wood Conditioner
A simple pre-treatment ensures your stain absorbs evenly for a professional, blotch-free finish.
If your door is crafted from Pine, Maple, Alder, or Cherry, skipping this step is the fastest way to end up with a “leopard print” finish that looks like a DIY disaster. These specific “soft” woods are notorious for having uneven densities across the grain.
Some spots will drink up the stain like a thirsty sponge, turning nearly black, while other sections reject it entirely and stay pale. Wood conditioner acts as a traffic controller, penetrating the fibers to level out the absorption rate so your color goes on smooth and uniform.
The “End Grain” Soak
The top and bottom edges of your door are essentially a bundle of tiny open straws. Apply an extra-heavy layer of conditioner here; otherwise, these thirsty edges will turn significantly darker than the rest of the door once you hit them with stain.
Timing is everything when it comes to pre-stain treatments. Most conditioners require you to apply your stain within a 15 to 30-minute window after application.
If you wait too long, the conditioner will dry and seal the wood pores entirely, preventing the stain from taking at all. You also need to ensure your bases match perfectly: always use an oil-based conditioner for oil-based stains to prevent the finish from peeling later.
⚠️ Mistake to Avoid: Mixing Bases
Never use a water-based conditioner under an oil-based stain. The two will repel each other, leading to a finish that never properly cures and eventually flakes off in the sun.
.
🔢 The Right Sequence for Success
Conditioner is a chemical primer, not a permanent sealer; following this tight timeline prevents the wood from closing up before the stain hits.
- Apply a liberal coat of conditioner, focusing on the thirsty end-grain edges first.
- Wait 5 to 15 minutes for the liquid to penetrate, then wipe away any excess.
- Apply your first coat of stain while the wood is still slightly damp and receptive.
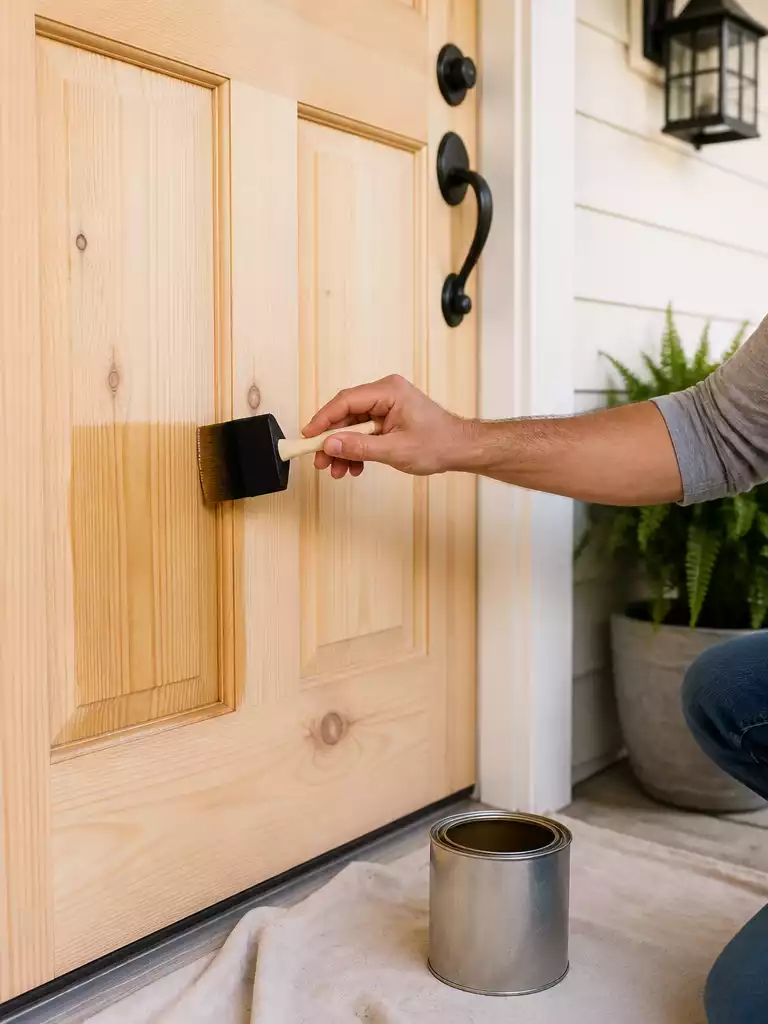
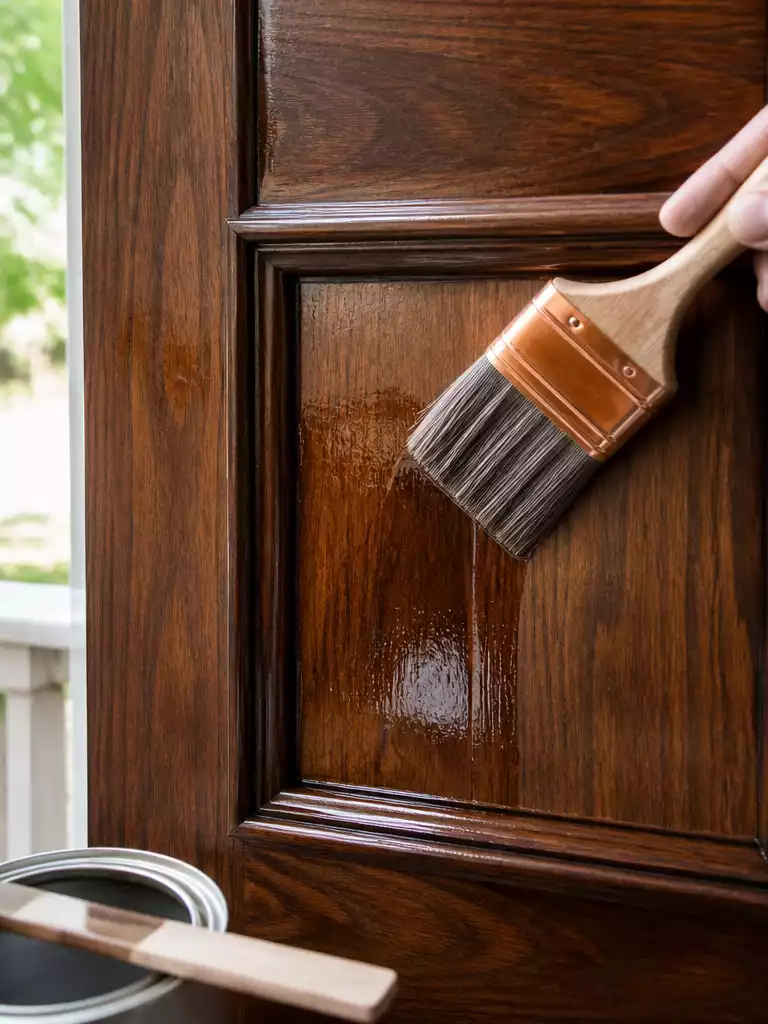
Stain or Paint the Door
Wiping away the excess stain reveals the hidden character and depth of your door’s natural grain.
This is where the door gets its “soul,” but it’s also where beginners rush and create permanent streaks. To get that high-end look, you have to respect the “Wet Edge” Rule: always work from one side of a panel to the other without stopping.
If the stain dries mid-panel, you’ll end up with a “lap mark,” which is a dark, ugly line where the two sections overlap. Because your door is flat on sawhorses, you have a massive advantage in controlling how the pigment settles into the wood fibers.
The Pro-Grade Sequence
To hide transitions and follow the door’s natural construction, apply your finish in this specific order:
- Recessed Panels: Do these first, including the intricate molding around them.
- Horizontal Rails: Move to the cross-pieces, wiping away any overlap on the vertical sections.
- Vertical Stiles: Finish with the long side pieces to create clean, continuous lines.
For the application itself, use a high-quality natural bristle brush for oil stains or a lint-free rag for a more “hand-rubbed” look. Apply the stain generously, let it sit for the time specified on the can—typically 5 to 10 minutes—then wipe off every bit of excess.
If you want a deeper, darker color, do not make the mistake of leaving the stain on longer; this creates a sticky mess that never properly dries. Instead, let the first coat dry fully and then apply a second coat to build the pigment density safely.
⚠️ Mistake to Avoid: The Puddle Trap
Never leave “puddles” of stain in the corners of decorative molding. Use a dry brush or the corner of your rag to soak up excess liquid, or it will remain tacky for days and ruin your topcoat bond.
Once you are satisfied with the color, let the door rest. While the stain provides the aesthetic transformation, it offers zero protection against UV rays or rain, so you’ll need to prepare for the final protective shield.
⭐ Top Products for Damage Assessment
Seal With a Protective Topcoat
Apply a professional-grade shield that preserves your door’s deep color against harsh sun and rain.
Standard indoor polyurethane is designed for coffee tables, not the brutal UV rays and driving rain of an entryway. If you use it here, you’ll find it cracking and flaking within six months.
To ensure this restoration lasts, you need a Spar Urethane. Unlike standard poly, a Spar finish is formulated with extra oils and UV blockers that allow it to stay slightly flexible.
Why Spar Urethane is Non-Negotiable:
Wood is a living material that expands in the heat and contracts in the cold. Spar Urethane moves with the door, whereas indoor finishes become brittle and eventually “shatter” at the joints.
When it comes to application, thin coats are king. It is infinitely better to apply three light, even layers than one thick, heavy coat that traps solvents and remains gummy for weeks.
Between each layer, you must perform a “scuff sand” using 320-grit paper. This isn’t meant to remove the finish, but rather to level out tiny dust “nibs” and create a mechanical bond for the next layer to grip.
⚠️ Critical Rule: Never Shake the Can
Gently stir your topcoat with a wooden stick. Shaking introduces micro-bubbles into the liquid that dry as tiny white craters, permanently ruining that smooth, glass-like professional look.
Work in long, continuous strokes following the grain of the wood. Since your door is currently flat on sawhorses, you can apply the finish slightly more generously than if it were vertical, but always watch the edges for pooling.
Once your final coat is applied, the door will look spectacular, but the chemical process is far from over. You are now entering the most delicate phase of the restoration: the cure.
.
⭐ Top Products for Damage Assessment
🔢 The Right Sequence for a Glass Finish
Rushing the topcoat is the most common cause of a “cloudy” door. Follow this specific cadence to ensure each layer bonds perfectly without trapping moisture.
- Stir the can for 60 seconds to distribute UV blockers without creating bubbles.
- Apply the first coat and wait 24 hours before the 320-grit scuff sand.
- Vacuum and tack-cloth the surface between every layer to prevent grit buildup.
Let the Finish Cure Fully
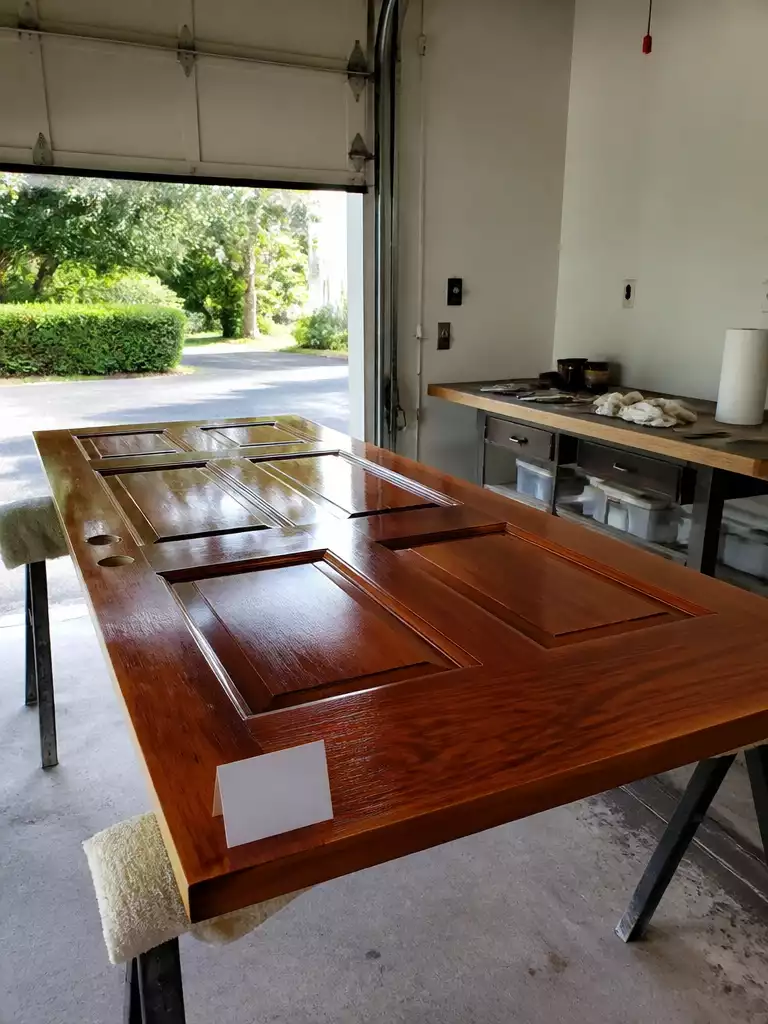
Patience in the final hours ensures a rock-hard finish that won’t stick or peel.
It is tempting to hang your door the moment the surface feels non-tacky, but “dry to the touch” is a dangerous metric. If you reinstall too early, the finish will chemically bond to your weatherstripping, causing the new topcoat to rip clean off the wood the first time you open the door.
Drying is merely the evaporation of surface solvents, while curing is the deep chemical hardening of the resins within the finish. While drying happens in hours, a full cure typically takes several days depending on humidity and temperature.
The Professional Thumb Test
Find an inconspicuous spot, like the very top edge of the door, and press your thumb firmly into the finish for five seconds. If it leaves a visible print or feels even slightly “grabby,” the resins are still soft and the door is not ready to be vertical.
Airflow is your best friend during this phase to help carry away outgassing solvents. Keep your garage door cracked open a few inches to maintain a steady cross-breeze without letting in debris or neighborhood dust.
The Blocking Fix: If security concerns mean you must hang the door before the 72-hour mark, rub a thin layer of paste wax or paraffin wax onto the weatherstripping. This acts as a release agent so the finish won’t stick to the rubber seal.
Once the surface feels hard, slick, and passes the thumb test, you have successfully navigated the most difficult part of the restoration. Your patience here prevents the “blocking” effect that ruins so many DIY projects at the finish line.
.
💰 Surprise Costs to Plan For:
- The real range: Budget under $200 for all materials, including premium spar urethane, high-grit sandpapers, and chemical strippers.
- Climate control: Factor in the cost of a heavy-duty tarp or plywood sheet to secure your entryway during the 72-hour cure.
- Worth it: Investing in a natural bristle brush specifically for oil-based topcoats prevents air bubbles that ruin a glass-like cure.
List 11 Reinstall the Door
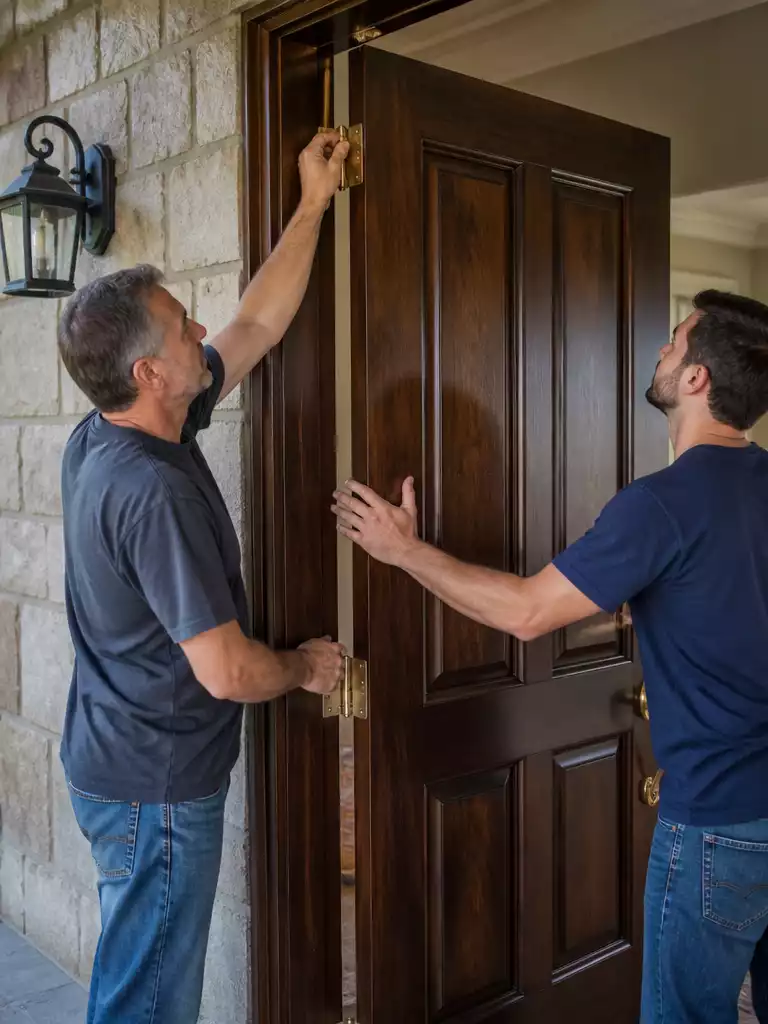
Carefully hanging your restored masterpiece back in place to reclaim your home’s curb appeal.
This is a two-person job, no exceptions. Trying to balance a 100lb solid oak slab while lining up microscopic hinge knuckles is a recipe for a crushed toe or, worse, a deep gouge in your fresh finish.
Even if you feel confident in your strength, the second person acts as the “navigator” to guide the pins home while you handle the heavy lifting. This prevents the door from tilting and putting unnecessary stress on the hinge leaves or the wood casing.
The Pro Reinstallation Sequence
- The Shim Technique: Place wood shims or a flat pry bar under the door to micro-adjust the height as you align the hinges.
- Pin Lubrication: Wipe a tiny bit of white lithium grease or rub a pencil lead (graphite) on the pins before sliding them in to prevent future squeaks.
- The Top-Down Method: Always seat the top hinge pin first. This supports the door’s weight so you can use both hands to align the middle and bottom hinges.
- Screw Tightening: If the original screws are spinning or stripped, shove a few toothpicks dipped in wood glue into the hole before driving the screw back in for a tight bite.
Once the pins are seated, tap them down gently with a hammer using a scrap piece of wood as a buffer to protect the finish on the pin heads. Open and close the door several times to check for “door drag” or resistance against the jamb.
If you labeled your hinges during removal as suggested, the door should swing perfectly on its original wear patterns. Your door is officially back where it belongs, but there is one final step to ensure this finish survives the elements.
⭐ Top Products for Damage Assessment
⚠️ Reinstallation Pitfalls to Avoid:
- The Hinge Swap: Forgetting to match hinges to their original positions can cause the door to bind or sag.
- Overtightening Screws: Driving screws too hard into old wood can snap heads off or strip out the delicate grain.
- Closing Too Soon: Shutting the door before the finish is fully hard creates a permanent chemical bond with seals.
Touch Up the Hardware and Weatherstripping
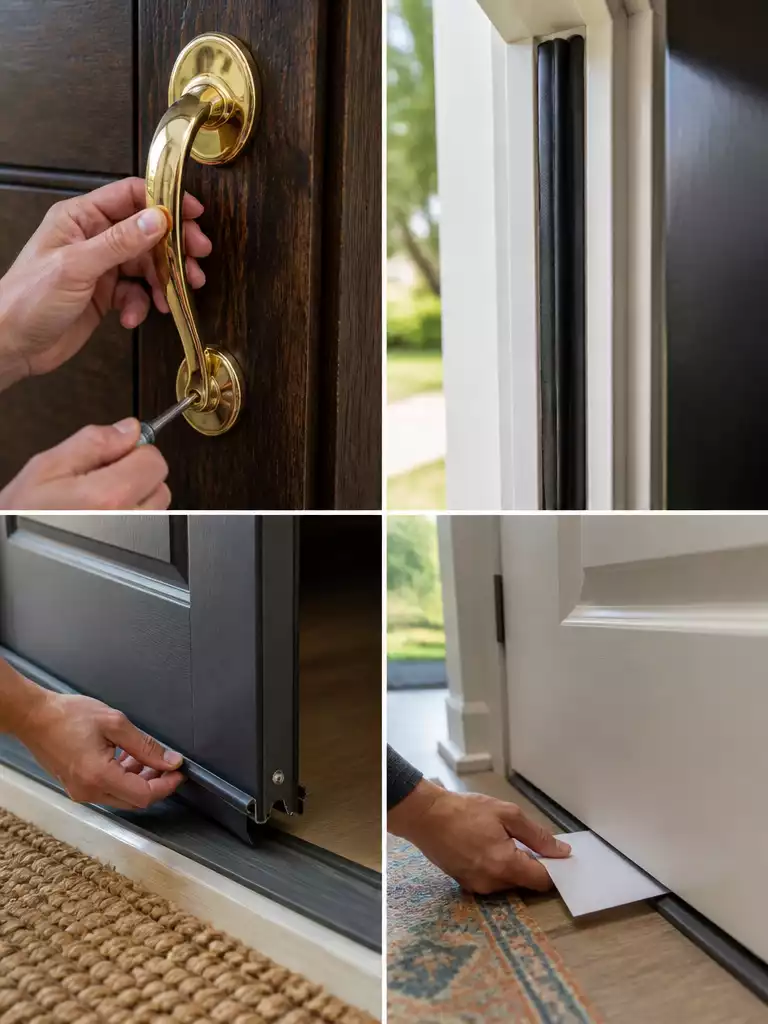
Complete your restoration with gleaming hardware and a tight seal for professional curb appeal.
Reinstalling pitted, oxidized brass hardware on a freshly refinished door is like wearing muddy work boots with a custom tuxedo. The contrast will immediately highlight every imperfection in the metal, making your hard work on the wood grain feel incomplete.
If your lockset is structurally sound but dull, use a high-quality metal polish for brass or a specialized touch-up kit for rubbed bronze finishes. If the hardware is failing or feels “gritty” when turning, now is the ideal time for a replacement since the mounting holes are already exposed and accessible.
The Protective Seal Checklist
- Weatherstripping Inspection: Check the “bulb” or “V-strip” on the frame; if it is flattened or cracked, moisture will seep in and trigger the same rot you just repaired.
- The Door Sweep: Ensure the bottom sweep makes firm, even contact with the threshold to prevent “wicking” moisture into the bottom rail of the door.
- Silicone Replacement: Swap out old, brittle seals for new silicone or foam stripping to maintain climate control and structural integrity.
To verify your work, perform the “Paper Test” by closing the door on a single sheet of paper at various points along the frame. If you can pull the paper out without resistance, your weatherstripping is failing and needs adjustment to protect your new finish.
Mistake to Avoid: The Hidden Moisture Trap
Never ignore a loose or worn door sweep. A faulty sweep allows rain to splash against the bottom edge of the door, where it can soak into the end grain and cause the new finish to peel within a single season.
With the hardware polished and the seals tight, you have successfully transitioned your door from a weathered liability into a high-value architectural feature. This final attention to detail ensures your $150 investment provides maximum ROI and protection for years to come.
.
💰 Final Restoration Budget Reality:
- The real range: You can restore structural integrity and curb appeal for under $200 in total project materials.
- Hidden cost: High-quality silicone weatherstripping or a heavy-duty door sweep often adds a surprise $25–$45 to the total.
- Worth it: This small spend prevents a $2,000–$5,000 replacement bill by stopping moisture from hitting the door core.
With this technical blueprint on the table, the decision to restore rather than replace your entryway becomes a matter of logic over guesswork. You don’t need to master every step today to see a result; focusing on the initial assessment and proper preparation will carry the project’s success.
Protecting your front door is a high-ROI move that shifts the entire presentation of your home. Start with the screwdriver test this afternoon to confirm your door is a candidate for this front door transformation, then move forward with the confidence that you’re preserving a high-value asset.